LinearLayout(リニアレイアウト)
このセクションの概要
このセクションは Android のレイアウトから始まります。 Android には次の 6 つの主要なレイアウトがあります。 LinearLayout(リニアレイアウト)、RelativeLayout(相対レイアウト)、TableLayout(テーブルレイアウト) FrameLayout(フレームレイアウト)、AbsoluteLayout(絶対レイアウト)、GridLayout(グリッドレイアウト) 今日説明するのは、最初のレイアウトである LinearLayout (リニア レイアウト)、画面適応の使用法です。 最も一般的に使用されるのは LinearLayout のウェイト (weight 属性) です。このセクションでは、それを詳しく分析します。 LinearLayout (いくつかの基本的な属性、Weight 属性の使用法、比率の計算方法など) 次にあまり使用されない属性は、android:divider で下線を引くことになります。
-
このセクションの学習チャート
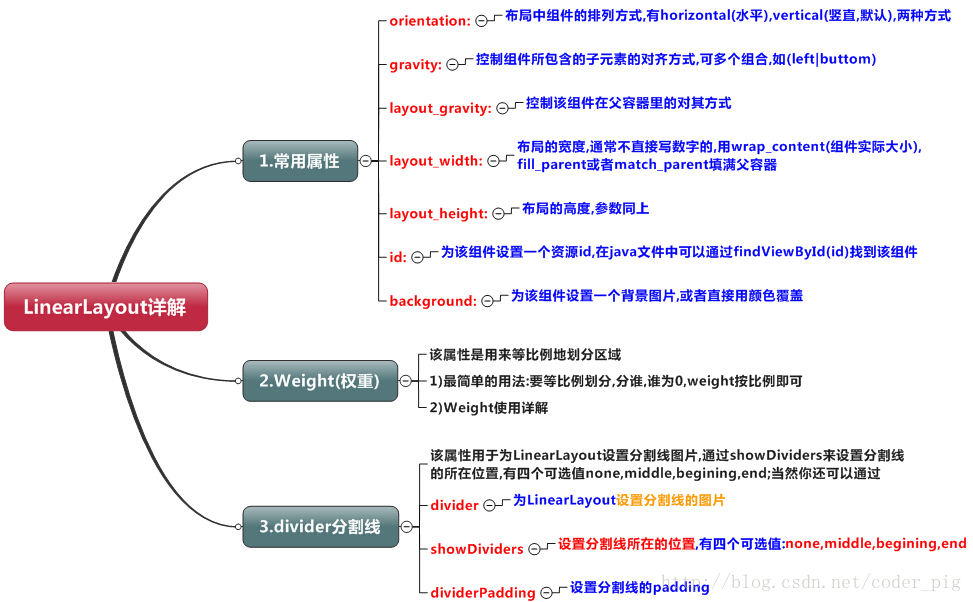
2. 重み属性の詳細な説明:
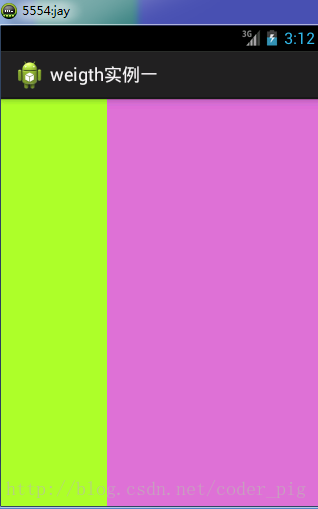
①最も簡単な使い方:
図に示すように:
実装コード:
xmlns:tools="http://schemas.android.com/tools"
android:id="@+ id/LinearLayout1"
android:layout_width="match_parent"
android:layout_height="match_parent"
android:orientation="horizontal">
<LinearLayout
android:layout_width="0dp"
android:layout_height="fill_parent"
android:background="../style/images/android-tutorial-linearlayout .html"
android:layout_weight="1" />
<LinearLayout
android:layout_width="0dp"
android:layout_height="fill_parent"
android:background="../style/ Images/android-tutorial-linearlayout.html"
android:layout_weight="2 "/>
</LinearLayout>
最初の 1:1 効果を実現するには、2 つの LinearLayout のウェイトをそれぞれ 1 と 1 に変更するだけです。 使用法の概要: 水平方向を比例的に分割します。関連するビューの android:width 属性を 0dp に設定し、それを android に設定します。 ウェイト属性は比率に設定できます。同様に、垂直方向では、android:height を 0dp に設定してからウェイト属性を設定します。 自分で縦等分を書いて簡単な使い方を体験してみましょう!
② 重み属性の詳細説明:
もちろん、上記の 0dp を設定する方法を適用せず、wrap_content と match_parent を直接使用すると、 次に、weight 属性を解析する必要があります。これは、wrap_content と match_parent の 2 つの状況に分けられます。こちらもご覧ください LinearLayout の方向が水平か垂直かによって、どちらの方向に均等に分割するかが決まります。
1) Wrap_content は比較的単純で、比例するだけです
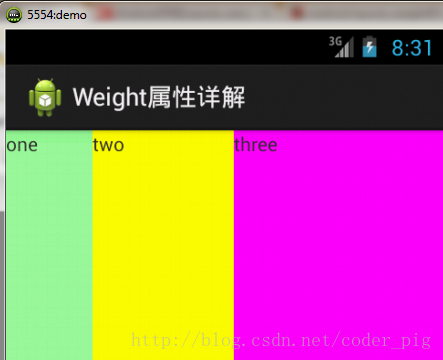
実装コード:
xmlns:tools="http://schemas.android.com/tools"
android:id="@+ id/LinearLayout1"
android:layout_width="match_parent"
android:layout_height="match_parent"
android:orientation="horizontal" >
<TextView
android:layout_weight="1"
android:layout_width="wrap_content"
android:layout_height="fill_parent"
android:text=" 1 つ"
android:background="../style/images/ android-tutorial-linearlayout.html"
/>
<TextView
android:layout_weight="2"
android:layout_width="wrap_content"
android:layout_height="fill_parent"
android:text="two"
android:background="../style/images/android -tutorial-linearlayout.html"
/>
<TextView
android:layout_weight="3"
android:layout_width="wrap_content"
android:layout_height="fill_parent"
android:text="three"
android:background="../style/images/android -tutorial-linearlayout.html"
/>
</LinearLayout>
2)match_parent(fill_parent): これは計算する必要があります
この簡単なコードを書いてみましょう。
xmlns:tools="http://schemas.android.com/tools"
android:id="@+id/LinearLayout1"
android:layout_width="match_parent"
android:layout_height="match_parent" >
<TextView
android:layout_weight="1"
android:layout_width="fill_parent"
android:layout_height="fill_parent"
android:text="one"
android:background="../style/images/android-tutorial-linearlayout.html"
/>
<TextView
android:layout_weight="2"
android:layout_width="fill_parent"
android:layout_height="fill_parent"
android:text="two"
android:background="../style/images/android-tutorial-linearlayout.html"
/>
<TextView
android:layout_weight="3"
android:layout_width="fill_parent"
android:layout_height="fill_parent"
android:text="three"
android:background="../style/images/android-tutorial-linearlayout.html"
/>
</LinearLayout>
操作のレンダリング:
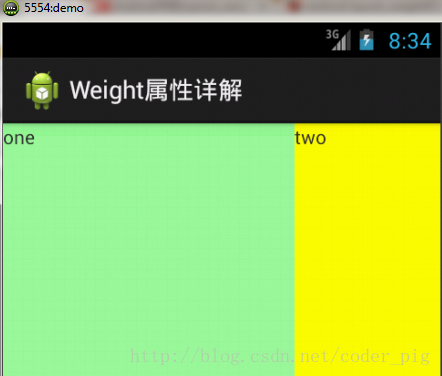
この時点で、比率が 2:1 であるのに、どうしてこれが起こるのかという疑問が生じるでしょう。では、3 つはどこに行ったのでしょうか?それは明らかにコードにあります 3 の場合も 3 が設定され、1 と 2 の比率が 2 : 1 : 0 になります。 回答: 実際にはそれほど単純ではありません。インターネット上にいくつかのアルゴリズムが記載されています。 私が理解しやすいと思うのは: ステップ 1: 全員が fill_parent ですが、画面が 1 つしかないので、1 - 3 = - 2 fill_parent ステップ 2: 比率は 1/6、2/6、 3 /6ステップ 3:先着順、最初に 1 つに割り当てられます、計算: 1 - 2 * (1/6) = 2/3 fill_parent 2 の次を計算します: 1 - 2 * (2/6) = 1/3 fill_parent 最後に、1 - 2 * (3/) を計算します。 6) = 0 fill_parentステップ 4: 最終結果は次のようになります: 1 つは 2 つのシェアを占有、2 つは 1 つのシェアを占有、3 つは何も持たない 上記の 3 つが表示されない理由は、これを読んでもまだ少し混乱しているかもしれません。もう少し例を見てみましょう。
比率は1:1:1です
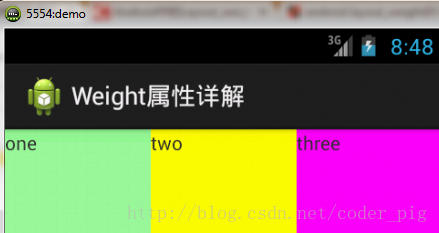
上記の計算方法に従って計算すると、結果は 1/3 1/3 1/3 です。
もう一度試してみましょう: 2:3:4
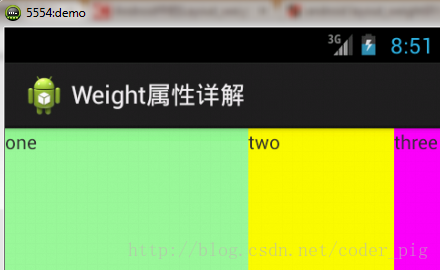
計算結果: 5/9 3/9 1/9 レンダリングを比較すると、5:3:1 が正しいので、この計算方法にマークを付ける必要があります。
③Javaコードでweight属性を設定します。
LayoutParams.WRAP_CONTENT, 1));
3. LinearLayoutの分割線を設定する
多くのインターフェイス開発では、インターフェイスをよりすっきりと美しくするために、次のような下線や分割線が設定されます。 楽曲登録ページ:
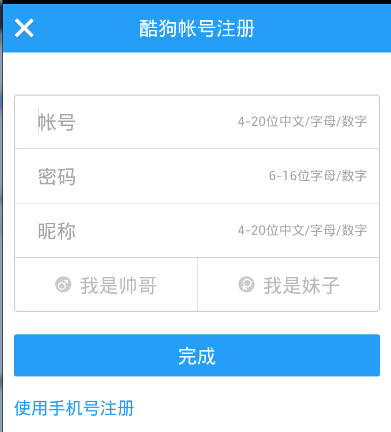
この種の行には、通常 2 つのメソッドがあります① レイアウトにビューを直接追加します このビューの機能は行を表示するだけであり、コードも非常に単純です。
android:layout_width="match_parent"
android:layout_height="1px"
android:background="../style/images/android-tutorial-linearlayout.html" />
これは横方向の黒い線です。もちろん、他の色に変更したり、写真を使用したりすることもできます。

②2つ目の方法は、LinearLayoutのdivider属性を利用してLinearLayoutに直接分割線を設定する方法です ここでは、ラインの写真を自分で準備する必要があります 1) android:divider は画像を分割線として設定します 2) android:showDividers は、分割線の位置、なし (なし)、開始 (開始)、終了 (終了)、中間 (各 2 つのコンポーネントの間) を設定します。 3)dividerPadding は分割線のパディングを設定します
使用例:
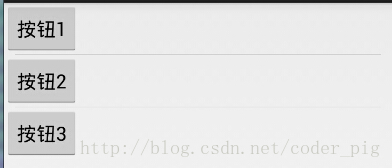

実装コード:
xmlns:tools="http://schemas.android.com/tools"
android:id="@+ id/LinearLayout1"
android:layout_width="match_parent"
android:layout_height="match_parent"
android:divider="@drawable/ktv_line_div"
android:orientation="vertical"
android:showDividers="middle"
アンドロイド: DivisionPadding="10dp"
tools:context="com.jay.example.linearlayoutdemo.MainActivity" >
<ボタン
android:layout_width="wrap_content"
android:layout_height="wrap_content"
android:text="按钮1" />
<ボタン
android:layout_width="wrap_content"
android:layout_height="wrap_content"
android:text="按钮2" />
<ボタン
android:layout_width="wrap_content"
android:layout_height="wrap_content"
android:text="按钮3" />
</LinearLayout>
4. LinearLayout の簡単な例:
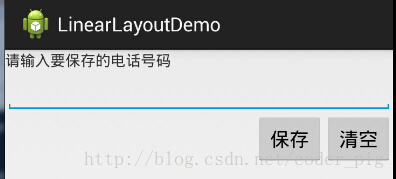
実装コードは次のとおりです。
xmlns:tools="http://schemas.android.com/tools"
android:id="@+ id/LinearLayout1"
android:layout_width="fill_parent"
android:layout_height="fill_parent"
android:orientation="vertical"
tools:context=".MainActivity" >
<TextView
android:layout_width="wrap_content"
android:layout_height="wrap_content"
android:text="请输入要保存电话号番号"/ >
<EditText
android:layout_width="fill_parent"
android:layout_height="wrap_content"/>
<LinearLayout
android:layout_width="fill_parent"
android:layout_height="wrap_content"
android:orientation="horizontal"
android:gravity 「そうです」>
<ボタン
android:layout_width="wrap_content"
android:layout_height="wrap_content"
android:text="保存"/>
<ボタン
android:layout_width="wrap_content"
android:layout_height="wrap_content"
android:text="清空"/>
</LinearLayout>
</LinearLayout>
5. 注:
Layout_gravity を使用する際の非常に重要な問題です。 質問内容: LinearLayout の水平方向に 2 つの TextView を配置し、1 つを左に、もう 1 つを右に配置するにはどうすればよいですか? もしかしたら、あなたは「重力の左右を設定すればいいだけだ!」と口走ってしまうでしょう。 それは本当に簡単ですか? 単純なレイアウトを書いてみると、それが裏目に出ることがわかります。 コードは以下のように表示されます。
xmlns:tools="http://schemas.android.com/tools"
android:layout_width="match_parent"
android:layout_height="match_parent"
android:orientation="horizontal"
tools:context="com.jay.example.getscreendemo.MainActivity" > _width="wrap_content"
android:layout_height="200dp"
android:layout_gravity ="left"
android:background="../style/images/android-tutorial-linearlayout.html"
android:gravity="center"
android:text="O( ∩_∩)おはは~" /> ;
<TextView
android:layout_width="wrap_content"
android:layout_height="200dp"
android:layout_gravity=" right"
android:background="../style /images/android-tutorial-linearlayout.html " android:gravity="center" LinearLayout
走行結果グラフ:
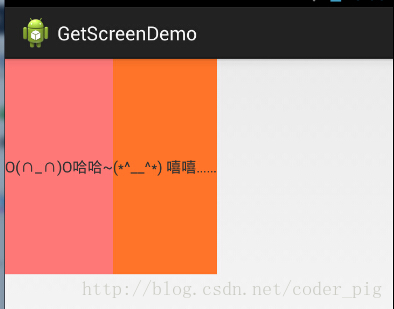
これを見た人は、「おっと、本当に機能しない。gravity=left 属性を外側の LinearLayout に追加してから、2 番目の属性を設定してはどうでしょうか?」と言うでしょう。 TextView のlayout_gravity は正しいので、試してみましょう。
xmlns:tools="http://schemas.android.com/tools"
android:layout_width="match_parent"
android:layout_height="match_parent"
android:orientation="horizontal"
android:gravity="left"
tools:context="com.jay.example.getscreendemo.MainActivity" >
<テキストビュー
android :layout_width="wrap_content"
android:layout_height="200dp"
android:background="../style/images/android-tutorial-linearlayout.html"
android:gravity="center"
text android:text = O( ∩_∩)あはは~" />
<TextView
android:layout_width="wrap_content"
android:layout_height="200dp"
android:layout_gravity=" right"
android:background="../ style /images/android-tutorial-linearlayout.html" android:gravity="center" LinearLayout
結果は依然として同じです:
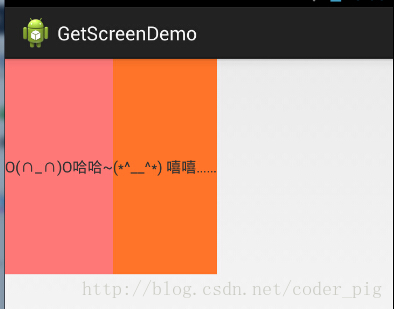
さて、途方に暮れてしまったのですが、どうすればいいでしょうか?
android:orientation="vertical" を使用した場合、水平設定のみが有効になり、垂直設定は無効になります。 つまり、left、right、center_horizontal が有効です。 android:orientation="horizontal" を使用した場合、垂直設定のみが有効になり、水平設定は無効になります。 つまり、top、bottom、center_vertical が有効です。
ただし、この方法は役に立たないようです。例えば: 垂直方向の左右の配置のみを設定できる場合、次のような効果が現れます。

これは明らかに私たちが望んでいる結果ではありません。 まとめると、どちらも上記のルールに従ってレイアウトしますが、この場合は相対レイアウト RelativeLayout を使用します。 インターネット上では明確な理由は示されていませんが、これは方向性の優先順位に関係していると言う人もいます。 とりあえずマークを付けておきます。理由がわかったら後で説明します。画面適応についても前に説明しましたが、それでもレイアウトを使用することをお勧めします。 相対レイアウト!


