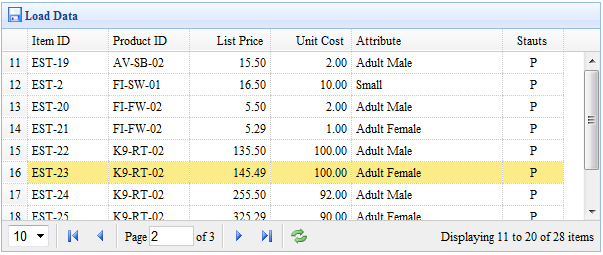
jEasyUI はページング コンポーネントを追加します
DataGrid を作成する

リモートサーバー側からデータをロードするには、サーバー側で JSON 形式のデータを返す「url」属性を設定する必要があります。データ形式の詳細については、datagrid のドキュメントを参照してください。
	<table id="tt" class="easyui-datagrid" style="width:600px;height:250px"
			url="datagrid2_getdata.php"
			title="Load Data" iconCls="icon-save"
			rownumbers="true" pagination="true">
		<thead>
			<tr>
				<th field="itemid" width="80">Item ID</th>
				<th field="productid" width="80">Product ID</th>
				<th field="listprice" width="80" align="right">List Price</th>
				<th field="unitcost" width="80" align="right">Unit Cost</th>
				<th field="attr1" width="150">Attribute</th>
				<th field="status" width="60" align="center">Stauts</th>
			</tr>
		</thead>
	</table>
データグリッド列を定義し、「ページネーション」プロパティを true に設定します。これにより、データグリッドの下部にページネーション ツールバーが生成されます。ページネーションは 2 つのパラメータをサーバーに送信します:
- page: ページ番号、開始値 1。
- rows: ページごとの行を表示します。
- サーバーサイドコード
	$page = isset($_POST['page']) ? intval($_POST['page']) : 1;
	$rows = isset($_POST['rows']) ? intval($_POST['rows']) : 10;
	// ...
	$rs = mysql_query("select count(*) from item");
	$row = mysql_fetch_row($rs);
	$result["total"] = $row[0];

	$rs = mysql_query("select * from item limit $offset,$rows");

	$items = array();
	while($row = mysql_fetch_object($rs)){
		array_push($items, $row);
	}
	$result["rows"] = $items;

	echo json_encode($result);


