


1. レンダリング

2. レイヤー制御
Folium 公式は、私たちが使用できるいくつかの明確な方法も提供しています。レイヤーコントロールと同じです。正式なメソッド名はFeatureGroupで、インポートメソッドはfolium import FeatureGroup、またはfolium.FeatureGroup()からのものです。ここでは特定の原則については詳しく説明しませんが、主に例を見ていきます。
import folium
def map2png(map_data,out_file='pdf.png'):
# 1.直接构造,默认底图
mo = folium.Map(location=[0, 0])
# 2.图层1-高德底图+数据
fg = folium.FeatureGroup()
# 2.1 高德地图
fg.add_child(folium.TileLayer(
tiles='http://webrd02.is.autonavi.com/appmaptile?lang=zh_cn&size=1&scale=1&style=8&x={x}&y={y}&z={z}',
attr="© <a href=http://ditu.amap.com/>高德地图</a>",
min_zoom=0,
max_zoom=19,
control=True,
zoom_control=False,
show=True))
# 2.2添加一个点
fg.add_child(folium.Marker(
location=[45.3311, -121.7113],
popup="Timberline Lodge",
icon=folium.Icon(color="green")))
# 2.3添加一个线形
fg.add_child(folium.PolyLine(
locations=[[38.68,115.67],
[38.85,115.48],
[38.65,115.37],
[38.68,115.67]],
color='green', weight=2, opacity=1))
# 2.4添加一个面
fg.add_child(folium.Polygon(
locations=[[38.68,115.67],
[38.85,115.48],
[38.65,115.37],
[38.68,115.67]],
color='green', weight=2,
fill=True,fill_color = 'red'))
# 2.5将我们的图层加入map
mo.add_child(fg)
# 3.图层2-重点数据+最上层
fg2 = folium.FeatureGroup()
fg2.add_child(folium.Polygon(
locations=[[38.68,115.67],
[38.85,115.48],
[38.65,115.37],
[38.68,115.67]],
color='green', weight=2,
fill=True,fill_color = 'red'))
mo.add_child(fg2)
# 4.将图层fg2显示在最上层,keep_in_front的参数必须是FeatureGroup或TileLayer对象
mo.keep_in_front(fg2)
# 5.根据范围缩放地图
mo.fit_bounds([[38.68,115.67],
[38.85,115.48],
[38.65,115.37],
[38.68,115.67]])
root = mo.get_root()
html = root.render() # 这个拿到的就是一个html的内容
# mo.save('text.html')3. ノース アロー
ノース アロー関数はマップには必ずしも必要ではありませんが、追加するものは次のとおりです。上がるのはいつも良いことだ。 FloatImage を使用するとこの機能を実現できますが、関連する内容は公式ドキュメントやソース コード分析には記載されていません。公式ドキュメントで提供されているプラグインは数多くありますが、その中で最も広く使われているのがヒートマップと呼ばれるHeatMap方式です。
FloatImage メソッドは、画面上に画像を配置し、画像のサイズと画面上の位置を指定する処理を実装します。パラメータは整数です (FloatImage メソッドはパーセント変換を実装します)。 2 番目のコードに基づいて、画像を左下隅に追加しました。
fg.add_child(FloatImage(os.path.join(base, 'map_png', 'image', 'compass.png'), left=5, bottom=10, width=5))
4. folium への js と css の追加
folium 公式では、js と css を追加するための関連メソッドは提供されていません。インターネット上の多くのメソッドは、ソース コードの解釈に基づいて抽出する必要があります。言ってみれば、それは比較的単純であり、js と css を追加する方法についての関連した指示はありません。
ソース コードから、folium のマップ関数は、データとマップの HTML をロードするために jinjia2 を通じて実装されていることがわかります。
ソース コードで使用されるデータとマップを追加するには、主に 3 つの方法があります。これらのメソッドには欠点があります (先頭にしか追加できない)。これらのメソッドはほとんどのシナリオで使用できます。マップ オブジェクトに対する操作が含まれない場合、これら 3 つのメソッドで要件を満たすことができます。
1.ヘッダーに js と css を追加
    init_script = """
        var mapsPlaceholder = [];
        L.Map.addInitHook(function () {mapsPlaceholder.push(this);});
    """
    # 加在header最上边
    mo.get_root().header.add_child(folium.Element(init_script))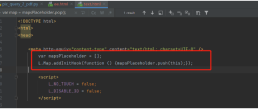
2.body に js と css を追加
    init_script = """
        var mapsPlaceholder = [];
        L.Map.addInitHook(function () {mapsPlaceholder.push(this);});
    """
    # 加在body中
    mo.get_root().html.add_child(folium.Element(init_script))
3.js と css を追加するスクリプト
    init_script = """
        var mapsPlaceholder = [];
        L.Map.addInitHook(function () {mapsPlaceholder.push(this);});
    """
    # 加在script中
    mo.get_root().script.add_child(folium.Element(init_script))
5. 経度と緯度のグリッド線
前のステップでは、別の場所に js と css を追加する実装が行われました。 htmlファイル方式の場合、地図オブジェクトの操作を伴う場合、経度・緯度のグリッド線の追加など満足できない場合があります。緯度と経度のグリッド ラインの機能を実装するのは、主に次の問題により面倒です:
1. 関連する公式のメソッドやプラグインはありません (現在はありません);
2.folium は実装のために leadlet.js に依存します 緯度と経度のサードパーティ ライブラリを実装したい場合は、リーフレットに精通する必要があります (インターネット上で関連記事が 1 つだけ見つかりました);
3. 上記の記事はフロントエンドによって完了しており、バックエンドに直接実装する方法はありません。
4. フロントエンドの実装方法はマップを直接構築することであり、ここではマップ作成オブジェクトは利用できません (マップ オブジェクトはランダムに生成されます)。
緯度と経度のグリッド線を決定するにはどうすればよいですか?
マップ オブジェクトの作成時にオブジェクトを保存し、次にマップ オブジェクトを取得して、ズーム レベルに応じてグリッド ラインを実装する必要があります。重要なタスクは、マップ オブジェクトの作成前後に JavaScript コードが HTML ページに適切に埋め込まれていることを確認することです。
マップオブジェクト作成時にオブジェクトを4つに格納するように実装されていましたが、foliumのソースコードを調べてjsを追加するメソッドをマップオブジェクト作成後にjsを追加するように書き換えました。


<!DOCTYPE html>
<html lang="en">
<head>
<meta charset="UTF-8" />
<meta http-equiv="X-UA-Compatible" content="IE=edge" />
<meta name="viewport" content="width=device-width, initial-scale=1.0" />
<link
rel="stylesheet"
href="https://unpkg.com/leaflet@1.7.1/dist/leaflet.css" rel="external nofollow"
/>
<script src="https://unpkg.com/leaflet@1.7.1/dist/leaflet.js"></script>
<title>leaflet-经纬网格</title>
<style>
html,
body {
width: 100%;
height: 100%;
padding: 0;
margin: 0;
}
.leaflet-div-icon {
background: none;
border: none;
}
</style>
</head>
<body>
<div id="map" ></div>
<script>
let map = L.map("map", { renderer: L.canvas({ padding: 0.5 }) }).setView(
[25.127879288597576, 118.37905883789064],
4
);
// 添加背景图层
L.tileLayer("https://{s}.tile.openstreetmap.org/{z}/{x}/{y}.png", {
attribution:
'© <a href="https://www.openstreetmap.org/copyright" rel="external nofollow" >OpenStreetMap</a> contributors',
}).addTo(map);
// 创建图层
let lonLatGridLineLayer = L.featureGroup().addTo(map);
// 经纬网格生成方法
let addLonLatLine = () => {
let zoom = map.getZoom();
let bounds = map.getBounds();
let north = bounds.getNorth();
let east = bounds.getEast();
// 经纬度间隔
let d = 90 / Math.pow(2, zoom - 1);
// 经线网格
for (let index = -180; index <= 360; index += d) {
// 判断当前视野内
if (bounds.contains([north, index])) {
// 绘制经线
let lonLine = L.polyline(
[
[-90, index],
[90, index],
],
{ weight: 1, color: "blue" }
);
lonLatGridLineLayer.addLayer(lonLine);
// 标注
let text = index.toFixed(1) + "°";
// 动态计算小数位数
if (zoom > 10) {
text = index.toFixed((zoom - 8) / 2) + "°";
}
let divIcon = L.divIcon({
html: `<div >${text}</div>`,
iconAnchor: [0, -5],
});
let textMarker = L.marker([north, index], { icon: divIcon });
lonLatGridLineLayer.addLayer(textMarker);
}
}
if(d>90)d=90;
// 纬线网格
for (let index = -90; index <= 90; index += d) {
if (bounds.contains([index, east])) {
let lonLine = L.polyline(
[
[index, -180],
[index, 360],
],
{ weight: 1, color: "blue" }
);
lonLatGridLineLayer.addLayer(lonLine);
// 标注
let text = index.toFixed(1) + "°";
if (zoom > 10) {
text = index.toFixed((zoom - 8) / 2) + "°";
}
let divIcon = L.divIcon({
html: `<div >${text}</div>`,
iconAnchor: [(text.length + 1) * 6, 0],
});
let textMarker = L.marker([index, east], { icon: divIcon });
lonLatGridLineLayer.addLayer(textMarker);
}
}
};
addLonLatLine();
map.on("zoomend move", () => {
lonLatGridLineLayer.clearLayers();
addLonLatLine();
});
</script>
</body>
</html>2. グリッド ライン クラスをカスタマイズしますソースコードのクラス継承関係により、MacroElementクラスを継承します。 from branca.element import MacroElement,
from jinja2 import Template
from folium.vector_layers import path_options
class Jwwg(MacroElement):
"""自定义经纬线网格"""
_template = Template("""
{% macro script(this, kwargs) %}
var map = mapsPlaceholder.pop();
// 创建图层
let lonLatGridLineLayer = L.featureGroup().addTo(map);
// 经纬网格生成方法
let addLonLatLine = () => {
let zoom = map.getZoom();
let bounds = map.getBounds();
let north = bounds.getNorth();
let east = bounds.getEast();
// 经纬度间隔
let d = 90 / Math.pow(2, zoom - 1);
// 经线网格
for (let index = -180; index <= 360; index += d) {
// 判断当前视野内
if (bounds.contains([north, index])) {
// 绘制经线
let lonLine = L.polyline(
[
[-90, index],
[90, index],
],
{weight: 1, color: "blue"}
);
lonLatGridLineLayer.addLayer(lonLine);
// 标注
let text = index.toFixed(1) + "°";
// 动态计算小数位数
if (zoom > 10) {
text = index.toFixed((zoom - 8) / 2) + "°";
}
let divIcon = L.divIcon({
html: `<div >${text}</div>`,
iconAnchor: [0, -5],
});
let textMarker = L.marker([north, index], {icon: divIcon});
lonLatGridLineLayer.addLayer(textMarker);
}
}
if (d > 90) d = 90;
// 纬线网格
for (let index = -90; index <= 90; index += d) {
if (bounds.contains([index, east])) {
let lonLine = L.polyline(
[
[index, -180],
[index, 360],
],
{weight: 1, color: "blue"}
);
lonLatGridLineLayer.addLayer(lonLine);
// 标注
let text = index.toFixed(1) + "°";
if (zoom > 10) {
text = index.toFixed((zoom - 8) / 2) + "°";
}
let divIcon = L.divIcon({
html: `<div >${text}</div>`,
iconAnchor: [(text.length + 1) * 6, 0],
});
let textMarker = L.marker([index, east], {icon: divIcon});
lonLatGridLineLayer.addLayer(textMarker);
}
}
};
addLonLatLine();
map.on("zoomend move", () => {
lonLatGridLineLayer.clearLayers();
addLonLatLine();
});
{% endmacro %}
""")
def __init__(self, **kwargs):
super(Jwwg, self).__init__()
self._name = 'Jwwg'
self.options = path_options(line=True, **kwargs)3. グリッド線を実装するimport folium
def map2png(map_data,out_file='pdf.png'):
# 1.直接构造,默认底图
mo = folium.Map(location=[0, 0])
# 2.图层1-高德底图+数据
fg = folium.FeatureGroup()
# 2.1 高德地图
fg.add_child(folium.TileLayer(
tiles='http://webrd02.is.autonavi.com/appmaptile?lang=zh_cn&size=1&scale=1&style=8&x={x}&y={y}&z={z}',
attr="© <a href=http://ditu.amap.com/>高德地图</a>",
min_zoom=0,
max_zoom=19,
control=True,
zoom_control=False,
show=True))
# 2.2添加一个点
fg.add_child(folium.Marker(
location=[45.3311, -121.7113],
popup="Timberline Lodge",
icon=folium.Icon(color="green")))
# 2.3添加一个线形
fg.add_child(folium.PolyLine(
locations=[[38.68,115.67],
[38.85,115.48],
[38.65,115.37],
[38.68,115.67]],
color='green', weight=2, opacity=1))
# 2.4添加一个面
fg.add_child(folium.Polygon(
locations=[[38.68,115.67],
[38.85,115.48],
[38.65,115.37],
[38.68,115.67]],
color='green', weight=2,
fill=True,fill_color = 'red'))
# 2.5将我们的图层加入map
mo.add_child(fg)
# 5.根据范围缩放地图
mo.fit_bounds([[38.68,115.67],
[38.85,115.48],
[38.65,115.37],
[38.68,115.67]])
# 网格线
init_script = """
var mapsPlaceholder = [];
L.Map.addInitHook(function () {mapsPlaceholder.push(this);});
"""
mo.get_root().script.add_child(folium.Element(init_script))
Jwwg().add_to(mo)
root = mo.get_root()
html = root.render() # 这个拿到的就是一个html的内容
# mo.save('text.html')
以上がPython foliumの機能の使い方の詳細内容です。詳細については、PHP 中国語 Web サイトの他の関連記事を参照してください。

 Pythonアレイに要素をどのように追加しますか?Apr 30, 2025 am 12:19 AM
inpython、youappendelementStoalistusingtheappend()method.1)useappend()forsingleelements:my_list.append(4).2)useextend()or = formultipleElements:my_list.extend(another_list)ormy_list = [4,5,6] .3)forspecificpositions:my_list.insert(1,5).beaware
 シバン関連の問題をどのようにデバッグしますか?Apr 30, 2025 am 12:17 AM
シェバンの問題をデバッグする方法には次のものがあります。1。シバン行をチェックして、それがスクリプトの最初の行であり、接頭辞スペースがないことを確認します。 2.通訳パスが正しいかどうかを確認します。 3.通訳を直接呼び出してスクリプトを実行して、シェバンの問題を分離します。 4. StraceまたはTrustsを使用して、システムコールを追跡します。 5.シバンに対する環境変数の影響を確認してください。
 Pythonアレイから要素をどのように削除しますか?Apr 30, 2025 am 12:16 AM
pythonlistscanbemanipulatedsingseveralmethodstoremoveElements:1)theremove()methodremovesthefirstoccurrenceofaspecifiedValue.2)thepop()methop()methodremovessanelementatagivenindex.3)thedelstatementementementementementementementementementemoritemoricedex.4)
 Pythonリストに保存できるデータ型は何ですか?Apr 30, 2025 am 12:07 AM
Integers、strings、floats、booleans、otherlists、anddictionaryを含むpythonlistscanstoreanydatype
 Pythonリストで実行できる一般的な操作は何ですか?Apr 30, 2025 am 12:01 AM
PythonListsSupportNumersoperations:1)AddingElementSwithAppend()、Extend()、Andinert()
 numpyを使用してマルチディメンシャルアレイをどのように作成しますか?Apr 29, 2025 am 12:27 AM
Numpyを使用して多次元配列を作成すると、次の手順を通じて実現できます。1)numpy.array()関数を使用して、np.array([[1,2,3]、[4,5,6]])などの配列を作成して2D配列を作成します。 2)np.zeros()、np.ones()、np.random.random()およびその他の関数を使用して、特定の値で満たされた配列を作成します。 3)アレイの形状とサイズの特性を理解して、サブアレイの長さが一貫していることを確認し、エラーを回避します。 4)np.reshape()関数を使用して、配列の形状を変更します。 5)コードが明確で効率的であることを確認するために、メモリの使用に注意してください。
 Numpyアレイの「ブロードキャスト」の概念を説明します。Apr 29, 2025 am 12:23 AM
BroadcastinginNumPyisamethodtoperformoperationsonarraysofdifferentshapesbyautomaticallyaligningthem.Itsimplifiescode,enhancesreadability,andboostsperformance.Here'showitworks:1)Smallerarraysarepaddedwithonestomatchdimensions.2)Compatibledimensionsare
 データストレージ用のリスト、array.array、およびnumpy配列を選択する方法を説明します。Apr 29, 2025 am 12:20 AM
Forpythondatastorage、chooseLists forfficability withmixeddatypes、array.arrayformemory-efficienthogeneousnumericaldata、およびnumpyArrays foradvancednumericalcomputing.listSareversatilebuteficient efficient forlargeNumericaldatates;


ホットAIツール

Undresser.AI Undress
リアルなヌード写真を作成する AI 搭載アプリ

AI Clothes Remover
写真から衣服を削除するオンライン AI ツール。

Undress AI Tool
脱衣画像を無料で

Clothoff.io
AI衣類リムーバー

Video Face Swap
完全無料の AI 顔交換ツールを使用して、あらゆるビデオの顔を簡単に交換できます。

人気の記事
ホットツール

AtomエディタMac版ダウンロード
最も人気のあるオープンソースエディター

EditPlus 中国語クラック版
サイズが小さく、構文の強調表示、コード プロンプト機能はサポートされていません

SublimeText3 Mac版
神レベルのコード編集ソフト(SublimeText3)

Safe Exam Browser
Safe Exam Browser は、オンライン試験を安全に受験するための安全なブラウザ環境です。このソフトウェアは、あらゆるコンピュータを安全なワークステーションに変えます。あらゆるユーティリティへのアクセスを制御し、学生が無許可のリソースを使用するのを防ぎます。

SAP NetWeaver Server Adapter for Eclipse
Eclipse を SAP NetWeaver アプリケーション サーバーと統合します。
ホットトピック
 7831
7831 15164814140252130025123929