1. easy-captcha の概要
easy-captcha は、グラフィック検証コードを生成する Java クラス ライブラリで、GIF、中国語、算術などのタイプをサポートしており、Java Web、JavaSE で使用できます。および他のプロジェクト。

<guava.version>20.0</guava.version>
<captcha.version>1.6.2</captcha.version>

<dependency>
    <groupId>com.google.guava</groupId>
    <artifactId>guava</artifactId>
    <version>${guava.version}</version>
</dependency>

<dependency>
    <groupId>com.github.whvcse</groupId>
    <artifactId>easy-captcha</artifactId>
    <version>${captcha.version}</version>
</dependency>
3. サービス層コードの作成@Service
public class CaptchaServiceImpl implements CaptchaService {
/**
* Local Cache 5分钟过期
*/
Cache<String, String> localCache = CacheBuilder.newBuilder().maximumSize(1000).expireAfterAccess(5, TimeUnit.MINUTES).build();
@Override
public void create(HttpServletResponse response, String uuid) throws IOException {
response.setContentType("image/gif");
response.setHeader("Pragma", "No-cache");
response.setHeader("Cache-Control", "no-cache");
response.setDateHeader("Expires", 0);
//生成验证码
SpecCaptcha captcha = new SpecCaptcha(150, 40);
captcha.setLen(5);
captcha.setCharType(Captcha.TYPE_DEFAULT);
captcha.out(response.getOutputStream());
//保存到缓存
setCache(uuid, captcha.text());
}
@Override
public boolean validate(String uuid, String code) {
//获取验证码
String captcha = getCache(uuid);
//效验成功
if(code.equalsIgnoreCase(captcha)){
return true;
}
return false;
}
private void setCache(String key, String value){
localCache.put(key, value);
}
private String getCache(String key){
String captcha = localCache.getIfPresent(key);
//删除验证码
if(captcha != null){
localCache.invalidate(key);
}
return captcha;
}
}
4. 検証コード インターフェイスの開発LoginController を作成し、検証コードを生成するメソッドを提供します@Controller
@AllArgsConstructor
public class CaptchaController {
private CaptchaService captchaService;
@GetMapping("/captcha")
public void captcha(HttpServletResponse response, String uuid)throws IOException {
//uuid不能为空
AssertUtils.isBlank(uuid, ErrorCode.IDENTIFIER_NOT_NULL);
//生成验证码
captchaService.create(response, uuid);
}
}5。フロントエンド vue は、生成された検証コードを表示するコードを追加します<Motion :delay="200">
<el-form-item prop="verifyCode">
<el-input
clearable
v-model="ruleForm.verifyCode"
placeholder="验证码"
:prefix-icon="useRenderIcon(Line)"
>
<template v-slot:append>
<img src="/static/imghwm/default1.png" data-src="captchaUrl" class="lazy"
style="
vertical-align: middle;
height: 40px;
width: 100px;
cursor: pointer;
"
:
@click="onRefreshCode"
alt=""
/>
</template>
</el-input>
</el-form-item>
</Motion>
完全なログイン ページ コードは次のとおりです<script setup lang="ts">
import Motion from "./utils/motion";
import { useRouter } from "vue-router";
import { message } from "@/utils/message";
import { loginRules } from "./utils/rule";
import { useNav } from "@/layout/hooks/useNav";
import type { FormInstance } from "element-plus";
import { useLayout } from "@/layout/hooks/useLayout";
import { useUserStoreHook } from "@/store/modules/user";
import { bg, avatar, illustration } from "./utils/static";
import { useRenderIcon } from "@/components/ReIcon/src/hooks";
import { ref, reactive, toRaw, onMounted, onBeforeUnmount } from "vue";
import { useDataThemeChange } from "@/layout/hooks/useDataThemeChange";
import { initRouter } from "@/router/utils";
import { getUuid } from "@/utils/utils";
import dayIcon from "@/assets/svg/day.svg?component";
import darkIcon from "@/assets/svg/dark.svg?component";
import Lock from "@iconify-icons/ri/lock-fill";
import User from "@iconify-icons/ri/user-3-fill";
import Line from "@iconify-icons/ri/shield-keyhole-line";
import { getConfig } from "@/config";
defineOptions({
name: "Login"
});
const router = useRouter();
const loading = ref(false);
const ruleFormRef = ref<FormInstance>();
const captchaUrl = ref("");
const { Api } = getConfig();
const { initStorage } = useLayout();
initStorage();
const { dataTheme, dataThemeChange } = useDataThemeChange();
dataThemeChange();
const { title } = useNav();
const ruleForm = reactive({
username: "admin",
password: "admin123",
verifyCode: "",
uuid: ""
});
const onLogin = async (formEl: FormInstance | undefined) => {
loading.value = true;
if (!formEl) return;
await formEl.validate((valid, fields) => {
if (valid) {
useUserStoreHook()
.loginByUsername({ username: ruleForm.username, password: "admin123" })
.then(res => {
if (res.code == 200) {
// 获取后端路由
initRouter().then(() => {
router.push("/");
message("登录成功", { type: "success" });
});
}
});
} else {
loading.value = false;
return fields;
}
});
};
/** 使用公共函数,避免`removeEventListener`失效 */
function onkeypress({ code }: KeyboardEvent) {
if (code === "Enter") {
onLogin(ruleFormRef.value);
}
}
function getCaptchaUrl() {
ruleForm.uuid = getUuid();
captchaUrl.value = `${Api}/captcha?uuid=${ruleForm.uuid}`;
}
function onRefreshCode() {
getCaptchaUrl();
}
onMounted(() => {
window.document.addEventListener("keypress", onkeypress);
getCaptchaUrl();
});
onBeforeUnmount(() => {
window.document.removeEventListener("keypress", onkeypress);
});
</script>
<template>
<div class="select-none">
<img class="wave lazy" src="/static/imghwm/default1.png" data-src="bg" : / alt="springboot が easy-captcha を統合して画像検証コードの表示とログインを実現する方法" >
<div class="flex-c absolute right-5 top-3">
<!-- 主题 -->
<el-switch
v-model="dataTheme"
inline-prompt
:active-icon="dayIcon"
:inactive-icon="darkIcon"
@change="dataThemeChange"
/>
</div>
<div class="login-container">
<div class="img">
<component :is="toRaw(illustration)" />
</div>
<div class="login-box">
<div class="login-form">
<avatar class="avatar" />
<Motion>
<h3 id="nbsp-title-nbsp">{{ title }}</h3>
</Motion>
<el-form
ref="ruleFormRef"
:model="ruleForm"
:rules="loginRules"
size="large"
>
<Motion :delay="100">
<el-form-item
:rules="[
{
required: true,
message: '请输入账号',
trigger: 'blur'
}
]"
prop="username"
>
<el-input
clearable
v-model="ruleForm.username"
placeholder="账号"
:prefix-icon="useRenderIcon(User)"
/>
</el-form-item>
</Motion>
<Motion :delay="150">
<el-form-item prop="password">
<el-input
clearable
show-password
v-model="ruleForm.password"
placeholder="密码"
:prefix-icon="useRenderIcon(Lock)"
/>
</el-form-item>
</Motion>
<Motion :delay="200">
  <el-form-item prop="verifyCode">
    <el-input
      clearable
      v-model="ruleForm.verifyCode"
      placeholder="验证码"
      :prefix-icon="useRenderIcon(Line)"
    >
      <template v-slot:append>
        <img src="/static/imghwm/default1.png"  data-src="captchaUrl"  class="lazy"
          style="
            vertical-align: middle;
            height: 40px;
            width: 100px;
            cursor: pointer;
          "
          :
          @click="onRefreshCode"
          alt=""
        />
      </template>
    </el-input>
  </el-form-item>
</Motion>
<Motion :delay="250">
<el-button
class="w-full mt-4"
size="default"
type="primary"
:loading="loading"
@click="onLogin(ruleFormRef)"
>
登录
</el-button>
</Motion>
</el-form>
</div>
</div>
</div>
</div>
</template>
<style scoped>
@import url("@/style/login.css");
</style>
<style lang="scss" scoped>
:deep(.el-input-group__append, .el-input-group__prepend) {
padding: 0;
}
</style>コンパイル バックエンドを実行すると、同僚がフロントエンドを実行し、ログイン ページが表示されます。 以上がspringboot が easy-captcha を統合して画像検証コードの表示とログインを実現する方法の詳細内容です。詳細については、PHP 中国語 Web サイトの他の関連記事を参照してください。
 怎么使用SpringBoot+Canal实现数据库实时监控May 10, 2023 pm 06:25 PM
Canal工作原理Canal模拟MySQLslave的交互协议,伪装自己为MySQLslave,向MySQLmaster发送dump协议MySQLmaster收到dump请求,开始推送binarylog给slave(也就是Canal)Canal解析binarylog对象(原始为byte流)MySQL打开binlog模式在MySQL配置文件my.cnf设置如下信息:[mysqld]#打开binloglog-bin=mysql-bin#选择ROW(行)模式binlog-format=ROW#配置My
 Spring Boot怎么使用SSE方式向前端推送数据May 10, 2023 pm 05:31 PM
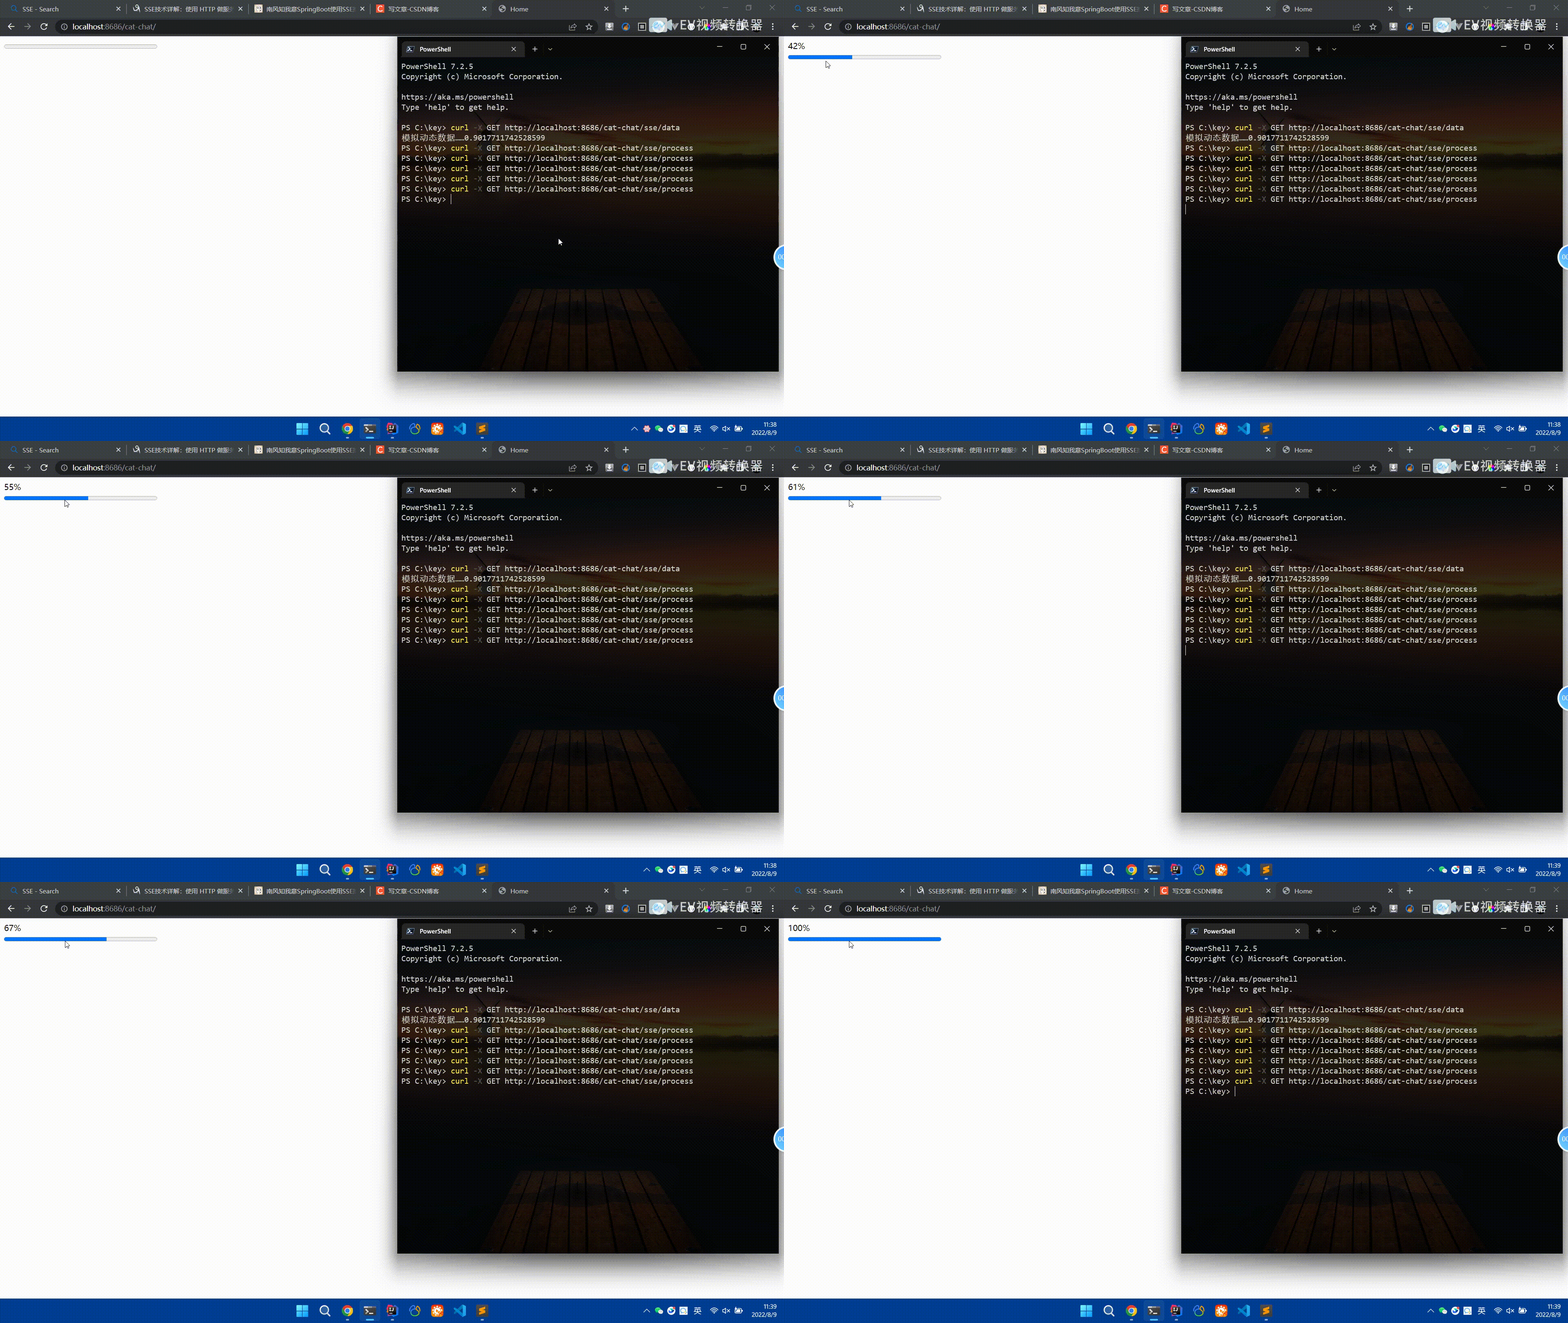
前言SSE简单的来说就是服务器主动向前端推送数据的一种技术,它是单向的,也就是说前端是不能向服务器发送数据的。SSE适用于消息推送,监控等只需要服务器推送数据的场景中,下面是使用SpringBoot来实现一个简单的模拟向前端推动进度数据,前端页面接受后展示进度条。服务端在SpringBoot中使用时需要注意,最好使用SpringWeb提供的SseEmitter这个类来进行操作,我在刚开始时使用网上说的将Content-Type设置为text-stream这种方式发现每次前端每次都会重新创建接。最
 SpringBoot怎么实现二维码扫码登录May 10, 2023 pm 08:25 PM
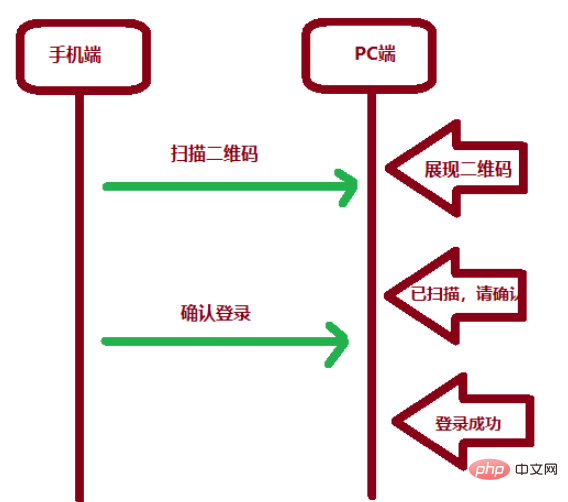
一、手机扫二维码登录的原理二维码扫码登录是一种基于OAuth3.0协议的授权登录方式。在这种方式下,应用程序不需要获取用户的用户名和密码,只需要获取用户的授权即可。二维码扫码登录主要有以下几个步骤:应用程序生成一个二维码,并将该二维码展示给用户。用户使用扫码工具扫描该二维码,并在授权页面中授权。用户授权后,应用程序会获取一个授权码。应用程序使用该授权码向授权服务器请求访问令牌。授权服务器返回一个访问令牌给应用程序。应用程序使用该访问令牌访问资源服务器。通过以上步骤,二维码扫码登录可以实现用户的快
 SpringBoot/Spring AOP默认动态代理方式是什么May 10, 2023 pm 03:52 PM
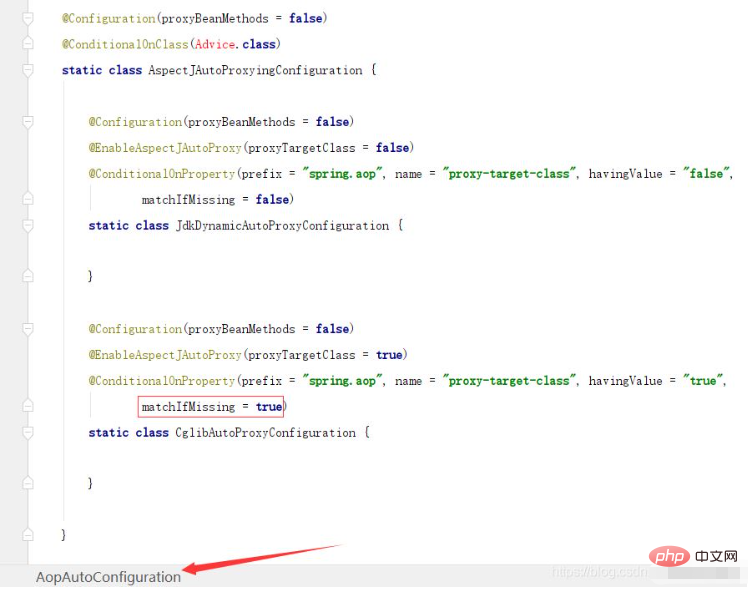
1.springboot2.x及以上版本在SpringBoot2.xAOP中会默认使用Cglib来实现,但是Spring5中默认还是使用jdk动态代理。SpringAOP默认使用JDK动态代理,如果对象没有实现接口,则使用CGLIB代理。当然,也可以强制使用CGLIB代理。在SpringBoot中,通过AopAutoConfiguration来自动装配AOP.2.Springboot1.xSpringboot1.xAOP默认还是使用JDK动态代理的3.SpringBoot2.x为何默认使用Cgl
 spring boot怎么对敏感信息进行加解密May 10, 2023 pm 02:46 PM
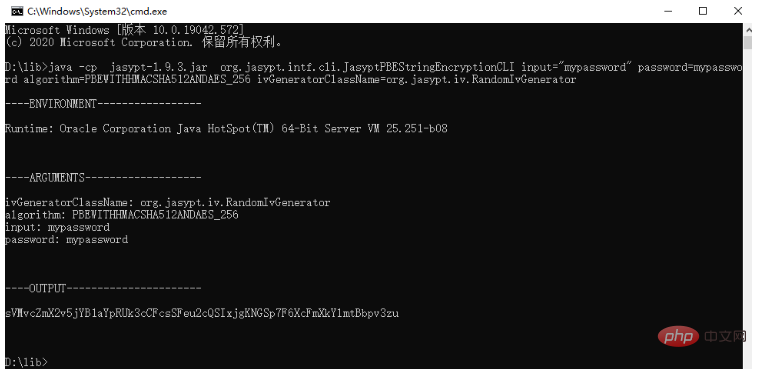
我们使用jasypt最新版本对敏感信息进行加解密。1.在项目pom文件中加入如下依赖:com.github.ulisesbocchiojasypt-spring-boot-starter3.0.32.创建加解密公用类:packagecom.myproject.common.utils;importorg.jasypt.encryption.pbe.PooledPBEStringEncryptor;importorg.jasypt.encryption.pbe.config.SimpleStrin
 使用Java SpringBoot集成POI实现Word文档导出Apr 21, 2023 pm 12:19 PM
知识准备需要理解ApachePOI遵循的标准(OfficeOpenXML(OOXML)标准和微软的OLE2复合文档格式(OLE2)),这将对应着API的依赖包。什么是POIApachePOI是用Java编写的免费开源的跨平台的JavaAPI,ApachePOI提供API给Java程序对MicrosoftOffice格式档案读和写的功能。POI为“PoorObfuscationImplementation”的首字母缩写,意为“简洁版的模糊实现”。ApachePOI是创建和维护操作各种符合Offic
 springboot怎么整合shiro实现多验证登录功能May 10, 2023 pm 04:19 PM
1.首先新建一个shiroConfigshiro的配置类,代码如下:@ConfigurationpublicclassSpringShiroConfig{/***@paramrealms这儿使用接口集合是为了实现多验证登录时使用的*@return*/@BeanpublicSecurityManagersecurityManager(Collectionrealms){DefaultWebSecurityManagersManager=newDefaultWebSecurityManager();
 springboot怎么配置mybatis和事务管理May 10, 2023 pm 07:13 PM
一、springboot与mybatis的配置1.首先,springboot配置mybatis需要的全部依赖如下:org.springframework.bootspring-boot-starter-parent1.5.1.RELEASEorg.springframework.bootspring-boot-starter-web1.5.1.RELEASEorg.mybatis.spring.bootmybatis-spring-boot-starter1.2.0com.oracleojdbc


ホットAIツール

Undresser.AI Undress
リアルなヌード写真を作成する AI 搭載アプリ

AI Clothes Remover
写真から衣服を削除するオンライン AI ツール。

Undress AI Tool
脱衣画像を無料で

Clothoff.io
AI衣類リムーバー

AI Hentai Generator
AIヘンタイを無料で生成します。

人気の記事

ホットツール

ドリームウィーバー CS6
ビジュアル Web 開発ツール

メモ帳++7.3.1
使いやすく無料のコードエディター

Safe Exam Browser
Safe Exam Browser は、オンライン試験を安全に受験するための安全なブラウザ環境です。このソフトウェアは、あらゆるコンピュータを安全なワークステーションに変えます。あらゆるユーティリティへのアクセスを制御し、学生が無許可のリソースを使用するのを防ぎます。

SublimeText3 英語版
推奨: Win バージョン、コードプロンプトをサポート!

ZendStudio 13.5.1 Mac
強力な PHP 統合開発環境

ホットトピック
 7428
7428 15
15 1359
1359 52
52


