ホームページ >Java >&#&チュートリアル >IDEA を使用して SpringBoot プロジェクトを作成する方法
IDEA を使用して SpringBoot プロジェクトを作成する方法
- 王林転載
- 2023-05-17 22:25:0420280ブラウズ
1. IDEA で新しいプロジェクトを作成し、Spring Initializr、
Project SDK を選択し、インストールされている JDK を選択します。
Initializr サービス URL を選択し、デフォルト: https を選択します。 ://start.spring.io )
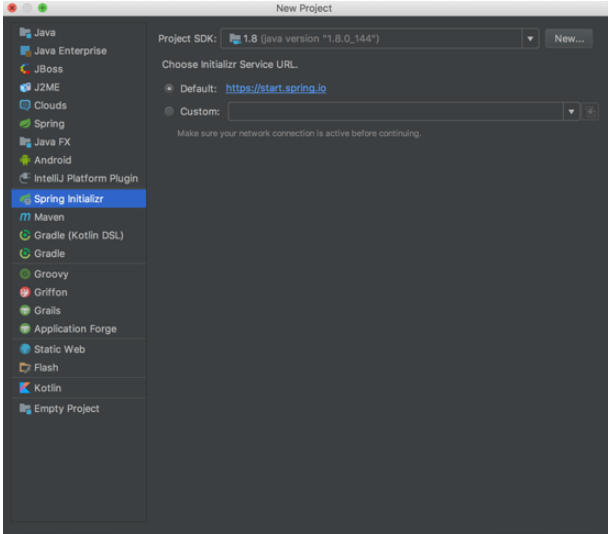
プロジェクト テンプレートを選択します
[次へ]をクリックします
2. プロジェクトを構成します
プロジェクト配列 (グループ)、プロジェクト識別子 (アーティファクト) を設定し、Maven プロジェクトを示すために Maven プロジェクトを選択します。
Version: プロジェクトのバージョン番号
Name :プロジェクト名
Description:プロジェクトの説明
Package:プロジェクトパッケージ名
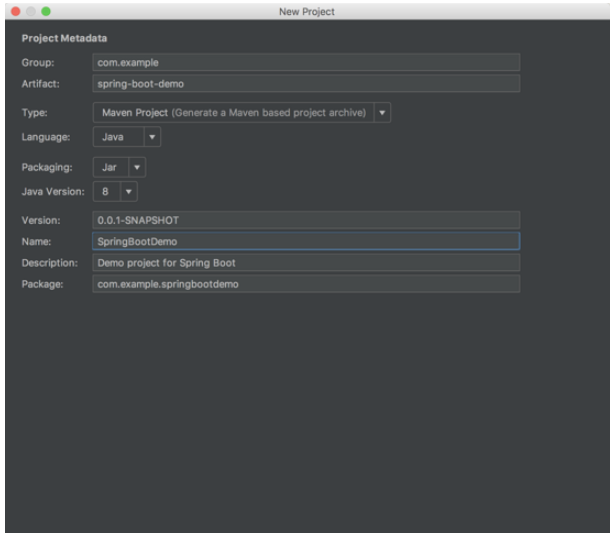
プロジェクト構成
「次へ」をクリックステップ
3. プロジェクト テンプレートを選択します
Web プロジェクトの作成を選択しましょう
Spring Boot バージョンを選択します
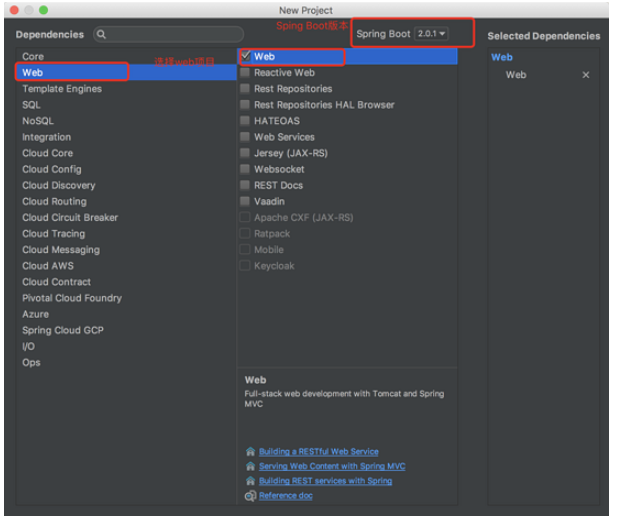
プロジェクト テンプレートの選択
#4. プロジェクト名とプロジェクト パスの設定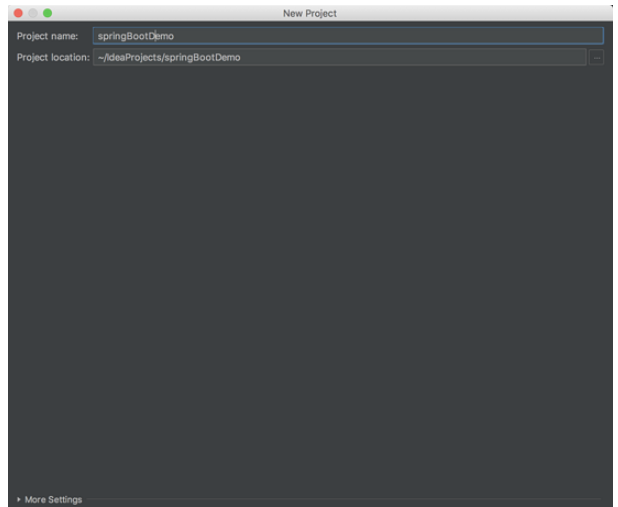 ##プロジェクト名とプロジェクト パスの設定
プロジェクトのパスとプロジェクト名を設定したら、[完了] をクリックしてプロジェクトの作成を完了します。プロジェクトをビルドし、完了するまでしばらく待つ必要があります。
5. 作成が完了したら、.mvn フォルダー、mvnw ファイル、および mvnw.cmd ファイルを削除します
##ファイルを削除します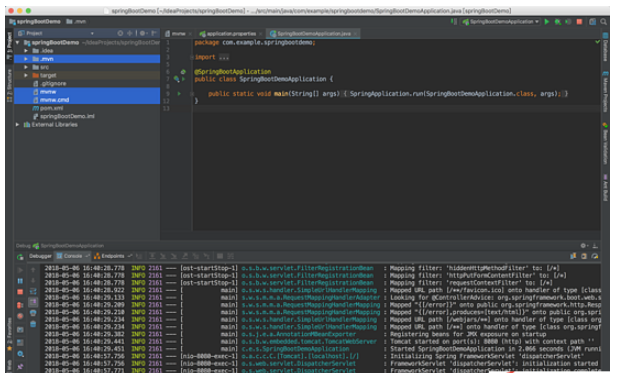
#pom.xml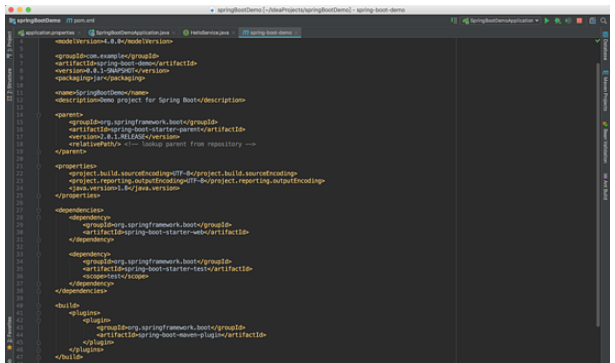
<!-- SpringBoot项目的基础库文件-->
  <parent>
    <groupid>org.springframework.boot</groupid>
    <artifactid>spring-boot-starter-parent</artifactid>
    <version>2.0.1.RELEASE</version>
    <relativepath></relativepath> <!-- lookup parent from repository -->
  </parent>
<!-- SpringBoot项目的基础库文件-->
  <dependencies>
<!-- web项目库-->
    <dependency>
      <groupid>org.springframework.boot</groupid>
      <artifactid>spring-boot-starter-web</artifactid>
    </dependency>
<!-- 测试所需库-->
    <dependency>
      <groupid>org.springframework.boot</groupid>
      <artifactid>spring-boot-starter-test</artifactid>
      <scope>test</scope>
    </dependency>
  </dependencies>
7. HelloService を作成します
package com.example.springbootdemo.service;
import org.springframework.stereotype.Service;
@Service
public interface HelloService {
  String sayHello();
}
8. HelloService 実装クラス HelloServiceImpl を作成し、sayHello() メソッドを実装し、「Hello World!」を返します。 "
package com.example.springbootdemo.service.impl;
import com.example.springbootdemo.service.HelloService;
import org.springframework.stereotype.Component;

@Component
public class HelloServiceImpl implements HelloService {
 @Override
 public String sayHello() {
   return "Hello World!";
 }
}
9. HelloController を作成し、HelloService 実装クラスを呼び出し、ブラウザに「Hello World!」を出力します。
package com.example.springbootdemo.service.impl;
import com.example.springbootdemo.service.HelloService;
import org.springframework.stereotype.Component;

@Component
public class HelloServiceImpl implements HelloService {
 @Override
 public String sayHello() {
   return "Hello World!";
 }
}
10. 奇跡を目撃した瞬間に、ビルドされたブラウザにアクセス アドレス http://localhost:8080/hello を入力すると、Hello World!が表示されます。
以上がIDEA を使用して SpringBoot プロジェクトを作成する方法の詳細内容です。詳細については、PHP 中国語 Web サイトの他の関連記事を参照してください。

