
ホームページ >Java >&#&チュートリアル >SpringBoot SPI メカニズムとカスタム スターターを実装する方法
SpringBoot SPI メカニズムとカスタム スターターを実装する方法

- WBOYWBOYWBOYWBOYWBOYWBOYWBOYWBOYWBOYWBOYWBOYWBOYWB転載
- 2023-05-16 19:58:101641ブラウズ
1. SpringBoot の SPI メカニズム
spi とは何ですか? 正式名は Service Provider Interface です。簡単に言うと、これはサービス プロバイダー インターフェイスであり、サービス実装を見つけるためのメカニズムです。
実際、これは標準定義、または実装標準です。
人生の例として、Xiaomi の携帯電話を購入するとします。
ただし、使用する充電器は Xiaomi 製である必要はなく、プロトコル、ポート、その他の要件を満たしていれば、他のメーカーの充電器を使用して充電することもできます。これもホットスワップ可能なアイデアですが、修正されていません。
これはコードの点でも同じです。インターフェイスを定義しましたが、実装クラスを変更したい場合は変更する必要があるため、特定の実装クラスを修正したくありませんでした。ソースコードですが、これは不可能な場合が多いです。
そうすれば、仕様を定義することもできます。後で実装クラスを変更したり、他の実装クラスを追加したりする必要がある場合は、この仕様に準拠します。また、これらの実装クラスを動的に検出することもできます。
SpringBoot では、現在の SpringBoot プラットフォームでいくつかの規範と標準が定義されていますが、今度は SpringBoot プラットフォームに受け入れてもらいたいと考えています。
どうすればいいですか?
これは非常に簡単で、その標準と仕様に従って物事を行うだけです。
SpringBoot が起動すると、すべての jar パッケージresource/META-INF/spring.factories ファイルがスキャンされ、完全修飾名に基づいて Bean# へのリフレクション メカニズムが使用されます。 ##コンテナにロードします。 2. カスタム スターター
このスターターでは、
を実装します。- 短い行を送信するためのテンプレート
- オブジェクト ストレージ用のテンプレート
- 自動アセンブリ~
- #設定ファイル内の設定をマッピングするために使用されるクラス xxxxProperties
- #操作に使用されるインターフェイスxxxx とクライアントなど (この記事の OssTemplate
- など) は、クラス xxxxAutoConfiguration を自動的に構成し、xxxxTemplate
- をコンテナーに挿入します。 spring.factories で xxxxAutoConfiguration を EnableAutoConfiguration の値コレクションに追加します。
- オブジェクト ストレージには Alibaba Cloud の oss を使用しており、その構成はすべて利用可能です。テキスト メッセージの場合、シミュレーションです。 ~ 、私を責めないでください
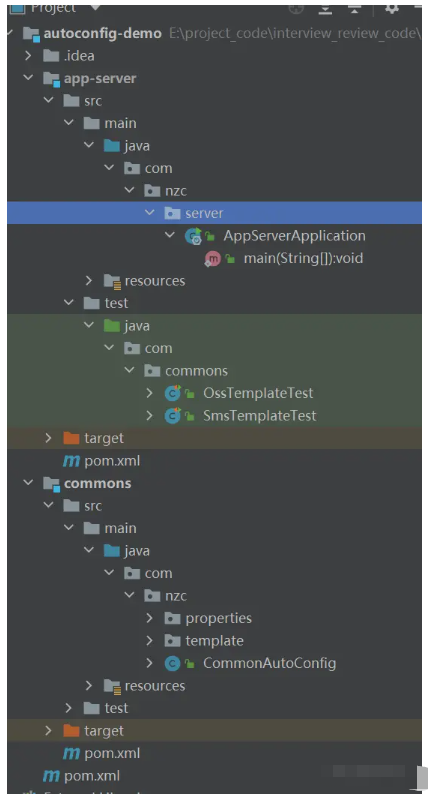 2.1. Maven プロジェクトを準備します
src ディレクトリを削除し、
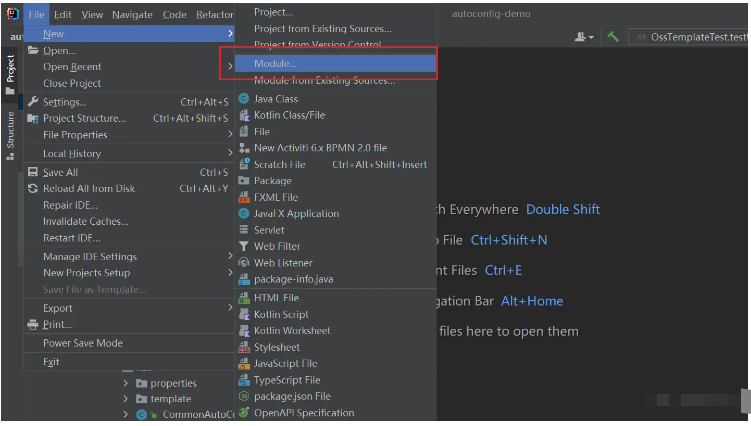
次に 2 つの Maven プロジェクトを作成します(私は個人的に習慣として空の Maven プロジェクトを作成することに慣れていますが、実際には SpringBoot プロジェクトの作成にも同じことが当てはまります)
 最も外側の pom.xml
 <parent>
     <groupId>org.springframework.boot</groupId>
     <artifactId>spring-boot-starter-parent</artifactId>
     <version>2.5.2</version>
     <relativePath/>
 </parent>

 <properties>
     <maven.compiler.source>8</maven.compiler.source>
     <maven.compiler.target>8</maven.compiler.target>
 </properties>


 <dependencies>
     <dependency>
         <groupId>org.projectlombok</groupId>
         <artifactId>lombok</artifactId>
     </dependency>
     <dependency>
         <groupId>org.springframework.boot</groupId>
         <artifactId>spring-boot-starter-web</artifactId>
     </dependency>
     <dependency>
         <groupId>org.springframework.boot</groupId>
         <artifactId>spring-boot-starter</artifactId>
     </dependency>
     <dependency>
         <groupId>org.springframework.boot</groupId>
         <artifactId>spring-boot-starter-test</artifactId>
     </dependency>
     <dependency>
         <groupId>org.springframework.boot</groupId>
         <artifactId>spring-boot-configuration-processor</artifactId>
         <optional>true</optional>
     </dependency>
 </dependencies>
2.2. プロパティ クラスの準備
は構成ファイルのマッピングに使用されます~
 /**
  * @author Ning Zaichun
  */
 @Data
 @ConfigurationProperties(prefix = "nzc.oss")
 public class OssProperties {

     private String accessKey;
     private String secret;
     private String bucketName;
     private String url;
     private String endpoint;
 }
@Data
@ConfigurationProperties(prefix = "nzc.sms")
public class SmsProperties {
private String name;
}2.3. 注入するクラスの準備
は最終的に注入するクラスです自動アセンブリを通じて SpringBoot 操作に組み込みます。
ここに OssTemplate と SmsTemplate
 /**
  * @author Ning Zaichun
  */
 public class OssTemplate {

     private OssProperties ossProperties;

     public OssTemplate(OssProperties ossProperties) {
         this.ossProperties = ossProperties;
     }

     public String test() {
         System.out.println(ossProperties.getBucketName());
         return "test";
     }
     public String upload(String filename, InputStream is) {
         // yourEndpoint填写Bucket所在地域对应的Endpoint。以华东1(杭州)为例,Endpoint填写为https://oss-cn-hangzhou.aliyuncs.com。
         String endpoint = ossProperties.getEndpoint();
         // 阿里云主账号AccessKey拥有所有API的访问权限,风险很高。强烈建议您创建并使用RAM账号进行API访问或日常运维,请登录 https://ram.console.aliyun.com 创建RAM账号。
         String accessKeyId = ossProperties.getAccessKey();
         String accessKeySecret = ossProperties.getSecret();

         // 创建OSSClient实例。
         OSS ossClient = new OSSClientBuilder().build(endpoint, accessKeyId, accessKeySecret);

         String storePath = new SimpleDateFormat("yyyy/MM/dd").format(new Date()) + "/" + UUID.randomUUID() + filename.substring(filename.lastIndexOf("."));

         System.out.println(storePath);
         // 依次填写Bucket名称(例如examplebucket)和Object完整路径(例如exampledir/exampleobject.txt)。Object完整路径中不能包含Bucket名称。
         ossClient.putObject(ossProperties.getBucketName(), storePath, is);

         String url = ossProperties.getUrl() + storePath;

         // 关闭OSSClient。
         ossClient.shutdown();
         return url + "#" + storePath;
    }

     public void remove(String fileUrl) {
         // yourEndpoint填写Bucket所在地域对应的Endpoint。以华东1(杭州)为例,Endpoint填写为https://oss-cn-hangzhou.aliyuncs.com。
         String endpoint = ossProperties.getEndpoint();
         // 阿里云账号AccessKey拥有所有API的访问权限,风险很高。强烈建议您创建并使用RAM用户进行API访问或日常运维,请登录RAM控制台创建RAM用户。
         String accessKeyId = ossProperties.getAccessKey();
         String accessKeySecret = ossProperties.getSecret();
         // 填写Bucket名称。
         String bucketName = ossProperties.getBucketName();
         // 填写文件完整路径。文件完整路径中不能包含Bucket名称。
         //2022/01/21/f0870eb3-4714-4fae-9fc3-35e72202f193.jpg
         String objectName = fileUrl;

         // 创建OSSClient实例。
         OSS ossClient = new OSSClientBuilder().build(endpoint, accessKeyId, accessKeySecret);

         // 删除文件或目录。如果要删除目录,目录必须为空。
         ossClient.deleteObject(bucketName, objectName);

         // 关闭OSSClient。
         ossClient.shutdown();
     }
 }
public class SmsTemplate {
private SmsProperties properties;
public SmsTemplate(SmsProperties properties) {
this.properties = properties;
}
public void sendSms(String mobile, String code){
System.out.println(properties.getName()+"=="+mobile+"===="+code);
}
}2.4、AutoConfiguration
 @EnableConfigurationProperties({
     SmsProperties.class,
     OssProperties.class
         })
 public class CommonAutoConfig {

     @Bean
     public SmsTemplate smsTemplate(SmsProperties smsProperties){
         return new SmsTemplate(smsProperties);
     }

     @Bean
     public OssTemplate ossTemplate(OssProperties ossProperties){
         return new OssTemplate(ossProperties);
     }

 }
2.5、spring.factories
を記述します。 resource ディレクトリに META-INF ファイル フォルダーを作成します。
META-INF フォルダーの下に spring.factories ファイルを作成します。
内容は
 org.springframework.boot.autoconfigure.EnableAutoConfiguration=\
   com.nzc.CommonAutoConfig
である場合は、
 org.springframework.boot.autoconfigure.EnableAutoConfiguration=\
   com.nzc.CommonAutoConfig \
   com.xxx.xxx
#このステップに到達したら、このプロジェクトの Jar パッケージを作成し、それを使用するプロジェクトに導入します。 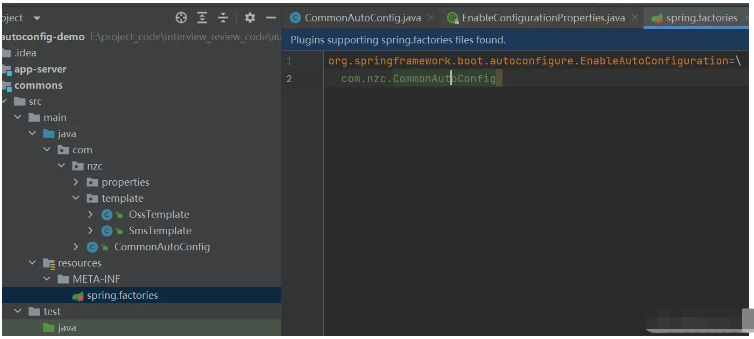
#2.6. アプリケーションのテスト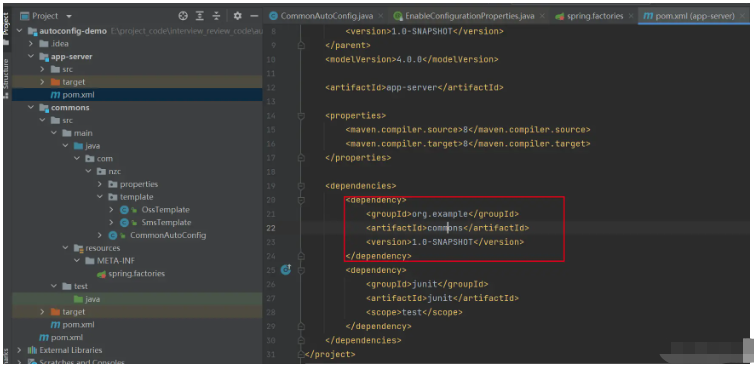
- 2. 設定ファイルを記述します
-
 spring:
   application:
     name: app-server
 nzc:
   sms:
     name: ningzaichun
   oss:
     accessKey: xxx
     secret: xxx
     endpoint: oss-cn-shenzhen.aliyuncs.com
     bucketName: xxx
     url: xxx
を変更すると使用できます。 oss 構成を正しく実行してください~
テスト クラスを作成します:
 @RunWith(SpringRunner.class)
 @SpringBootTest(classes = AppServerApplication.class)
 public class TemplateTest {

     @Autowired
     private OssTemplate ossTemplate;
     @Test
     public void testOss(){
         String s = ossTemplate.test();
         System.out.println(s);
     }
     @Test
     public void testUpload(){
         try {
             File file = new File("D:\evectionflow01.png");
             InputStream inputStream = new FileInputStream(file);
             ossTemplate.upload("123.jpg",inputStream);
         } catch (FileNotFoundException e) {
             e.printStackTrace();
         }
     }
     @Autowired
     private SmsTemplate smsTemplate;

     @Test
     public void testSendSms(){
         smsTemplate.sendSms("17670090715","123456");
     }
 }
それが使用できることを証明してください~
以上がSpringBoot SPI メカニズムとカスタム スターターを実装する方法の詳細内容です。詳細については、PHP 中国語 Web サイトの他の関連記事を参照してください。