ホームページ >Java >&#&チュートリアル >SpringBoot が TypeAliases 構成エラーの問題を解決する方法
SpringBoot が TypeAliases 構成エラーの問題を解決する方法
- WBOYWBOYWBOYWBOYWBOYWBOYWBOYWBOYWBOYWBOYWBOYWBOYWB転載
- 2023-05-16 12:22:111989ブラウズ
問題の説明
MyBatis を適用する場合、オブジェクト リレーショナル マッピングを使用してオブジェクトと Aliase をマップします。
Mybatis のドキュメントには、エンティティ クラスのエイリアスを明確に定義しない場合、フレームワークは自動的にクラス名をエイリアスとして使用することが明確に記載されています。
次に問題が発生します。java -jar xxx.jar& を使用して開始すると、次のエラーが報告されます。
クラスの解決中にエラーが発生しました。原因: org.apache.ibatis。 type.TypeException: 型エイリアス "XXXXX" を解決できませんでした。原因: java.lang.ClassNotFoundException: クラスが見つかりません: XXXXX
例外情報から、対応するエイリアスを取得できないことは明らかです。ローカルクラスで問題が発生し、最終的には sqlSessionFactory などの初期化エラーが発生しました。なお、ハンギングレールはIdeaで直接起動すれば問題ないというものですが、この問題はjarパッケージを起動した場合のみ発生します
解決策
ブロガーさんの記事を参照A_Beaver. mybatis のファクトは SpringBoot の独自の仮想ファイル システムをロードすることによってのみクラス パスを識別できることが判明しました。
public SpringBootVFS() {
    this.resourceResolver = new PathMatchingResourcePatternResolver(getClass().getClassLoader());
}
上記のコードから、リソースのロードは実際には PathMatchingResourcePatternResolver を通じて実装されます。
この問題を解決するには、mybatis 構成クラスを設定するだけです。ファクトリをセットアップするだけです。@Bean(name = "masterSqlSessionFactory")
@Primary
public SqlSessionFactory sqlSessionFactory(@Qualifier("masterDataSource") DataSource dataSource) throws Exception {
SqlSessionFactoryBean bean = new SqlSessionFactoryBean();
bean.setDataSource(dataSource);
bean.setVfs(SpringBootVFS.class);//设置SpringBootVFS
bean.setTypeAliasesPackage("com.fulan.domain.red");
...
}SpringBoot は Mybatis を統合し、落とし穴に遭遇します1. プロジェクト環境を構築します
1.1 プロジェクトを作成する
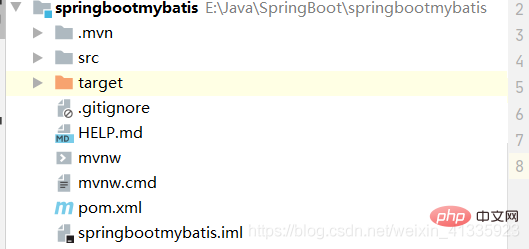
1.2 POM ファイルを変更し、関連する依存関係を追加します #pom.xml ファイルを変更し、次の依存関係を追加します。
<!--Thymeleaf启动器-->
 <dependency>
 <groupId>org.springframework.boot</groupId>
 <artifactId>spring-boot-starter-thymeleaf</artifactId>
 </dependency>
 <dependency>
 <groupId>org.springframework.boot</groupId>
 <artifactId>spring-boot-starter-web</artifactId>
 </dependency>
 <!--mybatis启动器-->
 <dependency>
 <groupId>org.mybatis.spring.boot</groupId>
 <artifactId>mybatis-spring-boot-starter</artifactId>
 <version>2.1.3</version>
 </dependency>
 <!--jdbc启动器-->
 <dependency>
 <groupId>org.springframework.boot</groupId>
 <artifactId>spring-boot-starter-jdbc</artifactId>
 </dependency>
 <!--数据库驱动坐标-->
 <dependency>
 <groupId>mysql</groupId>
 <artifactId>mysql-connector-java</artifactId>
 <version>8.0.12</version>
 </dependency>
 <!--Druid数据源依赖-->
 <dependency>
 <groupId>com.alibaba</groupId>
 <artifactId>druid</artifactId>
 <version>1.1.10</version>
 </dependency>
1.3 データ ソースの構成
application.yml ファイルで次のコードを構成します。
spring:
  datasource:
    driver-class-name: com.mysql.cj.jdbc.Driver
    url: jdbc:mysql://localhost:3306/test?useUnicode=true&characterEnconding=utf-8&useSSL=false&serverTimezone=GMT%2B8
    username: root
    password: root
    type: com.alibaba.druid.pool.DruidDataSource
2. Maven ジェネレーター プラグインの構成
2.1 ジェネレーター プラグインの座標を追加します<!--配置generator插件-->
<plugin>
<groupId>org.mybatis.generator</groupId>
<artifactId>mybatis-generator-maven-plugin</artifactId>
<version>1.4.0</version>
<dependencies>
<dependency>
<groupId>mysql</groupId>
<artifactId>mysql-connector-java</artifactId>
<version>8.0.12</version>
</dependency>
</dependencies>
<!--指定配置文件的路径-->
<configuration>
<configurationFile>${project.basedir}/src/main/resources/generator.xml</configurationFile>
<verbose>true</verbose>
<overwrite>true</overwrite>
</configuration>
</plugin>
ファイルにgenerator.xmlという名前を付け、src/main/resourcesに追加します。
<?xml version="1.0" encoding="UTF-8"?>
<!DOCTYPE generatorConfiguration
        PUBLIC "-//mybatis.org//DTD MyBatis Generator Configuration 1.0//EN"
        "http://mybatis.org/dtd/mybatis-generator-config_1_0.dtd">

<generatorConfiguration>
        <context id="testTables" targetRuntime="MyBatis3">
            <commentGenerator>
                <!-- 是否去除自动生成的注释 true:是 : false:否 -->
                <property name="suppressAllComments" value="true" />
            </commentGenerator>
            <!-- 数据库连接信息:驱动类、连接地址、用户名、密码-->
            <jdbcConnection driverClass="com.mysql.cj.jdbc.Driver"
                connectionURL="jdbc:mysql://localhost:3306/test?useUnicode=true&characterEnconding=utf-8&useSSL=false&serverTimezone=UTC"
                            userId="root" password="root">
            </jdbcConnection>
            <!-- 默认false,把JDBC DECIMAL 和 NUMERIC 类型解析为 Integer true,把JDBC DECIMAL
                和 NUMERIC 类型解析为java.math.BigDecimal -->
            <javaTypeResolver>
                <property name="forceBigDecimals" value="false" />
            </javaTypeResolver>
            <!--targetProject:生成PO类的位置-->
            <javaModelGenerator targetPackage="com.example.springbootmybatis.pojo"
                targetProject=".srcmainjava">
                <!--enableSubPackages:是否让schema作为包的后缀-->
                <property name="enableSubPackages" value="false" />
                <!-- 从数据库返回的值被清理前后的空格 -->
                <property name="trimStrings" value="true" />
            </javaModelGenerator>
            <!--对应的mapper.xml文件 -->
            <sqlMapGenerator targetPackage="com.example.springbootmybatis.mapper"
                targetProject=".srcmainjava">
                <!--enableSubPackages:是否让schema作为包的后缀-->
                <property name="enableSubPackages" value="false" />
            </sqlMapGenerator>
            <!-- 对应的Mapper接口类文件 -->
            <javaClientGenerator type="XMLMAPPER"
                                 targetPackage="com.example.springbootmybatis.mapper" targetProject="./src/main/java">
                <!--enableSubPackages:是否让schema作为包的后缀-->
                <property name="enableSubPackages" value="false" />
            </javaClientGenerator>
            <!-- 指定数据库表 -->
            <table schema="" tableName="users"></table>
            <!-- 列出要生成代码的所有表,这里配置的是不生成Example文件 -->
<!--            <table tableName="userinfo" domainObjectName="UserInfoPO"  -->
<!--                enableCountByExample="false" enableUpdateByExample="false"  -->
<!--                enableDeleteByExample="false" enableSelectByExample="false"  -->
<!--                selectByExampleQueryId="false">  -->
<!--                <property name="useActualColumnNames" value="false" />  -->
<!--            </table>  -->
        </context>
    </generatorConfiguration>
2.3 ジェネレーター設定ファイルの DTD ファイルを追加しますツールバーの [ファイル] -> [設定] で追加するか、Alt Shift キーを直接押して追加することもできます。ファイル内に自動的に追加されます。
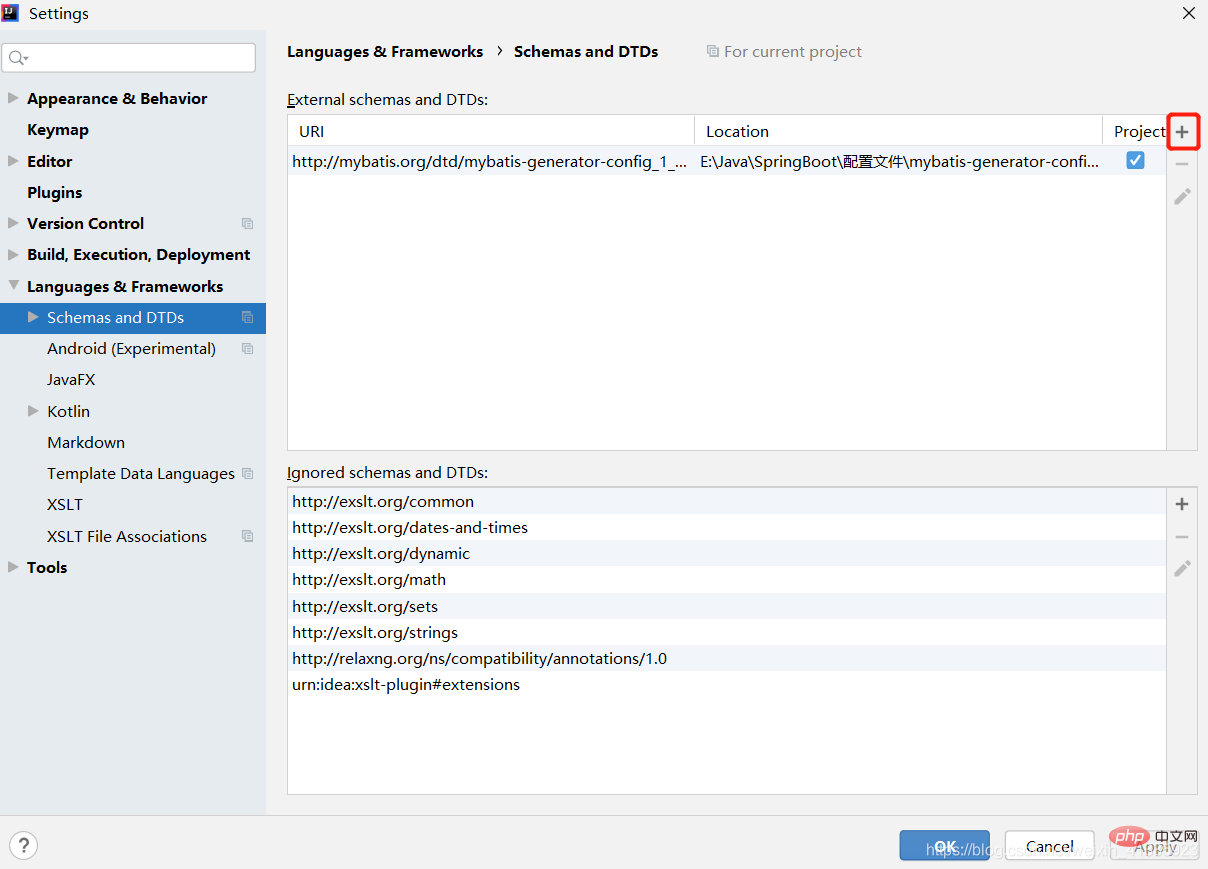 #2.4 ジェネレーター プラグインを実行してコードを生成する
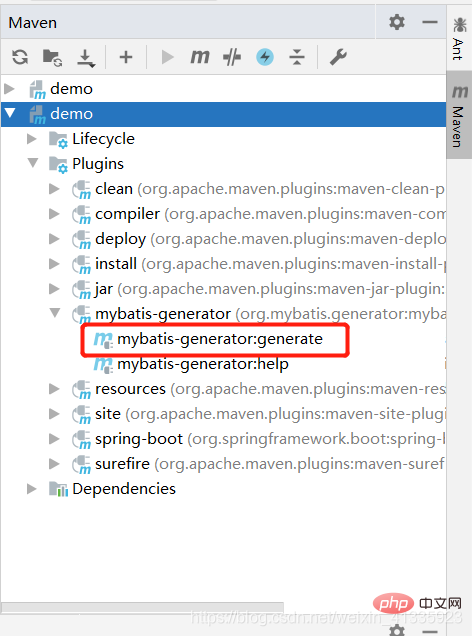
##3. リソース コピー プラグインの設定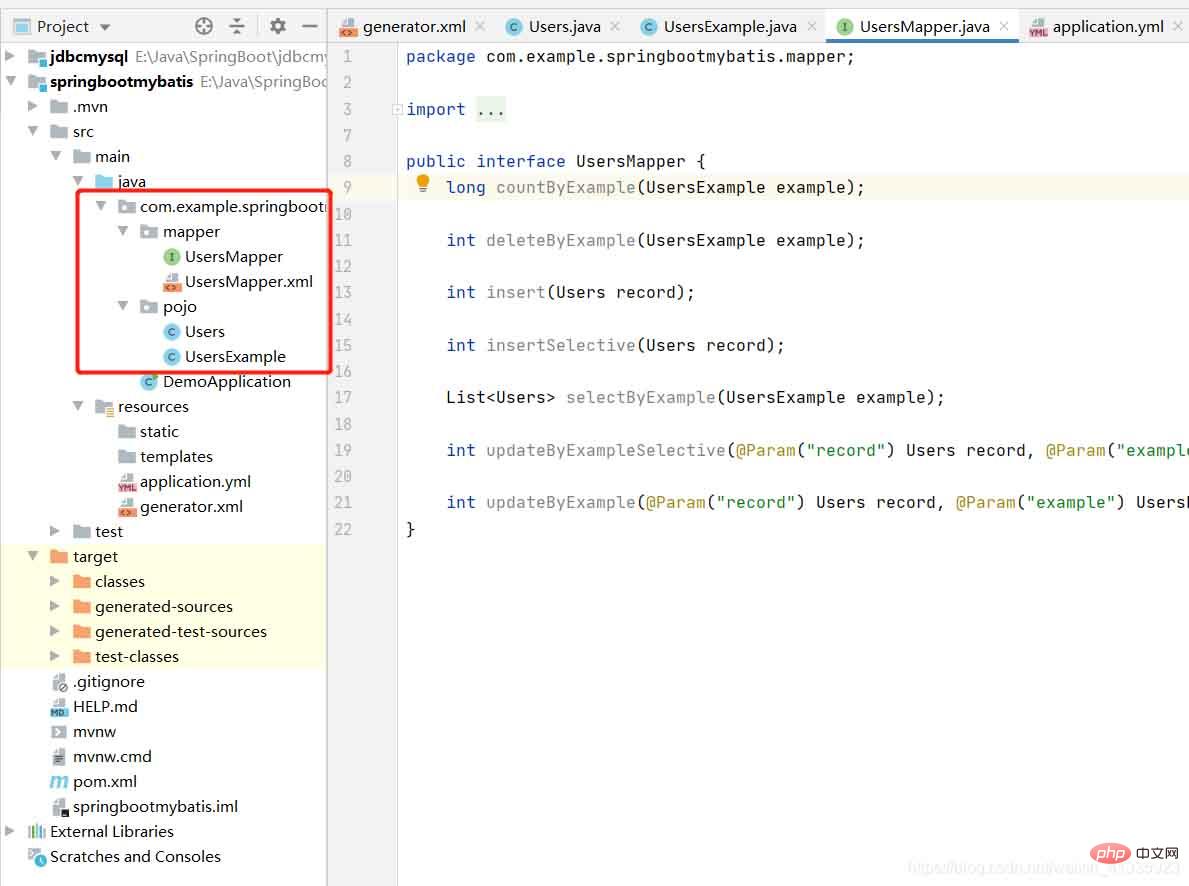
3.1 リソース コピー プラグインの座標の追加
<!--配置资源拷贝插件-->
 <resources>
 <resource>
 <directory>src/main/java</directory>
 <includes>
 <include>**/*.xml</include>
 </includes>
 </resource>
 <resource>
 <directory>src/main/resources</directory>
 <includes>
 <include>**/*.yml</include>
 </includes>
 </resource>
 </resources>
3.2 スタートアップ クラスを変更して @MapperScan アノテーションを追加します
package com.example.springbootmybatis;
import org.mybatis.spring.annotation.MapperScan;
import org.springframework.boot.SpringApplication;
import org.springframework.boot.autoconfigure.SpringBootApplication;
@SpringBootApplication
@MapperScan("com.example.springbootmybatis.mapper")//指定扫描接口与映射配置文件的包名
public class DemoApplication {
 public static void main(String[] args) {
 SpringApplication.run(DemoApplication.class, args);
 }
}
4. その他の設定項目mybatis: # 扫描classpath中mapper目录下的映射配置文件,针对于映射文件放到了resources目录下 mapper-locations: classpath:/mapper/*.xml # 定义包别名,使用pojo时可以直接使用pojo的类型名称不用加包名 type-aliases-package: com.example.springbootmybatis.pojo5. ユーザー関数の追加
5.1 ページの作成
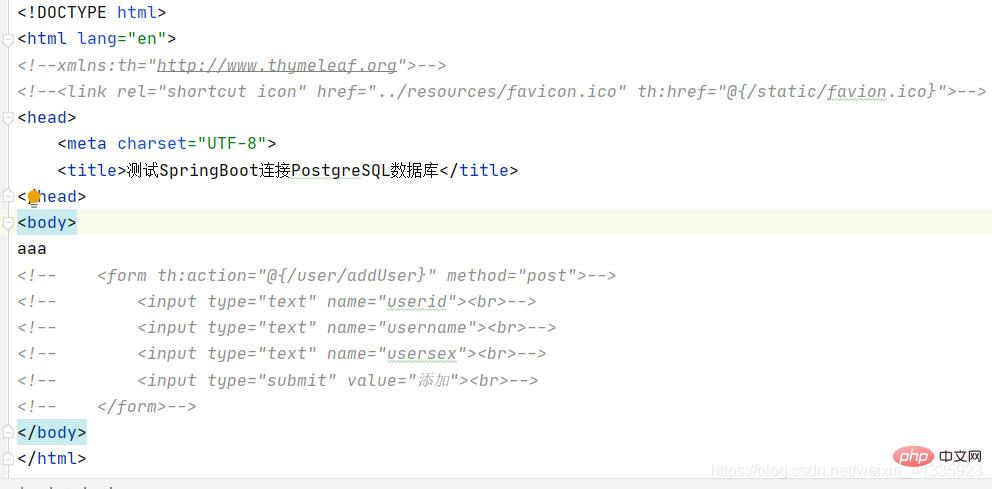
<!DOCTYPE html>
<html xmlns:th="http://www.thymeleaf.org">
<link rel="shortcut icon" href="../resources/favicon.ico" th:href="@{/static/favion.ico}">
<head>
    <meta charset="UTF-8">
    <title>测试SpringBoot连接PostgreSQL数据库</title>
</head>
<body>
    <form th:action="@{/user/addUser}" method="post">
        <input type="text" name="userid"><br>
        <input type="text" name="username"><br>
        <input type="text" name="usersex"><br>
        <input type="submit" value="添加"><br>
    </form>
</body>
</html>
5.2 コントローラの作成
5.2.1 ページコントローラ
package com.example.springbootmybatis.controller;
import org.springframework.stereotype.Controller;
import org.springframework.web.bind.annotation.PathVariable;
import org.springframework.web.bind.annotation.RequestMapping;
/**
 * 页面跳转Controller
 */
@Controller
public class PageController {
    /**
     * 页面跳转方法
     */
    @RequestMapping("/{page}")
    public String showPage(@PathVariable String page){
        return page;
    }
}
5.2.2 ユーザーコントローラpackage com.example.springbootmybatis.controller;
import com.example.springbootmybatis.pojo.Users;
import com.example.springbootmybatis.service.UsersService;
import org.springframework.beans.factory.annotation.Autowired;
import org.springframework.stereotype.Controller;
import org.springframework.web.bind.annotation.PostMapping;
import org.springframework.web.bind.annotation.RequestMapping;
import org.springframework.web.bind.annotation.RestController;
/**
* 用户管理Controller
*/
@RestController
@RequestMapping("/user")
public class UsersController {
@Autowired
private UsersService usersService;
/**
* 添加用户
*/
@PostMapping("/addUser")
public String addUsers(Users users){
try {
this.usersService.addUsers(users);
} catch (Exception e){
e.printStackTrace();
return "error";
}
return "redirect:/ok";
}
}
5.3 サービスインターフェイス実装クラスの作成 Impl
/**
 * 用户管理业务层
 */
@Service
public class UsersServiceImpl implements UsersService {
    @Autowired
    private UsersMapper usersMapper;
    @Override
    @Transactional
    public void addUsers(Users users) {
        this.usersMapper.insert(users);
    }
}Interfacepublic interface UsersService {
void addUsers(Users users);
}エラーが発生しました1. Mybatis Generator が自動的に生成され、同じ名前のデータベース テーブルが作成されます。 #[警告] テーブル構成ユーザーが複数のテーブル (test..users、performance_schema..users) に一致しました
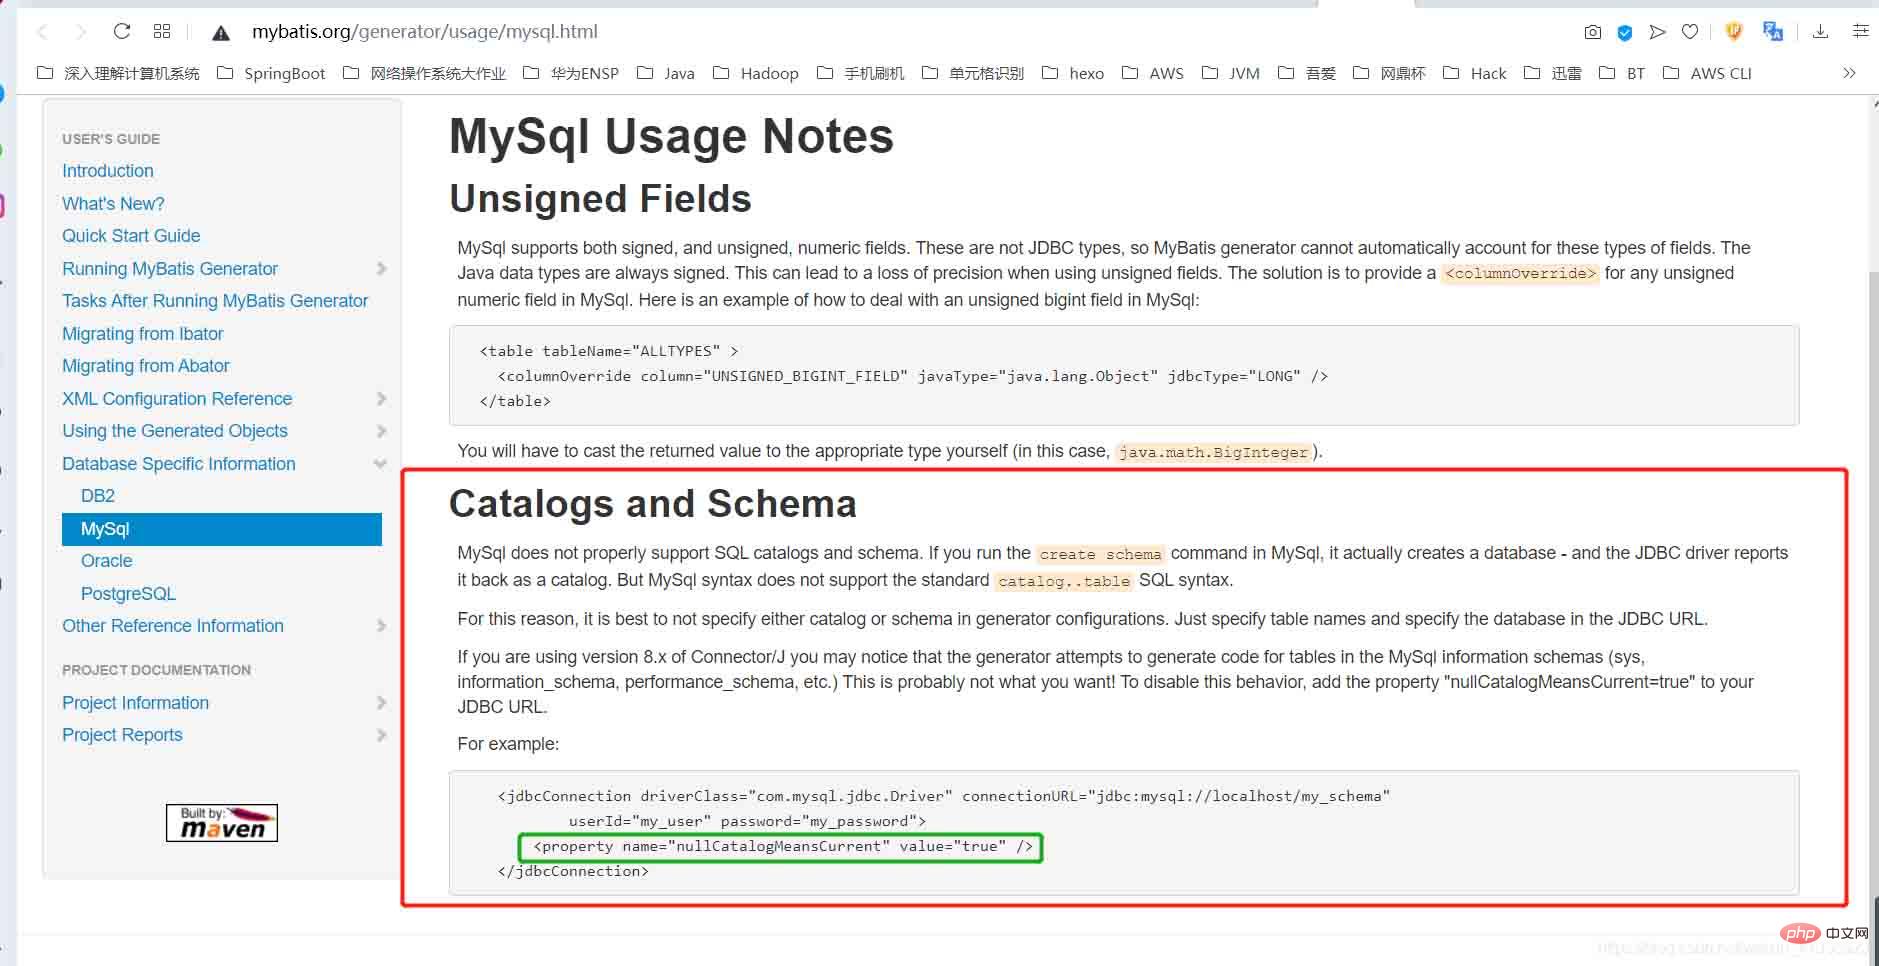
[警告] 主キーを取得できませんデータベースからの情報では、生成されたオブジェクトが不完全である可能性があります翻訳は次のとおりです。Mysql は SQL カタログとスキーマを適切にサポートできません。したがって、ジェネレーター設定ファイルではカタログとスキーマを指定せず、データ テーブルの名前を指定し、JDBC URL でデータベースを指定することをお勧めします。 mysql-connector-java 8.x バージョンを使用する場合、ジェネレーターは MySql の情報データベース (sys、information_schema、performance_schema) のテーブルのコードを生成します。この操作を回避するには、属性「nullCatalogMeansCurrent=true」を追加してください。 JDBC URL に。
この質問は、MyBatis Generator 公式 Web サイトで回答されています。
 設定ファイルgenerator.xml
<jdbcConnection driverClass="com.mysql.cj.jdbc.Driver"
                        connectionURL="jdbc:mysql://localhost:3306/test?useUnicode=true&characterEnconding=utf-8&useSSL=false&serverTimezone=UTC"
                        userId="username" password="password">
            <property name="nullCatalogMeansCurrent" value="true"/>
        </jdbcConnection>
2を変更します。ページに500エラーが表示されます
2020-06-27 14:23:42.459 ERROR 19676 --- [nio-8080-exec-1] o.a.c.c.C.[.[.[/].[dispatcherServlet] : Servlet.service() for servlet [dispatcherServlet] in context with path [] threw exception [Circular view path [addUsers]: would dispatch back to the current handler URL [/addUsers] again. Check your ViewResolver setup! (Hint: This may be the result of an unspecified view, due to default view name generation.)] with root cause
javax.servlet.ServletException: Circular view path [addUsers]: would dispatch back to the current handler URL [/addUsers] again. Check your ViewResolver setup! (Hint: This may be the result of an unspecified view, due to default view name generation.)
at org.springframework.web.servlet.view.InternalResourceView.prepareForRendering(InternalResourceView.java:210) ~[spring-webmvc-5.2.7.RELEASE.jar:5.2.7.RELEASE]
at
解决方法
查了很多博客,但是都不是自己的问题,自己的问题是在pom.xml配置文件中的资源路径中,没有写所有,而是单独的xml和yml配置文件。要加载所有的静态资源。
<!--原本的-->
<!--资源文件的路径-->
 <resource>
 <directory>src/main/resources</directory>
 <includes>
 <include>**/*.yml</include>
                    <include>**/*.xml</include>
 </includes>
 <!-- <filtering>false</filtering>-->
 </resource>
<!--修改后的-->
<!--资源文件的路径-->
 <resource>
 <directory>src/main/resources</directory>
 <includes>
 <include>**/*.*</include>
 </includes>
 <!-- <filtering>false</filtering>-->
 </resource>
以上がSpringBoot が TypeAliases 構成エラーの問題を解決する方法の詳細内容です。詳細については、PHP 中国語 Web サイトの他の関連記事を参照してください。

