ホームページ >バックエンド開発 >Python チュートリアル >Python を使用してアプリを開発する方法
Python を使用してアプリを開発する方法
- PHPz転載
- 2023-05-06 12:28:068697ブラウズ
準備
Python を使用してアプリを開発するには、Python モジュール - kivy を使用する必要があります。kivy は、開発用のオープンソースのクロスプラットフォーム Python 開発フレームワークです。革新的なものを使用してください。アプリ。つまり、これは Python デスクトップ プログラム開発フレームワーク (wxpython や他のモジュールと同様) です。強力なのは、kivy が Linux、Mac、Windows、Android、および ios プラットフォームをサポートしていることです。これが、アプリの開発にこのモジュールが必要な理由です。
kivy はクロスプラットフォームですが、異なるプラットフォームで Python コードを使用したい場合は、Python コードを対応するプラットフォームの実行可能プログラムにパッケージ化する必要もあります。 kivy プロジェクトのツール Project – buildozer, これは、比較的シンプルで自動化の度合いが高いため、公式に推奨されるパッケージング ツールです。Python-for-android などの他のプロジェクトも同様の役割を果たすことができるため、ここでは紹介しません。
kivy 開発環境の構築
kivy 開発環境を PC にインストールする必要があります。ここでは、Mac と Linux でのインストール プロセスのデモを示します。
install kivy for mac
いくつかの依存パッケージをインストールします:
brew install pkg-config sdl2 sdl2_image sdl2_ttf sdl2_mixer gstreamer
cython と kivy をインストールします:
pip install cython==0.25
pip install kivy
kivy のインストール時にエラーが報告された場合は、次の方法を使用してくださいkivy をインストールするには:
git clone https://github.com/kivy/kivy
python setup.py install
インストール後のテスト:
$python
Python 2.7.10 (default, Jul 15 2017, 17:16:57)
[GCC 4.2.1 Compatible Apple LLVM 9.0.0 (clang-900.0.31)] on darwin
Type "help", "copyright", "credits" or "license" for more information.
>>>
>>> import kivy
[INFO ] [Logger] Record log in /Users/didi/.kivy/logs/kivy_18-05-08_4.txt
[INFO ] [Kivy] v1.10.1.dev0, git-5f6c66e, 20180507
[INFO ] [Python] v2.7.10 (default, Jul 15 2017, 17:16:57)
[GCC 4.2.1 Compatible Apple LLVM 9.0.0 (clang-900.0.31)]
注: kivy モジュールのインポート時にエラーがなければ、インストールは成功したことを意味します。
centos7 用に kivy をインストール
依存関係を最初にインストールします:
yum install
make
mercurial
automake
gcc
gcc-c++
SDL_ttf-devel
SDL_mixer-devel
khrplatform-devel
mesa-libGLES
mesa-libGLES-devel
gstreamer-plugins-good
gstreamer
gstreamer-python
mtdev-devel
python-devel
python-pip
java-devel
cython と kivy をインストールします:
pip install Cython==0.20
pip install kivy
最初に kivy A で開発しますPython アプリ
kivy をインストールした後、アプリ プログラムを開発できます。ここでは hello-world プログラムのデモンストレーションを示します。kivy のより複雑な使用方法はこの記事の焦点ではないため、後で紹介します。後で書面で。
main.py ファイルを作成して次のように記述します:
#! -*- coding:utf-8 -*-
from kivy.app import App
class HelloApp(App):
pass
if __name__ == '__main__':
HelloApp().run()
hello.kv ファイルを作成して次のように記述します:
Label:
text: 'Hello, World! I am nMask'
簡単なメモ: main.py はエントリ関数であり、kivy.app を継承する HelloApp クラスを定義します。hello.kv ファイルは kivy プログラムであり、インターフェイス スタイルの定義などに相当します。このファイルの命名規則は、クラス名前は小文字で、アプリは削除されます。
最初の Python アプリを実行します
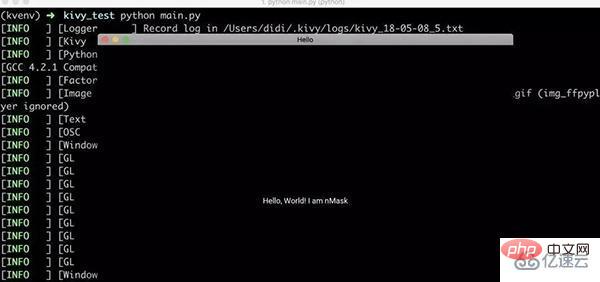
python main.py
実行結果:
pip install buildozerbuildozer ツールを使用して kivy プログラムを apk にパッケージ化します
buildozer init操作が成功すると、構成ファイル buildozer.spec が作成されます。構成ファイルを変更してアプリの名前を変更し、次のコマンドを実行します:
buildozer android debug deploy run上記のコマンドを実行すると、Android、ios などに適用できるクロスプラットフォーム インストール パッケージが生成されます。Android で使用する場合は、python-for-android プロジェクトを使用します。
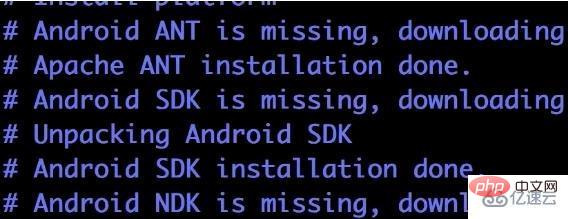
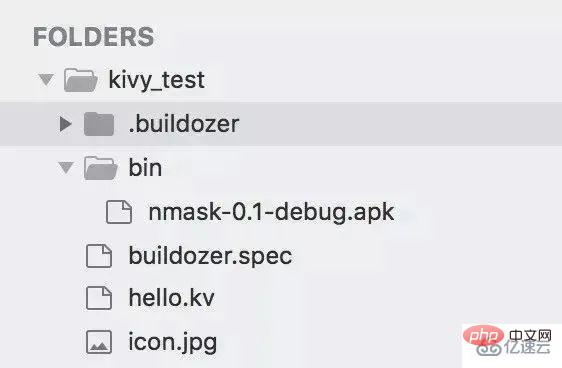 ##次に、apk を Android スマートフォンにダウンロードしてインストールします。テスト結果は次のとおりです:
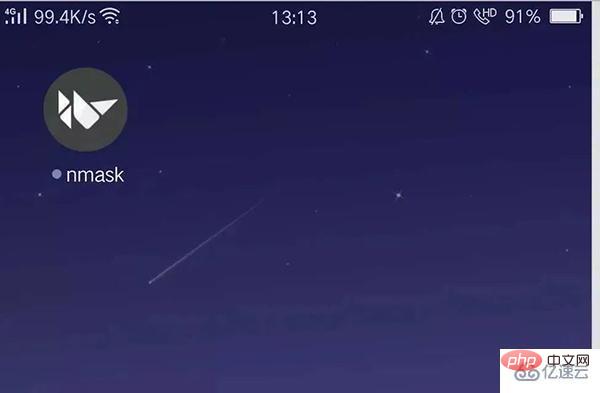 ##アプリを開きます
##Buildozer の手順
Usage:
buildozer [--profile] [--verbose] [target]...
buildozer --version
Available targets:
androidAndroid target, based on python-for-android project
iosiOS target, based on kivy-ios project
android_oldAndroid target, based on python-for-android project (old toolchain)
Global commands (without target):
distcleanClean the whole Buildozer environment.
help Show the Buildozer help.
init Create a initial buildozer.spec in the current directory
serveServe the bin directory via SimpleHTTPServer
setdefault Set the default command to run when no arguments are given
versionShow the Buildozer version
Target commands:
cleanClean the target environment
update Update the target dependencies
debugBuild the application in debug mode
releaseBuild the application in release mode
deploy Deploy the application on the device
runRun the application on the device
serveServe the bin directory via SimpleHTTPServer
Target "android_old" commands:
adbRun adb from the Android SDK. Args must come after --, or
use --alias to make an alias
logcat Show the log from the device
Target "ios" commands:
list_identitiesList the available identities to use for signing.
xcodeOpen the xcode project.
Target "android" commands:
adbRun adb from the Android SDK. Args must come after --, or
use --alias to make an alias
logcat Show the log from the device
p4aRun p4a commands. Args must come after --, or use --alias
to make an alias
Buildozer のパッケージ化プロセスにおける落とし穴
#パッケージ化プロセス中にエラーが発生した場合は、buildozer.spec 構成ファイルの log_level を 2 に変更して、再度実行すると、特定のエラー情報を確認できます。 yum -y install --skip-broken glibc.i686 arts.i686 audiofile.i686 bzip2-libs.i686 cairo.i686 cyrus-sasl-lib.i686 dbus-libs.i686 directfb.i686 esound-libs.i686 fltk.i686 freeglut.i686 gtk2.i686 hal-libs.i686 imlib.i686 lcms-libs.i686 lesstif.i686 libacl.i686 libao.i686 libattr.i686 libcap.i686 libdrm.i686 libexif.i686 libgnomecanvas.i686 libICE.i686 libieee1284.i686 libsigc++20.i686 libSM.i686 libtool-ltdl.i686 libusb.i686 libwmf.i686 libwmf-lite.i686 libX11.i686 libXau.i686 libXaw.i686 libXcomposite.i686 libXdamage.i686 libXdmcp.i686 libXext.i686 libXfixes.i686 libxkbfile.i686 libxml2.i686 libXmu.i686 libXp.i686 libXpm.i686 libXScrnSaver.i686 libxslt.i686 libXt.i686 libXtst.i686 libXv.i686 libXxf86vm.i686 lzo.i686 mesa-libGL.i686 mesa-libGLU.i686 nas-libs.i686 nss_ldap.i686 cdk.i686 openldap.i686 pam.i686 popt.i686 pulseaudio-libs.i686 sane-backends-libs-gphoto2.i686 sane-backends-libs.i686 SDL.i686 svgalib.i686 unixODBC.i686 zlib.i686 compat-expat1.i686 compat-libstdc++-33.i686 openal-soft.i686 alsa-oss-libs.i686 redhat-lsb.i686 alsa-plugins-pulseaudio.i686 alsa-plugins-oss.i686 alsa-lib.i686 nspluginwrapper.i686 libXv.i686 libXScrnSaver.i686 qt.i686 qt-x11.i686 pulseaudio-libs.i686 pulseaudio-libs-glib2.i686 alsa-plugins-pulseaudio.i686 python-matplotliエラー レポート: Cython ファイルのコンパイル中にエラーが発生しました
pip install cython==0.25
エラー: IOError: [Errno 2] No such file or directory.... これは、パッケージ化の最後のステップで、apk ファイルをプロジェクトの bin ディレクトリにコピーするときに報告されるエラーです。 . buildozer のバグです。 ファイルの先頭にインポート:
from distutils.version import LooseVersion
将786行:XXX found how the apk name is really built from the title这一行以下的代码替换为:
__sdk_dir = self.android_sdk_dir
build_tools_versions = os.listdir(join(__sdk_dir, 'build-tools'))
build_tools_versions = sorted(build_tools_versions, key=LooseVersion)
build_tools_version = build_tools_versions[-1]
gradle_files = ["build.gradle", "gradle", "gradlew"]
is_gradle_build = any((exists(join(dist_dir, x)) for x in gradle_files)) and build_tools_version >= ’25.0'
buildozer虚拟机
kivy官方推出了一个buildozer虚拟机镜像,已经安装好了buildozer以及一些依赖文件,为buildozer打包测试提供平台。由于之前我在mac上利用buildozer打包一直报错,后来换成centos也依然没有成功,因此便下载了此虚拟机,测试效果如下:
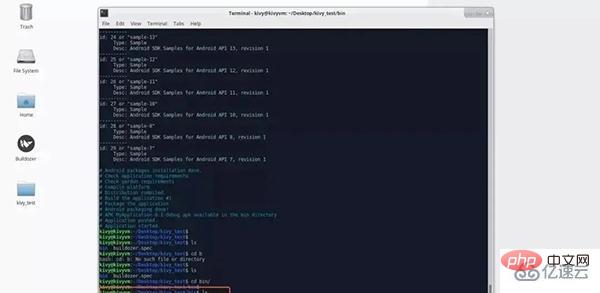
说明:对于无法解决依赖问题的朋友,可以使用此虚拟机进行程序打包,开发环境还是推荐用自己的本机。
以上がPython を使用してアプリを開発する方法の詳細内容です。詳細については、PHP 中国語 Web サイトの他の関連記事を参照してください。

