ホームページ >Java >&#&チュートリアル >Java Fluent Mybatis がプロジェクトを構築し、コード生成を実装する方法
Java Fluent Mybatis がプロジェクトを構築し、コード生成を実装する方法
- WBOYWBOYWBOYWBOYWBOYWBOYWBOYWBOYWBOYWBOYWBOYWBOYWB転載
- 2023-05-03 10:07:141404ブラウズ
機能
公式機能マップをご覧ください
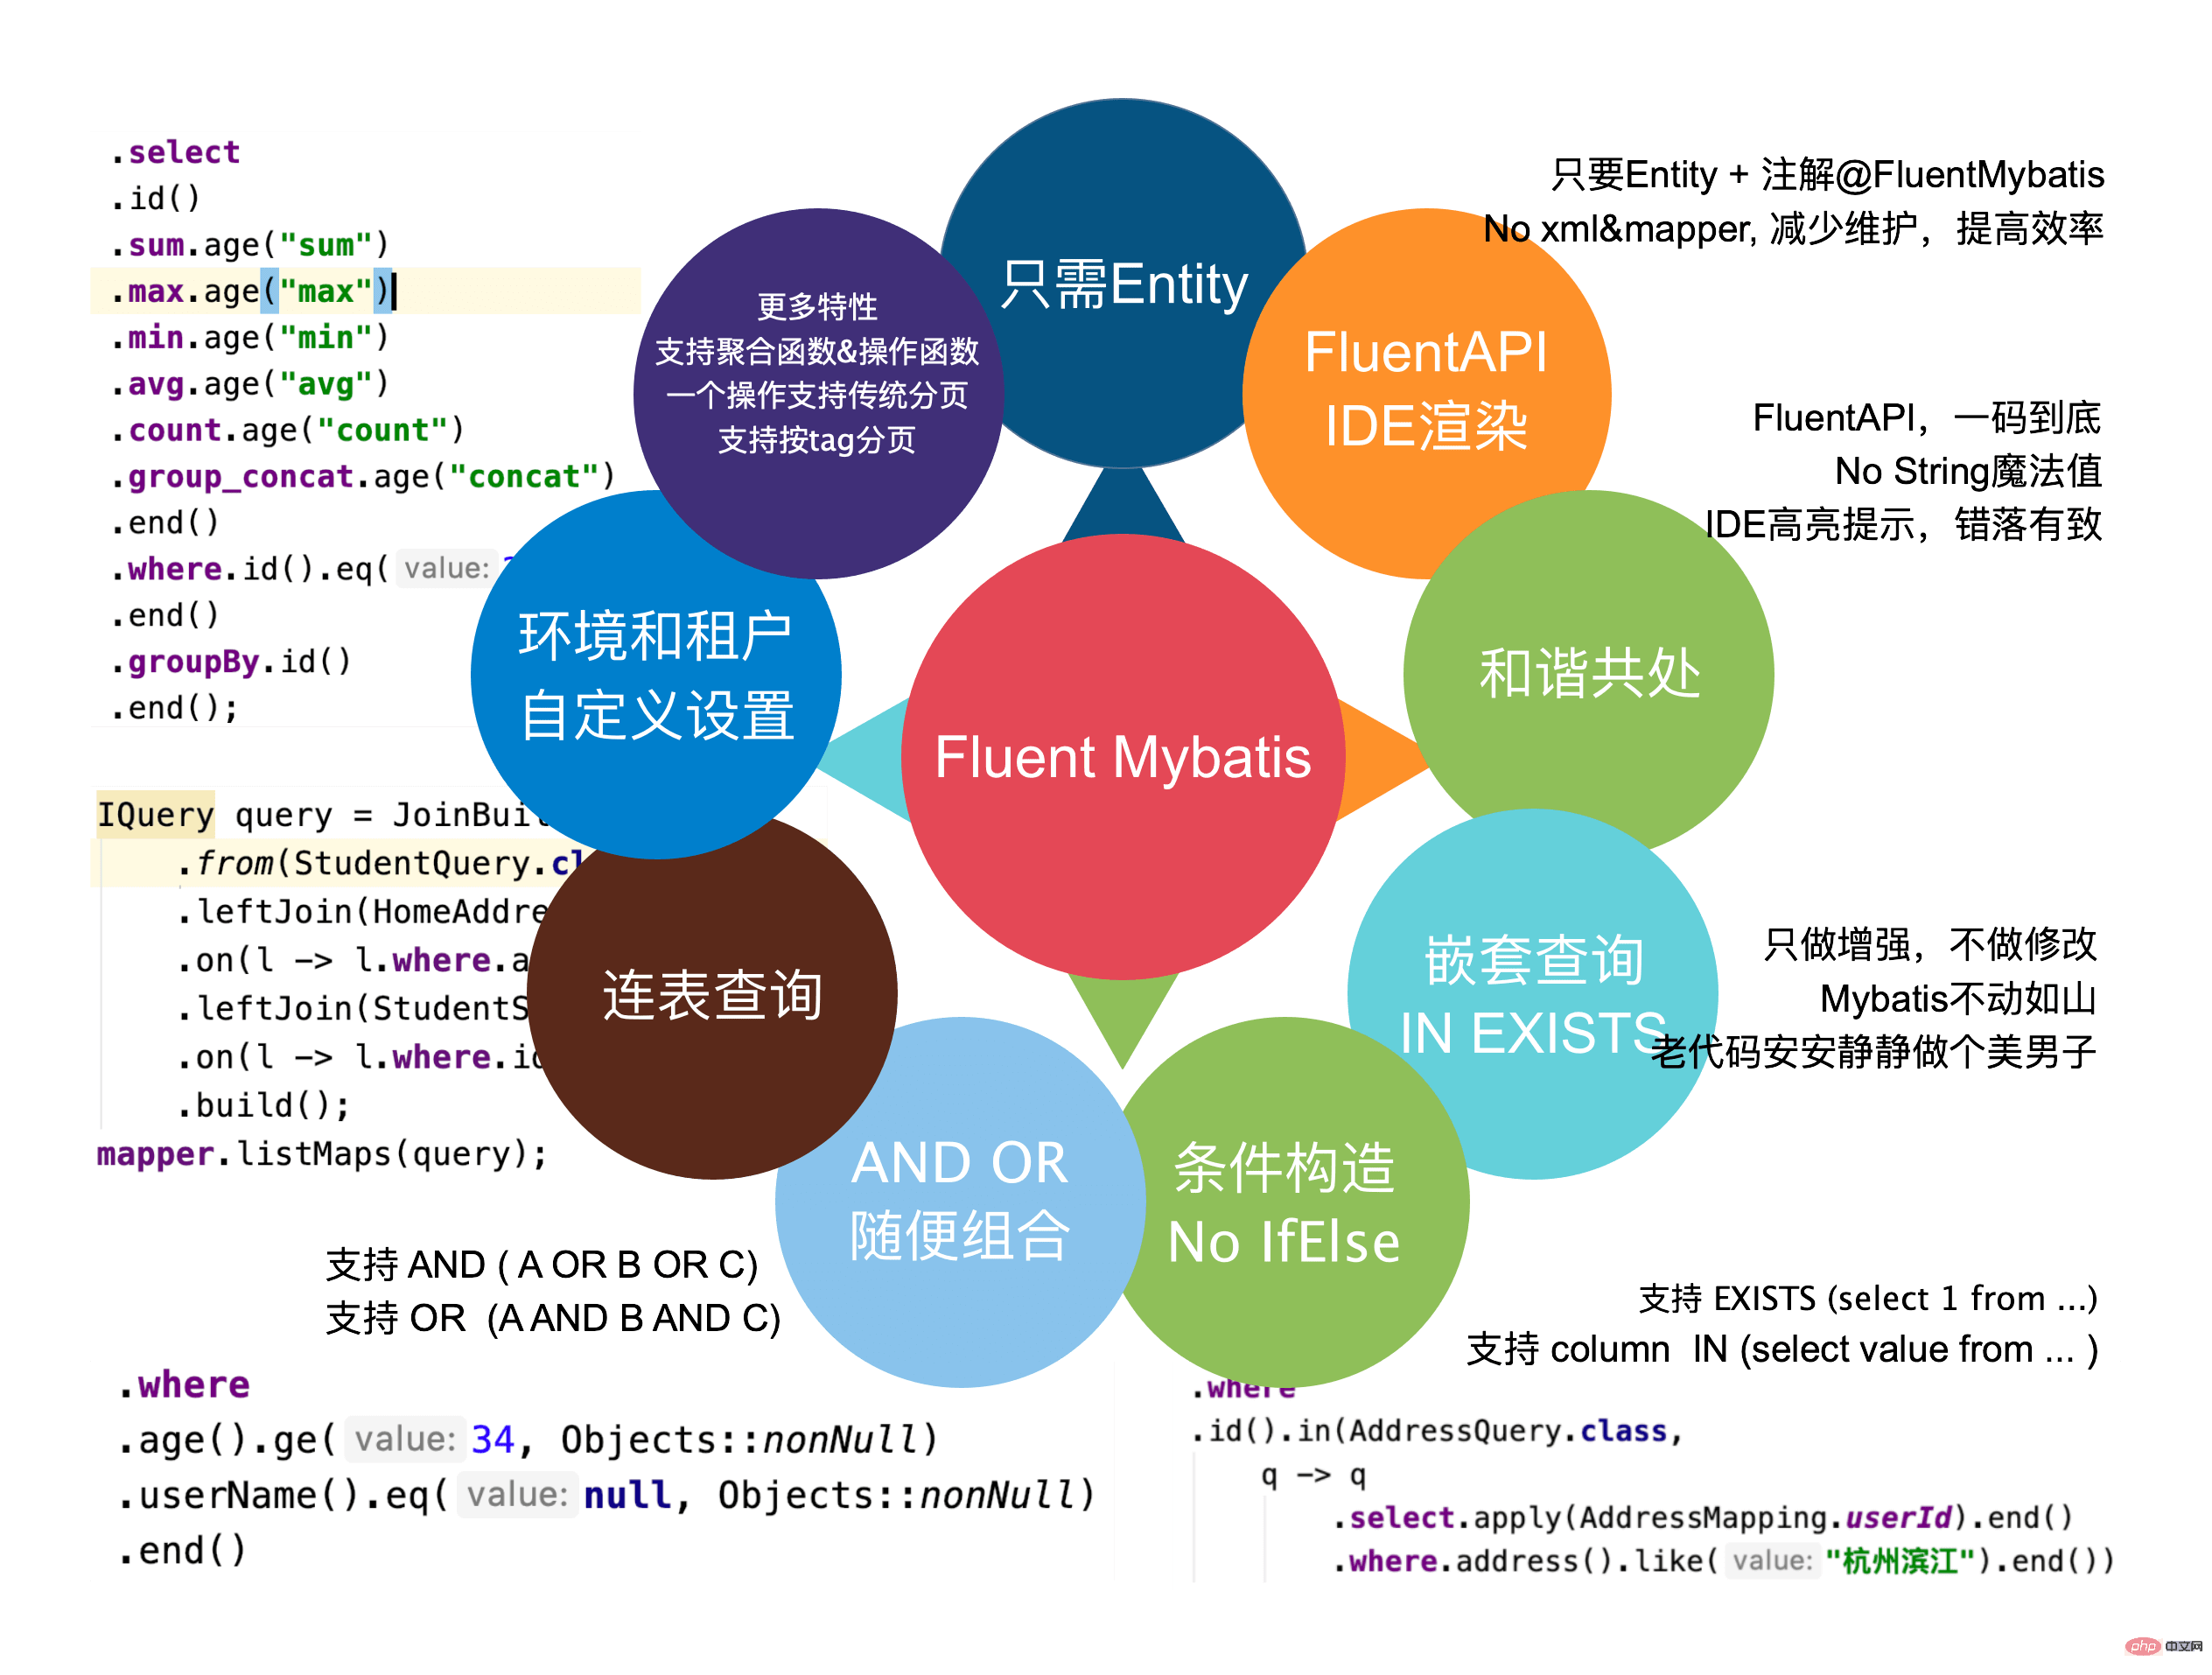
一見すると非常に包括的ないくつかの機能が示されており、その中にはより魅力的なものもあります。私の場合は2点です。
1. この図に示されている構文は SQL に非常によく似ており、注意して見ないと、直接 SQL ステートメントがスローされたと思われるでしょう。より実用的に見えます。
2. mybatis-plus はほとんどの SQL 操作を実装するための IService インターフェイスを実装していますが、xml&mapper はありません
プロジェクトの構築
springboot でプロジェクトを構築するプロセスはそれほど複雑ではありません。詳細は省きますが、これが私の実用的な Springboot バージョンです。
<parent>
        <groupId>org.springframework.boot</groupId>
        <artifactId>spring-boot-starter-parent</artifactId>
        <version>2.5.5</version>
        <relativePath/> <!-- lookup parent from repository -->
    </parent>
コード構造は次のとおりです。
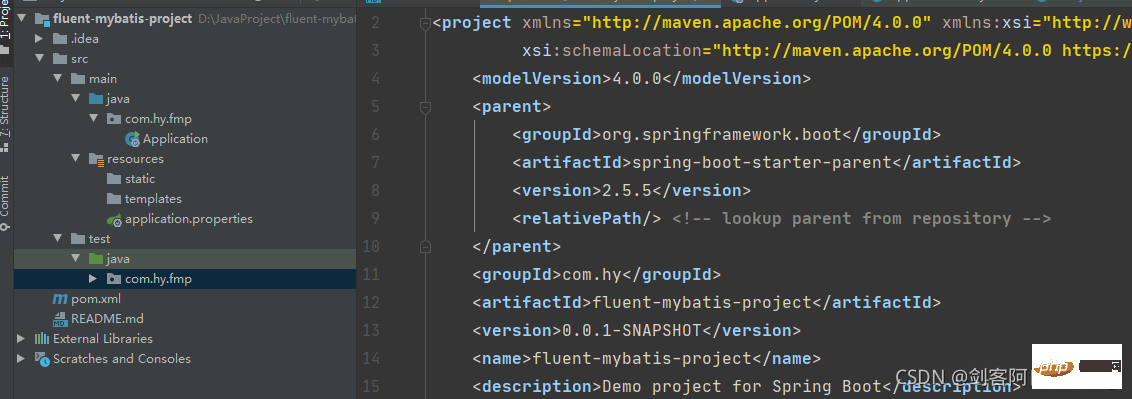
Maven 依存関係の導入-fluent-mybatis
<properties>
    <fluent-mybatis.version>1.8.7</fluent-mybatis.version>
</properties>
<dependencies>
    <!-- 引入fluent-mybatis 运行依赖包, scope为compile -->
    <dependency>
        <groupId>com.github.atool</groupId>
        <artifactId>fluent-mybatis</artifactId>
        <version>${fluent-mybatis.version}</version>
    </dependency>
    <!-- 引入fluent-mybatis-processor, scope设置为provider 编译需要,运行时不需要 -->
    <dependency>
        <groupId>com.github.atool</groupId>
        <artifactId>fluent-mybatis-processor</artifactId>
        <scope>provided</scope>
        <version>${fluent-mybatis.version}</version>
    </dependency>
</dependencies>
Maven の完全な依存関係は次のとおりです
4.0.0 <parent> <groupId>org.springframework.boot</groupId> <artifactId>spring-boot-starter-parent</artifactId> <version>2.5.5</version> <relativePath/> <!-- lookup parent from repository --> </parent>com.hy fluent-mybatis-project 0.0.1-SNAPSHOT fluent-mybatis-project Demo project for Spring Boot 1.8 1.8.7 org.springframework.boot spring-boot-starter-web org.springframework.boot spring-boot-devtools runtime true org.springframework.boot spring-boot-configuration-processor true org.projectlombok lombok true org.springframework.boot spring-boot-starter-test test org jaudiotagger 2.0.1 com.google.guava guava 30.1.1-jre cn.hutool hutool-all 5.5.2 com.github.atool fluent-mybatis ${fluent-mybatis.version} com.github.atool fluent-mybatis-processor provided ${fluent-mybatis.version} org.mybatis.spring.boot mybatis-spring-boot-starter 2.2.0 mysql mysql-connector-java runtime org.springframework.boot spring-boot-maven-plugin org.projectlombok lombok
テーブルの構築
データベースにテスト テーブルを作成します。テーブルは比較的単純なので、最初に試してください。 SQL は次のとおりです。
CREATE TABLE `test_fluent_mybatis` (
  `id` int NOT NULL AUTO_INCREMENT COMMENT '自增主键',
  `name` varchar(255) DEFAULT NULL COMMENT '姓名',
  `age` int DEFAULT NULL COMMENT '年龄',
  `create_time` datetime DEFAULT NULL COMMENT '创建时间',
  `del_flag` int DEFAULT NULL COMMENT '是否删除',
  PRIMARY KEY (`id`)
) ENGINE=InnoDB DEFAULT CHARSET=utf8mb4 COLLATE=utf8mb4_0900_ai_ci;
コード生成ツール クラス
注: テスト コード パッケージに入れてください。構造は次のとおりです。
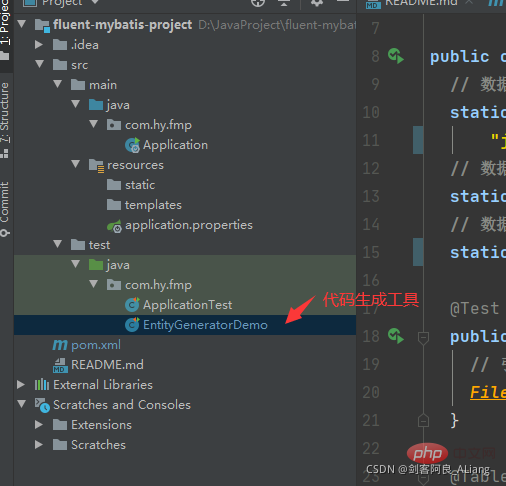
コード生成ツールのコード。まず、次のような公式の簡単な例に従います。
package com.hy.fmp;

import cn.org.atool.generator.FileGenerator;
import cn.org.atool.generator.annotation.Table;
import cn.org.atool.generator.annotation.Tables;
import org.junit.jupiter.api.Test;

public class EntityGeneratorDemo {
  // 数据源 url
  static final String url =
      "jdbc:mysql://192.168.0.16:3306/test?useUnicode=true&characterEncoding=utf8";
  // 数据库用户名
  static final String username = "root";
  // 数据库密码
  static final String password = "123456";

  @Test
  public void generate() throws Exception {
    // 引用配置类,build方法允许有多个配置类
    FileGenerator.build(Empty.class);
  }

  @Tables(
      // 设置数据库连接信息
      url = url,
      username = username,
      password = password,
      // 设置entity类生成src目录, 相对于 user.dir
      srcDir = "src/main/java",
      // 设置entity类的package值
      basePack = "com.hy.fmp.fluent",
      // 设置dao接口和实现的src目录, 相对于 user.dir
      daoDir = "src/main/java",
      // 设置哪些表要生成Entity文件
      tables = {@Table(value = {"test_fluent_mybatis"})})
  static class Empty { // 类名随便取, 只是配置定义的一个载体
  }
}
コード生成ツールを実行します。を参照してください。何が生成されるかを見てください。
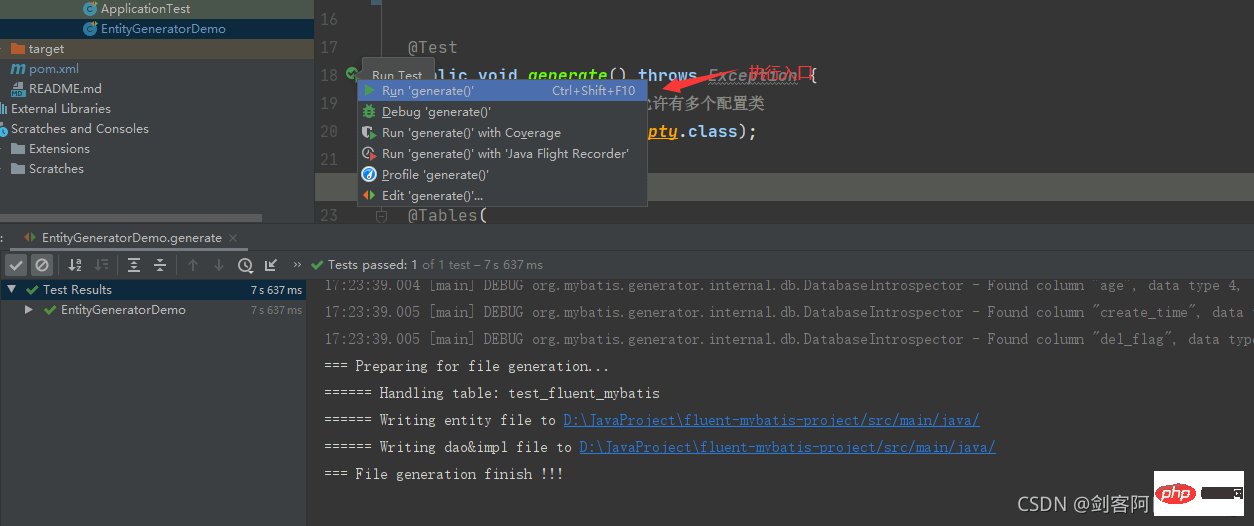
生成されたパッケージは次のように確認できます。
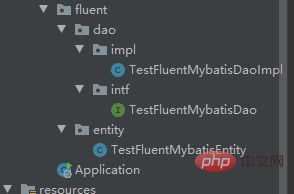
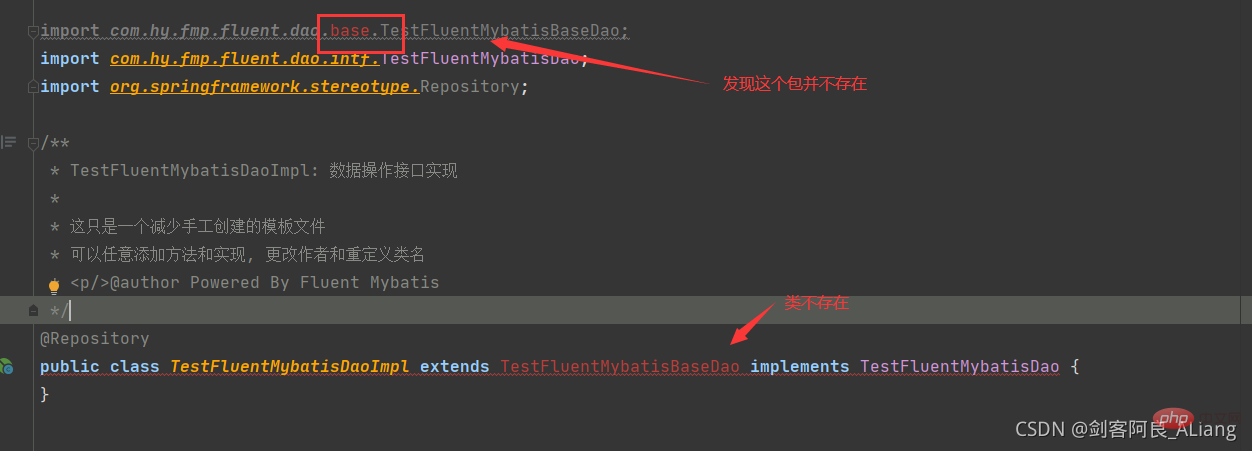 # ##実際、当局は解決策を示しましたが、それについては説明しませんでした。
 つまり、コンパイルには maven を使用する必要があるため、コンパイルします。
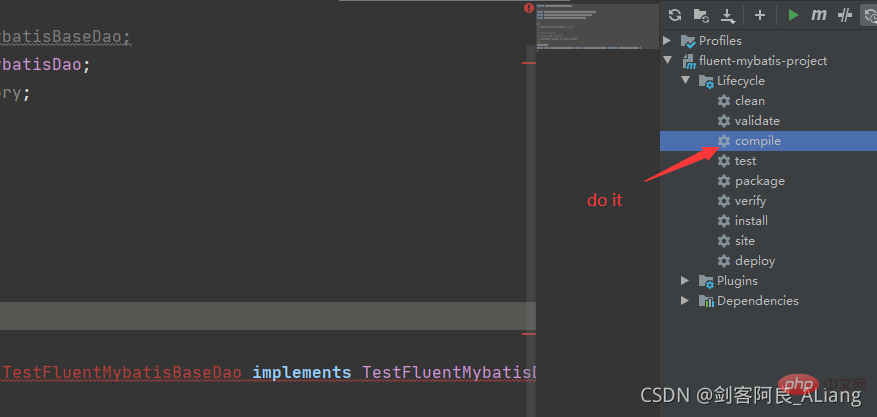 #コンパイル後、ターゲット内のエラー パッケージの場所にコンパイルされたファイルが見つかります。
 以前にエラーを報告していたクラスは、エラーを報告しなくなりました。完璧。
以上がJava Fluent Mybatis がプロジェクトを構築し、コード生成を実装する方法の詳細内容です。詳細については、PHP 中国語 Web サイトの他の関連記事を参照してください。

