ホームページ >WeChat アプレット >ミニプログラム開発 >ミニプログラムの依存関係解析の実践を紹介します。
ミニプログラムの依存関係解析の実践を紹介します。
- coldplay.xixi転載
- 2020-11-03 17:27:394446ブラウズ
WeChat ミニ プログラム開発チュートリアルミニ プログラムの依存関係分析の実践を紹介します。

webpack を使用したことがある学生は、現在のプロジェクトの js ファイルの依存関係を分析するために使用できる ミニプログラムの依存関係解析の実践を紹介します。 を知っている必要があります。
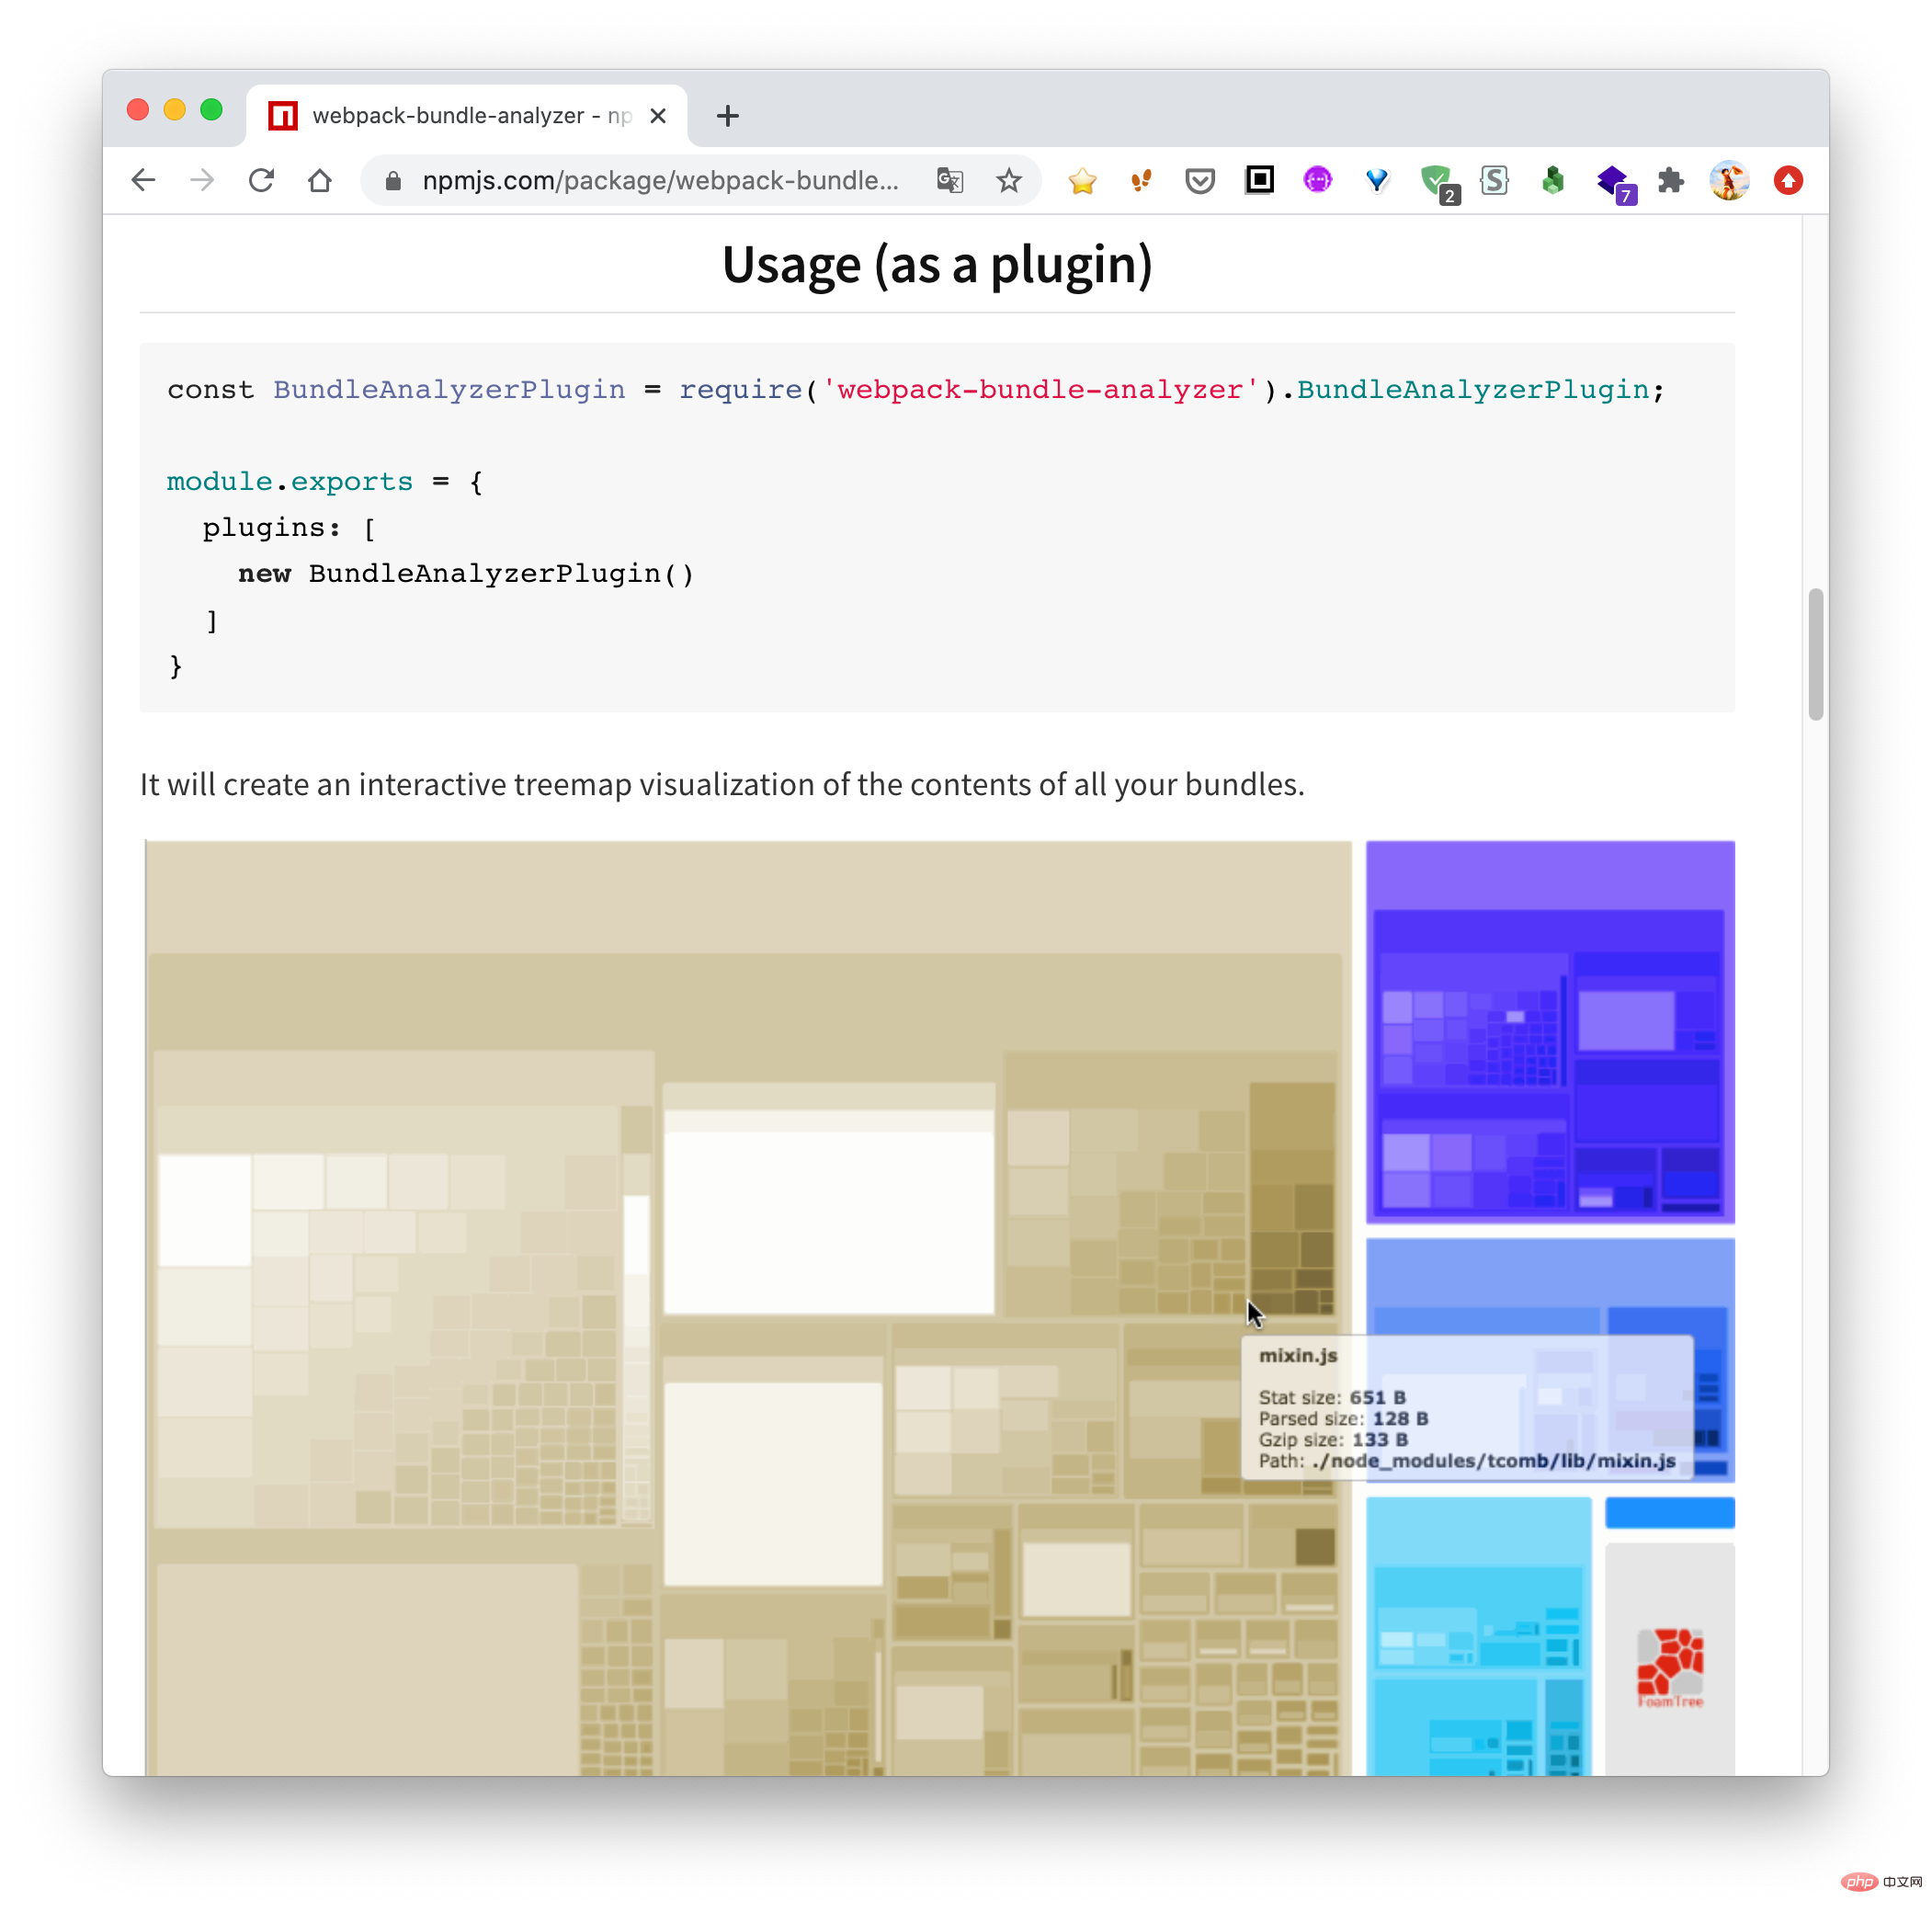
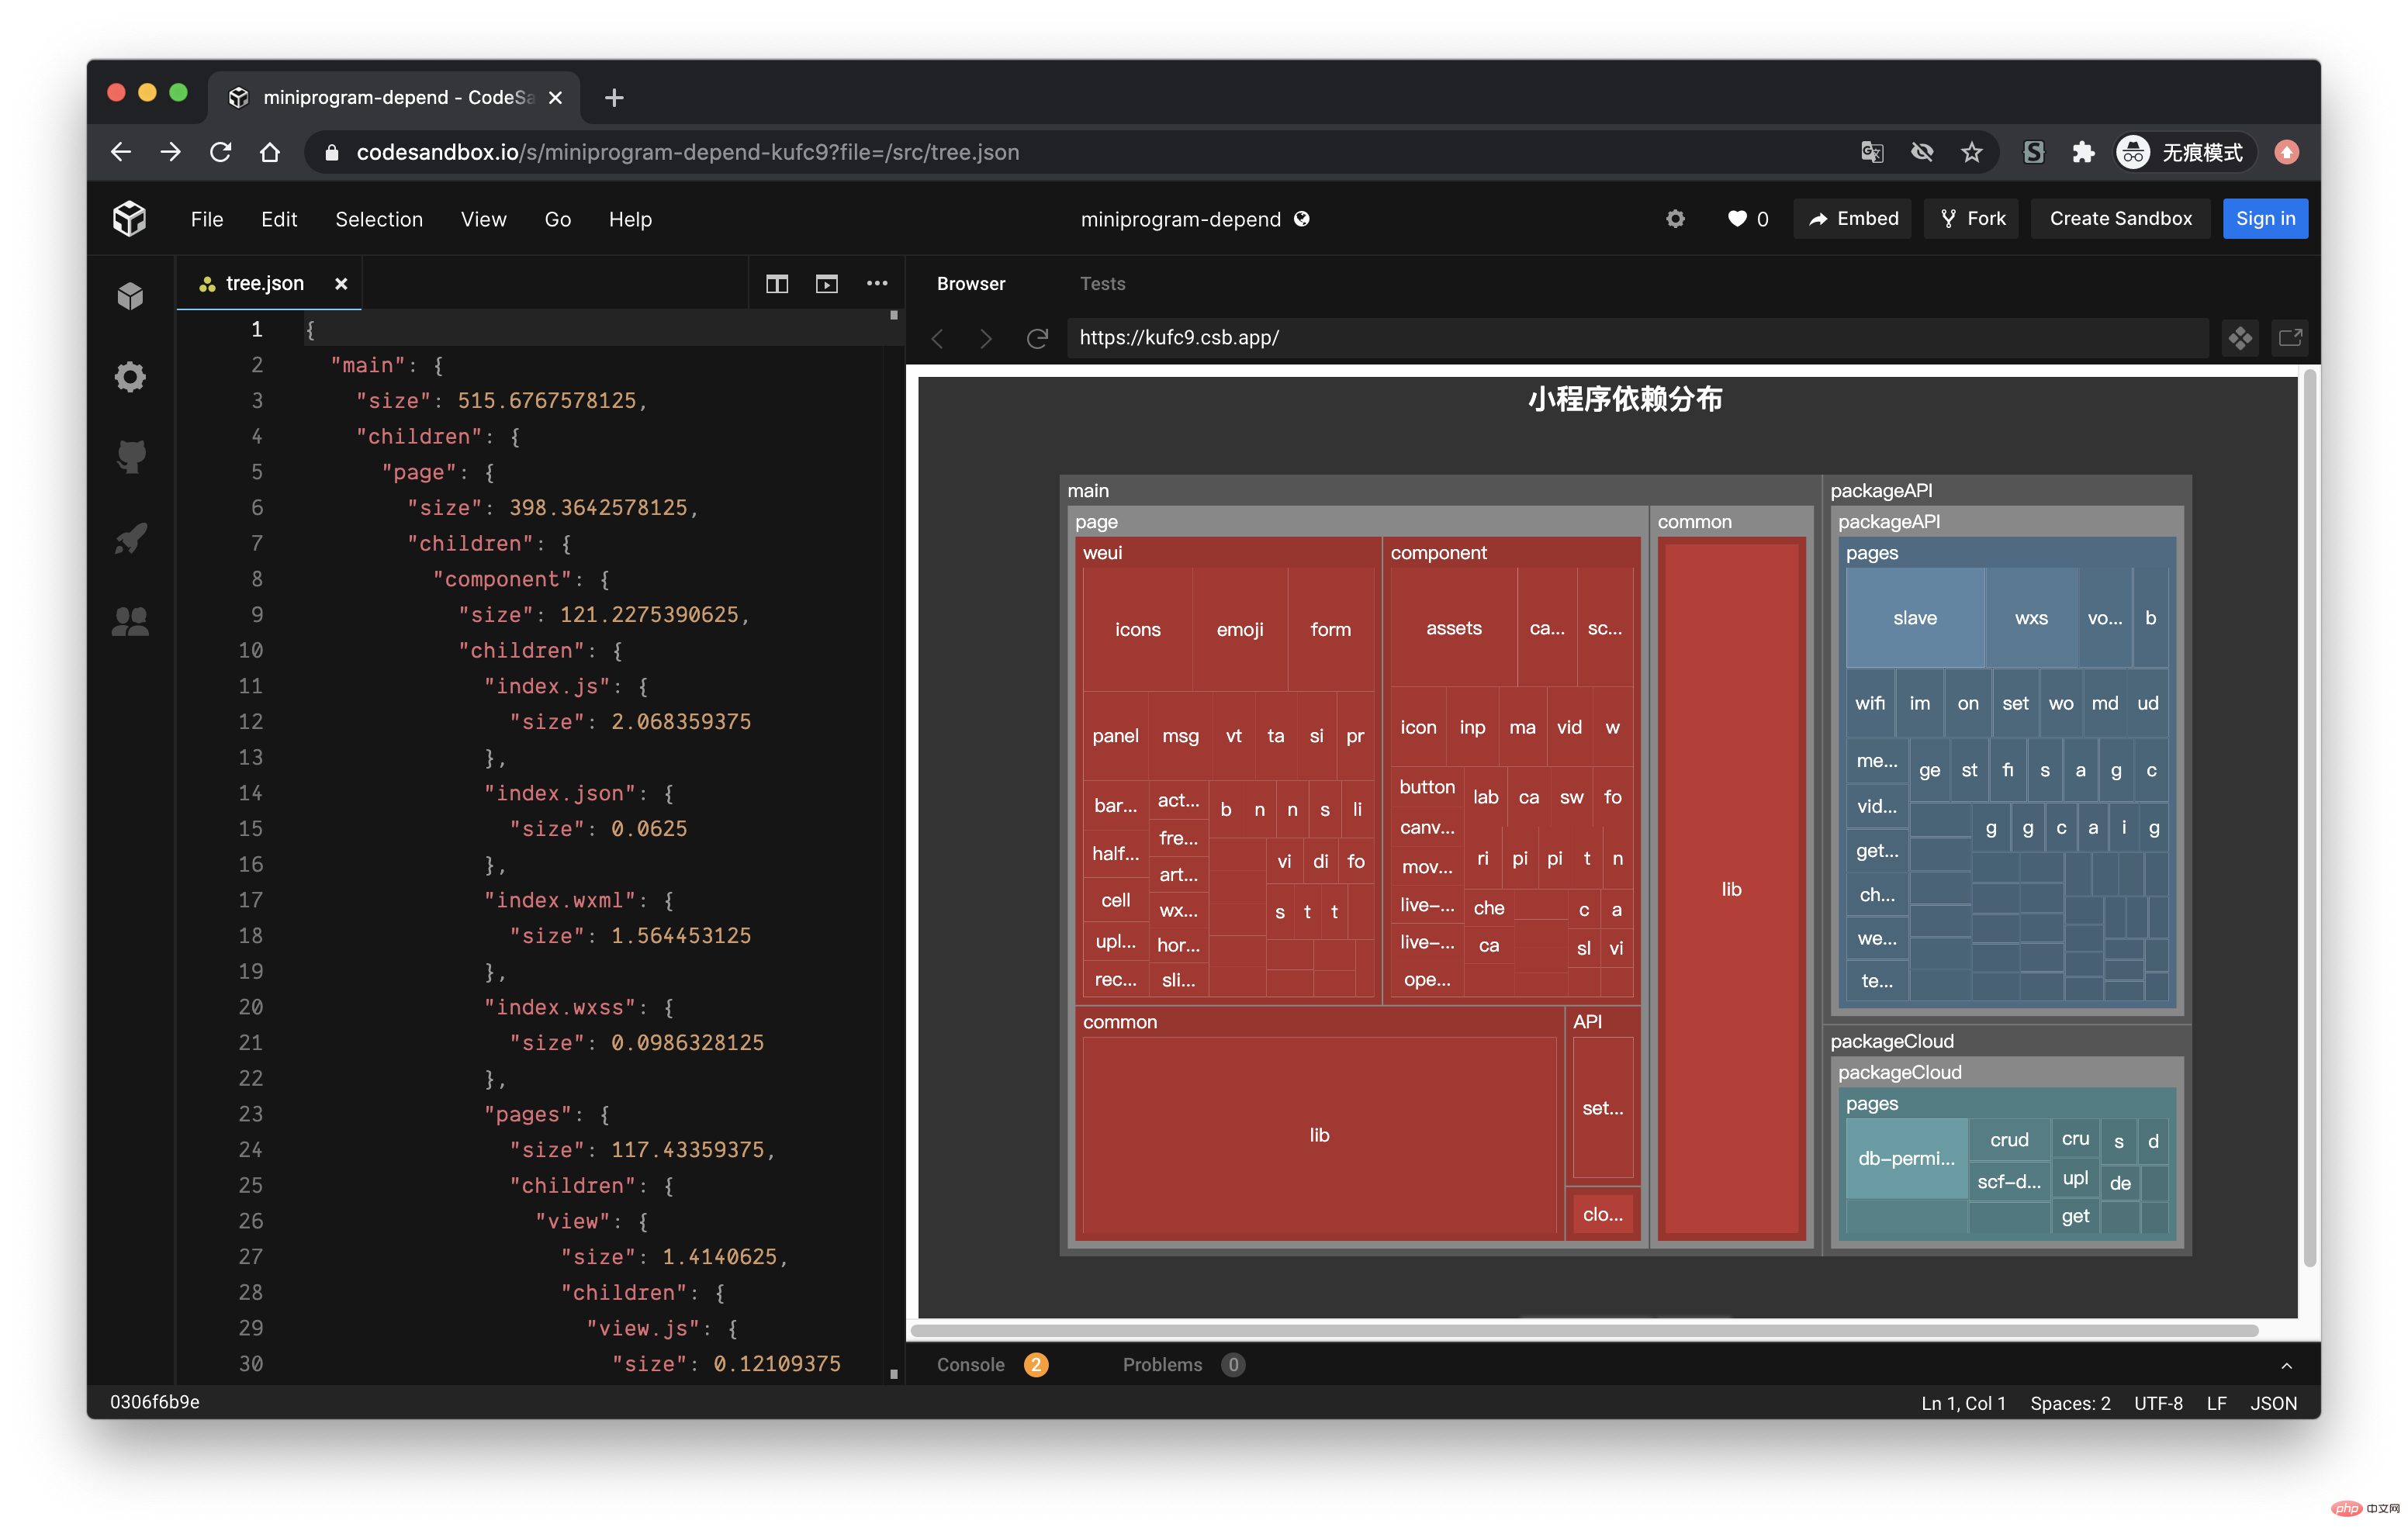
私は最近小規模プログラムのビジネスを行っており、小規模プログラムはパッケージ サイズに特に敏感であるため、現在のメインパッケージとミニプログラムのサブコントラクト間の依存関係。数日間試行錯誤した後、最終的には成功しました。その効果は次のとおりです。
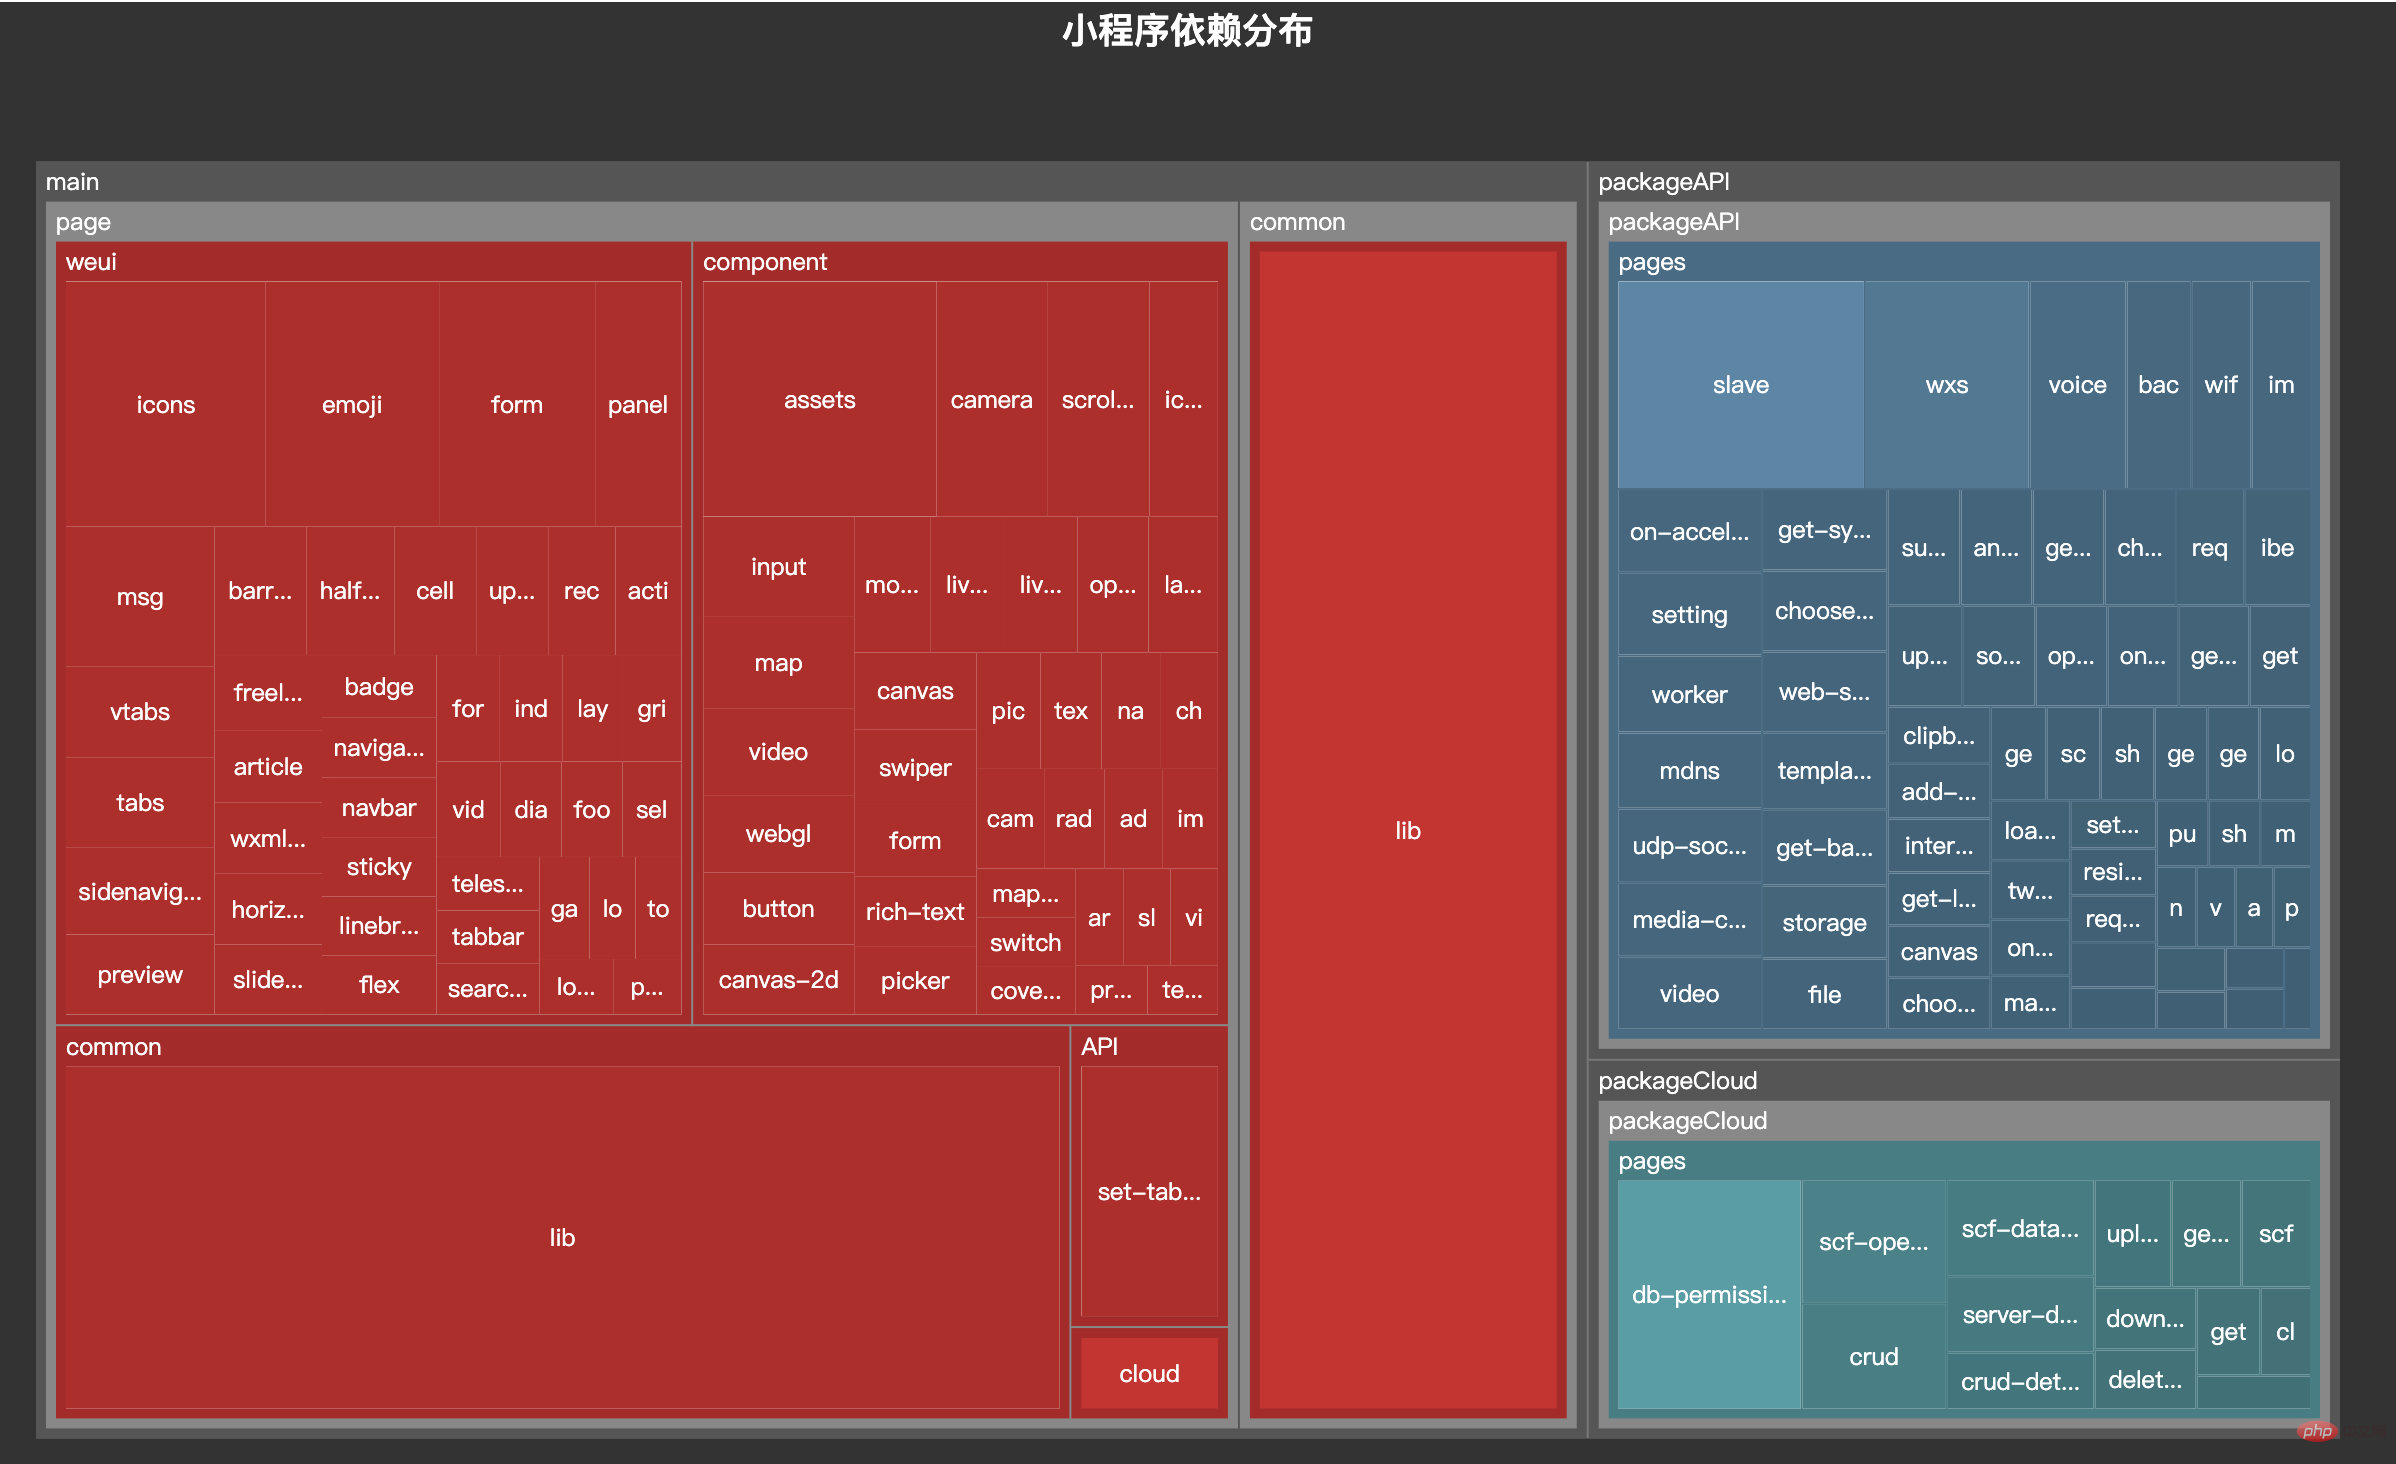
今日の記事では、このツールを実装します。
ミニ プログラムの入り口
ミニ プログラムのページは、app.json の pages パラメーターによって定義されます。これは、どのページを指定するかを指定するために使用されます。ミニプログラムを構成するページの各項目は、ページのパス(ファイル名を含む)情報に対応します。 pages の各ページについて、アプレットは対応する json、js、wxml、wxss## を探します # 4 つのファイルが処理されます。
├── app.js
├── app.json
├── app.wxss
├── pages
│   │── index
│   │   ├── index.wxml
│   │   ├── index.js
│   │   ├── index.json
│   │   └── index.wxss
│   └── logs
│       ├── logs.wxml
│       └── logs.js
└── utils复制代码
の場合、app.json に次のように記述する必要があります:
{  "pages": ["pages/index/index", "pages/logs/logs"]
}复制代码
デモを容易にするために、最初に公式デモをフォークします。小さなプログラムを作成し、新しいファイル depend.js を作成します。依存関係の解析に関連する作業はこのファイルに実装されます。
$ git clone git@github.com:wechat-miniprogram/miniprogram-demo.git
$ cd miniprogram-demo
$ touch depend.js复制代码
おおよそのディレクトリ構造は次のとおりです。
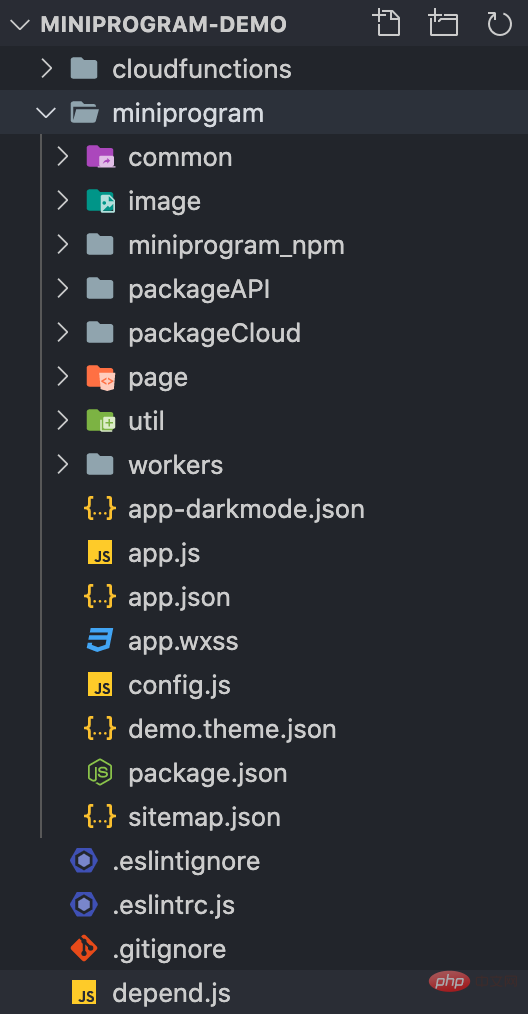
app.json をエントリとして使用すると、すべてのファイルを取得できます。メインパッケージページの下にあります。
const fs = require('fs-extra')const path = require('path')const root = process.cwd()class Depend {  constructor() {    this.context = path.join(root, 'miniprogram')
  }  // 获取绝对地址
  getAbsolute(file) {    return path.join(this.context, file)
  }  run() {    const appPath = this.getAbsolute('app.json')    const appJson = fs.readJsonSync(appPath)    const { pages } = appJson // 主包的所有页面
  }
}复制代码
各ページは 4 つのファイルに対応します: json、js、wxml、wxss: <pre class="brush:php;toolbar:false">const Extends = ['.js', '.json', '.wxml', '.wxss']class Depend { constructor() { // 存储文件
this.files = new Set() this.context = path.join(root, 'miniprogram')
} // 修改文件后缀
replaceExt(filePath, ext = '') { const dirName = path.dirname(filePath) const extName = path.extname(filePath) const fileName = path.basename(filePath, extName) return path.join(dirName, fileName + ext)
} run() { // 省略获取 pages 过程
pages.forEach(page => { // 获取绝对地址
const absPath = this.getAbsolute(page)
Extends.forEach(ext => { // 每个页面都需要判断 js、json、wxml、wxss 是否存在
const filePath = this.replaceExt(absPath, ext) if (fs.existsSync(filePath)) { this.files.add(filePath)
}
})
})
}
}复制代码</pre>これで、ページ内のページに関連するファイルがファイルフィールドに保存されます。
ツリー構造の構築
ファイルを取得した後、依存関係を後で表示するために、各ファイルに基づいてツリー構造のファイル ツリーを構築する必要があります。
pages
ディレクトリがあり、その pages ディレクトリ内に detail、index という 2 つのページがあるとします。 、この 2 ページのフォルダーの下に 4 つの対応するファイルがあります。 <pre class="brush:php;toolbar:false">pages
├── detail
│ ├── detail.js
│ ├── detail.json
│ ├── detail.wxml
│ └── detail.wxss
└── index
├── index.js
├── index.json
├── index.wxml
└── index.wxss复制代码</pre>上記のディレクトリ構造に基づいて、次のようにファイル ツリー構造を構築します。
は現在のファイルまたはフォルダーのサイズを示すために使用され、childrenフォルダーを保存します。 ファイルの場合、children 属性はありません。 <pre class="brush:php;toolbar:false">pages = { "size": 8, "children": { "detail": { "size": 4, "children": { "detail.js": { "size": 1 }, "detail.json": { "size": 1 }, "detail.wxml": { "size": 1 }, "detail.wxss": { "size": 1 }
}
}, "index": { "size": 4, "children": { "index.js": { "size": 1 }, "index.json": { "size": 1 }, "index.wxml": { "size": 1 }, "index.wxss": { "size": 1 }
}
}
}
}复制代码</pre> まず、コンストラクターで
フィールドを構築してファイル ツリー データを保存します。次に、各ファイルを addToTree メソッドに渡してファイルを追加します。木に。 <pre class="brush:php;toolbar:false">class Depend { constructor() { this.tree = { size: 0, children: {}
} this.files = new Set() this.context = path.join(root, 'miniprogram')
}
run() { // 省略获取 pages 过程
pages.forEach(page => { const absPath = this.getAbsolute(page)
Extends.forEach(ext => { const filePath = this.replaceExt(absPath, ext) if (fs.existsSync(filePath)) { // 调用 addToTree
this.addToTree(filePath)
}
})
})
}
}复制代码</pre> 次に、
メソッドを実装します。 <pre class="brush:php;toolbar:false">class Depend { // 省略之前的部分代码
// 获取相对地址
getRelative(file) { return path.relative(this.context, file)
} // 获取文件大小,单位 KB
getSize(file) { const stats = fs.statSync(file) return stats.size / 1024
} // 将文件添加到树中
addToTree(filePath) { if (this.files.has(filePath)) { // 如果该文件已经添加过,则不再添加到文件树中
return
} const size = this.getSize(filePath) const relPath = this.getRelative(filePath) // 将文件路径转化成数组
// 'pages/index/index.js' =>
// ['pages', 'index', 'index.js']
const names = relPath.split(path.sep) const lastIdx = names.length - 1
this.tree.size += size let point = this.tree.children
names.forEach((name, idx) => { if (idx === lastIdx) {
point[name] = { size } return
} if (!point[name]) {
point[name] = {
size, children: {}
}
} else {
point[name].size += size
}
point = point[name].children
}) // 将文件添加的 files
this.files.add(filePath)
}
}复制代码</pre> 実行後、ファイルを
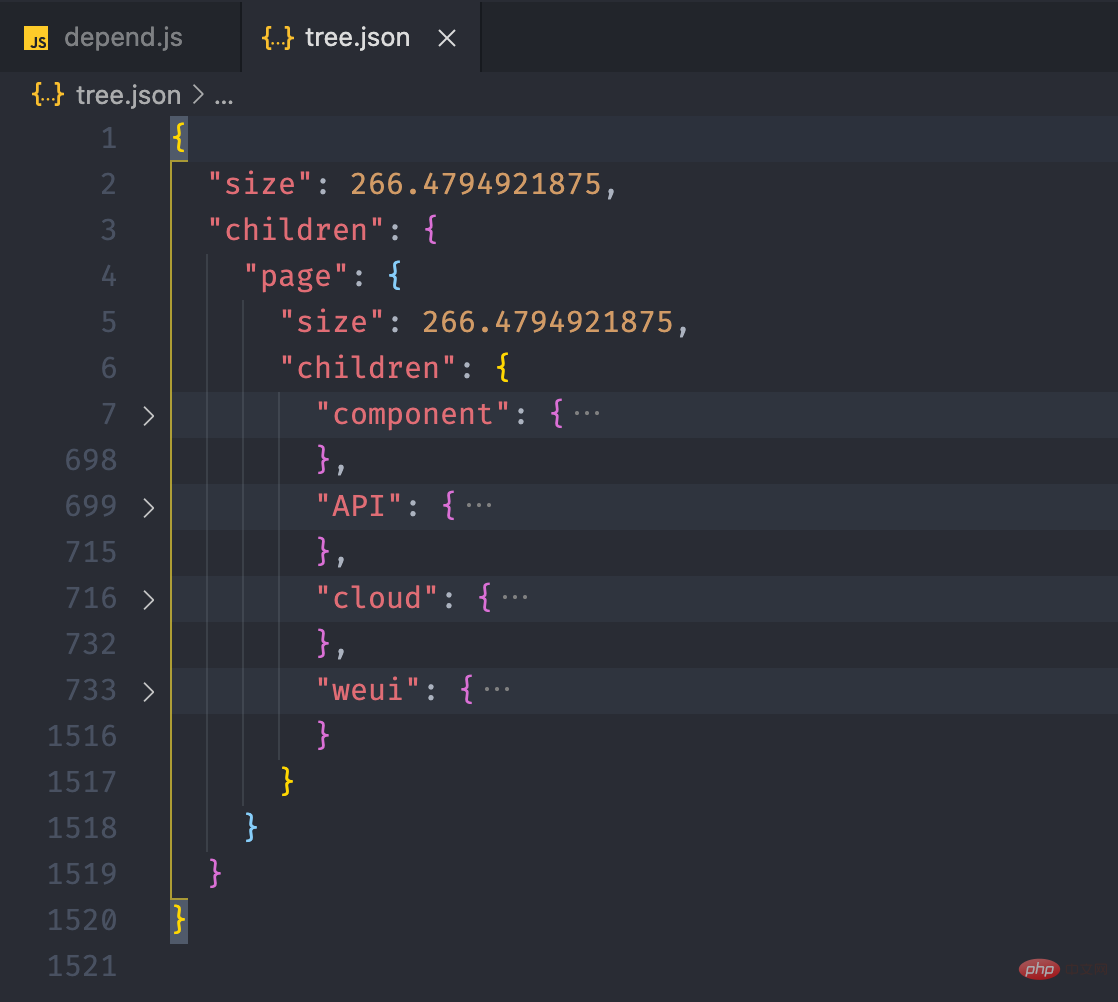
に出力して確認します。 <pre class="brush:php;toolbar:false"> run() { // ...
pages.forEach(page => { //...
})
fs.writeJSONSync('ミニプログラムの依存関係解析の実践を紹介します。', this.tree, { spaces: 2 })
}复制代码</pre>
 依存関係の取得
上記の手順は問題ないようですが、重要なリンクが抜けています。つまり、ファイル ツリーを構築する前に、また、出力がミニ プログラムの完全なファイル ツリーになるように、各ファイルの依存関係を取得する必要もあります。ファイルの依存関係は、
js、json、wxml、wxss の 4 つの部分に分割する必要があります。取得に依存する方法。 .js ファイルの依存関係を取得する
アプレットはモジュール化のために CommonJS をサポートします。es6 がオンになっている場合は、モジュール化のために ESM もサポートできます。
js ファイルの依存関係を取得したい場合は、まずモジュールをインポートするための js ファイルを記述する 3 つの方法を明確にする必要があります。次の 3 つの構文については、依存関係を取得するために Babel を導入できます。 <pre class="brush:php;toolbar:false">import a from './a.js'export b from './b.js'const c = require('./c.js')复制代码</pre>
を通じてコードを AST に変換し、@babel/traverse を通じて AST ノードを走査して、次の値を取得します。上記の3つのインポートメソッドを実行し、配列に配置します。 <pre class="brush:php;toolbar:false">const { parse } = require('@babel/parser')const { default: traverse } = require('@babel/traverse')class Depend { // ...
jsDeps(file) { const deps = [] const dirName = path.dirname(file) // 读取 js 文件内容
const content = fs.readFileSync(file, 'utf-8') // 将代码转化为 AST
const ast = parse(content, { sourceType: 'module', plugins: ['exportDefaultFrom']
}) // 遍历 AST
traverse(ast, { ImportDeclaration: ({ node }) => { // 获取 import from 地址
const { value } = node.source const jsFile = this.transformScript(dirName, value) if (jsFile) {
deps.push(jsFile)
}
}, ExportNamedDeclaration: ({ node }) => { // 获取 export from 地址
const { value } = node.source const jsFile = this.transformScript(dirName, value) if (jsFile) {
deps.push(jsFile)
}
}, CallExpression: ({ node }) => { if (
(node.callee.name && node.callee.name === 'require') &&
node.arguments.length >= 1
) { // 获取 require 地址
const [{ value }] = node.arguments const jsFile = this.transformScript(dirName, value) if (jsFile) {
deps.push(jsFile)
}
}
}
}) return deps
}
}复制代码</pre>依存モジュールのパスを取得した後、依存関係配列にパスをすぐに追加することはできません。これは、モジュール構文
によれば、サフィックスは省略でき、パスが必要であるためです。はファイル フォルダーです。デフォルトでは、フォルダー内の index.js がインポートされます。 <pre class="brush:php;toolbar:false">class Depend { // 获取某个路径的脚本文件
transformScript(url) { const ext = path.extname(url) // 如果存在后缀,表示当前已经是一个文件
if (ext === '.js' && fs.existsSync(url)) { return url
} // a/b/c => a/b/c.js
const jsFile = url + '.js'
if (fs.existsSync(jsFile)) { return jsFile
} // a/b/c => a/b/c/index.js
const jsIndexFile = path.join(url, 'index.js') if (fs.existsSync(jsIndexFile)) { return jsIndexFile
} return null
} jsDeps(file) {...}
}复制代码</pre>
を作成し、出力 deps が正しいかどうかを確認できます: <pre class="brush:php;toolbar:false">// 文件路径:/Users/shenfq/Code/fork/miniprogram-demo/import a from './a.js'export b from '../b.js'const c = require('../../c.js')复制代码</pre>
<p><img class="lazyload lazy" src="/static/imghwm/default1.png" data-src="https://img.php.cn/upload/article/000/000/052/d1027296a3eafc6a3805451b6d9ef634-4.png" alt="ミニプログラムの依存関係解析の実践を紹介します。" data- style="max-width:90%" data- style="max-width:90%"></p>
<h3 data-id="heading-4">获取 .json 文件依赖</h3>
<p><code>json 文件本身是不支持模块化的,但是小程序可以通过 json 文件导入自定义组件,只需要在页面的 json 文件通过 usingComponents 进行引用声明。usingComponents 为一个对象,键为自定义组件的标签名,值为自定义组件文件路径:
{  "usingComponents": {    "component-tag-name": "path/to/the/custom/component"
  }
}复制代码
自定义组件与小程序页面一样,也会对应四个文件,所以我们需要获取 json 中 usingComponents 内的所有依赖项,并判断每个组件对应的那四个文件是否存在,然后添加到依赖项内。
class Depend {  // ...
  jsonDeps(file) {    const deps = []    const dirName = path.dirname(file)    const { usingComponents } = fs.readJsonSync(file)    if (usingComponents && typeof usingComponents === 'object') {      Object.values(usingComponents).forEach((component) => {
        component = path.resolve(dirName, component)        // 每个组件都需要判断 js/json/wxml/wxss 文件是否存在
        Extends.forEach((ext) => {          const file = this.replaceExt(component, ext)          if (fs.existsSync(file)) {
            deps.push(file)
          }
        })
      })
    }    return deps
  }
}复制代码
获取 .wxml 文件依赖
wxml 提供两种文件引用方式 import 和 include。
<import></import><include></include>复制代码
wxml 文件本质上还是一个 html 文件,所以可以通过 html parser 对 wxml 文件进行解析,关于 html parser 相关的原理可以看我之前写过的文章 《Vue 模板编译原理》。
const htmlparser2 = require('htmlparser2')class Depend {  // ...
	wxmlDeps(file) {    const deps = []    const dirName = path.dirname(file)    const content = fs.readFileSync(file, 'utf-8')    const htmlParser = new htmlparser2.Parser({      onopentag(name, attribs = {}) {        if (name !== 'import' && name !== 'require') {          return
        }        const { src } = attribs        if (src) {          return
        }      	const wxmlFile = path.resolve(dirName, src)        if (fs.existsSync(wxmlFile)) {
        	deps.push(wxmlFile)
        }
      }
    })
    htmlParser.write(content)
    htmlParser.end()    return deps
  }
}复制代码
获取 .wxss 文件依赖
最后 wxss 文件导入样式和 css 语法一致,使用 @import 语句可以导入外联样式表。
@import "common.wxss";复制代码
可以通过 postcss 解析 wxss 文件,然后获取导入文件的地址,但是这里我们偷个懒,直接通过简单的正则匹配来做。
class Depend {  // ...
  wxssDeps(file) {    const deps = []    const dirName = path.dirname(file)    const content = fs.readFileSync(file, 'utf-8')    const importRegExp = /@import\\s*['"](.+)['"];*/g
    let matched    while ((matched = importRegExp.exec(content)) !== null) {      if (!matched[1]) {        continue
      }      const wxssFile = path.resolve(dirName, matched[1])      if (fs.existsSync(wxmlFile)) {
        deps.push(wxssFile)
      }
    }    return deps
  }
}复制代码
将依赖添加到树结构中
现在我们需要修改 addToTree 方法。
class Depend {  addToTree(filePath) {    // 如果该文件已经添加过,则不再添加到文件树中
    if (this.files.has(filePath)) {      return
    }    const relPath = this.getRelative(filePath)    const names = relPath.split(path.sep)
    names.forEach((name, idx) => {      // ... 添加到树中
    })    this.files.add(filePath)    // ===== 获取文件依赖,并添加到树中 =====
    const deps = this.getDeps(filePath)
    deps.forEach(dep => {      this.addToTree(dep)
    })
  }
}复制代码
获取分包依赖
熟悉小程序的同学肯定知道,小程序提供了分包机制。使用分包后,分包内的文件会被打包成一个单独的包,在用到的时候才会加载,而其他的文件则会放在主包,小程序打开的时候就会加载。subpackages 中,每个分包的配置有以下几项:
| 字段 | 类型 | 说明 |
|---|---|---|
| root | String | 分包根目录 |
| name | String | 分包别名,分包预下载时可以使用 |
| pages | StringArray | 分包页面路径,相对与分包根目录 |
| independent | Boolean | 分包是否是独立分包 |
所以我们在运行的时候,除了要拿到 pages 下的所有页面,还需拿到 subpackages 中所有的页面。由于之前只关心主包的内容,this.tree 下面只有一颗文件树,现在我们需要在 this.tree 下挂载多颗文件树,我们需要先为主包创建一个单独的文件树,然后为每个分包创建一个文件树。
class Depend {  constructor() {    this.tree = {}    this.files = new Set()    this.context = path.join(root, 'miniprogram')
  }  createTree(pkg) {    this.tree[pkg] = {      size: 0,      children: {}
    }
  }  addPage(page, pkg) {    const absPath = this.getAbsolute(page)
    Extends.forEach(ext => {      const filePath = this.replaceExt(absPath, ext)      if (fs.existsSync(filePath)) {        this.addToTree(filePath, pkg)
      }
    })
  }  run() {    const appPath = this.getAbsolute('app.json')    const appJson = fs.readJsonSync(appPath)    const { pages, subPackages, subpackages } = appJson
    this.createTree('main') // 为主包创建文件树
    pages.forEach(page => {      this.addPage(page, 'main')
    })    // 由于 app.json 中 subPackages、subpackages 都能生效
    // 所以我们两个属性都获取,哪个存在就用哪个
    const subPkgs = subPackages || subpackages    // 分包存在的时候才进行遍历
    subPkgs && subPkgs.forEach(({ root, pages }) => {
      root = root.split('/').join(path.sep)      this.createTree(root) // 为分包创建文件树
      pages.forEach(page => {        this.addPage(`${root}${path.sep}${page}`, pkg)
      })
    })    // 输出文件树
    fs.writeJSONSync('ミニプログラムの依存関係解析の実践を紹介します。', this.tree, { spaces: 2 })
  }
}复制代码
addToTree 方法也需要进行修改,根据传入的 pkg 来判断将当前文件添加到哪个树。
class Depend {  addToTree(filePath, pkg = 'main') {    if (this.files.has(filePath)) {      // 如果该文件已经添加过,则不再添加到文件树中
      return
    }    let relPath = this.getRelative(filePath)    if (pkg !== 'main' && relPath.indexOf(pkg) !== 0) {      // 如果该文件不是以分包名开头,证明该文件不在分包内,
      // 需要将文件添加到主包的文件树内
      pkg = 'main'
    }    const tree = this.tree[pkg] // 依据 pkg 取到对应的树
    const size = this.getSize(filePath)    const names = relPath.split(path.sep)    const lastIdx = names.length - 1

    tree.size += size    let point = tree.children
    names.forEach((name, idx) => {      // ... 添加到树中
    })    this.files.add(filePath)    // ===== 获取文件依赖,并添加到树中 =====
    const deps = this.getDeps(filePath)
    deps.forEach(dep => {      this.addToTree(dep)
    })
  }
}复制代码
这里有一点需要注意,如果 package/a 分包下的文件依赖的文件不在 package/a 文件夹下,则该文件需要放入主包的文件树内。
通过 EChart 画图
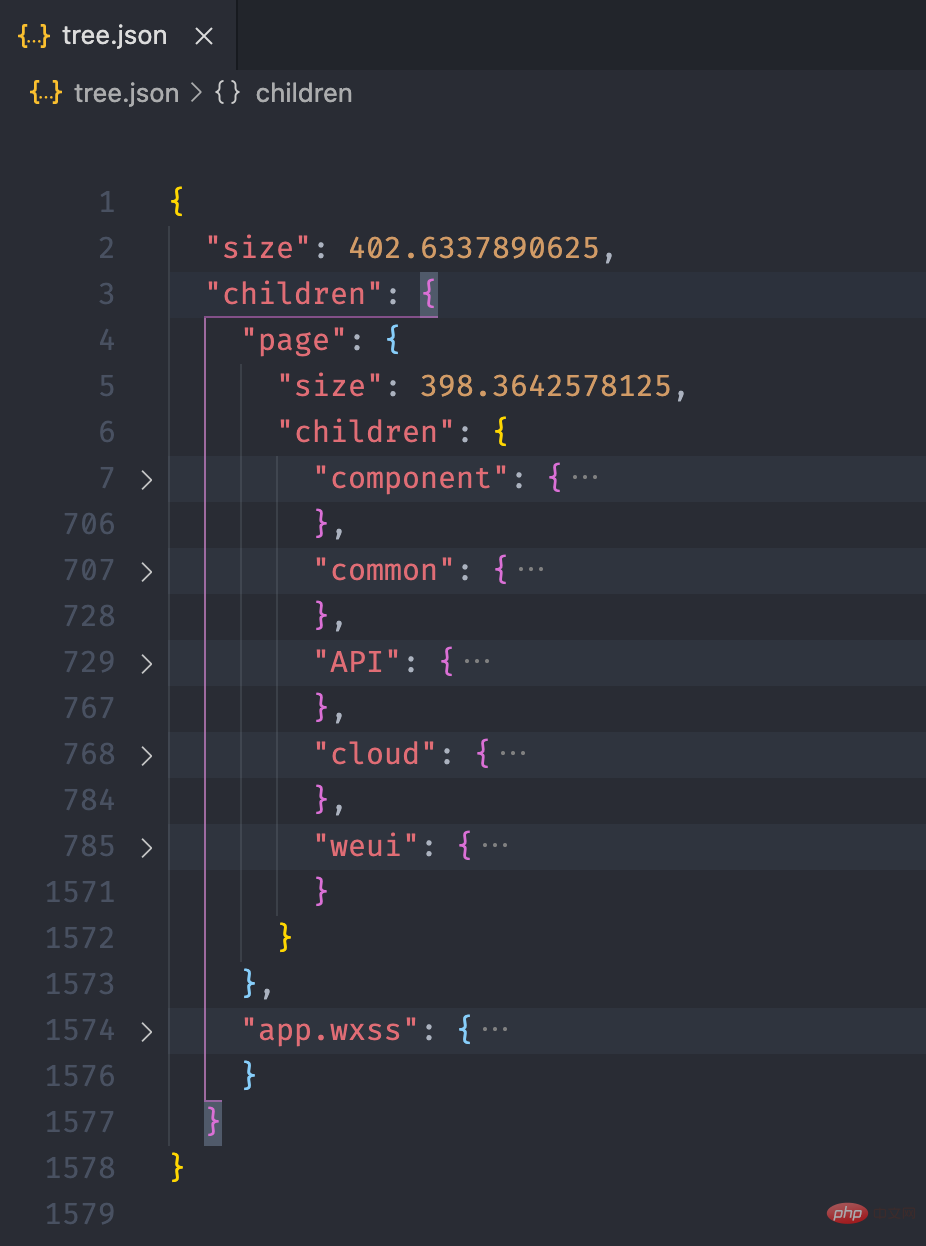
经过上面的流程后,最终我们可以得到如下的一个 json 文件:
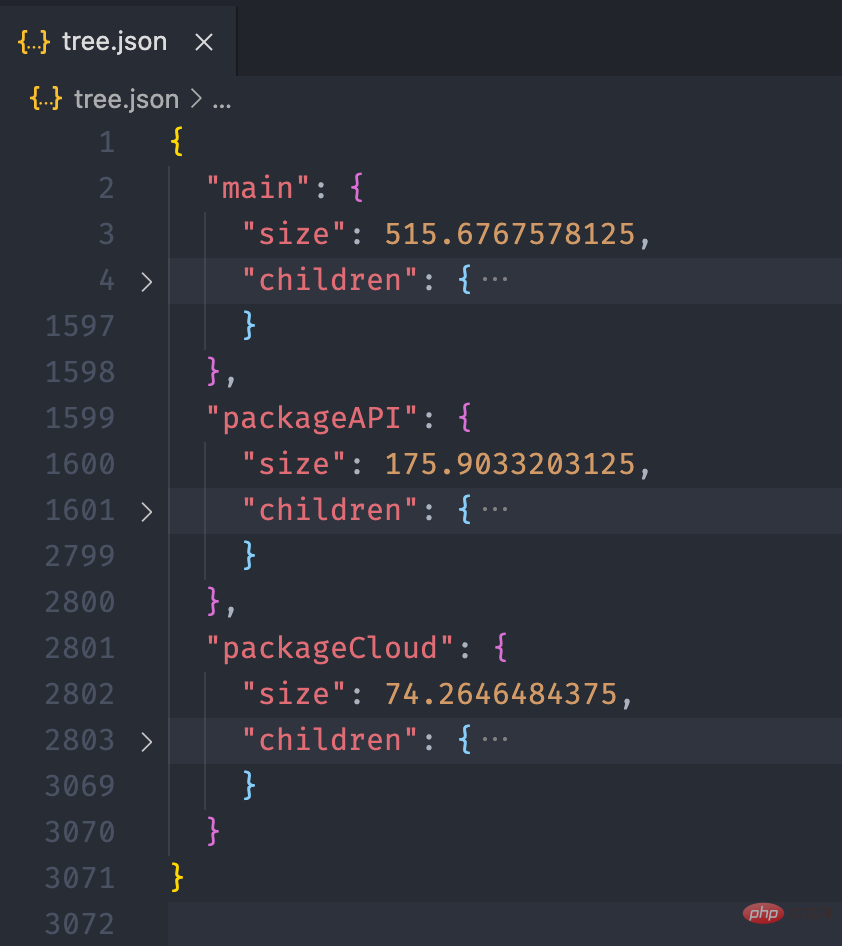
接下来,我们利用 ミニプログラムの依存関係解析の実践を紹介します。 的画图能力,将这个 json 数据以图表的形式展现出来。我们可以在 ミニプログラムの依存関係解析の実践を紹介します。 提供的实例中看到一个 Disk Usage 的案例,很符合我们的预期。
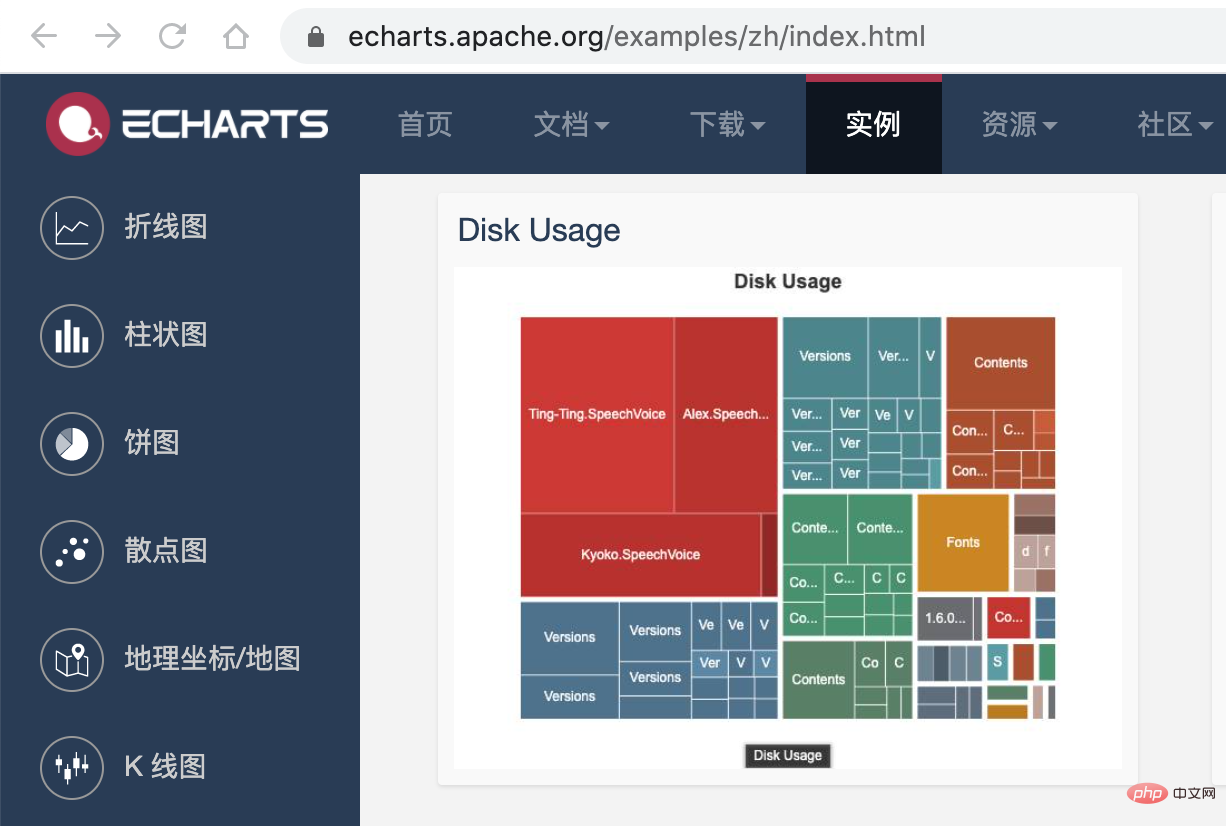
ミニプログラムの依存関係解析の実践を紹介します。 的配置这里就不再赘述,按照官网的 demo 即可,我们需要把 tree. json 的数据转化为 ミニプログラムの依存関係解析の実践を紹介します。 需要的格式就行了,完整的代码放到 codesandbod 了,去下面的线上地址就能看到效果了。
线上地址:https://codesandbox.io/s/cold-dawn-kufc9
总结
这篇文章比较偏实践,所以贴了很多的代码,另外本文对各个文件的依赖获取提供了一个思路,虽然这里只是用文件树构造了一个这样的依赖图。
在业务开发中,小程序 IDE 每次启动都需要进行全量的编译,开发版预览的时候会等待较长的时间,我们现在有文件依赖关系后,就可以只选取目前正在开发的页面进行打包,这样就能大大提高我们的开发效率。如果有对这部分内容感兴趣的,可以另外写一篇文章介绍下如何实现。
相关免费学习推荐:微信小程序开发教程
以上がミニプログラムの依存関係解析の実践を紹介します。の詳細内容です。詳細については、PHP 中国語 Web サイトの他の関連記事を参照してください。

