ホームページ >ウェブフロントエンド >CSSチュートリアル >CSS言語を使用したLightning接続線の作成例
CSS言語を使用したLightning接続線の作成例
- php是最好的语言オリジナル
- 2018-07-30 14:37:072473ブラウズ

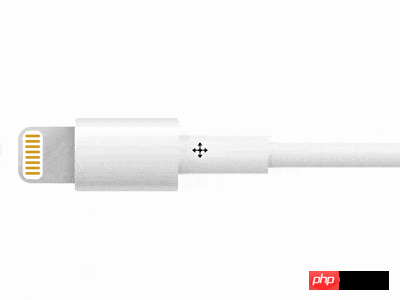
効果プレビュー
右側の「クリックしてプレビュー」ボタンを押して現在のページでプレビューするか、リンクをクリックして全画面でプレビューします。
https://codepen.io/comehope/pen/RBjdzZ
インタラクティブビデオ
このビデオはインタラクティブです。いつでもビデオを一時停止して、ビデオ内のコードを編集できます。
Chrome、Safari、Edgeを開いて視聴してください。
https://scrimba.com/p/pEgDAM/cgkE6C6
コード解釈
dom を定義します。コンテナにはそれぞれプラグとケーブルを表す 2 つの要素が含まれます:
<p class="cable">
    <span class="head"></span>
    <span class="body"></span>
</p>
中央表示:
body {
    margin: 0;
    height: 100vh;
    display: flex;
    align-items: center;
}
コンテナ サイズを定義します:
.cable {
    display: flex;
    align-items: center;
    font-size: 10px;
    margin-left: 5em;
}
プラグの輪郭を描く:
.head {
    width: 8.5em;
    height: 8.5em;
    border-radius: 2em 0 0 2em;
}
プラグのピンの輪郭を描く:
.head {
    position: relative;
}

.head::before {
    content: '';
    position: absolute;
    width: 3em;
    height: 7.3em;
    top: calc((8.5em - 7.3em) / 2);
    left: 0.7em;
    border-radius: 1em;
    box-sizing: border-box;
}
ケーブルの手持ち部分の輪郭を描く:
.body {
    width: 15.5em;
    height: 11em;
    border-radius: 0.5em;
}
ケーブルの少し太い部分の輪郭を描くケーブル:
.body {
    position: relative;
    display: flex;
    align-items: center;
}

.body::before {
    content: '';
    position: absolute;
    width: 13.5em;
    height: 6em;
    left: 15.5em;
}
ケーブルの延長部分を描画:
.body::after {
    content: '';
    position: absolute;
    width: 100vh;
    height: 3.9em;
    left: calc(15.5em + 13.5em);
}
画面外の部分を非表示:
body {
    overflow: hidden;
}
次に詳細を描画します。
延長コードをグラデーションカラーでペイント:
.body::after {
    background:
        linear-gradient(
            white,
            hsl(0, 0%, 96%) 5%,
            hsl(0, 0%, 97%) 25%,
            hsl(0, 0%, 95%) 40%,
            hsl(0, 0%, 81%) 95%,
            white
        );
}
ケーブルの太い部分をグラデーションカラーでペイント:
.body::before {
    background:
        linear-gradient(
            white,
            hsl(0, 0%, 96%) 5%,
            hsl(0, 0%, 98%) 20%,
            hsl(0, 0%, 95%) 50%,
            hsl(0, 0%, 81%) 95%,
            white
        );
}
ケーブルの手持ち部分をグラデーションカラーでペイント:
.body {
    background:linear-gradient(
        hsl(0, 0%, 91%),
        white 15%,
        hsl(0, 0%, 93%) 50%,
        hsl(0, 0%, 87%) 70%,
        hsl(0, 0%, 79%) 90%,
        hsl(0, 0%, 84%),
        hsl(0, 0%, 86%)
    );
}
プラグをグラデーションカラーでペイント:
.head {
    background:
        linear-gradient(
            -45deg,
            hsl(0, 0%, 75%),
            hsl(0, 0%, 79%),
            hsl(0, 0%, 78%),
            hsl(0, 0%, 87%) 80%
        );
}
プラグにピンを描きます:
.head::before {
    background-color: white;
}

.head::after {
    content: '';
    position: absolute;
    box-sizing: border-box;
    width: 2.2em;
    height: 0.4em;
    color: goldenrod;
    background-color: currentColor;
    border-radius: 0.5em;
    left: 1.1em;
    top: 1.2em;
    box-shadow:
        0 0.8em 0,
        0 1.6em 0,
        0 2.4em 0,
        0 3.2em 0,
        0 4em 0,
        0 4.8em 0,
        0 5.6em 0;
}
次に影を追加して、ケーブルをより立体的にします。
プラグの影を描く:
.head {
    background:
        linear-gradient(
            90deg,
            transparent 80%,
            rgba(0,0,0,12%)
        ),
        linear-gradient(
            -45deg,
            hsl(0, 0%, 75%),
            hsl(0, 0%, 79%),
            hsl(0, 0%, 78%),
            hsl(0, 0%, 87%) 80%
        );
}
ケーブルの手持ち部分の影を描く:
.body::before {
    background:
        linear-gradient(
            45deg,
            rgba(0,0,0,4%) 10%,
            transparent 20%
        ),
        linear-gradient(
            90deg,
            rgba(0,0,0,4%),
            transparent 10%
        ),
        linear-gradient(
            white,
            hsl(0, 0%, 96%) 5%,
            hsl(0, 0%, 98%) 20%,
            hsl(0, 0%, 95%) 50%,
            hsl(0, 0%, 81%) 95%,
            white
        );
}
ケーブルの太い部分の影を描く:
.body::after {
    background:
        linear-gradient(
            45deg,
            rgba(0,0,0,4%),
            transparent 4%
        ),
        linear-gradient(
            90deg,
            rgba(0,0,0,4%),
            transparent 2%
        ),
        linear-gradient(
            white,
            hsl(0, 0%, 96%) 5%,
            hsl(0, 0%, 97%) 25%,
            hsl(0, 0%, 95%) 40%,
            hsl(0, 0%, 81%) 95%,
            white
        );
}
最後に、画面に入口アニメーションを追加します
.cable {
    animation: show 5s linear infinite;
}

@keyframes show {
    0% {
        transform: translateX(100vw);
    }

    20%, 100% {
        transform: translateX(0);
    }
}
これで完了です!
関連記事:
純粋な CSS3 を使用してスピンドル ディバイダーを作成する
純粋な CSS3 を使用してシンプルな五芒星グラフィックを作成する方法
関連動画:
以上がCSS言語を使用したLightning接続線の作成例の詳細内容です。詳細については、PHP 中国語 Web サイトの他の関連記事を参照してください。

