ホームページ >ウェブフロントエンド >jsチュートリアル >jqueryプラグインuploadifyの使い方を詳しく解説
jqueryプラグインuploadifyの使い方を詳しく解説
- php中世界最好的语言オリジナル
- 2018-04-23 11:30:166733ブラウズ
今回はjqueryプラグインuploadifyの使い方について詳しく説明します。jqueryプラグインuploadifyを使用する際の注意事項は何ですか?実際の事例を見てみましょう。
プロジェクトでファイルの一括アップロード機能が必要な場合、個人的には、uploadify が迅速で簡単な解決策だと思います。詳細は次のとおりです
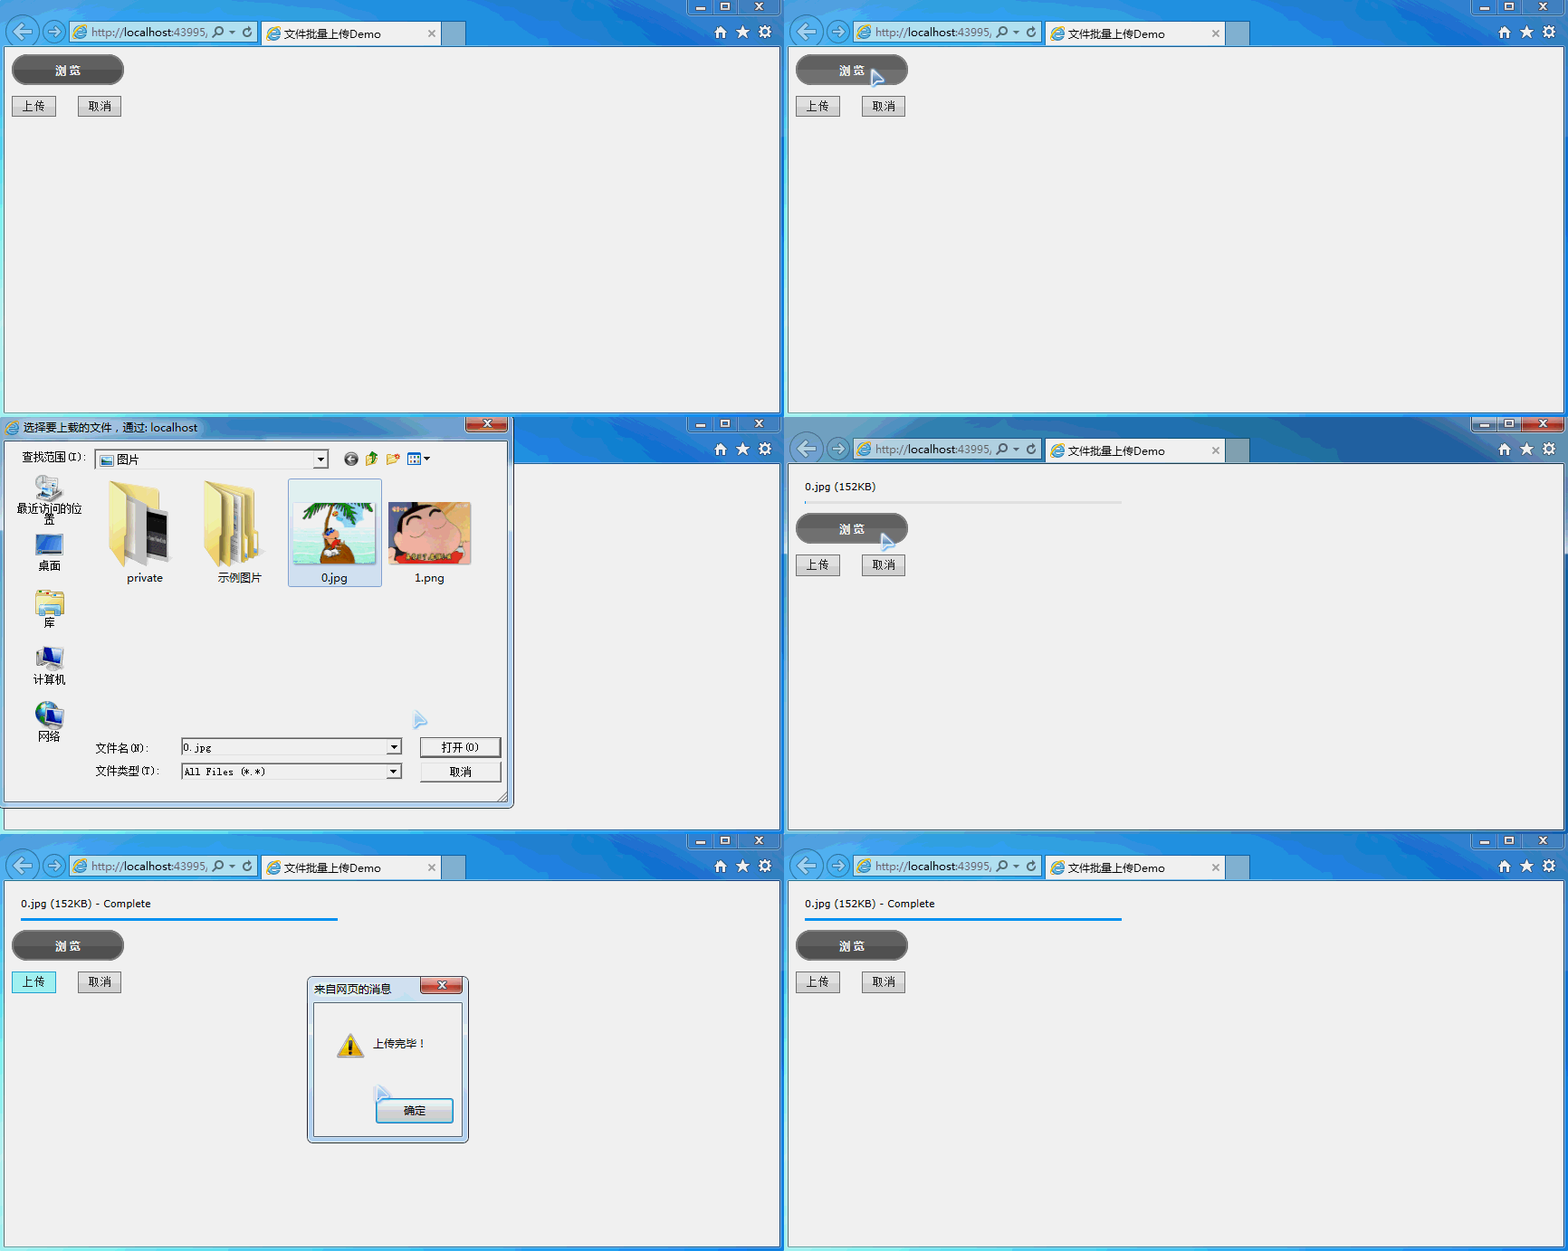
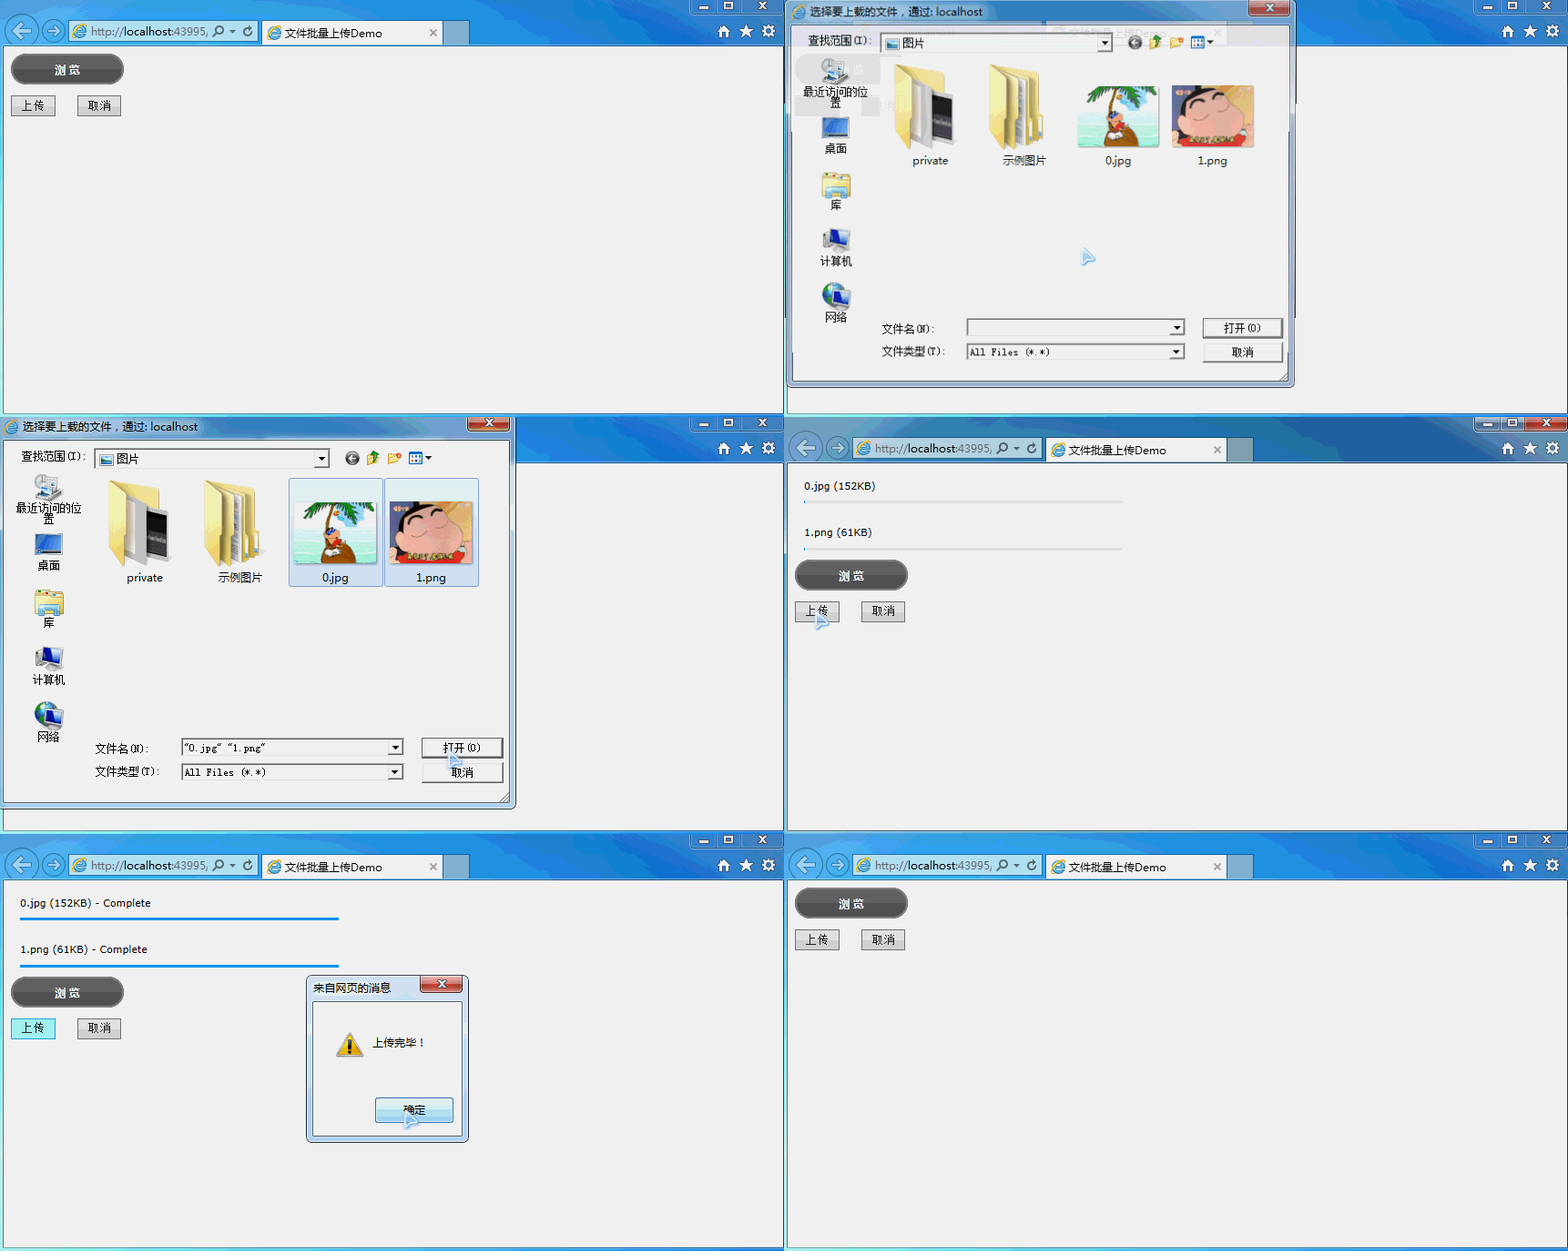
まず、レンダリングです。

 ページは次のとおりです
<%@ Page Language="C#" AutoEventWireup="true" CodeFile="Default.aspx.cs" Inherits="_Default" %>
<!DOCTYPE html>
<html xmlns="http://www.w3.org/1999/xhtml">
<head runat="server">
<meta http-equiv="Content-Type" content="text/html; charset=utf-8"/>
<title>文件批量上传Demo</title>
<!--引入Jquery-->
<script src="js/jquery-1.11.3.min.js"></script>
<!--引入uploadify-->
<script type="text/javascript" src="uploadify/jquery.uploadify.js"></script>
<link type="text/css" href="uploadify/uploadify.css" rel="stylesheet" />
<script type="text/javascript">
$(function () {
var guid = '<%=Request["guid"] %>';
var type = '<%=Request["type"] %>';
if (guid == null || guid == "") {
guid = newGuid();
}
if (type != null) {
type = type + '/';
}
$('#file_upload').uploadify({
'swf': 'uploadify/uploadify.swf', //FLash文件路径
'buttonText': '浏 览', //按钮文本
'uploader': 'uploadhandler.ashx?guid=' + guid, //处理ASHX页面
'formData': { 'folder': 'picture', 'isCover': 1 }, //传参数
'queueID': 'fileQueue', //队列的ID
'queueSizeLimit': 10, //队列最多可上传文件数量,默认为999
'auto': false, //选择文件后是否自动上传,默认为true
'multi': true, //是否为多选,默认为true
'removeCompleted': true, //是否完成后移除序列,默认为true
'fileSizeLimit': '0', //单个文件大小,0为无限制,可接受KB,MB,GB等单位的字符串值
'fileTypeDesc': 'All Files', //文件描述
'fileTypeExts': '*.*', //上传的文件后缀过滤器
'onQueueComplete': function (queueData) { //所有队列完成后事件
alert("上传完毕!");
},
'onError': function (event, queueId, fileObj, errorObj) {
alert(errorObj.type + ":" + errorObj.info);
},
'onUploadStart': function (file) {
},
'onUploadSuccess': function (file, data, response) { //一个文件上传成功后的响应事件处理
//var data = $.parseJSON(data);//如果data是json格式
//var errMsg = "";
}
});
});
function newGuid() {
var guid = "";
for (var i = 1; i <= 32; i++) {
var n = Math.floor(Math.random() * 16.0).toString(16);
guid += n;
if ((i == 8) || (i == 12) || (i == 16) || (i == 20))
guid += "-";
}
return guid;
}
//执行上传
function doUpload() {
$('#file_upload').uploadify('upload', '*');
}
</script>
</head>
<body>
<form id="form1" runat="server" enctype="multipart/form-data">
<p id="fileQueue" class="fileQueue"></p>
<p>
<input type="file" name="file_upload" id="file_upload" />
<p>
<input type="button" class="shortbutton" id="btnUpload" onclick="doUpload()" value="上传" />
<input type="button" class="shortbutton" id="btnCancelUpload" onclick="$('#file_upload').uploadify('cancel')" value="取消" />
</p>
<p id="p_show_files"></p>
</p>
</form>
</body>
</html>
 UploadHandler.ashxコード:
using System;
using System.Web;
using System.IO;
public class UploadHandler : IHttpHandler {

 public void ProcessRequest (HttpContext context) {
  context.Response.ContentType = "text/plain";
  context.Request.ContentEncoding = System.Text.Encoding.GetEncoding("UTF-8");
  context.Response.ContentEncoding = System.Text.Encoding.GetEncoding("UTF-8");
  context.Response.Charset = "UTF-8";
  if (context.Request.Files.Count > 0)
  {
   #region 获取上传路径
   string uploadFolder = GetUploadFolder();
   #endregion
   if (System.IO.Directory.Exists(uploadFolder))
   {//如果上传路径存在
    HttpPostedFile file = context.Request.Files["Filedata"];
    string filePath = Path.Combine(uploadFolder, file.FileName);
    file.SaveAs(filePath);
    context.Response.Write("0");
   }
   else
   {
    context.Response.Write("2");
   }
  }
 }

 public bool IsReusable {
  get {
   return false;
  }
 }
 /// <summary>
 /// 返回不带后缀的文件名
 /// </summary>
 /// <param name="fileName"></param>
 /// <returns></returns>
 public static string GetFirstFileName(string fileName)
 {
  return Path.GetFileNameWithoutExtension(fileName);
 }
 /// <summary>
 /// 获取上传目录
 /// </summary>
 /// <returns></returns>
 public static string GetUploadFolder()
 {
  string rootPath = HttpContext.Current.Server.MapPath("~");
  return Path.Combine(rootPath, "test");
 }
}
ファイルのアップロードと同様に、デフォルトでサイズ制限があります。デフォルトのリクエスト サイズは 30M で、IIS によって制限されます。たとえば、IIS を変更したくないが、このサイズ制限を突破したい場合は、1 GB のファイルをアップロードします。
これは、Web.config を変更することで実現できます。
<?xml version="1.0" encoding="utf-8"?>
<!--
 -->
<configuration>
 <system.web>
  <compilation debug="true" targetFramework="4.0" />
  <httpRuntime maxRequestLength="1073741824"/>
 </system.web>
 <!--用于设置文件上传的最大允许大小(单位:bytes)-->
 <system.webServer>
  <security>
  <requestFiltering>
   <!--修改服务器允许最大长度(1GB)-->
   <requestLimits maxAllowedContentLength="1073741824"/>
  </requestFiltering>
  </security>
 </system.webServer>

</configuration>
この記事の事例を読んだ後は、この方法を習得したと思います。さらに興味深い情報については、php 中国語 Web サイトの他の関連記事に注目してください。
推奨読書:
jQuery を使用すると、ブラウザーが相互にジャンプしてパラメーターを渡すことができます。詳しくは以上がjqueryプラグインuploadifyの使い方を詳しく解説の詳細内容です。詳細については、PHP 中国語 Web サイトの他の関連記事を参照してください。
声明:
この記事の内容はネチズンが自主的に寄稿したものであり、著作権は原著者に帰属します。このサイトは、それに相当する法的責任を負いません。盗作または侵害の疑いのあるコンテンツを見つけた場合は、admin@php.cn までご連絡ください。

