
ホームページ >ウェブフロントエンド >jsチュートリアル >render メソッドの使用方法の詳細な図による説明
render メソッドの使用方法の詳細な図による説明
- php中世界最好的语言オリジナル
- 2018-03-23 11:47:339989ブラウズ
今回はrenderメソッドの使い方を画像と文章で詳しく解説しますrenderメソッドを使用する際の注意点は何なのか、実際の事例を見てみましょう。
まず、公式 Web サイトのデモについての私の個人的な理解を話させてください:<!DOCTYPE html>
<html>
<head>
<title>Vue的render方法说明</title>
<script src="vue.js"></script>
</head>
<body>
<p id="app">
<child :level="1">
hello world
</child>
</p>
<script type="text/x-template" id="anchored-heading-template">
<p>
<h1 v-if="level === 1">
<slot></slot>
</h1>
<h2 v-if="level === 2">
<slot></slot>
</h2>
<h3 v-if="level === 3">
<slot></slot>
</h3>
<h4 v-if="level === 4">
<slot></slot>
</h4>
<h5 v-if="level === 5">
<slot></slot>
</h5>
<h6 v-if="level === 6">
<slot></slot>
</h6>
</p>
</script>
<script type="text/javascript">
Vue.component('child', {
template: '#anchored-heading-template',
props: {
level: {
type: Number,
required: true
}
}
});
new Vue({
el: "#app"
})
</script>
</body>
</html>テンプレートを使用してコンポーネントを定義する方法は非常に直感的ですが、これによりコードが長すぎます。 render メソッドを使用できます
<!DOCTYPE html>
<html>
<head>
<title>Vue的render方法说明</title>
<script src="vue.js"></script>
</head>
<body>
<p id="app">
<child :level="1">
hello world
</child>
</p>
<script type="text/javascript">
Vue.component('child', {
render:function (createElement) {
var body=this.$slots.default;
//this.$slots返回了一个组件分发下来的元素和内容
//this.$slots.default返回了具名的内容
return createElement(
'h'+this.level,
//this.level是利用v-bind注入到组件中的level
body
)
},
//因为vue中组件父组件无法向子组件注入内容。所以我们需要通过
//v-bind定义一个key,value向子组件注入内容。所要接收的值也需要在定义组件时的props属性中的定义一下
props:{
level:{
}
}
});
new Vue({
el: "#app"
})
</script>
</body>
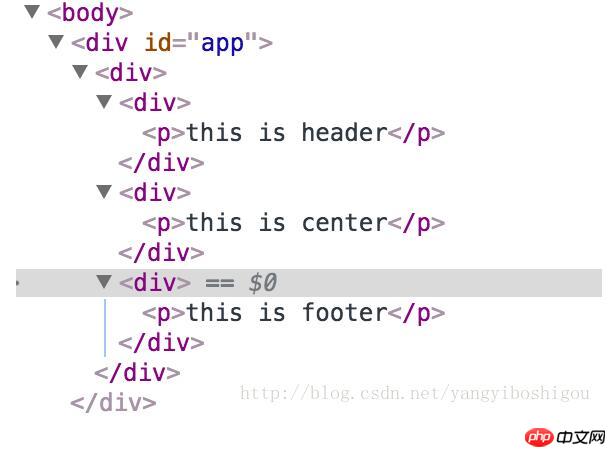
</html>以下は、distribution という名前のスロットのデモです: createElement の使用方法の紹介:
<!DOCTYPE html>
<html>
<head>
  <title>Vue的render方法说明</title>
  <script src="vue.js"></script>
</head>
<body>
<p id="app">
  <child>
    <p slot="header">this is header</p>
    <p slot="center">this is center</p>
    <p slot="footer">this is footer</p>
  </child>
</p>
<script type="text/javascript">
  Vue.component('child', {
    render: function (createElement) {
     var header=this.$slots.header;
     var center=this.$slots.center;
     var footer=this.$slots.footer;
//createElement第一个参数是标签名,第二个参数是值
     return createElement('p',[
       createElement('p', header),
       createElement('p', center),
       createElement('p', footer),
     ])
    }
  });
  new Vue({
    el: "#app"
  })
</script>
</body>
</html>
作成したコンポーネントのデモ結果は次のとおりです:
ユーザーの携帯電話番号を取得するためのWeChatミニプログラムを開発する方法
以上がrender メソッドの使用方法の詳細な図による説明の詳細内容です。詳細については、PHP 中国語 Web サイトの他の関連記事を参照してください。
声明:
この記事の内容はネチズンが自主的に寄稿したものであり、著作権は原著者に帰属します。このサイトは、それに相当する法的責任を負いません。盗作または侵害の疑いのあるコンテンツを見つけた場合は、admin@php.cn までご連絡ください。
前の記事:JS がブラウザ通信を実装する方法次の記事:JS がブラウザ通信を実装する方法