ホームページ >ウェブフロントエンド >jsチュートリアル >Angular2 は WeChat を模倣して 9 つの画像アップロードとプレビュー例の共有を実装します
Angular2 は WeChat を模倣して 9 つの画像アップロードとプレビュー例の共有を実装します
- 小云云オリジナル
- 2018-01-09 10:19:411930ブラウズ
この記事では、WeChat UI を模倣して 9 枚の画像をアップロードするためのサンプル コードを主に紹介します。必要な方はぜひ参考にしてください。
最近一番長く取り組んでいるのは、WeChatのUIを模倣した画像アップロード・サムネイル表示・プレビュー・削除機能で、1~9枚の写真が必要です。 WeChatの画像プレビュー・削除機能の実装方法を記録してみます。
スタイル--weui.css
このスタイルは、WeChat の公式 UI、weui.min.css を使用します (運用環境ではこの圧縮バージョンを使用することをお勧めします)。
ダウンロードアドレス weui.css/weui.min.css。
サンプル -- weui.io
WeChat 公式にはデモが付属しています: weui.io。
主な手順
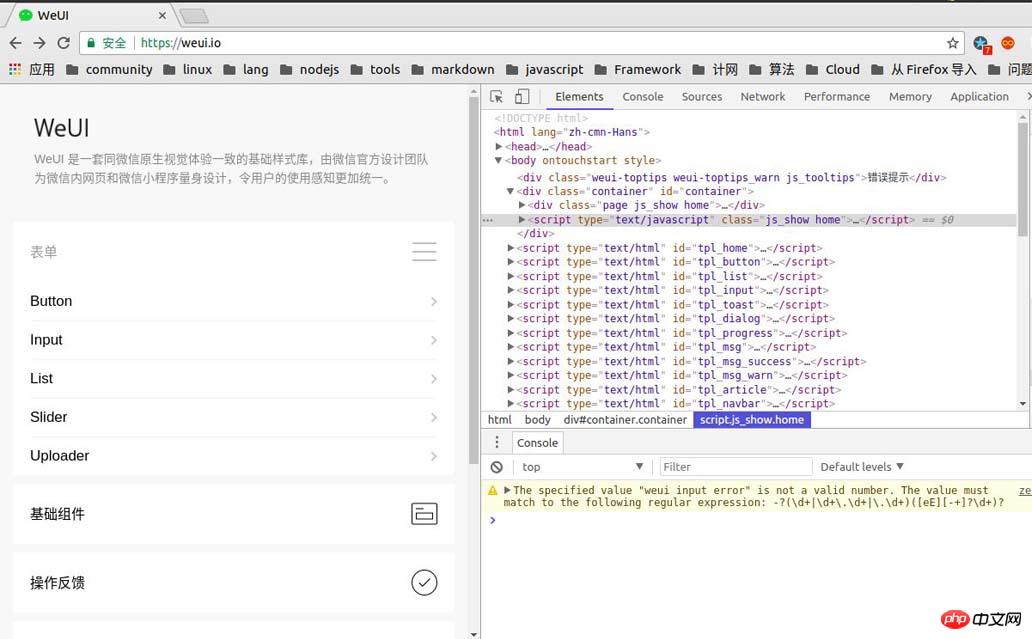
正式に各小さな機能の説明に入る前に、まず公式デモ -> weui.io に移動して、画像アップロード コンポーネントのスタイルとソース コードを表示します。
公式UIは以下の通りで、画像アップロード用のUIはUploaderにあります。

以下に示すように、画像アップロードのソース コードは review 要素から取得できます:
<p class="page uploader js_show">
  <p class="page__hd">
    <h1 class="page__title">Uploader</h1>
    <p class="page__desc">上传组件,一般配合<a class="link" href=" " rel="external nofollow" >组件Gallery</a >来使用。</p >
  </p>
  <p class="page__bd">
    <p class="weui-gallery" id="gallery" style="opacity: 0; display: none;">
      <span class="weui-gallery__img" id="galleryImg" style="background-image:url(./images/pic_160.png)"></span>
      <p class="weui-gallery__opr">
        <a href="javascript:" rel="external nofollow" rel="external nofollow" rel="external nofollow" class="weui-gallery__del">
          <i class="weui-icon-delete weui-icon_gallery-delete"></i>
        </a >
      </p>
    </p>

    <p class="weui-cells weui-cells_form">
      <p class="weui-cell">
        <p class="weui-cell__bd">
          <p class="weui-uploader">
            <p class="weui-uploader__hd">
              <p class="weui-uploader__title">图片上传</p >
              <p class="weui-uploader__info">0/2</p>
            </p>
            <p class="weui-uploader__bd">
              <ul class="weui-uploader__files" id="uploaderFiles">
                <li class="weui-uploader__file" style="background-image:url(./images/pic_160.png)"></li>
                <li class="weui-uploader__file" style="background-image:url(./images/pic_160.png)"></li>
                <li class="weui-uploader__file" style="background-image:url(./images/pic_160.png)"></li>
                <li class="weui-uploader__file weui-uploader__file_status" style="background-image:url(./images/pic_160.png)">
                  <p class="weui-uploader__file-content">
                    <i class="weui-icon-warn"></i>
                  </p>
                </li>
                <li class="weui-uploader__file weui-uploader__file_status" style="background-image:url(./images/pic_160.png)">
                  <p class="weui-uploader__file-content">50%</p>
                </li>
              </ul>
              <p class="weui-uploader__input-box">
                <input id="uploaderInput" class="weui-uploader__input" type="file" accept="image/*" multiple="">
              </p>
            </p>
          </p>
        </p>
      </p>
    </p>
  </p>
  <p class="page__ft j_bottom">
    <a href="javascript:home()" rel="external nofollow" >< img src="./images/icon_footer_link.png"></a >
  </p>
</p>
上記のコードを観察すると、外側のスタイルが直接適用され、コア関数ブロックは次のようになります。 :
画像のプレビュー/削除部分:
<p class="weui-gallery" id="gallery">
 <!--显示预览-->
 <span class="weui-gallery__img" id="galleryImg"></span>
 <!--删除按钮-->
 <p class="weui-gallery__opr">
  <a href="javascript:" rel="external nofollow" rel="external nofollow" rel="external nofollow" class="weui-gallery__del">
   <i class="weui-icon-delete weui-icon_gallery-delete"></i></a >
 </p>
</p>
图片缩略图列表部分:
 <ul class="weui-uploader__files" id="uploaderFiles">
  <!--每张图片是一个<li>标签-->
  <li class="weui-uploader__file" style="background-image:url(./images/pic_160.png)"></li>
</ul>
上記の準備で、機能をダウンロードして実装できます:
1. 画像のサムネイル表示
ソースコードを観察すると、次のことがわかります。各画像のサムネイルのコード構造は次のとおりです:
<li class="weui-uploader__file" style="background-image:url(./images/pic_160.png)"></li>
画像の URL を直接 background-img:url() 属性に入力し、スタイルは WeChat の公式 UI クラスを直接使用しました。 。したがって、これを実行できます。picturesUrl を保存する配列を作成して画像の URL を保存し、angular2 命令 *ngFor を使用して配列内の内容に基づいてサムネイル リストを動的に生成します (配列内の要素の形式に注意してください) photosUrl は: url (画像の URL)) :、画像 URL 配列の各要素は中間変数 img に順番に保存され、angular2 命令 [ngStyle] を使用して img の値に基づいてプレビュー画像を生成します。メインのコードは次のとおりです:
<ul class="weui-uploader__files picture-preview" id="uploaderFiles" >
<li *ngFor="let img of picturesUrl"
class="weui-uploader__file"
[ngStyle]="{'background-image':img}">
</li>
</ul>
<!--img实例-->
<!--'url(http://upload-images.jianshu.io/upload_images/7166236-ed8a621900728c39.jpg?imageMogr2/auto-orient/strip%7CimageView2/2/w/1240)'--> ts ファイル配列で画像を定義し、特定のシミュレーション データを指定します:
picturesUrl = [
  'url(http://upload-images.jianshu.io/upload_images/7166236-40ed406c30ef20a0.jpg?imageMogr2/auto-orient/strip%7CimageView2/2/w/1240)',
  'url(http://upload-images.jianshu.io/upload_images/7166236-d79762ed654342bf.jpg?imageMogr2/auto-orient/strip%7CimageView2/2/w/1240)',
  'url(http://upload-images.jianshu.io/upload_images/7166236-64e1a458e5e29d59.jpg?imageMogr2/auto-orient/strip%7CimageView2/2/w/1240)',
  'url(http://upload-images.jianshu.io/upload_images/7166236-9a267a540acb8688.jpg?imageMogr2/auto-orient/strip%7CimageView2/2/w/1240)',
  'url(http://upload-images.jianshu.io/upload_images/7166236-283f5687cb73eea8.jpg?imageMogr2/auto-orient/strip%7CimageView2/2/w/1240)',
 ]; //存储图片Url
 title = 'app';
 shown = false;  //是否显示预览,初始化为否
 selectImageUrl: string; //用于存放选中图片的url
2. 画像のプレビューを表示および非表示にします。プレビューはネイティブ メソッドを使用し、< through [ngStyle] ;p> スタイル全体を制御する必要があります。私は [ngStyle] ディレクティブと *ngIf ディレクティブを使用してサムネイルを生成するのと同じ方法を使用しました。これは、ユーザーのクリックを監視し、クリックしてプレビューを終了する機能を実装するために使用されます。主なコードは次のとおりです:
WeChat メソッド (ページをクリックして取得したコードによる):
<!--预览隐藏的样式-->
<p class="weui-gallery" id="gallery" style="opacity: 0; display: none;">

</p>

<!--预览显示的样式-->
<p class="weui-gallery" id="gallery" style="display: block; opacity: 1;">

</p>
私が使用したメソッド:
<p class="weui-gallery" id="gallery" style="display: block"
*ngIf="shown">
<span class="weui-gallery__img" (click)="touchEvent()" [ngStyle]="{'background-image':selectImageUrl}"></span>
<p class="weui-gallery__opr">
<a href="javascript:" rel="external nofollow" rel="external nofollow" rel="external nofollow" (click)="onDelete()" class="weui-gallery__del">
<i class="weui-icon-delete weui-icon_gallery-delete"></i>
</a >
</p>
</p>//点击缩略图显示预览
showPicture($event){
console.log("$event.target.backgroundImage:" + $event.target.style.backgroundImage);
this.selectImageUrl = $event.target.style.backgroundImage;
this.shown = true;
}
//点击屏幕退出预览
touchEvent(){
this.shown = false;
}
3 . 画像の削除
画像削除のメインコードは、画像プレビューのコードブロックにネストされており、削除された部分にクリックイベント ((click)="onDelete()") をバインドし、削除してプレビューを終了するだけです。クリックすると。
onDelete(){
  if(isUndefined(this.selectImageUrl)){
   console.log("查看图片预览,图片url未定义,this.selectImageUrl:" + this.selectImageUrl);
   return;
  }
 //正则去除URL中的双引号
  this.selectImageUrl = this.selectImageUrl.replace(/"/g,"");
  console.log("(this.picturesUrl.indexOf(this.selectImageUrl):"+this.picturesUrl.indexOf(this.selectImageUrl));
  //判断图片URL是否存在
  if(this.picturesUrl.indexOf(this.selectImageUrl)!== -1){
   this.picturesUrl.splice(this.picturesUrl.indexOf(this.selectImageUrl) , 1);
   setTimeout(()=>{
     this.shown = false;
    },
    20);
  }else{
   console.log("删除图片出错,获取URL或URL格式出错出错:" + this.selectImageUrl )
  }
 }
効果は次のとおりです:
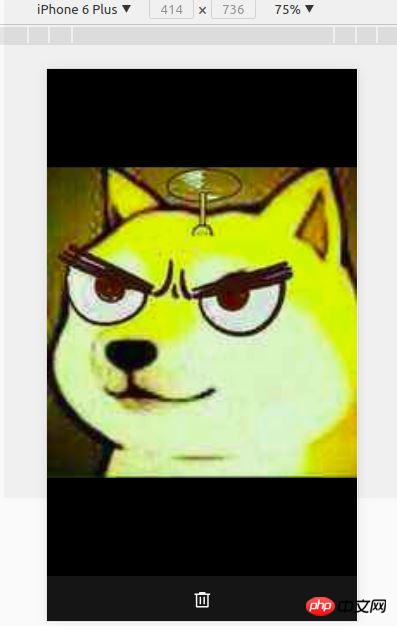
プレビューを表示: 
下の削除バーをクリックします:  関連するおすすめ:

PHPはiframeを使用して画像アップロードと表示を実装
PHPはWeChatアプレット画像アップロードサンプルコード共有を実装
以上がAngular2 は WeChat を模倣して 9 つの画像アップロードとプレビュー例の共有を実装しますの詳細内容です。詳細については、PHP 中国語 Web サイトの他の関連記事を参照してください。

