
ホームページ >ウェブフロントエンド >jsチュートリアル >ノードはテキスト生成画像を実装します
ノードはテキスト生成画像を実装します

- 小云云オリジナル
- 2018-01-02 10:47:484339ブラウズ
この記事では主にノードテキストを画像に変換するサンプルコードを紹介します。編集者が非常に良いと思ったので、参考として共有します。編集者をフォローして見てみましょう。皆さんのお役に立てれば幸いです。
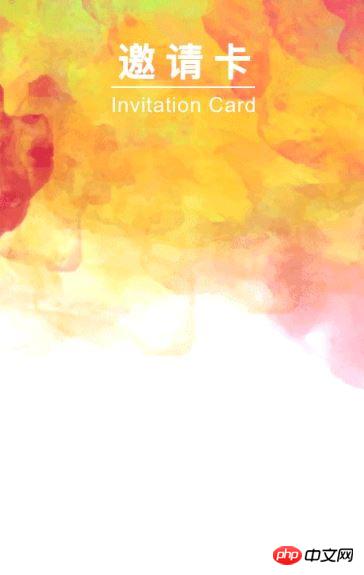
今日、上司はサーバー上で招待カードを生成するリクエストを出しました。簡単に言うと、これを次のように変更します:
Rubyを使っている友人が画像を変換するHTMLを作ったのですが、変換が遅すぎると言うので、落とし穴にハマってしまいました
 それで、寝る前にちょっといじって簡単な実装をしてみました
ソリューションのアイデア
テキストを SVG に変換 -> SVG を PNG に変換 -> 画像を結合
画像 Node.js の軽量クロスプラットフォーム画像エンコードおよびデコード ライブラリ、追加のインストール依存関係は必要ありません
text-to -svg テキストを svg に変換
svg2png svg を png 画像に変換
サンプルコード
-
'use strict';

const fs = require('fs');
const images = require('images');
const TextToSVG = require('text-to-svg');
const svg2png = require("svg2png");
const Promise = require('bluebird');

Promise.promisifyAll(fs);

const textToSVG = TextToSVG.loadSync('fonts/文泉驿微米黑.ttf');

const sourceImg = images('./i/webwxgetmsgimg.jpg');
const sWidth = sourceImg.width();
const sHeight = sourceImg.height();

const svg1 = textToSVG.getSVG('魏长青-人人讲App', {
 x: 0,
 y: 0,
 fontSize: 24,
 anchor: 'top',
});

const svg2 = textToSVG.getSVG('邀请您参加', {
 x: 0,
 y: 0,
 fontSize: 16,
 anchor: 'top',
});

const svg3 = textToSVG.getSVG('人人讲课程', {
 x: 0,
 y: 0,
 fontSize: 32,
 anchor: 'top',
});

Promise.coroutine(function* generateInvitationCard() {
 const targetImg1Path = './i/1.png';
 const targetImg2Path = './i/2.png';
 const targetImg3Path = './i/3.png';
 const targetImg4Path = './i/qrcode.jpg';
 const [buffer1, buffer2, buffer3] = yield Promise.all([
  svg2png(svg1),
  svg2png(svg2),
 svg2png(svg3),
 ]);

 yield Promise.all([
  fs.writeFileAsync(targetImg1Path, buffer1),
  fs.writeFileAsync(targetImg2Path, buffer2),
  fs.writeFileAsync(targetImg3Path, buffer3),
 ]);

 const target1Img = images(targetImg1Path);
 const t1Width = target1Img.width();
 const t1Height = target1Img.height();
 const offsetX1 = (sWidth - t1Width) / 2;
 const offsetY1 = 200;

 const target2Img = images(targetImg2Path);
 const t2Width = target2Img.width();
 const t2Height = target2Img.height();
 const offsetX2 = (sWidth - t2Width) / 2;
 const offsetY2 = 240;

 const target3Img = images(targetImg3Path);
 const t3Width = target3Img.width();
 const t3Height = target3Img.height();
 const offsetX3 = (sWidth - t3Width) / 2;
 const offsetY3 = 270;

 const target4Img = images(targetImg4Path);
 const t4Width = target4Img.width();
 const t4Height = target4Img.height();
 const offsetX4 = (sWidth - t4Width) / 2;
 const offsetY4 = 400;

 images(sourceImg)
 .draw(target1Img, offsetX1, offsetY1)
 .draw(target2Img, offsetX2, offsetY2)
 .draw(target3Img, offsetX3, offsetY3)
 .draw(target4Img, offsetX4, offsetY4)
 .save('./i/card.png', { quality : 90 });
})().catch(e => console.error(e));
Notes
私の場合、壊れたコンピューターで1回実行するのに500ミリ秒以上かかっただけで十分だと感じましたので、皆さんに参考にしていただけると幸いです
関連する推奨事項:
php。ネイティブ画像合成とテキスト生成画像
以上がノードはテキスト生成画像を実装しますの詳細内容です。詳細については、PHP 中国語 Web サイトの他の関連記事を参照してください。
声明:
この記事の内容はネチズンが自主的に寄稿したものであり、著作権は原著者に帰属します。このサイトは、それに相当する法的責任を負いません。盗作または侵害の疑いのあるコンテンツを見つけた場合は、admin@php.cn までご連絡ください。