


動的スクリプト
ページ内の <script> 要素を使用して、JavaScript コードをページに挿入できます。方法は 2 つあります。1 つは src 属性を通じて外部 JS ファイルを参照する方法、もう 1 つはこの要素を使用して js コードの一部を含める方法です。いわゆる動的スクリプトとは、ページが読み込まれるときにスクリプトが存在しないことを意味し、将来の特定の時点で DOM を変更することでスクリプトを動的に追加できます。 HTML 要素の操作と同様に、動的スクリプトを作成するには、外部ファイルを挿入する方法と JavaScript コードを直接挿入する方法の 2 つがあります。 </script>
次のコードなど、動的にロードされた外部 JavaScript コードはすぐに実行できます。
var script = document.createElement("script");
script.type = "text/javascript";
script.src = "demo.js";
document.body.appendChild(script);
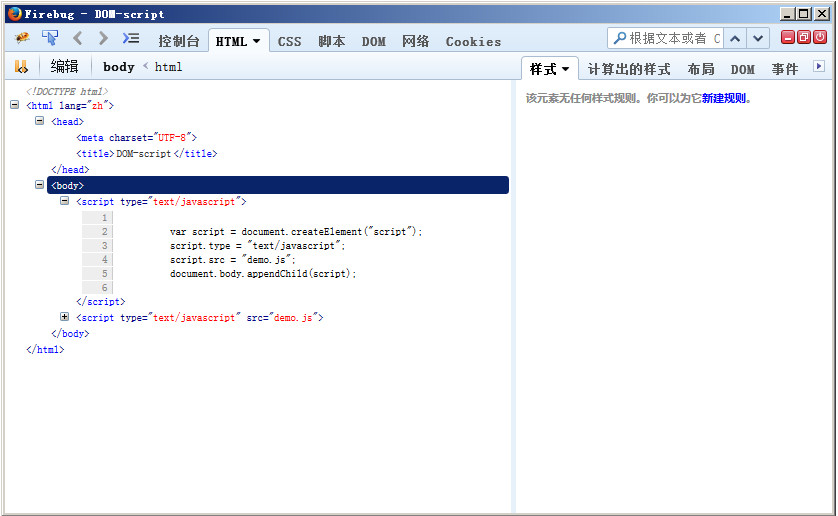
上記の結果からわかるように、上記のコードは
要素に <script> ノードを生成します。 <div class="jb51code"> <pre class='brush:php;toolbar:false;'> <script type="text/javascript" src="demo.js"></script> </pre> ページに <script> を追加するコードの最後の行が実行されるまでは、外部スクリプト ファイルはダウンロードされないことに注意してください。 <p> JavaScript コードをインラインで指定するもう 1 つの方法は次のとおりです。<p> <div class="jb51code"> <pre class='brush:php;toolbar:false;'> var script = document.createElement("script"); script.type = "text/javascript"; script.appendChild(document.createTextNode("function fn1(){alert('hello wolrd!')} fn1();")); document.body.appendChild(script); </pre> <p style="text-align: center"><img src="/static/imghwm/default1.png" data-src="http://files.jb51.net/file_images/article/201512/2015128143006554.jpg?2015118143027?x-oss-process=image/resize,p_40" class="lazy" id="theimg" alt="" baiduimageplusrect="null" baiduimageplusstatus="2" onclick="window.open(this.src)" /> 上記のコードは、<body> 要素に JavaScript コードを挿入します。 <p> <div class="jb51code"> <pre class='brush:php;toolbar:false;'> <script type="text/javascript"> function fn1(){alert('hello wolrd!')} fn1(); </script> </pre>上記のコードを実行すると、プロンプト ボックスがポップアップ表示され、「hello world!」というテキストが表示されます。 <p>Firefox、Safari、Chrome、Opera ブラウザでは、上記で操作した DOM コードは正常に実行できます。ただし、古いバージョンの IE ブラウザでは、これらのコードによりエラーが発生します。古いバージョンの IE ブラウザは、<script> 要素を特別な要素として扱い、DOM がその子ノードにアクセスすることを許可しません。ただし、JavaScript コードは、 のように、<script> 要素の text 属性を使用して指定できます。 <p> <div class="jb51code"> <pre class='brush:php;toolbar:false;'> var script = document.createElement("script"); script.type = "text/javascript"; script.text("function fn1(){alert('hello wolrd!')} fn1();"); document.body.appendChild(script); </pre>上記のようにコードを変更すると、IE、Firefox、Safari3.0、Chrome、Opera ブラウザで実行できるようになります。 Safari 3.0 より前のブラウザでは text 属性を正しく実行できませんが、テキスト ノードを使用してコードを指定できます。したがって、古いバージョンのブラウザをサポートする必要がある場合は、次のようなコードを書くことができます: <p> <div class="jb51code"> <pre class='brush:php;toolbar:false;'> var script = document.createElement("script"); script.type = "text/javascript"; var code = "function fn1(){alert('hello wolrd!')} fn1();"; try{ script.appendChild(document.createTextNode(code)); }catch(e){ script.text = code; }</pre>上記のコードは、古いバージョンの IE を除き、他のブラウザーがこのメソッドをサポートしているため、最初に標準の DOM テキスト ノード メソッドを試みます。このコード行で例外がスローされた場合、それは古いバージョンの IE であり、text 属性を使用する必要があることを意味します。 <p>関数にスクリプトを動的に追加するコードをカプセル化し、さまざまなパラメータを通じてさまざまなスクリプトを動的にロードできます。 <p> <div class="jb51code"> <pre class='brush:php;toolbar:false;'> function loadScript(code){ var script = document.createElement("script"); script.type = "text/javascript"; try{ script.appendChild(document.createTextNode(code)); }catch(e){ script.text = code; } document.body.appendChild(script); } </pre>この関数を呼び出すには、次のように実行できます: <p> <div class="jb51code"> <pre class='brush:php;toolbar:false;'> loadScript("function fn1(){alert('hello wolrd!')}"); </pre>この方法でロードされたコードはグローバル スコープで実行され、スクリプトの実行後すぐに使用できるようになります。実際、この方法でコードを実行することは、同じ文字列をグローバル スコープの eval() 関数に渡すことと同じです。 <p><p>ダイナミックスタイル<strong><span style="color: #0000ff"> 通常、CSS スタイルを HTML ページに含めることができる要素は 2 つあります。1 つは外部ソースからのファイルを含めるために使用される <style> 要素です。埋め込みスタイルを指定します。動的スクリプトと同様に、動的スタイルは、ページの読み込み時には存在しないスタイルです。動的スタイルは、ページの読み込みが完了した後にページに動的に追加されるスクリプトです。たとえば、次の例: <p> <div class="jb51code"> <pre class='brush:php;toolbar:false;'> var link = document.createElement("link"); link.rel = "stylesheet" link.type = "text/css"; link.href = "styles.css"; var head = document.getElementsByTagName("head")[0];</pre><p style="text-align: center"> <img src="/static/imghwm/default1.png" data-src="http://files.jb51.net/file_images/article/201512/2015128143341450.jpg?2015118143357?x-oss-process=image/resize,p_40" class="lazy" id="theimg" alt="" baiduimageplusrect="null" baiduimageplusstatus="2" onclick="window.open(this.src)" />上記のコードは、すべての主要なブラウザで正常に実行できます。すべてのブラウザで一貫した動作を保証するには、<link> 要素を <body> 要素に追加する必要があることに注意してください。 <p>もう 1 つ注意すべき点は、外部スタイル ファイルの読み込みプロセスは非同期であるということです。つまり、スタイルの読み込みと JavaScript コードの実行のプロセスに固定された順序はありません。 <p>スタイルを定義するもう 1 つの方法は、<style> 要素を使用して埋め込み CSS スタイルを含めることです。たとえば、次のコード: <p> <div class="jb51code"> <pre class='brush:php;toolbar:false;'> var style = document.createElement("style"); style.type = "text/css"; style.appendChild(document.createTextNode("body{background:#f00;}")); var head = document.getElementsByTagName("head")[0]; head.appendChild(link); </pre>上記のコードを実行すると、次のノードを <head> 要素に動的に追加できます。 <p> <p>以上的代码可以在Firefox、Safari、Chrome和Opera浏览器中正常运行,在旧版本的IE浏览器中会报错。旧版本的IE浏览器会将<style>元素看做一个特殊的节点,不允许访问它的子节点。要解决旧版本IE的问题,就是访问元素的styleSheet属性,该属性又有一个cssText属性,可以接受CSS代码。例如下面的代码: <div class="jb51code"> <pre class='brush:php;toolbar:false;'> var style = document.createElement("style"); style.type = "text/css"; try{ style.appendChild(document.createTextNode("body{background:#f00;}")); }catch(e){ style.styleSheet.cssText = "body{background:#f00;}"; } </pre> <p>同样,我们也可以将动态添加样式的代码封装到一个函数中,通过不同的参数来动态加载不同的样式。 <div class="jb51code"> <pre class='brush:php;toolbar:false;'> function loadStyle(code){ var style = document.createElement("style"); style.type = "text/css"; try{ style.appendChild(document.createTextNode(code)); }catch(e){ style.styleSheet.cssText = code; } var head = document.getElementsByTagName("head")[0]; head.appendChild(style); } </pre> <p><strong><span style="color: #0000ff">JavaScript对表格的操作 <p>在JavaScript中,为了使我们能够方便的构建表格,HTML DOM为表格的<table>、<tbody>和<tr>提供了一些属性和方法。 <p>表格的<table>元素的属性和方法有: <p>caption:保存<caption>元素的引用的指针。<br /> tBodies:是一个<tbody>元素的HTMLCollection。<br /> tFoot:保存<tfoot>元素的引用的指针。<br /> tHead:保存<thead>元素的引用的指针。<br /> rows:是表格中所有行的HTMLCollection。<br /> createTHead():创建<thead>元素,将它放入表格中,并返回其引用。<br /> createTFoot():创建<tfoot>元素,将它放入表格中,并返回其引用。<br /> createCaption():创建<caption>元素,将它放入表格中,并返回其引用。<br /> deleteTHead():删除<thead>元素。<br /> deleteTFoot():删除<tfoot>元素<br /> deleteCaption():删除<caption>元素<br /> deleteRow(pos):删除指定位置的表格行。<br /> insertRow(pos):向rows集合中指定位置插入一行。 <p><span style="color: #ff0000"><strong>表格的<tbody>元素的属性和方法有: <p><br /> <p>rows:保存着<tbody>元素中行的HTMLCollection。<br /> deleteRow(pos):删除指定位置的表格行。<br /> insertRow(pos):向rows集合中指定位置插入一行。 <p><strong><span style="color: #ff0000">表格的<tr>元素的属性和方法有: <p>cells:保存着<tr>元素中单元格的HTMLCollection。<br /> deleteCell(pos):删除指定位置的单元格。<br /> insertCell(pos):向cells集合中指定位置插入一个单元格,并返回新插入单元格的引用。 <p>使用上面的这些属性和方法,可以使我们轻松的使用JavaScript来创建表格,例如下面的代码: <div class="jb51code"> <pre class='brush:php;toolbar:false;'> //创建表格 vatabldocument.createElement("table"); table.borde1; table.widt"100%"; //创建tbody vatboddocument.createElement("tbody"); table.appendChild(tbody); //创建第一个表格行 tbody.insertRow(0); tbody.rows[0].insertCell(0); tbody.rows[0].cells[0].appendChild(document.createTextNode("单元1-1")); tbody.rows[0].insertCell(1); tbody.rows[0].cells[1].appendChild(document.createTextNode("单元2-1")); //创建第二个表格行 tbody.insertRow(1); tbody.rows[1].insertCell(0); tbody.rows[1].cells[0].appendChild(document.createTextNode("单元1-2")); tbody.rows[1].insertCell(1); tbody.rows[1].cells[1].appendChild(document.createTextNode("单元2-2")); //将表格添加到文档中 document.body.appendChild(table) </pre> <p>使用上面的代码可以动态的在页面中创建一个表格。其中在创建表格行的时候,通过<tbody>元素调用了insertCell()方法,并传入参数0(表示将插入的行放在什么位置上)。执行了这一行代码后,会自动创建一个表格行,并将它插入到<tbody>元素的0位置上,此时就可以通过tbody.rows[0]来引用新插入的行。 <p>创建单元格的方式也与创建表格行的方式相同。通过<tr>元素来调用insertCell()方法,并传入要放置单元格的位置。然后就可以通过tbody.rows[0].cells[0]来引用新插入的单元格。 <p>关于NodeList <p>理解NodeList和NamedNodeMap、HTMLCollection是从整体上理解DOM的关键所在。这3个集合都是动态的,也就是说,每当文档结构发生了变化,它们始终都会保存最新的信息。从本质上来说,所有的NodeList对象都是在访问DOM文档时实时运行的查询。例如下面的代码会导致死循环的出现: <div class="jb51code"> <pre class='brush:php;toolbar:false;'> var divs = document.getElementsByTagName("div"); for(var i = 0; i < divs.length; i++){ var div = document.createElement("div"); document.body.appendChild(div); } </pre> <p>上面的代码首先获取了所有<div>元素的HTMLCollection,保存在一个变量中。由于这个集合是动态的,所以只要有新的<div>被添加到页面中,新的<div>元素就会被添加到这个集合中。这样导致的后果是div.length值是不断变化的,每次循环会在页面中添加一个<div>元素,length的值也会递增。这样i < divs.length条件就永远不会成立,导致死循环的发生。 <p>如果我们要迭代一个NodeList,最好将length属性初始化为第二个变量,然后将迭代器和这个变量做比较,例如: <div class="jb51code"> <pre class='brush:php;toolbar:false;'> var divs = document.getElementsByTagName("div"); for(var i = 0,len = divs.length; i < len; i++){ var div = document.createElement("div"); document.body.appendChild(div); } </pre> <p>由于len中保存了divs.length在循环开始时的一个快照,因此会避免死循环情况的发生。 <p>更多示例: <div class="jb51code"> <pre class='brush:php;toolbar:false;'> function sAlert(str){ var msgw,msgh,bordercolor; msgw=400;//提示窗口的宽度 msgh=100;//提示窗口的高度 titleheight=25 //提示窗口标题高度 bordercolor="#c51100";//提示窗口的边框颜色 titlecolor="#c51100";//提示窗口的标题颜色 var sWidth,sHeight; sWidth=screen.width; sHeight=screen.height; var bgObj=document.createElement("div"); bgObj.setAttribute('id','bgDiv'); bgObj.style.position="absolute"; bgObj.style.top="0"; bgObj.style.background="#cccccc"; bgObj.style.filter="progid:DXImageTransform.Microsoft.Alpha(style=3,opacity=25,finishOpacity=75"; bgObj.style.opacity="0.6"; bgObj.style.left="0"; bgObj.style.width=sWidth + "px"; bgObj.style.height=sHeight + "px"; bgObj.style.zIndex = "10000"; document.body.appendChild(bgObj); var msgObj=document.createElement("div") msgObj.setAttribute("id","msgDiv"); msgObj.setAttribute("align","center"); msgObj.style.background="white"; msgObj.style.border="1px solid " + bordercolor; msgObj.style.position = "absolute"; msgObj.style.left = "50%"; msgObj.style.top = "50%"; msgObj.style.font="12px/1.6em Verdana, Geneva, Arial, Helvetica, sans-serif"; msgObj.style.marginLeft = "-225px" ; msgObj.style.marginTop = -75+document.documentElement.scrollTop+"px"; msgObj.style.width = msgw + "px"; msgObj.style.height =msgh + "px"; msgObj.style.textAlign = "center"; msgObj.style.lineHeight ="25px"; msgObj.style.zIndex = "10001"; msgObj.style.position = "absolute"; var box=document.getElementById(str); var title=document.createElement("h4"); title.setAttribute("id","msgTitle"); title.setAttribute("align","right"); title.style.margin="0"; title.style.padding="3px"; title.style.background=bordercolor; title.style.filter="progid:DXImageTransform.Microsoft.Alpha(startX=20, startY=20, finishX=100, finishY=100,style=1,opacity=75,finishOpacity=100);"; title.style.opacity="0.75"; title.style.border="1px solid " + bordercolor; title.style.height="18px"; title.style.font="12px Verdana, Geneva, Arial, Helvetica, sans-serif"; title.style.color="white"; title.style.cursor="pointer"; title.onmousedown=function(){startDrag(this,'msgDiv')}; title.onmouseup=function(){stopDrag(this,'msgDiv')}; title.onmousemove=function(){drag('msgDiv')}; var closer=document.createElement("div"); closer.onclick=function(){ CloseReturn(); document.body.appendChild(box); box.style.display = "none"; document.body.removeChild(bgObj); document.getElementById("msgDiv").removeChild(title); document.body.removeChild(msgObj); }; closer.innerHTML="确定"; document.body.appendChild(msgObj); document.getElementById("msgDiv").appendChild(title); document.getElementById("msgTitle").appendChild(closer); box.style.display="inline"; document.getElementById("msgDiv").appendChild(box); ShowReturn(); }</pre> <p>html dom樹: <p style="text-align: center"><img src="/static/imghwm/default1.png" data-src="http://files.jb51.net/file_images/article/201512/2015128143651942.gif?201511814375?x-oss-process=image/resize,p_40" class="lazy" id="theimg" onclick="window.open(this.src)" baiduimageplusstatus="2" baiduimageplusrect="null" alt="" /></script>
 CおよびJavaScript:接続が説明しましたApr 23, 2025 am 12:07 AM
CおよびJavaScriptは、WebAssemblyを介して相互運用性を実現します。 1)CコードはWebAssemblyモジュールにコンパイルされ、JavaScript環境に導入され、コンピューティングパワーが強化されます。 2)ゲーム開発では、Cは物理エンジンとグラフィックスレンダリングを処理し、JavaScriptはゲームロジックとユーザーインターフェイスを担当します。
 Webサイトからアプリまで:JavaScriptの多様なアプリケーションApr 22, 2025 am 12:02 AM
JavaScriptは、Webサイト、モバイルアプリケーション、デスクトップアプリケーション、サーバー側のプログラミングで広く使用されています。 1)Webサイト開発では、JavaScriptはHTMLおよびCSSと一緒にDOMを運用して、JQueryやReactなどのフレームワークをサポートします。 2)ReactNativeおよびIonicを通じて、JavaScriptはクロスプラットフォームモバイルアプリケーションを開発するために使用されます。 3)電子フレームワークにより、JavaScriptはデスクトップアプリケーションを構築できます。 4)node.jsを使用すると、JavaScriptがサーバー側で実行され、高い並行リクエストをサポートします。
 Python vs. JavaScript:ユースケースとアプリケーションと比較されますApr 21, 2025 am 12:01 AM
Pythonはデータサイエンスと自動化により適していますが、JavaScriptはフロントエンドとフルスタックの開発により適しています。 1. Pythonは、データ処理とモデリングのためにNumpyやPandasなどのライブラリを使用して、データサイエンスと機械学習でうまく機能します。 2。Pythonは、自動化とスクリプトにおいて簡潔で効率的です。 3. JavaScriptはフロントエンド開発に不可欠であり、動的なWebページと単一ページアプリケーションの構築に使用されます。 4. JavaScriptは、node.jsを通じてバックエンド開発において役割を果たし、フルスタック開発をサポートします。
 JavaScript通訳者とコンパイラにおけるC/Cの役割Apr 20, 2025 am 12:01 AM
CとCは、主に通訳者とJITコンパイラを実装するために使用されるJavaScriptエンジンで重要な役割を果たします。 1)cは、JavaScriptソースコードを解析し、抽象的な構文ツリーを生成するために使用されます。 2)Cは、Bytecodeの生成と実行を担当します。 3)Cは、JITコンパイラを実装し、実行時にホットスポットコードを最適化およびコンパイルし、JavaScriptの実行効率を大幅に改善します。
 JavaScript in Action:実際の例とプロジェクトApr 19, 2025 am 12:13 AM
現実世界でのJavaScriptのアプリケーションには、フロントエンドとバックエンドの開発が含まれます。 1)DOM操作とイベント処理を含むTODOリストアプリケーションを構築して、フロントエンドアプリケーションを表示します。 2)node.jsを介してRestfulapiを構築し、バックエンドアプリケーションをデモンストレーションします。
 JavaScriptとWeb:コア機能とユースケースApr 18, 2025 am 12:19 AM
Web開発におけるJavaScriptの主な用途には、クライアントの相互作用、フォーム検証、非同期通信が含まれます。 1)DOM操作による動的なコンテンツの更新とユーザーインタラクション。 2)ユーザーエクスペリエンスを改善するためにデータを提出する前に、クライアントの検証が実行されます。 3)サーバーとのリフレッシュレス通信は、AJAXテクノロジーを通じて達成されます。
 JavaScriptエンジンの理解:実装の詳細Apr 17, 2025 am 12:05 AM
JavaScriptエンジンが内部的にどのように機能するかを理解することは、開発者にとってより効率的なコードの作成とパフォーマンスのボトルネックと最適化戦略の理解に役立つためです。 1)エンジンのワークフローには、3つの段階が含まれます。解析、コンパイル、実行。 2)実行プロセス中、エンジンはインラインキャッシュや非表示クラスなどの動的最適化を実行します。 3)ベストプラクティスには、グローバル変数の避け、ループの最適化、constとletsの使用、閉鎖の過度の使用の回避が含まれます。
 Python vs. JavaScript:学習曲線と使いやすさApr 16, 2025 am 12:12 AM
Pythonは、スムーズな学習曲線と簡潔な構文を備えた初心者により適しています。 JavaScriptは、急な学習曲線と柔軟な構文を備えたフロントエンド開発に適しています。 1。Python構文は直感的で、データサイエンスやバックエンド開発に適しています。 2。JavaScriptは柔軟で、フロントエンドおよびサーバー側のプログラミングで広く使用されています。


ホットAIツール

Undresser.AI Undress
リアルなヌード写真を作成する AI 搭載アプリ

AI Clothes Remover
写真から衣服を削除するオンライン AI ツール。

Undress AI Tool
脱衣画像を無料で

Clothoff.io
AI衣類リムーバー

Video Face Swap
完全無料の AI 顔交換ツールを使用して、あらゆるビデオの顔を簡単に交換できます。

人気の記事
ホットツール

VSCode Windows 64 ビットのダウンロード
Microsoft によって発売された無料で強力な IDE エディター

MinGW - Minimalist GNU for Windows
このプロジェクトは osdn.net/projects/mingw に移行中です。引き続きそこでフォローしていただけます。 MinGW: GNU Compiler Collection (GCC) のネイティブ Windows ポートであり、ネイティブ Windows アプリケーションを構築するための自由に配布可能なインポート ライブラリとヘッダー ファイルであり、C99 機能をサポートする MSVC ランタイムの拡張機能が含まれています。すべての MinGW ソフトウェアは 64 ビット Windows プラットフォームで実行できます。

mPDF
mPDF は、UTF-8 でエンコードされた HTML から PDF ファイルを生成できる PHP ライブラリです。オリジナルの作者である Ian Back は、Web サイトから「オンザフライ」で PDF ファイルを出力し、さまざまな言語を処理するために mPDF を作成しました。 HTML2FPDF などのオリジナルのスクリプトよりも遅く、Unicode フォントを使用すると生成されるファイルが大きくなりますが、CSS スタイルなどをサポートし、多くの機能強化が施されています。 RTL (アラビア語とヘブライ語) や CJK (中国語、日本語、韓国語) を含むほぼすべての言語をサポートします。ネストされたブロックレベル要素 (P、DIV など) をサポートします。

PhpStorm Mac バージョン
最新(2018.2.1)のプロフェッショナル向けPHP統合開発ツール

SublimeText3 英語版
推奨: Win バージョン、コードプロンプトをサポート!

