ホームページ >ウェブフロントエンド >jsチュートリアル >JSとcanvasを使ってgifアニメーションを停止・再生する方法を詳しく解説
JSとcanvasを使ってgifアニメーションを停止・再生する方法を詳しく解説
- 巴扎黑オリジナル
- 2017-09-02 14:12:052176ブラウズ
この記事では、JS と Canvas を使用して gif アニメーションの停止と再生のコードを実装する方法を主に紹介します。必要な場合は非常に実用的です。
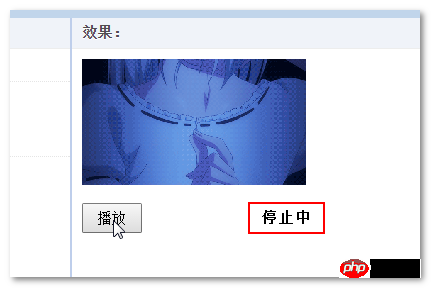
HTML5 の Canvas は画像情報を読み取り、現在の画像を描画できます。したがって、画像モザイク、ぼかし、色値フィルタリングなどの多くの画像特殊効果を実現できます。ここではそれほど複雑にする必要はありません。画像を読み取って再描画するだけです。

HTML コード:
<img id="testImg" src="xxx.gif" width="224" height="126">
<p><input type="button" id="testBtn" value="停止"></p>
JS コード:
if ('getContext' in document.createElement('canvas')) {
 HTMLImageElement.prototype.play = function() {
  if (this.storeCanvas) {
   // 移除存储的canvas
   this.storeCanvas.parentElement.removeChild(this.storeCanvas);
   this.storeCanvas = null;
   // 透明度还原
   image.style.opacity = '';
  }
  if (this.storeUrl) {
   this.src = this.storeUrl;
  }
 };
 HTMLImageElement.prototype.stop = function() {
  var canvas = document.createElement('canvas');
  // 尺寸
  var width = this.width, height = this.height;
  if (width && height) {
   // 存储之前的地址
   if (!this.storeUrl) {
    this.storeUrl = this.src;
   }
   // canvas大小
   canvas.width = width;
   canvas.height = height;
   // 绘制图片帧(第一帧)
   canvas.getContext('2d').drawImage(this, 0, 0, width, height);
   // 重置当前图片
   try {
    this.src = canvas.toDataURL("image/gif");
   } catch(e) {
    // 跨域
    this.removeAttribute('src');
    // 载入canvas元素
    canvas.style.position = 'absolute';
    // 前面插入图片
    this.parentElement.insertBefore(canvas, this);
    // 隐藏原图
    this.style.opacity = '0';
    // 存储canvas
    this.storeCanvas = canvas;
   }
  }
 };
}

var image = document.getElementById("testImg"),
 button = document.getElementById("testBtn");

if (image && button) {
 button.onclick = function() {
  if (this.value == '停止') {
   image.stop();
   this.value = '播放';
  } else {
   image.play();
   this.value = '停止';
  }
 };
}
上記のコードは詳細にはテストされておらず、エクスペリエンスに関する潜在的な問題 (IE のフラッシュ) には特に対処されていません(影響原理) を使用します)、実際に使用する場合は、自分で微調整する必要があります。
短所:
1. IE9+ のサポート。 IE7/IE8はキャンバスをサポートしていません。
2. 停止できるのは gif だけであり、実際の一時停止はできません。 Canvasで取得するGIF画像情報は最初のフレームの情報なのでそれ以降は取得できないようです。停止ではなく一時停止を実現するには、さらなる研究が必要です。方法がある場合は、共有していただければ幸いです。
以上がJSとcanvasを使ってgifアニメーションを停止・再生する方法を詳しく解説の詳細内容です。詳細については、PHP 中国語 Web サイトの他の関連記事を参照してください。
声明:
この記事の内容はネチズンが自主的に寄稿したものであり、著作権は原著者に帰属します。このサイトは、それに相当する法的責任を負いません。盗作または侵害の疑いのあるコンテンツを見つけた場合は、admin@php.cn までご連絡ください。

