ホームページ >Java >&#&チュートリアル >javaWeb 開発プロセスの細部の要約と共有 (1)
javaWeb 開発プロセスの細部の要約と共有 (1)
- 黄舟オリジナル
- 2017-03-17 11:08:301838ブラウズ
これが freemark と bootstrap との最初の接触です。使用中に、注意が必要な多くの細かい点に遭遇します。このブログ記事では、使用中に遭遇した問題を継続的にまとめていきます。
1.フリーマーク時間設定
<span class="control-label ">${content.createTime?string('yyyy-MM-dd HH:mm:ss')}</span>2.if /listタグの使用
<#if questionAnswers??>
<#list questionAnswers as answers>
<input type="hidden" name="questionAnswerId" id="questionAnswerId" value="${answers.questionAnswerId}"/>
<p style="
padding
: inherit;b
ord
er-
top
:1px solid #808080">
<p class=" control-label" id="answer" >${answers.answerContent}</p>
<p class="control-label">
<span class="control-label" > 回答者:${answers.createUserName}</span>
<span class=" control-label">${answers.createTime?string('yyyy-MM-dd HH:mm:ss')}</span>
</p>
</p>
</#list>
</#if>3.pコンテンツを追加
4.確認ボックス
function
delete
QuestionAnswers(contentIds){
confirmOptions.content ="请确认是否
删除
?";
confirmOptions.confirm = function (){
$.ajax({
type: "POST",
cache
: false,
data:{contentIds:contentIds.join(",")},//后台
传值
url: "/pmms/question/verify/delete",
success: function (
json
Object
 , success , response) {
$('#questionTable').bootstrapTable('refresh');
toastr.success('删除成功!', '成功提醒');
},
error: function (xhr, ajaxOptions, thrownError) {
toastr.error(thrownError, '失败提醒');
}
});
}
$.confirm(confirmOptions);
}
5. フロントエンドデバッグメソッド
フロントエンドデバッグメソッド
6. freemarkはページをポップアップします
<a href="#add" class="btn green btn-sm"data-toggle="modal"id="addTem"> 新增 </a>
必要なページを含めてくださいページ内にポップアップ表示します
<#include "window_add_edit.ftl"/>面 このページのIDをADDとし、AタグのHREFを
$('#addSummernote').summernote({
lang
: 'zh-CN',
height
: 100,
focus: true,
airPopover: [
   ['color', ['color']],
   ['font', ['bold', 'underline', '
clear
']],
   ['para', ['ul', 'paragraph']],
   ['table', ['table']],
   ['insert', ['link', 'picture']]
]
});
に対応させたい。
スタイルは、データベースに保存されているタグに二重引用符を使用します。 。
8. ブートストラップの時間が長い場合、

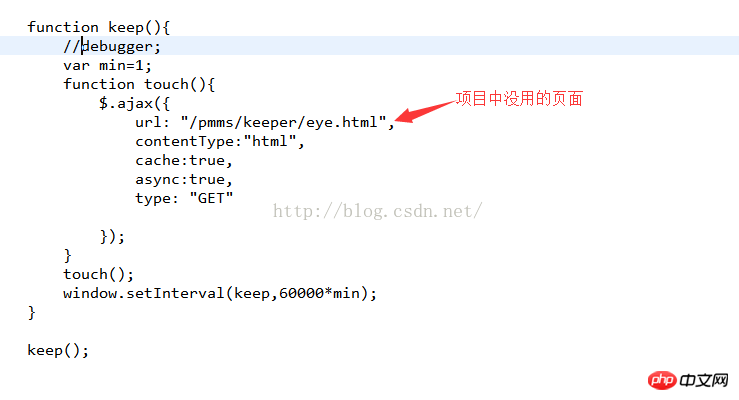
9. セッションを防ぐためにページを自動的に更新します。失敗
以上がjavaWeb 開発プロセスの細部の要約と共有 (1)の詳細内容です。詳細については、PHP 中国語 Web サイトの他の関連記事を参照してください。
声明:
この記事の内容はネチズンが自主的に寄稿したものであり、著作権は原著者に帰属します。このサイトは、それに相当する法的責任を負いません。盗作または侵害の疑いのあるコンテンツを見つけた場合は、admin@php.cn までご連絡ください。

