ホームページ >WeChat アプレット >ミニプログラム開発 >WeChatアプレット開発におけるアルバム選択と写真撮影のサンプルコードを詳しく解説
WeChatアプレット開発におけるアルバム選択と写真撮影のサンプルコードを詳しく解説
- 高洛峰オリジナル
- 2017-03-16 15:05:002984ブラウズ
この記事は主にWeChatアプレット開発のためのアルバム選択とカメラ選択サンプルコードに関する関連情報を詳しく説明していますので、必要な友人は参考にしてください
WeChatアプレットでの写真とカメラ選択の詳細な説明
前書き:
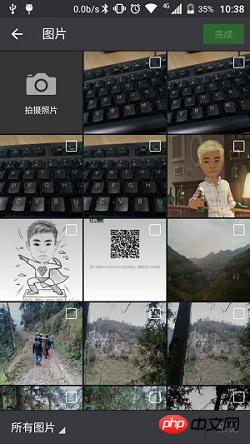
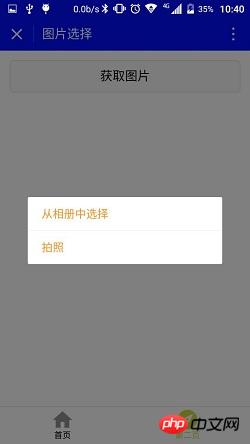
アプレットで取得写真は2つの方法で取得できます。1つ目は、WeChat内で直接開く方法で、最初のフレームは写真を撮影します。は、次のように、写真を撮るかアルバムから選択するかをユーザーに尋ねるポップアップ ボックスです。 1 つずつ見てください。
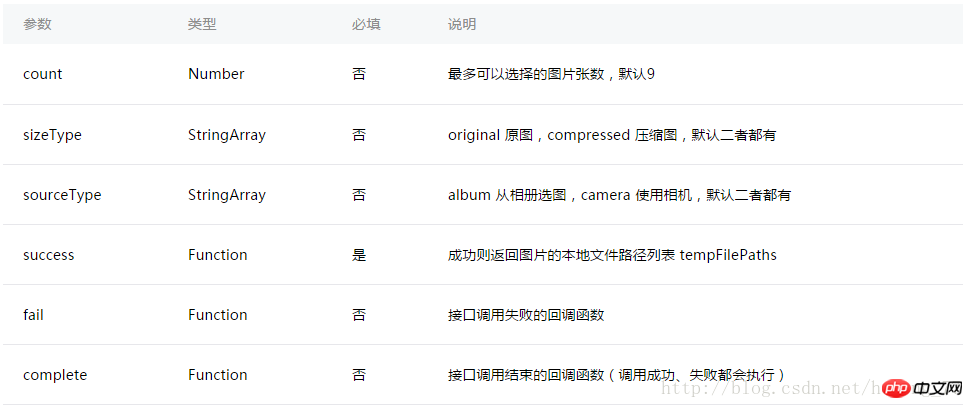
アルバムを選択するには、wx.chooseImage(OBJECT) 関数を使用する必要があります。具体的なパラメーターは次のとおりです:

Page({
 data: {
  tempFilePaths: ''
 },
 onLoad: function () {
 },
 chooseimage: function () {
  var that = this;
  wx.chooseImage({
   count: 1, // 默认9
   sizeType: ['original', 'compressed'], // 可以指定是原图还是压缩图,默认二者都有
   sourceType: ['album', 'camera'], // 可以指定来源是相册还是相机,默认二者都有
   success: function (res) {
    // 返回选定照片的本地文件路径列表,tempFilePath可以作为img标签的src属性显示图片
    that.setData({
     tempFilePaths: res.tempFilePaths
    })
   }
  })

 },


})
方法 1 の効果は次のとおりです: 

Page({
 data: {
  tempFilePaths: ''
 },
 onLoad: function () {
 },
 chooseimage: function () {
  var that = this;
  wx.showActionSheet({
   itemList: ['从相册中选择', '拍照'],
   itemColor: "#CED63A",
   success: function (res) {
    if (!res.cancel) {
     if (res.tapIndex == 0) {
      that.chooseWxImage('album')
     } else if (res.tapIndex == 1) {
      that.chooseWxImage('camera')
     }
    }
   }
  })

 },

 chooseWxImage: function (type) {
  var that = this;
  wx.chooseImage({
   sizeType: ['original', 'compressed'],
   sourceType: [type],
   success: function (res) {
    console.log(res);
    that.setData({
     tempFilePaths: res.tempFilePaths[0],
    })
   }
  })
 }


})
アプレット内のファイルの一時パス。最初の起動時に通常どおり使用できます。永続的に保存する必要がある場合は、積極的に wx を呼び出す必要があります。 saveFile に保存され、次回アプレットを起動するときにアクセスできるようになります。 レイアウトファイル:
<button style="margin:30rpx;" bindtap="chooseimage">获取图片</button>
<image src="{{tempFilePaths }}" catchTap="chooseImageTap" mode="aspectFit" style="width: 100%; height: 450rpx" />
以上がWeChatアプレット開発におけるアルバム選択と写真撮影のサンプルコードを詳しく解説の詳細内容です。詳細については、PHP 中国語 Web サイトの他の関連記事を参照してください。
声明:
この記事の内容はネチズンが自主的に寄稿したものであり、著作権は原著者に帰属します。このサイトは、それに相当する法的責任を負いません。盗作または侵害の疑いのあるコンテンツを見つけた場合は、admin@php.cn までご連絡ください。

