ホームページ >バックエンド開発 >PHPチュートリアル >Android UI コントロール シリーズ: AutoCompleteTextView (自動プロンプト)
Android UI コントロール シリーズ: AutoCompleteTextView (自動プロンプト)
- 黄舟オリジナル
- 2017-01-19 09:34:532221ブラウズ
AutoCompleteTextView的功能类似于百度或者Google在搜索栏输入信息的时候,弹出的与输入信息接近的提示信息。当然这里要要用到一些适配器
在Android中提供了两智能输入框,它们是MultiAutoCompleteTextView、AutoCompleteTextView。它们的功能大致一样,它和AutoCompleteTextView的区别就是MultiAutoCompleteTextView可以在输入框中一直增加新的选取值。编写方式也有所不同,在进行setAdapter之后还需要调用setTokenizer() 。下面详细介绍一下。
一、AutoCompleteTextView
1.简介
一个可编辑的文本视图,当用户输入信息后弹出提示。提示列表显示在一个下拉菜单中,用户可以从中选择一项,以完成输入。提示列表是从一个数据适配器获取的数据。
2.重要方法
clearListSelection():清除选中的列表项
dismissDropDown():如果存在关闭下拉菜单
getAdapter():获取适配器
3.创建须知
(1)布局文件
<AutoCompleteTextView
 android:id="@+id/edit"
 android:layout_width="match_parent"
 android:layout_height="wrap_content" />
(2)程序
实例化适配器
ArrayAdapter<String> adapter = new ArrayAdapter<String>(this,android.R.layout.simple_dropdown_item_1line, strs);
设置适配器
edit.setAdapter(adapter);
二、MultiAutoCompleteTextView
1.简介
继承自AutoCompleteTextView,延长AutoCompleteTextView的长度,你必须要提供一个MultiAutoCompleteTextView.Tokenizer来区分不同的子串
2.重要方法
enoughToFilter():当文本长度超过阈值时过滤
performValidation():代替验证整个文本,这个子类方法验证每个单独的文字标记
setTokenizer(MultiAutoCompleteTextView.Tokenizer t);用户正在输入时,tokenizer设置将用于确定文本相关范围内
3.使用须知
(1)布局文件
<MultiAutoCompleteTextView
 android:id="@+id/edit1"
 android:layout_width="match_parent"
 android:layout_height="wrap_content" />
(2)程序
实例化适配器
ArrayAdapter<String> adapter = new ArrayAdapter<String>(this,android.R.layout.simple_dropdown_item_1line, strs);
确定范围
edit1.setTokenizer(new MultiAutoCompleteTextView.CommaTokenizer())
下面是个例子
AutoCommitTest.java
package org.hualang.auto;

import android.app.Activity;
import android.os.Bundle;
import android.widget.ArrayAdapter;
import android.widget.AutoCompleteTextView;
import android.widget.MultiAutoCompleteTextView;

public class AutoCommitTest extends Activity {
    /** Called when the activity is first created. */
        private static final String[] autoString=new String[]{"welcome","well",
                "weatch","weexeview","werap"};
    @Override
    public void onCreate(Bundle savedInstanceState) {
        super.onCreate(savedInstanceState);
        setContentView(R.layout.main);
        //关联关键字
        ArrayAdapter<String> adapter=new ArrayAdapter<String>(this,
                        android.R.layout.simple_dropdown_item_1line,
                        autoString);
        AutoCompleteTextView autocomplete=(AutoCompleteTextView)findViewById(R.id.auto);
        autocomplete.setAdapter(adapter);
        MultiAutoCompleteTextView multi=(MultiAutoCompleteTextView) findViewById(R.id.multi);
        //将adapter添加到AutoCompleteTextView中
        multi.setAdapter(adapter);
        multi.setTokenizer(new MultiAutoCompleteTextView.CommaTokenizer());
    }
}
main.xml
<?xml version="1.0" encoding="utf-8"?>
<LinearLayout xmlns:android="http://schemas.android.com/apk/res/android"
    android:orientation="vertical"
    android:layout_width="fill_parent"
    android:layout_height="fill_parent"
    >
<TextView
    android:layout_width="fill_parent"
    android:layout_height="wrap_content"
    android:text="自动提示功能演示"
    />
<AutoCompleteTextView
        android:id="@+id/auto"
        android:layout_width="fill_parent"
        android:layout_height="wrap_content"
/>
<MultiAutoCompleteTextView
        android:id="@+id/multi"
        android:layout_width="fill_parent"
        android:layout_height="wrap_content"
/>
</LinearLayout>
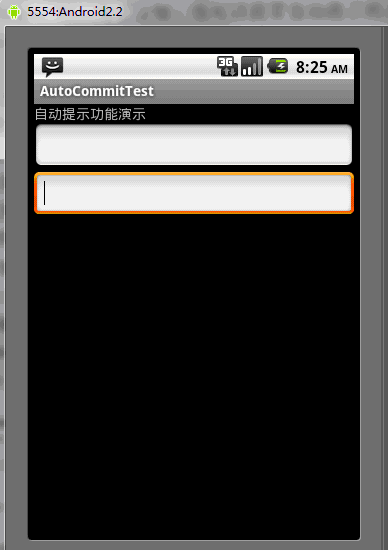
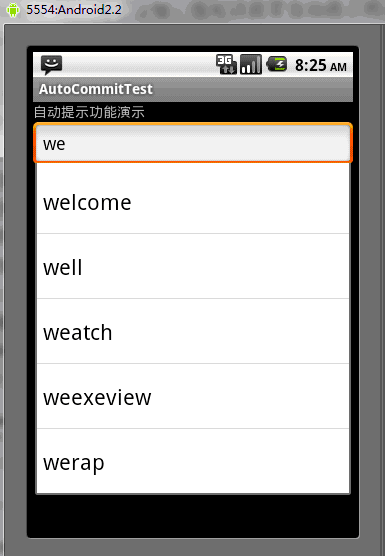
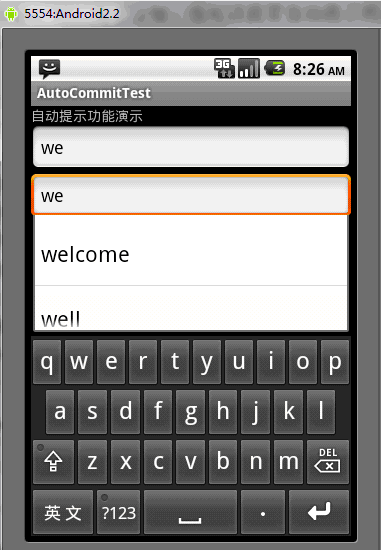
运行结果如下:


以上就是Android UI控件系列:AutoCompleteTextView(自动提示)的内容,更多相关内容请关注PHP中文网(www.php.cn)!

