ホームページ >バックエンド開発 >PHPチュートリアル >Android UIコントロールシリーズ:TextView(テキストボックス)
Android UIコントロールシリーズ:TextView(テキストボックス)
- 黄舟オリジナル
- 2017-01-19 09:24:311340ブラウズ
TextView は比較的単純で、編集には使用できません。
レイアウト ファイルでよく使用される XML 属性
android:gravity - コントロール内のテキストの配置を設定するために使用されます。 :layout_gravity - 親コントロールを基準として、コントロールの配置を設定するために使用されます
android:text - コントロールのテキスト情報を設定するために使用されます
android:layout_width - コントロールの幅を設定するために使用されます
android: layout_height — コントロールの高さの設定に使用されます
android:background — コントロールの背景色の設定に使用されます
android:textColor — コントロール内のテキストの色の設定に使用されます
android:textSize — に使用されますコントロールのテキストのフォント サイズを設定します
android:width および android:height — android:layout_width に似た関数
違い:
android:layout_width は、fill_parent (画面全体を水平方向に埋める) または
wrap_content (画面全体を埋める) のみを設定できます。コントロール自体の水平方向のサイズ)
android:width は、特定のコントロールの水平方向のサイズをピクセル単位で設定します
例: TextView は、
main.xml レイアウト ファイルを表示します
<?xml version="1.0" encoding="utf-8"?>
<LinearLayout xmlns:android="http://schemas.android.com/apk/res/android"
    android:orientation="vertical"
    android:layout_width="fill_parent"
    android:layout_height="fill_parent"
    >
<TextView
    android:layout_width="fill_parent"
    android:layout_height="wrap_content"
    android:text="@string/hello"
    />
</LinearLayout>
string.xml ファイル
<?xml version="1.0" encoding="utf-8"?>
<resources>
    <string name="hello">Hello World, MyTestView!</string>
    <string name="app_name">MyTestView</string>
</resources>
MyTextView.java ファイルを表示します
package org.loulijun.MyTestView;

import android.app.Activity;
import android.os.Bundle;

public class MyTestView extends Activity {
    /** Called when the activity is first created. */
    @Override
    public void onCreate(Bundle savedInstanceState) {
        super.onCreate(savedInstanceState);
        setContentView(R.layout.main);
    }
}
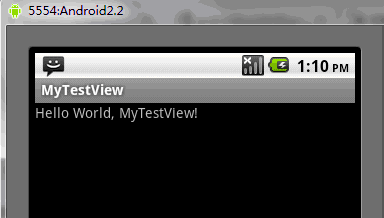
実行結果:
 上記は Android UI コントロール シリーズ: TextView (テキスト ボックス ) です。その他の関連コンテンツについては、PHP 中国語 Web サイト (www.php.cn) にご注意ください。

