ホームページ >バックエンド開発 >C#.Net チュートリアル >asp.net core は kindeditor を統合して画像アップロード機能を実装します
asp.net core は kindeditor を統合して画像アップロード機能を実装します
- 高洛峰オリジナル
- 2016-12-20 14:29:092323ブラウズ
この記事では、asp.net core が kindeditor を統合し、画像アップロード機能を実装する具体的な方法を共有します。具体的な内容は次のとおりです
準備
1.visual Studio 2015 update3 開発環境
2. net core 1.0 .1 以降のバージョン
ディレクトリ
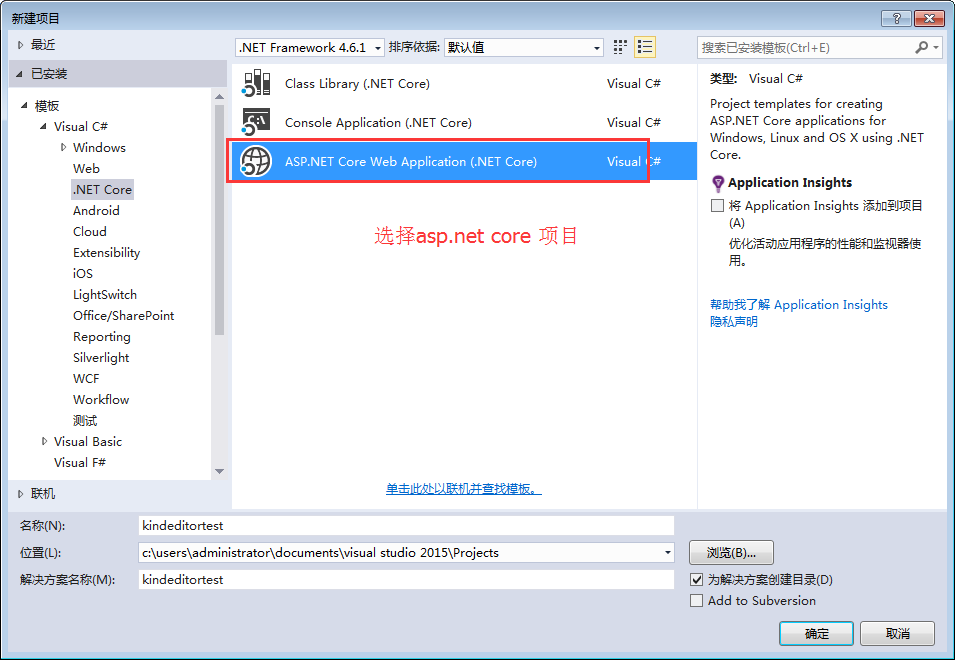
新しい asp.net core Web プロジェクト
kindeditor をダウンロード
画像アップロード コントローラーを追加
kindeditor パラメーターを構成する
コードのダウンロード
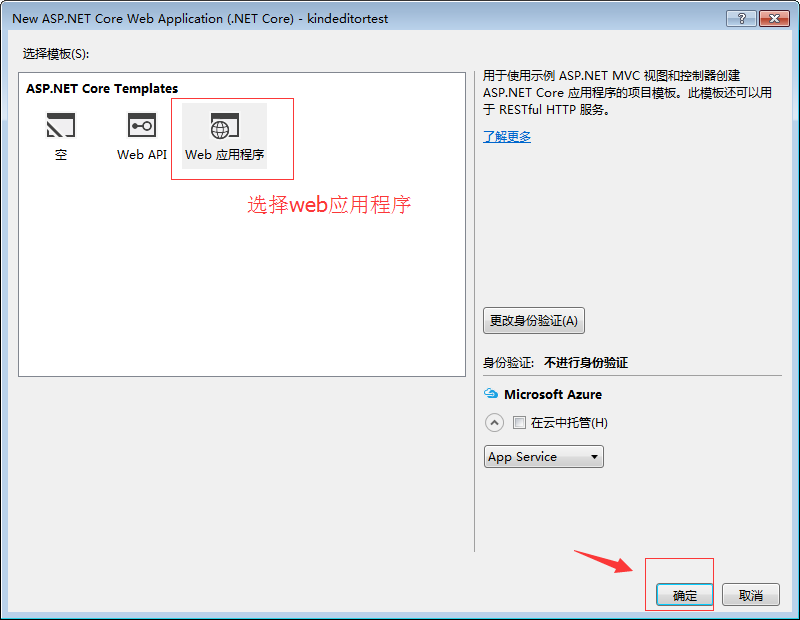
新しい asp.net core Web プロジェクト
新しい asp.net core プロジェクトを作成します。ここでは kindeditor という名前を付けます

Web アプリケーションを選択します

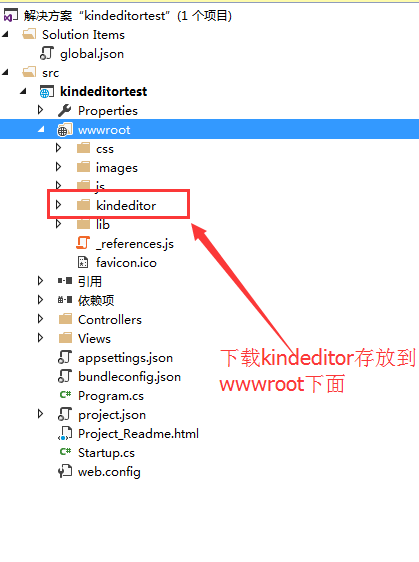
kindeditor をダウンロードします
ここでは、システムに付属する新しいサンプル プロジェクトを作成しました。kindeditor 公式にアクセスしてください。 Web サイトでバージョンをダウンロードし、解凍してコピーします。大きな wwwroot

で、views/index.cshtml
@{
ViewData["Title"] = "Home Page";
}
<link href="~/kindeditor/themes/default/default.css" rel="stylesheet" />
<script src="~/kindeditor/kindeditor-min.js"></script>
<script src="~/kindeditor/lang/zh_CN.js"></script>
<div class="row">
<textarea id="detail_desc" name="detail_desc" style="width:700px;height:300px;">
</textarea>
</div>
<script type="text/javascript">
//实例化编辑器
//建议使用工厂方法getEditor创建和引用编辑器实例,如果在某个闭包下引用该编辑器,直接调用UE.getEditor('editor')就能拿到相关的实例
KindEditor.ready(function (K) {
window.editor = K.create('#detail_desc', {
width: '98%',
height: '500px'
});
});
</script>を変更して実行すると、kindeditor が統合されていることがわかります。
画像アップロードコントローラーを追加します
戻り値は json オブジェクトであるため、単純なオブジェクトの戻り値が構築されることに注意してください。
using System;
using System.Collections.Generic;
using System.Linq;
using System.Threading.Tasks;
using Microsoft.AspNetCore.Mvc;
using Microsoft.AspNetCore.Http;
using Microsoft.Net.Http.Headers;
using Microsoft.AspNetCore.Hosting;
using System.IO;
namespace kindeditortest.Controllers
{
public class HomeController : Controller
{
private IHostingEnvironment hostingEnv;
public IActionResult Index()
{
return View();
}
public HomeController(IHostingEnvironment env)
{
this.hostingEnv = env;
}
/// <summary>
/// Kindeditor图片上传
/// </summary>
/// <param name="imgFile">Kindeditor图片上传自带的命名,不可更改名称</param>
/// <param name="dir">不可更改名称 这里没有用到dir</param>
/// <returns></returns>
public IActionResult KindeditorPicUpload(IList<IFormFile> imgFile, string dir)
{
PicUploadResponse rspJson = new PicUploadResponse() { error = 0, url = "/upload/" };
long size = 0;
string tempname = "";
foreach (var file in imgFile)
{
var filename = ContentDispositionHeaderValue
.Parse(file.ContentDisposition)
.FileName
.Trim('"');
var extname = filename.Substring(filename.LastIndexOf("."), filename.Length - filename.LastIndexOf("."));
var filename1 = System.Guid.NewGuid().ToString() + extname;
tempname = filename1;
var path = hostingEnv.WebRootPath;
filename = hostingEnv.WebRootPath + $@"\upload\{filename1}";
size += file.Length;
using (FileStream fs = System.IO.File.Create(filename))
{
file.CopyTo(fs);
fs.Flush();
//这里是业务逻辑
}
}
rspJson.error = 0;
rspJson.url = $@"../../upload/" + tempname;
return Json(rspJson);
}
public IActionResult About()
{
ViewData["Message"] = "Your application description page.";
return View();
}
public IActionResult Contact()
{
ViewData["Message"] = "Your contact page.";
return View();
}
public IActionResult Error()
{
return View();
}
}
public class PicUploadResponse
{
public int error { get; set; }
public string url { get; set; }
}
}
kindeditorパラメータの設定
<script type="text/javascript">
//实例化编辑器
//建议使用工厂方法getEditor创建和引用编辑器实例,如果在某个闭包下引用该编辑器,直接调用UE.getEditor('editor')就能拿到相关的实例
KindEditor.ready(function (K) {
window.editor = K.create('#detail_desc', {
width: '98%',
height: '500px',
uploadJson: '/home/KindeditorPicUpload',
fileManagerJson: '/home/KindeditorPicUpload',
allowFileManager: true
});
});
</script>
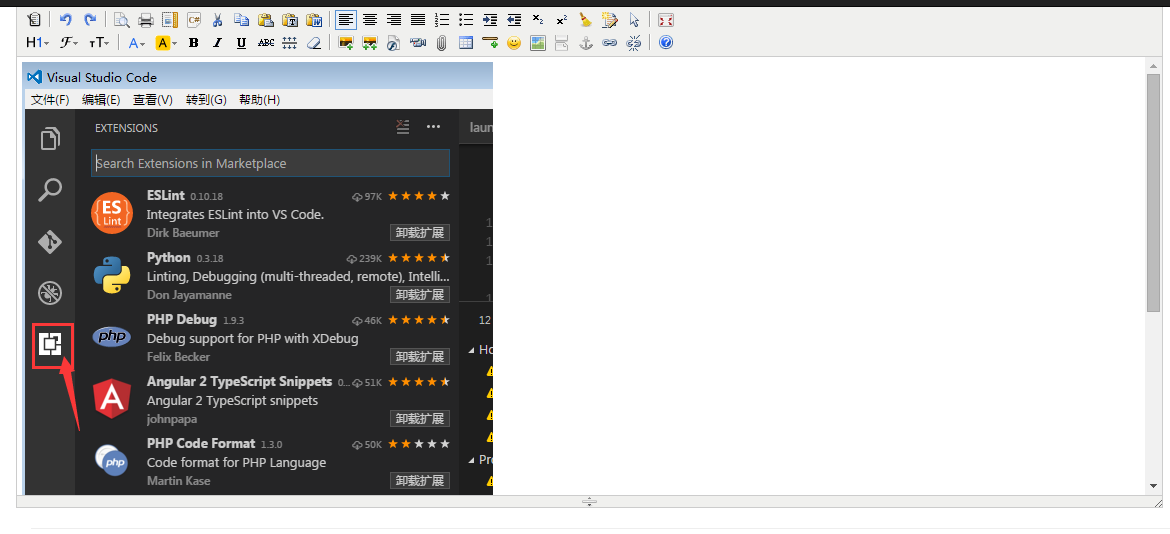
操作効果

以上がこの記事の全内容であり、皆さんの学習に役立つことを願っています。 PHP中国語ウェブサイト。

