

jsドラッグ&ドロップアップロードについて【アバターを変更するドラッグ&ドロップアップロードの手順】_javascriptスキル

最新のブラウザの多くは現在、ドラッグ アンド ドロップによるファイル読み取り操作をサポートしており、その利点は今後も繰り返されることはありません。フロントエンドでは、ドラッグ アンド ドロップを使用して Web サイトのアバター アップロード プロセスを改善し、重要なポイントと実際の経験をまとめました。
まず全体的なビューを見てみましょう: 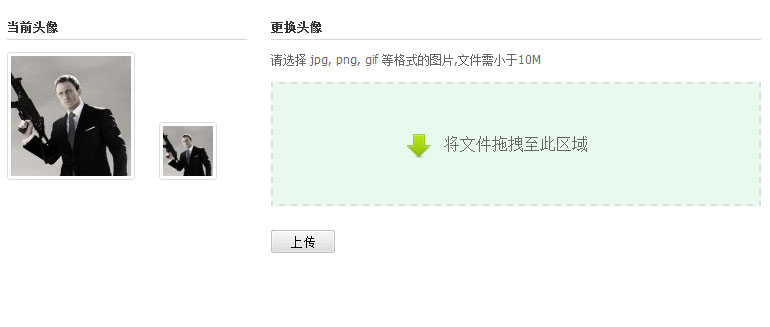
1. ファイルのドラッグ アンド ドロップ受け入れ領域を明確にマークし、できるだけ大きくする必要があります (レイアウト上の理由により、このインターフェイスのドラッグ アンド ドロップ ボックスはそれほど大きくありません)。破線ボックスやその他のスタイルを使用して、ユーザーをファイルのドラッグ アンド ドロップに誘導できます。わかりやすいテキスト プロンプトとアイコンを用意するのが最善です。
2. インタラクティブなエクスペリエンスでは、ファイルをブラウザ ウィンドウにドラッグすると、ドラッグ アンド ドロップ領域を使用して背景色などを変更し、ユーザーにドロップ操作を促すことができます。
実装コード:
doc.bind ({
'dragenter':function(e){
$("#brsbox").addClass("dragbrowse");
dropbox.addClass("shine");
return false;
},
'dragleave':function(e){
dropbox.removeClass("shine");
return false;
'drop':function(e) ){
stopdft(e);}
});
dropbox.bind({
'dragenter':function(e){
dropbox.addClass("candrop");
stopdft (e);},
'dragleave':function(e){
dropbox.removeClass("candrop");
stopdft(e);},
'dragover': function(e ){
stopdft(e);},
'drop':function(e){
}
残念ながら、IE9 などの最新のブラウザを含め、一部のブラウザではファイルのドラッグ アンド ドロップによる読み取りがサポートされていません。したがって、ドラッグ アンド ドロップをサポートしていないブラウザのバックアップ ソリューションとして、通常のファイルの参照とアップロードを準備する必要があります。
ドラッグ アンド ドロップによるファイルの読み取りがサポートされていない場合、インターフェイスは次のようになります:

filedrag = !!window.FileReader;
if(!filedrag) return;
$("#avtcnt").addClass('dragable');

e.dataTransefer.files がブラウザとオペレーティング システムの間で転送されることに注意してください。常に複数形です。つまり、複数のファイルです。これは、マウスによって運ばれるファイルをループする必要があることも意味します。 コードは次のとおりです:
it.handlefile(e.dataTransfer.files);
stopdft(e);},false); ;
it.handlefile = function(files){
var noimg = 0;
for(var i=0; i
if(!file.type.match(/image*/)){
noimg ;
if(noimg ==files.length){
QSL.optTips('他の形式の画像を選択します');
return
}
Continue
var Reader = new FileReader(); .onload = function(e ){
var img = document.createElement('img');
img.src = Reader.result;
setTimeout(function(){
it.imgSize = {
w: img.width,
h:img.height
},500);
dropdom.innerHTML=""; ';
it .imgData = Reader.result;
dropdom.appendChild(img);
dropbox.addClass("droped") ;
show();
readAsDataURL(ファイル);
Processing files dragged to the browser
The stopdft(e) is to prevent the browser from opening the file by default. Instead, the script handles the dragged and dropped files.
In this process, we need image files, so it is convenient to operate the e.dataTransfer.files object to find files of type image.
If not, it will prompt.
Key code for reading files:
var reader = new FileReader();
reader.onload = function(e){
var img = document. createElement('img');
img.src = reader.result;
};
reader.readAsDataURL(file);
In this example we need to read the height and width attributes of the image. So we did the following operations
setTimeout(function(){
it.imgSize = {
w:img.width,
h:img.height
};
}, 500);
Although it is reading a local file, there is still a delay to ensure that the image is actually read. Otherwise, the width and height values may not be obtained in some browsers. (Is there any other easier method? Please point it out)
Delete existing images and reset the drag area:
After browsing and reading local images, provide users with options to delete and reset. (Of course it is easier to upload directly)
it.resetDropbox = function(){
dropbox.attr("class","dropbox")
.empty()
.text("Drag files to this area");
imgData = '' ;
it.imgData = '';
it.imgSize = {w:0,h:0};
picsub.removeClass("uploading")
.find("button"). removeAttr("disabled")
.text("Upload");
imagedata.val('');
clearner.hide();
Reset drag Area
The process of dragging and dropping to read files is basically completed here.
Other advantages of using drag and drop to read local files:
The ordinary process of uploading and changing pictures is: select the picture-upload the picture-upload successfully-the server returns the picture-client browsing effect
And if you use drag-and-drop Reading local files can save the step of returning pictures from the server and directly use the data returned by reader.result.
This saves the delay in reading images from the server and saves round-trip data traffic. So just confirm that the server-side image is uploaded successfully and the image preview retrieves local data:
Code:
function initImageCrop(url){
var t = document.getElementById("target"),
p = document.getElementById("preview"),
b = browseImage,
s = [],
ts = [];
if(url=='data'){
t.src = b.imgData;
p.src = b.imgData;
posImage(b.imgSize.w,b.imgSize.h);
}else{
var cutimg = new Image();
cutimg.onload = function() {
t.src = url;
p.src = url;
posImage(cutimg.width,cutimg.height);
}
cutimg.src = url;
Processing after the image is uploaded successfully
Full DEMO preview(Static files are not displayed after the upload is successful (:)
DEMO script

 next.jsを使用してマルチテナントSaaSアプリケーションを構築する(バックエンド統合)Apr 11, 2025 am 08:23 AM
私はあなたの日常的な技術ツールを使用して機能的なマルチテナントSaaSアプリケーション(EDTECHアプリ)を作成しましたが、あなたは同じことをすることができます。 まず、マルチテナントSaaSアプリケーションとは何ですか? マルチテナントSaaSアプリケーションを使用すると、Singの複数の顧客にサービスを提供できます
 next.jsを使用してマルチテナントSaaSアプリケーションを構築する方法(フロントエンド統合)Apr 11, 2025 am 08:22 AM
この記事では、許可によって保護されたバックエンドとのフロントエンド統合を示し、next.jsを使用して機能的なedtech SaaSアプリケーションを構築します。 FrontEndはユーザーのアクセス許可を取得してUIの可視性を制御し、APIリクエストがロールベースに付着することを保証します
 JavaScript:Web言語の汎用性の調査Apr 11, 2025 am 12:01 AM
JavaScriptは、現代のWeb開発のコア言語であり、その多様性と柔軟性に広く使用されています。 1)フロントエンド開発:DOM操作と最新のフレームワーク(React、Vue.JS、Angularなど)を通じて、動的なWebページとシングルページアプリケーションを構築します。 2)サーバー側の開発:node.jsは、非ブロッキングI/Oモデルを使用して、高い並行性とリアルタイムアプリケーションを処理します。 3)モバイルおよびデスクトップアプリケーション開発:クロスプラットフォーム開発は、反応および電子を通じて実現され、開発効率を向上させます。
 JavaScriptの進化:現在の傾向と将来の見通しApr 10, 2025 am 09:33 AM
JavaScriptの最新トレンドには、TypeScriptの台頭、最新のフレームワークとライブラリの人気、WebAssemblyの適用が含まれます。将来の見通しは、より強力なタイプシステム、サーバー側のJavaScriptの開発、人工知能と機械学習の拡大、およびIoTおよびEDGEコンピューティングの可能性をカバーしています。
 javascriptの分解:それが何をするのか、なぜそれが重要なのかApr 09, 2025 am 12:07 AM
JavaScriptは現代のWeb開発の基礎であり、その主な機能には、イベント駆動型のプログラミング、動的コンテンツ生成、非同期プログラミングが含まれます。 1)イベント駆動型プログラミングにより、Webページはユーザー操作に応じて動的に変更できます。 2)動的コンテンツ生成により、条件に応じてページコンテンツを調整できます。 3)非同期プログラミングにより、ユーザーインターフェイスがブロックされないようにします。 JavaScriptは、Webインタラクション、シングルページアプリケーション、サーバー側の開発で広く使用されており、ユーザーエクスペリエンスとクロスプラットフォーム開発の柔軟性を大幅に改善しています。
 pythonまたはjavascriptの方がいいですか?Apr 06, 2025 am 12:14 AM
Pythonはデータサイエンスや機械学習により適していますが、JavaScriptはフロントエンドとフルスタックの開発により適しています。 1. Pythonは、簡潔な構文とリッチライブラリエコシステムで知られており、データ分析とWeb開発に適しています。 2。JavaScriptは、フロントエンド開発の中核です。 node.jsはサーバー側のプログラミングをサポートしており、フルスタック開発に適しています。
 JavaScriptをインストールするにはどうすればよいですか?Apr 05, 2025 am 12:16 AM
JavaScriptは、最新のブラウザにすでに組み込まれているため、インストールを必要としません。開始するには、テキストエディターとブラウザのみが必要です。 1)ブラウザ環境では、タグを介してHTMLファイルを埋め込んで実行します。 2)node.js環境では、node.jsをダウンロードしてインストールした後、コマンドラインを介してJavaScriptファイルを実行します。
 クォーツでタスクが開始される前に通知を送信する方法は?Apr 04, 2025 pm 09:24 PM
Quartzタイマーを使用してタスクをスケジュールする場合、Quartzでタスク通知を事前に送信する方法、タスクの実行時間はCron式によって設定されます。今...


ホットAIツール

Undresser.AI Undress
リアルなヌード写真を作成する AI 搭載アプリ

AI Clothes Remover
写真から衣服を削除するオンライン AI ツール。

Undress AI Tool
脱衣画像を無料で

Clothoff.io
AI衣類リムーバー

AI Hentai Generator
AIヘンタイを無料で生成します。

人気の記事
ホットツール

SublimeText3 Linux 新バージョン
SublimeText3 Linux 最新バージョン

ゼンドスタジオ 13.0.1
強力な PHP 統合開発環境

SublimeText3 中国語版
中国語版、とても使いやすい

VSCode Windows 64 ビットのダウンロード
Microsoft によって発売された無料で強力な IDE エディター

mPDF
mPDF は、UTF-8 でエンコードされた HTML から PDF ファイルを生成できる PHP ライブラリです。オリジナルの作者である Ian Back は、Web サイトから「オンザフライ」で PDF ファイルを出力し、さまざまな言語を処理するために mPDF を作成しました。 HTML2FPDF などのオリジナルのスクリプトよりも遅く、Unicode フォントを使用すると生成されるファイルが大きくなりますが、CSS スタイルなどをサポートし、多くの機能強化が施されています。 RTL (アラビア語とヘブライ語) や CJK (中国語、日本語、韓国語) を含むほぼすべての言語をサポートします。ネストされたブロックレベル要素 (P、DIV など) をサポートします。

