


Sometimes a chance to show somebody how things are done proves more effective than having to come up with lengthy instructions. This is often true for educators, developers, IT support, YouTubers, online businesses, and teams working from different locations and even different time zones.
Taking a video of your actions as they happen on the screen of your Mac is called screen recording. (You can record your entire screen, a selected portion of the screen, or an app window.)
Ways to record screen with audio |
Steps to follow |
With a specialized third-party app |
Install and open CleanShot X. Choose Record Screen > Press Space bar > Click the microphone icon to Record MacBook Microphone or other source. Install and open iShowU. Set recording preferences and press the red circled dot in the bottom right corner of the app to start recording. |
With Mac’s webcam |
Install and open Capto. Choose the Record option from the toolbar > Select Record Camera > FaceTime HD Camera > Start recording. |
Using Mac’s built-in tools |
Use QuickTime from the menu bar to record the screen. |
With a Mac keyboard shortcut using a microphone |
Press Command + Shift + 5 > Click Options to turn on the audio recording > Record. |

Record your Mac’s screen with Capto
Capture, edit, and share your Mac screen effortlessly with Capto. Record any screen area and add real-time voiceovers.
Try free Security-testedThe best Mac screen recorder option for your Mac
A great comprehensive all-in-one tool for screen recording Mac users can rely on is Capto.
With Capto you get to not only record your screen with real-time voiceover and webcam feed, but also edit your video and audio tracks, add text or speech bubbles, and share instantly from the app:
- Capture a specific app window, a browser, your whole screen, or select an area of any size with any number of windows in it
- Hide desktop while recording
- Take screenshots
- Edit video and images: crop, cut, fade in and fade out for audio
- Add annotations
- Share to Dropbox, YouTube, Facebook, and all possible shared storages, including FTP/SFTP servers

You can also use iShowU to record your screen. This app is particularly handy for creating product walkthroughs and demos and it can record high quality video with a selfie cam overlay. This allows you to create videos with a “talking head” inserted in them.
iShowU can also replace the background in your selfie video to make it look more polished and professional.

How to record your screen on Mac using the Screenshot toolbar
If you’re wondering, “Can I screen record on my Mac with a native macOS utility?” the answer is — yes. Apple has its own built-in screen recording feature called Screenshot that lets you capture video of whatever’s happening on your screen (with real-time audio, should you choose to).
You can use the Screenshot toolbar for taking both screenshots and video recordings of your screen (for video choose from the last two screen icons with a dot in the lower right corner).
To record with Screenshot:
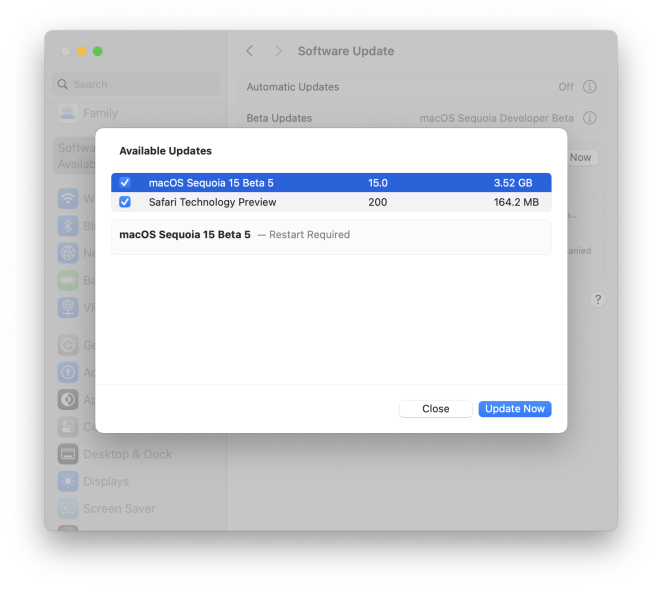
- Press Shift + Command + 5 to open the toolbar
- Choose Record Entire Screen or Record Selected Portion (you’ll be able to drag and resize the frame of the screen area you want to be recorded, if you choose this option)
- Go to Options and choose microphone settings, decide where you’d like to save your recording to, or set a countdown timer
- Click on Record to start the recording
- Click on Stop Recording menu bar icon when you’re done
If your Screenshot toolbar is already set to screen recording, you can use hotkeys for recording your screen: press Shift + Command + 5 to start the recording and Command + Control + Esc to stop the recording.
How to record audio in screen recordings
When you think about how to screen record on MacBook, it’s important to also understand how to include sound in your videos.
As we have already discussed, your native Mac screen recorder allows you to capture audio from your Mac’s built-in microphone, but if you’re looking for more advanced capabilities (like creating and editing voiceovers or learning to record your Skype meetings), you can find out more from our dedicated article on how to record your screen on Mac with sound.
How to screen record on Mac using QuickTime
Another option to record a screen Mac users can try is QuickTime Player. We know this app for playing media files, but it can also be used for recording your screen and sound.
To use QuickTime Player as a Mac screen recorder, simply launch it from Applications and choose New Screen Recording from the File menu. This will open the Screenshot toolbar that lets you configure and start your recording.
The only difference with Screenshot is that with QuickTime Player, once you’re done recording, your file will automatically open inside the app and you can edit it right away.

Read also:
- Crop Video on Mac
- No Clutter Screen Capturing for Mac
- Record Edit Share Videos on Mac
- Take A Scrolling Screenshot
How to screen record for collaboration
Another great tool for asynchronous screen sharing is CleanShot X.It’s a simple screen recording macOS app that comes with a rich toolkit, allowing you to capture your screen without desktop icons, record as MP4 or GIF, trim video, annotate, and keep your recordings saved on CleanShot’s cloud for free — all a few clicks on the menu bar icon away.

How to record a screen with OBS Studio
Another popular contender for Mac screen recorder of choice is OBS Studio.
OBS Studio is a free open-source app used for both streaming and screen recording by many content creators. It’s known for a variety of advanced features, but can also be easily used by beginners.
Understanding how to screen record on Mac with OBS Studio starts with the basics:
- Download (obsproject.com), install, and launch the app
- Set up video: Sources ➙ + icon ➙ Display Capture ➙ name the source ➙ OK
- Set up audio: OBS Studio is set to capture audio from the built-in microphone on your Mac by default — you can add external audio sources or apps for capturing system sound in Sources
- Choose where you want to save your recorded files: Controls ➙ Settings ➙ Output ➙ Recording ➙ Browse ➙ OK
- Choose Start Recording under Controls to begin screen recording Mac
- Press Stop Recording when you're finished

If you’re also looking for an advanced app to help you edit your recordings, check CamerBag Pro. It’s a powerful photo and video editor that allows for professional adjustments and offers pro-quality preset filters to add style to your creations.
How to record your screen on Mac and have an impact?
Being able to clearly get your point across even if you aren’t in the same room with your audience or colleagues is very important. Having a video recording to illustrate it — is priceless. Learning how to screen record on Mac is, without a doubt, a useful skill, and you can master it in no time with Mac’s built-in Screenshot and QuickTime Player or a more advanced OBS Studio screen recording setup.
If you’d like an effective tool that lets you both record and edit your videos from the same app on Mac, opt forCaptoorCleanShot X(if you also like creating GIFs). And, finally, for advance editing and pro quality image adjustments arm yourself withCamerBag Proto present your ideas with style.
Be sure to try Capto, CleanShot X, CameraBag Pro, and iShowU for free with the 7-day trial ofSetapp, a platform of high-performance apps for tasks on Mac and iPhone. Learn how to screen record MacBook and check out more than 250 other options to boost productivity.
FAQ
How to record screen and audio at the same time on Mac
All the above mentioned methods of screen recording Mac users can choose from allow for recording audio from Mac’s built-in mic: you can capture your voice commentary, as well as any sounds playing at the moment (music, app sounds, etc.)
How can I record my screen on Mac with sound but without a mic?
All Macs have an internal microphone built-in, so you don’t have to have an external microphone for capturing sound when screen recording Mac.
Where does screen recording go on a Mac?
The answer differs depending on the app you choose for recording your screen:
Mac’s native Screenshot utility saves recorded files to Desktop (you can choose a different location in Options ➙ Save to)
QuickTime Player automatically opens the video after you hit Stop Recording, and you can then choose where to save your file (File ➙ Save)
OBS Studio lets you locate recordings using the File menu (File ➙ Show Recordings)
-
Apps like CleanShot X save your files to your free in-app cloud account
What is the recording shortcut on Mac?
Use Shift + Command + 5 to start screen recording Mac.以上がMacでレコードをスクリーニングする方法:簡単で迅速の詳細内容です。詳細については、PHP 中国語 Web サイトの他の関連記事を参照してください。

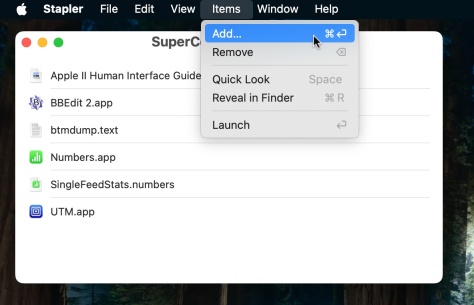 Mac用のStaplerを使用したプロジェクトに関連するすべてのアプリとドキュメントを起動しますMay 13, 2025 am 10:37 AM
長年のMacユーザーは、Staplerと呼ばれる古典的なMacintoshの便利な古いシェアウェアアプリケーションを思い出すかもしれません。これは、一連のアプリとドキュメントを単一のドキュメントにグループ化することでプロジェクトを管理するのに基本的に役立ちました。
 iPhone、iPad、またはMacでApple Intelligenceを入手する方法May 13, 2025 am 10:32 AM
Apple Intelligenceは、Appleがベータ版で展開しているAI機能のセットであり、秋にAppleデバイス所有者のより大きなセットにデビューします。 Apple Intelligenceは、テキストや電子メールの作成と作成、アクションの取得まで、多くの機能を提供しています。
 Macos Sonoma 14.6.1&Ventura 13.6.9バグ修正でリリースMay 13, 2025 am 10:25 AM
最近、Appleデバイスにシステムソフトウェアを更新するのにかなりの時間を費やしていると感じている場合は、おもしろいです。システムソフトウェアの更新の別のラウンド!今回、AppleはMacos Sonoma 14.6.1 Alonをリリースしました
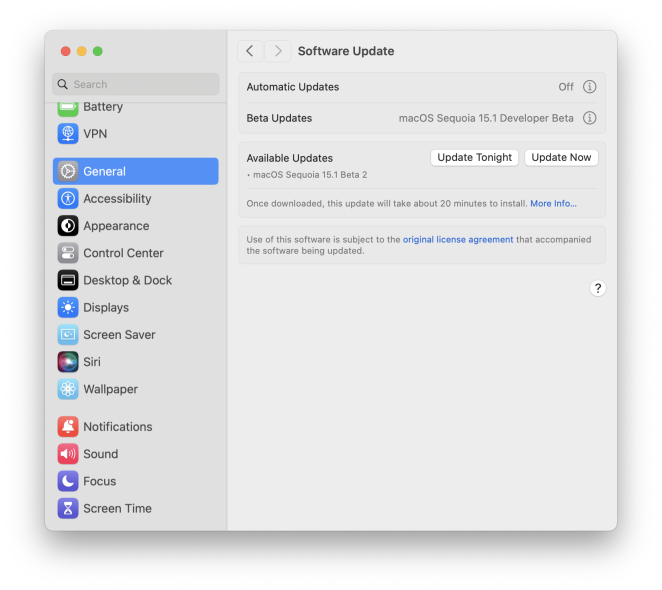
 MacOS Sequoia 15ベータ6テストに利用できますMay 13, 2025 am 10:23 AM
Appleは、開発者ベータテストプログラムに登録されているユーザー向けに、MacOS Sequoiaの6番目のベータ版を発行しました。通常、一致するパブリックベータビルドがすぐに到着します。この場合、Dev Beta 6はパブリックベータ4としてバージョンされます。 MacOS Secoia
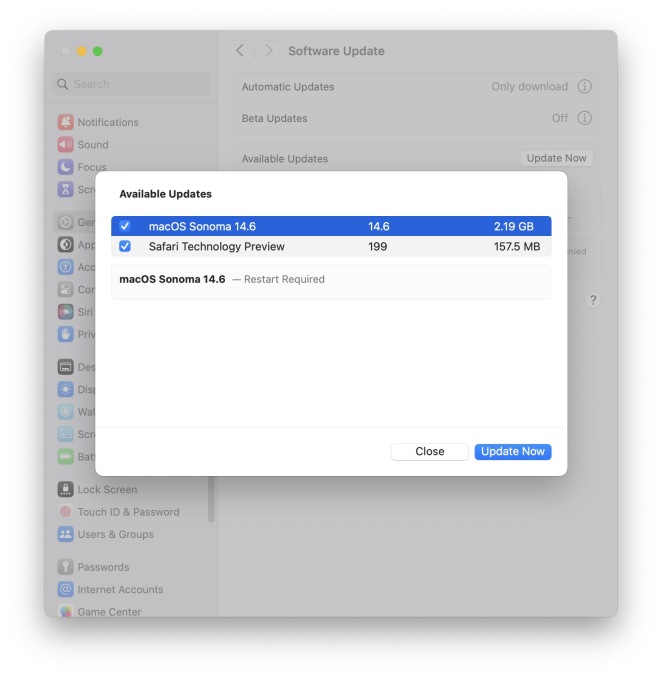 MacOSSonoma14.6バグ修正とセキュリティの更新でリリースされたアップデートMay 13, 2025 am 10:20 AM
Appleは、ソノマオペレーティングシステムを実行しているMacユーザー向けにMacOS Sonoma 14.6をリリースしました。 MacOS Sonoma 14.6ソフトウェアアップデートは、主にほとんどのMacのバグ修正とセキュリティの更新に焦点を当てていますが、特に素晴らしい新機能が含まれています
 MacOS Sequoia 15ベータ5ダウンロード可能May 13, 2025 am 10:06 AM
MacOS Sequoia Beta 5は、開発者ベータテストプログラムに登録されているユーザーがMacをダウンロードしてインストールできるようになりました。 MacOS Sequoia Beta 5には24A5309Eのビルドがあり、通常、新しい開発者ベータビルドの後にMが続きます。
 IOS 18.1、Macos Sequoia 15.1、およびiPados 18.1のベータ2はApple IntelligenceでリリースされましたMay 13, 2025 am 09:49 AM
Appleは、iOS 18.1、iPados 18.1、およびMacos Sequoia 15.1の2番目のベータ版をリリースしました。これらの新しいベータアップデートのリリースは、それらが同時にウィットであるという点で珍しいです
 MacでVMware Fusionをアンインストールする方法May 13, 2025 am 09:44 AM
VMware Fusion Proは自由にダウンロードしてインストールできることに気付くかもしれません。おそらく、Macにインストールして仮想マシンをテストしたり、遊んだりすることで、MacにVMwareが必要ないと判断しました。 しかし、VMware Fusion p


ホットAIツール

Undresser.AI Undress
リアルなヌード写真を作成する AI 搭載アプリ

AI Clothes Remover
写真から衣服を削除するオンライン AI ツール。

Undress AI Tool
脱衣画像を無料で

Clothoff.io
AI衣類リムーバー

Video Face Swap
完全無料の AI 顔交換ツールを使用して、あらゆるビデオの顔を簡単に交換できます。

人気の記事
ホットツール

MantisBT
Mantis は、製品の欠陥追跡を支援するために設計された、導入が簡単な Web ベースの欠陥追跡ツールです。 PHP、MySQL、Web サーバーが必要です。デモおよびホスティング サービスをチェックしてください。

EditPlus 中国語クラック版
サイズが小さく、構文の強調表示、コード プロンプト機能はサポートされていません

Dreamweaver Mac版
ビジュアル Web 開発ツール

AtomエディタMac版ダウンロード
最も人気のあるオープンソースエディター

WebStorm Mac版
便利なJavaScript開発ツール

