


There are several ways Microsoft gives you in order to repair a malfunctioning Windows device – from things like System Restore or Windows reset to repair-installing or fully reinstalling. While the solution depends on the situation at hand and personal preference, performing in-place upgrade is the most common tactic used.
Why choose repair-installing?
There are several scenarios where repair-installing Windows can be beneficial. If your system files are corrupted and causing errors, or if you're facing issues with system updates, a repair installation can resolve these problems. It is also useful for fixing minor performance issues and addressing specific OS glitches. Unlike a complete reinstallation, this method keeps all your personal files and installed applications intact, saving you time and effort.
When to consider a repair installation
When ordinary troubleshooting fails to resolve persistent issues, you could consider about having a repair installation done. A repair installation may be necessary, for example, if corrupted system files cannot be repaired using the System File Checker (SFC) and Deployment Imaging Service and Management Tool (DISM) commands, or if Windows updates are not successful even after utilizing the Windows Update Troubleshooter. If previous performance adjustments haven't improved the overall speed of your machine, this is also a viable choice.
Preparing for it
Before starting a repair installation, it's important to get adequately prepared. While the process should keep your data intact, you should still back up your important files – just in case. This ensures that in case anything goes wrong, your data remains safe.
You'll need to download the Windows 11 ISO file or use the Media Creation Tool to get the installation media. Having these ready beforehand will make the process easier. Additionally, you should also disconnect any unnecessary peripherals (such as printers and external drives), and uninstall third-party security software, if applicable.
The process and what to expect
During a repair installation, you'll essentially be performing an upgrade over your current system. In order to repair any damage or errors, this procedure replaces the essential system files with new copies from the installation ISO. You won't have to reinstall anything or lose any data because your installed apps, personal files, and settings are all kept exactly as they are.
The repair installation can take some time, depending on the speed of your computer and the extent of the issues being resolved. After the process, your system should be more stable and perform better, with the problems that prompted the repair installation resolved.
Below you will find detailed instructions on how to perform repair install in Windows 11. However, if you are having persistent system issues, you can first try repairing it with a powerful PC repair application FortectMac Washing Machine X9.

Create Windows ISO
- Download Windows 11 Installation media from the official Microsoft website.
- Double-click the MediaCreationTool.exe file to launch it.
- When UAC shows up, click Yes.
- Accept license terms.
- Select Language and Edition (make sure it matches the one you have currently installed) or simply mark the Use the recommended options for this PC and click Next).

- Select the ISO file and click Next.
- Pick the location for your ISO file and wait till all the needed files are downloaded, then click Finish.

Repair-install Windows
- Go to the location of your ISO file, right-click, and select Mount.
- Run the setup.exe file.

- You will be asked whether you want to update Windows to the latest version – pick Not right now and click Next.
- Accept Terms and Windows will make several checks to ensure everything is fine.
- Click Change what to keep.

- Here, you have several options: Keep your files and apps, Keep files only, or Keep nothing – choose what suits you the best. Click Next.
- Finally, click Install to begin the installation process.
以上がWindows 11で修理インストールを実行する方法は?の詳細内容です。詳細については、PHP 中国語 Web サイトの他の関連記事を参照してください。

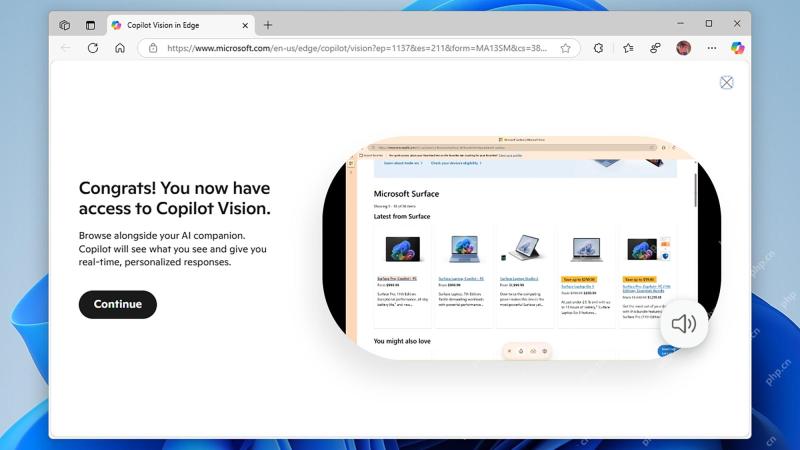 Microsoft Edgeで無料でCopilot Visionを使用する方法May 09, 2025 am 10:32 AM
すべての新しいAIツールで最新の状態を維持することは課題です。 多くの人は、容易に利用可能なAI機能を見落としているかもしれません。たとえば、Copilot VisionはすべてのMicrosoft Edgeユーザーにとって無料であるようになりました。エッジを定期的に使用していない場合やそうでない場合、事実は簡単に見逃しています。
 サバイバルマシンを見つけてファイルの場所を保存し、ファイルを保護しますMay 08, 2025 pm 08:10 PM
このガイドは、どこにあるか、サバイバルマシンゲームの保存ファイルを保護する方法を示しています。 保存ファイルの場所を知ることは、ゲームの管理、問題のトラブルシューティング、または設定の調整に不可欠です。 サバイバルマシンを見つけるファイルを保存します fo
 Windows資格情報をバックアップして復元する効果的な方法May 08, 2025 pm 08:04 PM
このガイドでは、安全な認証と資格認証ストレージのための重要なシステムメカニズムであるWindows資格情報をバックアップおよび復元する方法について説明します。 資格情報、それらを保護する方法、および回復方法をカバーします。 Windows Credentiとは何ですか
 ビデオメモリからサンダーフォークのためのトップ5の実績のある修正May 08, 2025 pm 08:02 PM
Sunderfolkのビデオメモリの問題の解決:包括的なガイド 魅力的なターンベースの戦術RPGであるサンダーフォークは、ビデオメモリの制限に遭遇することがあります。このガイドは、「ビデオメモリからサンダーフォークを解決する」erを解決するためのソリューションを提供します
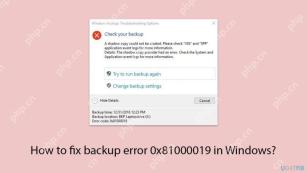 Windowsでバックアップエラー0x81000019を修正する方法は?May 08, 2025 pm 08:00 PM
Windowsには、システムイメージを作成してポイントを復元できるようにするバックアッププログラムが組み込まれています。しかし、この中で、一部の人々は自分自身に直面していることに気づきます
 米国の3Dクラッシュ/起動なし:この新鮮なガイドを確認してくださいMay 08, 2025 pm 06:01 PM
米国の中で、3D PCバージョンが失敗しましたか、それともクラッシュしましたか? Minitoolは実用的なソリューションを提供します!多くのプレイヤーは、米国の3D PCバージョンでプレイする際に、スタートアップの失敗、クラッシュ、ブラックスクリーン、またはKWSの問題に遭遇します。この記事では、これらの問題を解決し、ゲームのパフォーマンスを改善するのに役立ついくつかの方法を提供します。 クイックナビゲーション: 米国の3D PCバージョンの障害またはクラッシュを修正する方法 要約します US 3Dの中には、チームワークと裏切りの要素を組み合わせた人気のあるマルチプレイヤーの3Dバージョンがあります。 多くのプレイヤーは、ゲームが開始されたときにクラッシュ、黒い画面、または最初のインターフェイスに巻き込まれたと報告しました。 問題を1つずつ解決するために、以下の手順に従ってください。 中で修正する方法
 nvidia openglドライバーエラーコード3(サブコード2/7)、クイックフィックス!May 07, 2025 pm 08:01 PM
NVIDIA OpenGLドライバーエラーコード3:ゲーム操作の障害とソリューション Windows 11/10システムでは、NVIDIA OpenGLドライバーエラーコード3がゲームの実行に失敗する可能性があります。この記事では、エラーコード3(サブコード2または7)を解決するさまざまな方法を提供します。 OpenGLは、3Dおよび2Dグラフィックをレンダリングするための業界標準グラフィカルアプリケーションプログラミングインターフェイス(API)です。 Nvidiaは、GPUが最高のパフォーマンスを発揮するためにOpenGLをサポートしています。ただし、NVIDIA OpenGLドライバーエラーコード3はすべての操作を中断し、ゲームおよびビデオ/画像編集ソフトウェアを使用できなくなります。 エラーメッセージは次のとおりです。 NVI
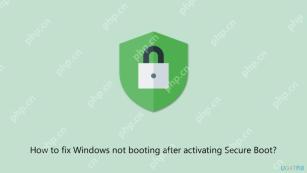 セキュアブートをアクティブにした後、起動しないWindowsを修正する方法は?May 07, 2025 pm 08:00 PM
Secure Bootは、信頼できるデジタル署名されたオペレーティングシステムとブートローダーのみがブーイングできることを確認するのに役立つ新しいUEFIファームウェアの組み込みセキュリティ機能です。


ホットAIツール

Undresser.AI Undress
リアルなヌード写真を作成する AI 搭載アプリ

AI Clothes Remover
写真から衣服を削除するオンライン AI ツール。

Undress AI Tool
脱衣画像を無料で

Clothoff.io
AI衣類リムーバー

Video Face Swap
完全無料の AI 顔交換ツールを使用して、あらゆるビデオの顔を簡単に交換できます。

人気の記事
ホットツール

DVWA
Damn Vulnerable Web App (DVWA) は、非常に脆弱な PHP/MySQL Web アプリケーションです。その主な目的は、セキュリティ専門家が法的環境でスキルとツールをテストするのに役立ち、Web 開発者が Web アプリケーションを保護するプロセスをより深く理解できるようにし、教師/生徒が教室環境で Web アプリケーションを教え/学習できるようにすることです。安全。 DVWA の目標は、シンプルでわかりやすいインターフェイスを通じて、さまざまな難易度で最も一般的な Web 脆弱性のいくつかを実践することです。このソフトウェアは、

AtomエディタMac版ダウンロード
最も人気のあるオープンソースエディター

VSCode Windows 64 ビットのダウンロード
Microsoft によって発売された無料で強力な IDE エディター

SublimeText3 Mac版
神レベルのコード編集ソフト(SublimeText3)

ZendStudio 13.5.1 Mac
強力な PHP 統合開発環境

