


シリーズのパート 3 へようこそ!この一連の記事では、バックエンドに Django を使用して、私自身が HTMX について学習したことを文書化しています。
このシリーズに参加したばかりの場合は、最初にパート 1 とパート 2 を確認するとよいでしょう。
テンプレートとビューの作成
まず、ベース テンプレートと、データベース内にある Todo をリストするインデックス ビューを指すインデックス テンプレートを作成します。 Todo の見栄えを良くするために、Tailwind CSS の拡張である DaisyUI を使用します。
これは、ビューが設定され、HTMLX を追加する前のページの外観です。

ビューと URL の追加
まず、プロジェクトのルートにある urls.py ファイルを更新して、「コア」アプリに定義する URL を含める必要があります。
# todomx/urls.py

from django.contrib import admin
from django.urls import include, path #


<p>次に、アプリの新しい URL を定義し、新しいファイル core/urls.py を追加します。<br>
</p>

<pre class="brush:php;toolbar:false"># core/urls.py

from django.urls import path
from . import views

urlpatterns = [
    path("", views.index, name="index"),
    path("tasks/", views.tasks, name="tasks"),
]
これで、core/views.py に対応するビューを作成できるようになりました
# core/views.py

from django.shortcuts import redirect, render
from .models import UserProfile, Todo
from django.contrib.auth.decorators import login_required


def index(request):
    return redirect("tasks/")


def get_user_todos(user: UserProfile) -> list[Todo]:
    return user.todos.all().order_by("created_at")


@login_required
def tasks(request):
    context = {
        "todos": get_user_todos(request.user),
        "fullname": request.user.get_full_name() or request.user.username,
    }

    return render(request, "tasks.html", context)
ここで興味深い点がいくつかあります。インデックス ルート (ホームページ) はタスクの URL とビューにリダイレクトされるだけです。これにより、将来的にアプリに何らかのランディング ページを自由に実装できるようになります。
タスクビューにはログインが必要で、コンテキスト内で 2 つの属性を返します。ユーザーのフルネーム (必要に応じてユーザー名と合体)、および ToDo アイテム (作成日順にソート) (将来)。
次に、テンプレートを追加しましょう。 Tailwind CSS と DaisyUI を含むアプリ全体の基本テンプレートと、タスク ビューのテンプレートを用意します。
<!-- core/templates/_base.html -->


    <meta charset="utf-8">
    <meta http-equiv="X-UA-Compatible" content="IE=edge">
    <title></title>
    <meta name="description" content="">
    <meta name="viewport" content="width=device-width, initial-scale=1">
    <link href="https://cdn.jsdelivr.net/npm/daisyui@5.0.0-beta.1/daisyui.css" rel="stylesheet" type="text/css">
    <script src="https://cdn.tailwindcss.com?plugins=typography"></script>
    {% block header %}
    {% endblock %}


<p>Note that we're adding Tailwind and DaisyUI from a CDN, to keep these articles simpler. For production-quality code, they should be  bundled in your app.</p>

<p>We're using the beta version of DaisyUI 5.0, which includes a new list component which suits our todo items fine.<br>
</p>

<pre class="brush:php;toolbar:false"><!-- core/templates/tasks.html -->

{% extends "_base.html" %}

{% block content %}
<div>


<p>We can now add some Todo items with the admin interface, and run the server, to see the Todos similarly to the previous screenshot. </p>

<p>We're now ready to add some HTMX to the app, to toggle the completion of the item</p>

<h2>


  Add inline partial templates
</h2>

<p>In case you're new to HTMX, it's a JavaScript library that makes it easy to create dynamic web pages by replacing and updating parts of the page with fresh content from the server. Unlike client-side libraries like React, HTMX focuses on <strong>server-driven</strong> updates, leveraging <strong>hypermedia</strong> (HTML) to fetch and manipulate page content on the server, which is responsible for rendering the updated content, rather than relying on complex client-side rendering and rehydration, and saving us from the toil of serializing to and from JSON just to provide data to client-side libraries.</p>

<p>In short: when we toggle one of our todo items, we will get a new fragment of HTML from the server (the todo item) with its new state.</p>

<p>To help us achieve this we will first install a Django plugin called django-template-partials, which adds support to inline partials in our template, the same partials that we will later return for specific todo items.<br>
</p>

<pre class="brush:php;toolbar:false">❯ uv add django-template-partials
Resolved 24 packages in 435ms
Installed 1 package in 10ms
 + django-template-partials==24.4
インストール手順に従って、settings.py ファイルを更新する必要があります
INSTALLED_APPS = [
    "django.contrib.admin",
    "django.contrib.auth",
    "django.contrib.contenttypes",
    "django.contrib.sessions",
    "django.contrib.messages",
    "django.contrib.staticfiles",
    "core",
    "template_partials",  #


<p>タスク テンプレートでは、各 ToDo アイテムをインライン部分テンプレートとして定義します。ページをリロードしても、視覚的な違いは何もないはずです。<br>
</p>

<pre class="brush:php;toolbar:false"><!-- core/templates/tasks.html -->

{% extends "_base.html" %}
{% load partials %} <!-- NEW -->

{% block content %}
<div>


<p>The two attributes added are important: the name of the partial, todo-item-partial, will be used to refer to it in our view and other templates, and the inline attribute indicates that we want to keep rendering the partial within the context of its parent template.</p>

<p>With inline partials, you can see the template within the context it lives in, making it easier to understand and maintain your codebase by preserving locality of behavior, when compared to including separate template files.</p>

<h2>


  Toggling todo items on and off with HTMX
</h2>

<p>To mark items as complete and incomplete, we will implement a new URL and View for todo items, using the PUT method. The view will return the updated todo item rendered within a partial template.</p>

<p>First of all we need to add HTMX to our base template. Again, we're adding straight from a CDN for the sake of simplicity, but for real production apps you should serve them from the application itself, or as part of a bundle. Let's add it in the HEAD section of _base.html, right after Tailwind:<br>
</p>

<pre class="brush:php;toolbar:false">    <link href="https://cdn.jsdelivr.net/npm/daisyui@5.0.0-beta.1/daisyui.css" rel="stylesheet" type="text/css">
    <script src="https://cdn.tailwindcss.com?plugins=typography"></script>
    <script src="https://unpkg.com/htmx.org@2.0.4"></script> <!-- NEW -->
    {% block header %}
    {% endblock %}
core/urls.py に新しいルートを追加します:
# core/urls.py
from django.urls import path
from . import views
urlpatterns = [
path("", views.index, name="index"),
path("tasks/", views.tasks, name="tasks"),
path("tasks/<task_id>/", views.toggle_todo, name="toggle_todo"), #
<p>次に、core/views.py に対応するビューを追加します。<br>
</p>
<pre class="brush:php;toolbar:false"># core/views.py
from django.shortcuts import redirect, render
from .models import UserProfile, Todo
from django.contrib.auth.decorators import login_required
from django.views.decorators.http import require_http_methods #
<p>return ステートメントでは、テンプレートのパーシャルをどのように利用できるかを確認できます。名前 todo-item-partial と、対象の項目の名前と一致するコンテキストを参照して、パーシャルのみを返しています。 task.html.</p> のループ内で反復処理します。
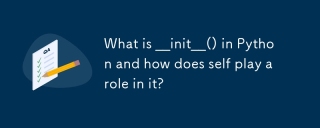
<p>項目のオンとオフの切り替えをテストできるようになりました:</p>
<p><img src="/static/imghwm/default1.png" data-src="https://img.php.cn/upload/article/000/000/000/173609284449958.jpg?x-oss-process=image/resize,p_40" class="lazy" alt="Creating a To-Do app with Django and HTMX - Part Creating the frontend and adding HTMX"></p>
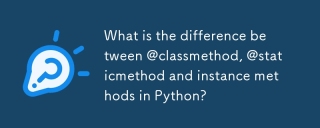
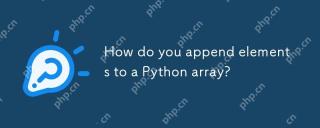
<p>クライアント側の作業を行っているだけのように見えますが、ブラウザでネットワーク ツールを調べると、PUT リクエストをディスパッチし、部分的な HTML を返していることがわかります。</p><p>PUT リクエスト </p>
<p><img src="/static/imghwm/default1.png" data-src="https://img.php.cn/upload/article/000/000/000/173609284544580.jpg?x-oss-process=image/resize,p_40" class="lazy" alt="Creating a To-Do app with Django and HTMX - Part Creating the frontend and adding HTMX"></p>
<p>応答</p>
<p><img src="/static/imghwm/default1.png" data-src="https://img.php.cn/upload/article/000/000/000/173609284614077.jpg?x-oss-process=image/resize,p_40" class="lazy" alt="Creating a To-Do app with Django and HTMX - Part Creating the frontend and adding HTMX"></p>
<p>私たちのアプリは HTMX 対応になりました!最終的なコードはここで確認できます。パート 4 では、タスクを追加および削除する機能を追加します。</p>
以上がDjango と HTMX を使用した To-Do アプリの作成 - パート フロントエンドの作成と HTMX の追加の詳細内容です。詳細については、PHP 中国語 Web サイトの他の関連記事を参照してください。

 Python Switchステートメントとは何ですか?Apr 30, 2025 pm 02:08 PM
この記事では、バージョン3.10で導入されたPythonの新しい「マッチ」ステートメントについて説明します。これは、他の言語のスイッチステートメントに相当するものです。コードの読みやすさを向上させ、従来のif-elif-elよりもパフォーマンスの利点を提供します
 Pythonの例外グループとは何ですか?Apr 30, 2025 pm 02:07 PM
Python 3.11の例外グループは、複数の例外を同時に処理することで、同時シナリオと複雑な操作でエラー管理を改善します。
 Pythonの関数注釈とは何ですか?Apr 30, 2025 pm 02:06 PM
Pythonの関数注釈は、タイプチェック、ドキュメント、およびIDEサポートの関数にメタデータを追加します。それらはコードの読みやすさ、メンテナンスを強化し、API開発、データサイエンス、ライブラリの作成において重要です。
 Pythonのユニットテストとは何ですか?Apr 30, 2025 pm 02:05 PM
この記事では、Pythonの単体テスト、その利点、およびそれらを効果的に書く方法について説明します。テスト用のUnittestやPytestなどのツールを強調しています。
 Pythonのアクセス仕様とは何ですか?Apr 30, 2025 pm 02:03 PM
記事では、Pythonのアクセス仕様について説明します。Pythonは、厳格な執行ではなく、クラスメンバーの可視性を示すために命名規則を使用します。
 Pythonの__init __()とは何ですか?また、セルフはどのように役割を果たしますか?Apr 30, 2025 pm 02:02 PM
記事では、Pythonの\ _ \ _ init \ _ \ _()メソッドと、オブジェクト属性の初期化における自己の役割について説明します。 \ _ \ _ init \ _ \ _()に対するその他のクラス方法と継承の影響についてもカバーされています。
 Pythonの@ClassMethod、@StaticMethod、およびインスタンスメソッドの違いは何ですか?Apr 30, 2025 pm 02:01 PM
この記事では、@ClassMethod、@StaticMethod、およびPythonのインスタンスメソッドの違いについて説明し、そのプロパティ、ユースケース、および利点を詳述します。必要な機能とDAに基づいて適切な方法タイプを選択する方法を説明します
 Pythonアレイに要素をどのように追加しますか?Apr 30, 2025 am 12:19 AM
inpython、youappendelementStoalistusingtheappend()method.1)useappend()forsingleelements:my_list.append(4).2)useextend()or = formultipleElements:my_list.extend(another_list)ormy_list = [4,5,6] .3)forspecificpositions:my_list.insert(1,5).beaware


ホットAIツール

Undresser.AI Undress
リアルなヌード写真を作成する AI 搭載アプリ

AI Clothes Remover
写真から衣服を削除するオンライン AI ツール。

Undress AI Tool
脱衣画像を無料で

Clothoff.io
AI衣類リムーバー

Video Face Swap
完全無料の AI 顔交換ツールを使用して、あらゆるビデオの顔を簡単に交換できます。

人気の記事
ホットツール

ZendStudio 13.5.1 Mac
強力な PHP 統合開発環境

mPDF
mPDF は、UTF-8 でエンコードされた HTML から PDF ファイルを生成できる PHP ライブラリです。オリジナルの作者である Ian Back は、Web サイトから「オンザフライ」で PDF ファイルを出力し、さまざまな言語を処理するために mPDF を作成しました。 HTML2FPDF などのオリジナルのスクリプトよりも遅く、Unicode フォントを使用すると生成されるファイルが大きくなりますが、CSS スタイルなどをサポートし、多くの機能強化が施されています。 RTL (アラビア語とヘブライ語) や CJK (中国語、日本語、韓国語) を含むほぼすべての言語をサポートします。ネストされたブロックレベル要素 (P、DIV など) をサポートします。

SecLists
SecLists は、セキュリティ テスターの究極の相棒です。これは、セキュリティ評価中に頻繁に使用されるさまざまな種類のリストを 1 か所にまとめたものです。 SecLists は、セキュリティ テスターが必要とする可能性のあるすべてのリストを便利に提供することで、セキュリティ テストをより効率的かつ生産的にするのに役立ちます。リストの種類には、ユーザー名、パスワード、URL、ファジング ペイロード、機密データ パターン、Web シェルなどが含まれます。テスターはこのリポジトリを新しいテスト マシンにプルするだけで、必要なあらゆる種類のリストにアクセスできるようになります。

SAP NetWeaver Server Adapter for Eclipse
Eclipse を SAP NetWeaver アプリケーション サーバーと統合します。

MinGW - Minimalist GNU for Windows
このプロジェクトは osdn.net/projects/mingw に移行中です。引き続きそこでフォローしていただけます。 MinGW: GNU Compiler Collection (GCC) のネイティブ Windows ポートであり、ネイティブ Windows アプリケーションを構築するための自由に配布可能なインポート ライブラリとヘッダー ファイルであり、C99 機能をサポートする MSVC ランタイムの拡張機能が含まれています。すべての MinGW ソフトウェアは 64 ビット Windows プラットフォームで実行できます。
ホットトピック
 7859
7859 15164914140352130025124229