ホームページ >ウェブフロントエンド >jsチュートリアル >Reactables で簡素化された RxJS
Reactables で簡素化された RxJS
- Barbara Streisandオリジナル
- 2024-10-10 06:19:021126ブラウズ
導入
RxJS は強力なライブラリですが、学習曲線が急であることが知られています。
ライブラリの大規模な API サーフェスは、リアクティブ プログラミングへのパラダイム シフトと相まって、初心者にとっては圧倒される可能性があります。
RxJS の使用法を簡素化し、開発者がリアクティブ プログラミングを簡単に導入できるようにするために、Reactables API を作成しました。
例
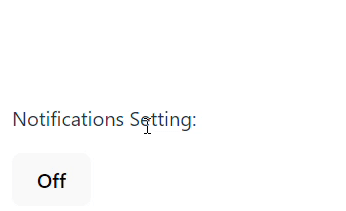
ユーザーの通知設定を切り替える簡単なコントロールを構築します。
また、更新されたトグル設定をモック バックエンドに送信し、ユーザーに成功メッセージをフラッシュします。

RxJS と Reactables をインストールする
npm i rxjs @reactables/core
基本的なトグルから始めます。
import { RxBuilder, Reactable } from '@reactables/core';

export type ToggleState = {
  notificationsOn: boolean;
};

export type ToggleActions = {
  toggle: (payload: boolean) => void;
};

export const RxNotificationsToggle = (
  initialState = {
    notificationsOn: false,
  } as ToggleState
): Reactable<ToggleState, ToggleActions> =>
  RxBuilder({
    initialState,
    reducers: {
      toggle: (state) => ({
        notificationsOn: !state.notificationsOn,
      }),
    },
  });


const [state$, actions] = RxToggleNotifications();

state$.subscribe((state) => {
  console.log(state.notificationsOn);
});

actions.toggle();

/*
OUTPUT

false
true

*/
RxBuilder は、2 つの項目を含むタプルである Reactable を作成します。
UI が状態変更をサブスクライブできる RxJS Observable。
状態変更を呼び出すために UI が呼び出すことができるアクション メソッドのオブジェクト。
Reactables を使用する場合はサブジェクトは必要ありません。
純粋なリデューサー関数を使用して、必要な動作を記述するだけです。
Reactables は、サブジェクトとさまざまな演算子を内部で使用して、開発者の状態を管理します。
API呼び出しの追加と成功メッセージの点滅
Reactable は、RxJS オペレーター関数として表現されるエフェクトを使用して非同期操作を処理します。これらは、エフェクトをトリガーするアクション/リデューサーで宣言できます。
これにより、非同期ロジックを処理する際に RxJS を最大限に活用できるようになります。
上記のトグルの例を変更して、非同期動作を組み込んでみましょう。短くするためにエラー処理は省略します。
import { RxBuilder, Reactable } from '@reactables/core';
import { of, concat } from 'rxjs';
import { debounceTime, switchMap, mergeMap, delay } from 'rxjs/operators';

export type ToggleState = {
  notificationsOn: boolean;
  showSuccessMessage: boolean;
};
export type ToggleActions = {
  toggle: (payload: boolean) => void;
};

export const RxNotificationsToggle = (
  initialState = {
    notificationsOn: false,
    showSuccessMessage: false,
  }
): Reactable<ToggleState, ToggleActions> =>
  RxBuilder({
    initialState,
    reducers: {
      toggle: {
        reducer: (_, action) => ({
          notificationsOn: action.payload as boolean,
          showSuccessMessage: false,
        }),
        effects: [
          (toggleActions$) =>
            toggleActions$.pipe(
              debounceTime(500),
              // switchMap to unsubscribe from previous API calls if a new toggle occurs
              switchMap(({ payload: notificationsOn }) =>
                of(notificationsOn)
                  .pipe(delay(500)) // Mock API call
                  .pipe(
                    mergeMap(() =>
                      concat(
                        // Flashing the success message for 2 seconds
                        of({ type: 'updateSuccess' }),
                        of({ type: 'hideSuccessMessage' }).pipe(delay(2000))
                      )
                    )
                  )
              )
            ),
        ],
      },
      updateSuccess: (state) => ({
        ...state,
        showSuccessMessage: true,
      }),
      hideSuccessMessage: (state) => ({
        ...state,
        showSuccessMessage: false,
      }),
    },
  });
StackBlitz の完全な例を参照してください:
反応する |角度
Reactable をビューにバインドしましょう。以下は、@reactables/react パッケージの useReactable フックを使用して React コンポーネントにバインドする例です。
import { RxNotificationsToggle } from './RxNotificationsToggle';
import { useReactable } from '@reactables/react';

function App() {
  const [state, actions] = useReactable(RxNotificationsToggle);
  if (!state) return;

  const { notificationsOn, showSuccessMessage } = state;
  const { toggle } = actions;

  return (
    <div className="notification-settings">
      {showSuccessMessage && (
        <div className="success-message">
          Success! Notifications are {notificationsOn ? 'on' : 'off'}.
        </div>
      )}
      <p>Notifications Setting:</p>
      <button onClick={() => toggle(!notificationsOn)}>
        {notificationsOn ? 'On' : 'Off'}
      </button>
    </div>
  );
}

export default App;
以上です!
結論
Reactables は、Subject の世界に飛び込むのではなく、純粋なリデューサー関数を使用して機能を構築できるようにすることで、RxJS を簡素化するのに役立ちます。
RxJS は、非同期ロジックの構成という最適な作業のために予約されます。
Reactable は拡張してさらに多くのことを行うことができます。 フォームの管理に使用する方法など、その他の例については、ドキュメントを確認してください。
以上がReactables で簡素化された RxJSの詳細内容です。詳細については、PHP 中国語 Web サイトの他の関連記事を参照してください。

