


このプロジェクトは、メイン ブランチへのプッシュ時のアプリケーションのビルド、テスト、ステージング環境へのデプロイメント プロセスの自動化を示す簡単なサンプル プロジェクトです。
CI/CD パイプラインを適切にデモンストレーションするために、最小限のコードでシンプルな Python プロジェクトを作成し、それを GitHub Actions に統合します。
単純な Python プロジェクトを作成する
前に述べたように、パイプラインで使用する単純なプロジェクトを作成します。特に理由はありませんが、他のプログラミング言語を使用することもできます。このプロジェクトの主な目的は、パイプラインをデモンストレーションすることです。
プロジェクトフォルダーの作成
それでは、プロジェクト フォルダーを作成し、そのフォルダーに移動します。
mkdir automated-testing
cd automated-testing
アプリケーションファイルの書き込み
ここで、簡単な Python アプリケーションを作成します。プロジェクト フォルダーに新しいファイル app.py を作成します。
touch app.py
以下のコード ブロックをファイルに追加します:
def hello():
  return "Hello, World!"

if __name__ == "__main__":
  print(hello())
これは、CI パイプラインでテストできる基本機能の例として機能する、非常に単純な Python の「Hello world」関数です。
def hello() は、引数を取らない hello という名前の関数を定義します。この関数が呼び出されると、文字列「Hello, World!」が返されます。
if __name__ == "__main__" は、ファイルが直接実行された場合 (モジュールとしてインポートされた場合ではない) にのみ特定のコードが実行されるようにするために使用される標準の Python 構造です。これは、スクリプトのエントリ ポイントとして機能します。
app.py が直接実行されると (例: python app.py を実行することにより)、スクリプトは hello() 関数を呼び出し、結果「Hello, World!」を出力します。
要件ファイルを作成します。
一般的なプロジェクトには依存関係があり、Python プロジェクトでは依存関係は通常、requirements.txt ファイルで定義されます。
新しいファイルrequirements.txtを作成します
touch requirements.txt
これをファイルに追加します:
pytest
単体テストの作成
ここで、app.py の関数をテストするために、基本的なテスト ファイル test_app.py を追加します。以下をファイルに追加します:
from app import hello

def test_hello():
  assert hello() == "Hello, World!"
これでパイプラインを作成する準備が整いました。
CI/CD 用の GitHub アクションのセットアップ
GitHub アクションを構成するには、リポジトリ内に .github/workflows フォルダーを作成する必要があります。これが、リポジトリ内の CI/CD パイプラインを GitHub に通知する方法です。
新しいファイルを作成します:
mkdir -p .github/workflows
1 つのリポジトリに複数のパイプラインを含めることができるため、.github/workflows フォルダーにファイル proj.yml を作成します。ここで、Python プロジェクトを構築、テスト、デプロイするための手順を定義します。
以下のコードをファイルに追加します:
name: Build, Test and Deploy

# Trigger the workflow on pushes to the main branch
on:
  push:
    branches:
      - main

jobs:
  build-and-test:
    runs-on: ubuntu-latest

    steps:
    # Checkout the code from the repository
    - name: Checkout repo
      uses: actions/checkout@v4

    # Set up Python environment
    - name: Setup Python
      uses: actions/setup-python@v5
      with:
        python-version: '3.x'

    # Install dependencies
    - name: Install Dependecies
      run: |
        python -m pip install --upgrade pip
        pip install -r requirements.txt

    # Build (this project deosn't require a build but we will simulate a build by creating a file)
    - name: Build Project
      run: |
        mkdir -p build
        # Simulate build output by creating a file
        touch build/output_file.txt

    # Run tests using pytest
    - name: Run tests
      run:
        pytest

    # Upload the build output as an artifact (we created a file in the build step to simulate an artifact)
    - name: Upload build artifact
      uses: actions/upload-artifact@v4
      with:
        name: build-artifact
        path: build/

  deploy:
    runs-on: ubuntu-latest
    needs: build-and-test
    if: success()

    steps:
    # Download the artifact from the build stage
    - name: Download build artifact
      uses: actions/download-artifact@v4
      with:
        name: build-artifact
        path: build/

    - name: Simulate Deployment
      run: |
        echo "Deploying to staging..."
        ls build/
Breakdown of the CI/CD Pipeline Steps
- Trigger on Push to main: The pipeline is triggered whenever there is a push to the main branch.
- Checkout Code: This step uses GitHub’s checkout action to pull our code from the repository.
- Set Up Python: The pipeline sets up a Python environment on the CI runner (GitHub's virtual machine), ensuring that the correct Python version is used.
- Install Dependencies: It installs the required dependencies for our Python project (pytest in this case). This dependency was just added as an example of when a project has dependencies as this particular sample python application does not require any.
- Build: This stage was also just added for demonstration purposes, supposing this was a JavaScript/Node.js project this is where we would run the npm run build command and this will create an artifact we can upload and use in the deploy stage. Since this is a python project and it doesn't really require a build, we will create a file and folder in this stage. The file will serve as our artifact for the deploy stage.
- Run Tests: It runs the tests using pytest to validate the code.
- Upload Build Artifact: After running the tests, the build-and-test stage creates and saves a build artifact (in this case, a simulated output_file.txt in the build folder from the build step). The action upload-artifact is used to store this artifact. You can replace this with whatever actual build output your project creates.
- Deploy Stage: Our application will only be deployed if the test was successful which is why I have added the conditionals needs and if. Using “needs” we can require that the deploy job won’t even run unless the test job is successful. The download-artifact action retrieves the build artifact and the last step "Simulate Deployment" simulates deployment by printing a message and lists the artifact. If this was a live project we would have the actual deployment commands to deploy to a real staging environment here. You can replace the echo and ls commands with actual deployment commands (e.g., deploying to a cloud platform). This approach ensures that the output from the build-and-test stage is properly passed to the deploy stage, simulating how a real deployment would work with build artifacts.
Push to GitHub
If you haven't already, you need to initialize a git repository using the commands below:
git init
git add .
git commit -m "Create project as well as CI/CD pipeline"
Now we push to GitHub. Create a GitHub repository and push your code using the below commands:
git remote add origin <your-repo-url>
git push -u origin main
</your-repo-url>
Verify the Pipeline
After pushing the code, you can visit the Actions tab in your GitHub repository. You should see the pipeline triggered, running the steps defined in your proj.yml file.
If everything is set up correctly, the pipeline will build, test, and simulate deployment. You can changes things around in your project and make new pushes to see the the pipeline works, create errors intentional so you can see how the pipeline works when the tests fail.
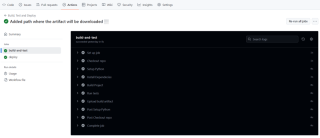
On a successful run this is how your Actions tab should look.
And that's it, this setup provides a working example of a CI/CD pipeline for a very basic Python project. If you found this helpful, please share with your connection and if you have any questions, do not hesitate to drop the question in the comments.
以上がGitHub アクションを使用してビルド、テスト、デプロイのプロセスを自動化するの詳細内容です。詳細については、PHP 中国語 Web サイトの他の関連記事を参照してください。

 Python:主要なアプリケーションの調査Apr 10, 2025 am 09:41 AM
Pythonは、Web開発、データサイエンス、機械学習、自動化、スクリプトの分野で広く使用されています。 1)Web開発では、DjangoおよびFlask Frameworksが開発プロセスを簡素化します。 2)データサイエンスと機械学習の分野では、Numpy、Pandas、Scikit-Learn、Tensorflowライブラリが強力なサポートを提供します。 3)自動化とスクリプトの観点から、Pythonは自動テストやシステム管理などのタスクに適しています。
 2時間でどのくらいのPythonを学ぶことができますか?Apr 09, 2025 pm 04:33 PM
2時間以内にPythonの基本を学ぶことができます。 1。変数とデータ型を学習します。2。ステートメントやループの場合などのマスター制御構造、3。関数の定義と使用を理解します。これらは、簡単なPythonプログラムの作成を開始するのに役立ちます。
 プロジェクトの基本と問題駆動型の方法で10時間以内にコンピューター初心者プログラミングの基本を教える方法は?Apr 02, 2025 am 07:18 AM
10時間以内にコンピューター初心者プログラミングの基本を教える方法は?コンピューター初心者にプログラミングの知識を教えるのに10時間しかない場合、何を教えることを選びますか...
 中間の読書にどこでもfiddlerを使用するときにブラウザによって検出されないようにするにはどうすればよいですか?Apr 02, 2025 am 07:15 AM
fiddlereveryversings for the-middleの測定値を使用するときに検出されないようにする方法
 Python 3.6にピクルスファイルをロードするときに「__Builtin__」モジュールが見つからない場合はどうすればよいですか?Apr 02, 2025 am 07:12 AM
Python 3.6のピクルスファイルのロードレポートエラー:modulenotFounderror:nomodulenamed ...
 風光明媚なスポットコメント分析におけるJieba Wordセグメンテーションの精度を改善する方法は?Apr 02, 2025 am 07:09 AM
風光明媚なスポットコメント分析におけるJieba Wordセグメンテーションの問題を解決する方法は?風光明媚なスポットコメントと分析を行っているとき、私たちはしばしばJieba Wordセグメンテーションツールを使用してテキストを処理します...
 正規表現を使用して、最初の閉じたタグと停止に一致する方法は?Apr 02, 2025 am 07:06 AM
正規表現を使用して、最初の閉じたタグと停止に一致する方法は? HTMLまたは他のマークアップ言語を扱う場合、しばしば正規表現が必要です...
 Investing.comの反クローラーメカニズムをバイパスするニュースデータを取得する方法は?Apr 02, 2025 am 07:03 AM
Investing.comの反クラウリング戦略を理解する多くの人々は、Investing.com(https://cn.investing.com/news/latest-news)からのニュースデータをクロールしようとします。


ホットAIツール

Undresser.AI Undress
リアルなヌード写真を作成する AI 搭載アプリ

AI Clothes Remover
写真から衣服を削除するオンライン AI ツール。

Undress AI Tool
脱衣画像を無料で

Clothoff.io
AI衣類リムーバー

AI Hentai Generator
AIヘンタイを無料で生成します。

人気の記事
ホットツール

ドリームウィーバー CS6
ビジュアル Web 開発ツール

DVWA
Damn Vulnerable Web App (DVWA) は、非常に脆弱な PHP/MySQL Web アプリケーションです。その主な目的は、セキュリティ専門家が法的環境でスキルとツールをテストするのに役立ち、Web 開発者が Web アプリケーションを保護するプロセスをより深く理解できるようにし、教師/生徒が教室環境で Web アプリケーションを教え/学習できるようにすることです。安全。 DVWA の目標は、シンプルでわかりやすいインターフェイスを通じて、さまざまな難易度で最も一般的な Web 脆弱性のいくつかを実践することです。このソフトウェアは、

SAP NetWeaver Server Adapter for Eclipse
Eclipse を SAP NetWeaver アプリケーション サーバーと統合します。

ゼンドスタジオ 13.0.1
強力な PHP 統合開発環境

ZendStudio 13.5.1 Mac
強力な PHP 統合開発環境
ホットトピック
 7450
7450 15137452