
ホームページ >バックエンド開発 >C#.Net チュートリアル >C#のリストボックス
C#のリストボックス

- WBOYWBOYWBOYWBOYWBOYWBOYWBOYWBOYWBOYWBOYWBOYWBOYWBオリジナル
- 2024-09-03 15:28:171066ブラウズ
C# の ListBox は、要素のリストを ListBox に追加して、単一または複数の要素を操作するものとして定義されます。ドロップダウン ボックスとリスト ボックスの違いは、ドロップダウン ボックスでは一度に 1 つの要素しか選択できませんが、リスト ボックスの場合は一度に 1 つまたは複数の要素を選択できることです。 ListBox は、さまざまなタイプのメソッド、プロパティ、イベントを提供します。この ListBox は System で指定されます。 Windows.Forms パッケージ (名前空間)。
ListBox クラスにも、C# の 3 つの異なるタイプのコレクションが含まれています。彼らは
です- ListBox.ObjectCollection: このコレクション クラスは、ListBox コントロールのすべての要素を保持します。
- ListBox.SelectedObjectCollection: このコレクション クラスは、ListBox コントロールで選択された項目のコレクションを保持します。
- ListBox.SelectedIndexCollection: このコレクション クラスは、選択されたインデックスのコレクションを保持します。これらの要素は ListBox.ObjectCollection のインデックスのサブセットであり、ListBox コントロール内で特に選択されたインデックスです。
C# のリスト ボックスの種類?
- 単一の選択された ListBox: ListBox はリストから 1 つの要素のみを選択できます。
- 複数選択された ListBox: ListBox はリストから複数の要素を選択できます。
C# の ListBox の前提条件:
- .Net ライブラリを PC にインストールする必要があります
- Visual Studio のセットアップ
C# で ListBox を作成する方法?
ListBox は 2 つの方法で作成できます:
- 設計時
- ランタイム
1.設計時
最初にコードを必要とせずに作成するのは非常に簡単です。プロジェクトを作成する手順
ステップ 1: Visual Studio を開く
「ファイル」=>「新規」=>「プロジェクト」をクリックします
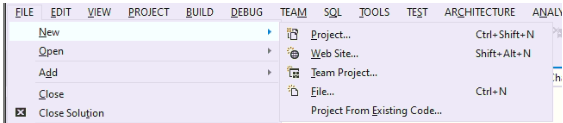
=>Windows フォーム アプリケーションを選択し、
プロジェクトの構造をよりよく理解するには、以下の画像を参照してください:
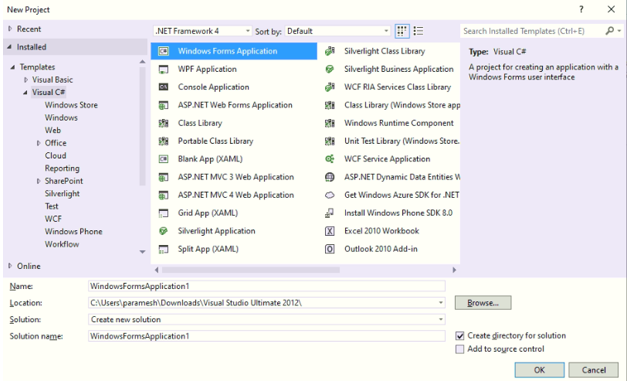
プロジェクトに名前を付けて「OK」をクリックすると、以下のような Form1.cs(Design) タブが表示されます
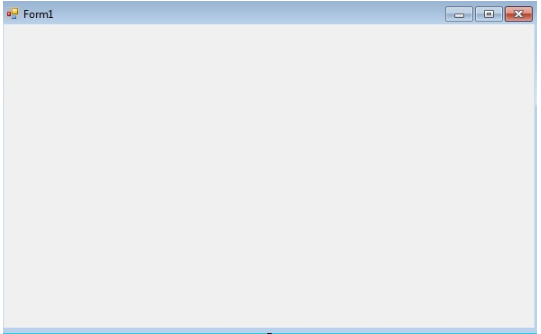
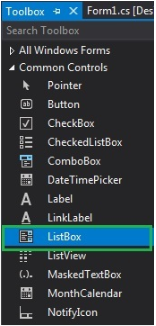
ステップ 2: ビジュアル スタジオの左側またはビューから、[ツールボックス] を選択します。次に、上の画像に示すように、必要な要素を Form1.cs(デザイン) にドラッグ アンド ドロップします。
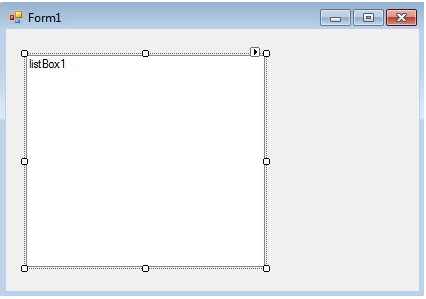
ステップ 3: ドラッグ アンド ドロップ後、Visual Studio の右側からプロパティを選択し、Text プロパティに名前を付けます。これは、2nd メソッド Run-Time.
でコードを記述するために使用されます。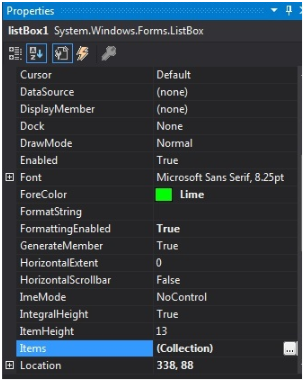
出力:
2.ランタイム
これは上記の方法に従って直接実行しているわけではありません。 ListBox を作成するプログラムをいくつか書きました。これは非常に簡単です。まず、ListBox、Label、TextField、Button などの必要な要素をすべてドラッグ アンド ドロップします。ドロップされた要素のいずれかをダブルクリックすると、アクション メソッドを要素とする C# コードが取得されます。ロジックを記述する必要があります。それらの要素を使用したいと考えています。 ListBox
を作成するためのランタイム プロジェクト コードを作成する手順ステップ 1: ListBox() コンストラクターを使用して ListBox コントロールを作成します。
構文:
ListBox listBox = new ListBox();
ステップ 2: ListBox プロパティを作成した後、Font、Font.Size、Color などの ListBox のプロパティを要素に設定する場合
構文:
listBox.Location = new Point(200, 100);
listBox.Size = new Size(100, 90);
listBox.ForeColor = Color.Red;
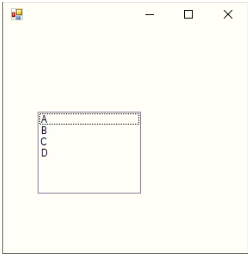
ステップ 3: ListBox に要素を追加します。
構文:
listBox.Items.Add("A");
listBox.Items.Add("B");
listBox.Items.Add("C");
listBox.Items.Add("D");
ステップ 4: この ListBox をフォームに追加します。
構文:
this.Controls.Add(listBox);
C# のリストボックスの例
以下に挙げる例を次に示します
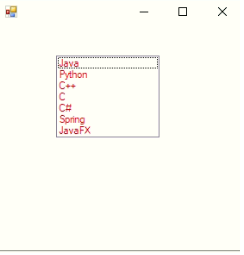
例 #1 – ListBox の作成と要素の追加
コード:
//importing C# required libraries
using System;
using System.Collections.Generic;
using System.ComponentModel;
using System.Data;
using System.Drawing;
using System.Linq;
using System.Text;
using System.Windows.Forms;
//namespace is project name
namespace WindowsFormsApplication26
{
//creating class extends from Form class
public partial class Form1 : Form
{
//constrcutor
public Form1()
{
//initializing components
InitializeComponent();
//Creating list box and add some properties and values to the List Box
listBox2.ForeColor = Color.Red;
listBox2.Items.Add("Java");
listBox2.Items.Add("Python");
listBox2.Items.Add("C++");
listBox2.Items.Add("C");
listBox2.Items.Add("C#");
listBox2.Items.Add("Spring");
listBox2.Items.Add("JavaFX");
listBox2.SelectionMode = SelectionMode.MultiSimple;
}
//method for selectedIndex change operation
private void listBox2_SelectedIndexChanged(object sender, EventArgs e)
{
}
}
}
出力:
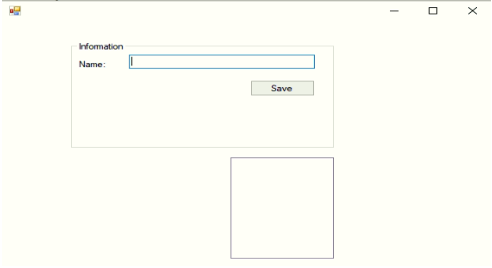
例 #2 – ユーザーが値を入力し、ボタンをクリックしてリスト ボックスに追加します
コード:
//importing C# required libraries
using System;
using System.Collections.Generic;
using System.ComponentModel;
using System.Data;
using System.Drawing;
using System.Linq;
using System.Text;
using System.Windows.Forms;
//namespace is project name
namespace WindowsFormsApp25
{
//creating class extends from Form class
public partial class Form1 : Form
{
//constrcutor
public Form1()
{
//initializing components
InitializeComponent();
}
//saving the enter values into List box
private void buttonSave_Click(object sender, EventArgs e)
{
//If user enter any values then if block executes
if (this.textBoxName.Text != "")
{
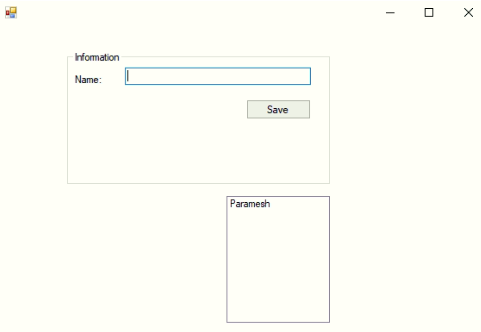
NameList.Items.Add(this.textBoxName.Text);
this.textBoxName.Focus();
this.textBoxName.Clear();
}
//If user did not enter any values then else block executes
else
{
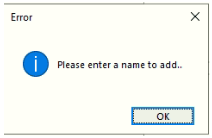
MessageBox.Show("Please enter a name to add..","Error",MessageBoxButtons.OK,MessageBoxIcon.Information);
this.textBoxName.Focus();
}
}
}
}
出力:
値を入力する前に:
値を入力せずに、保存ボタンをクリックしてみてください:
値を入力した後:
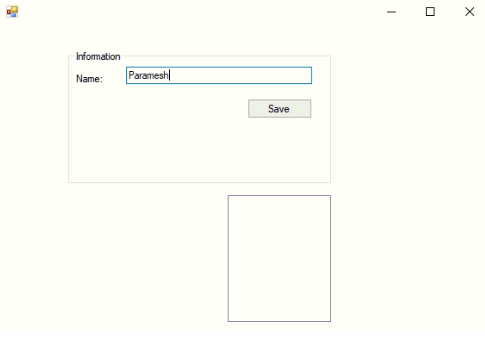
After entering a value and clicking the save button:
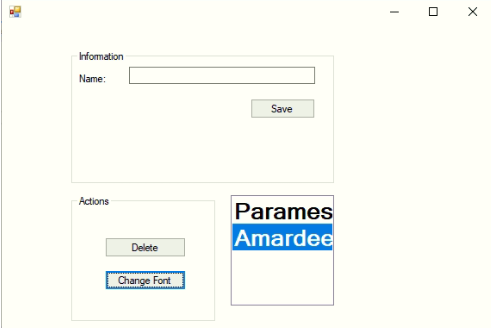
Example #3 – Delete, Change the font of List Box values
Code:
//importing C# required libraries
using System;
using System.Collections.Generic;
using System.ComponentModel;
using System.Data;
using System.Drawing;
using System.Linq;
using System.Text;
using System.Windows.Forms;
//namespace is project name
namespace WindowsFormsApp25
{
//creating class extends from Form class
public partial class Form1 : Form
{
//constrcutor
public Form1()
{
//initializing components
InitializeComponent();
}
//saving the enter values into List box
private void buttonSave_Click(object sender, EventArgs e)
{
//If user enter any values then if block executes
if (this.textBoxName.Text != "")
{
NameList.Items.Add(this.textBoxName.Text);
this.textBoxName.Focus();
this.textBoxName.Clear();
}
//If user did not enter any values then else block executes
else
{
MessageBox.Show("Please enter a name to add..","Error",MessageBoxButtons.OK,MessageBoxIcon.Information);
this.textBoxName.Focus();
}
}
//Removing the selected elements
private void button2_Click(object sender, EventArgs e)
{
if (this.NameList.SelectedIndex >= 0)
{
this.NameList.Items.RemoveAt(this.NameList.SelectedIndex);
}
}
//Setting List box selected values font
private void button3_Click(object sender, EventArgs e)
{
if (fontDialog1.ShowDialog() == DialogResult.OK)
{
NameList.Font = fontDialog1.Font;
}
}
}
}
Output:
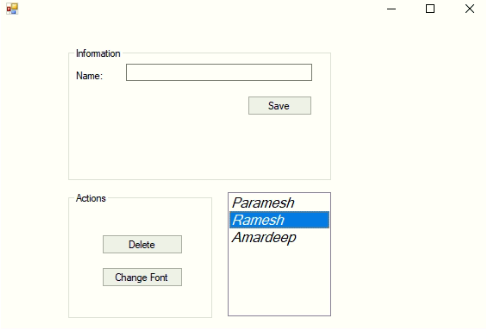
After adding 3 names:
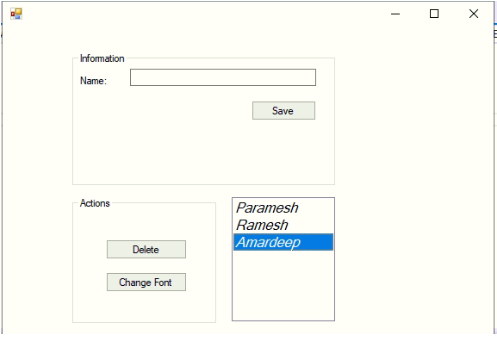
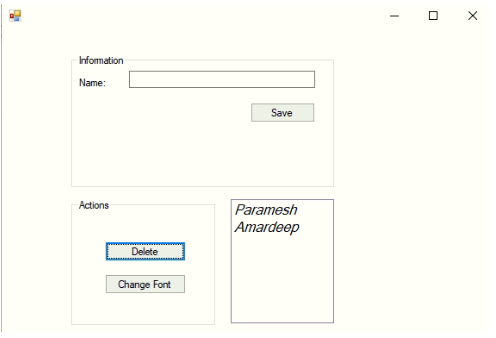
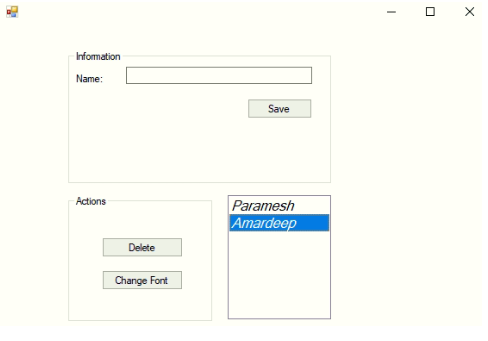
Deleting selected element:
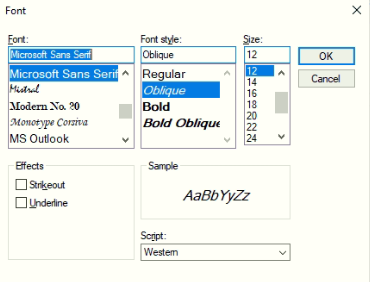
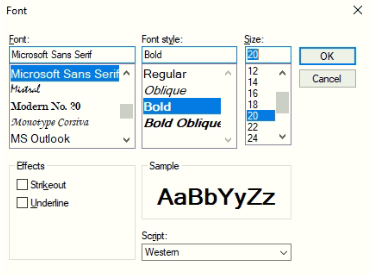
Change the font of the values:
Conclusion
C# List box is used to add multiple elements to perform any specific operation. List Boxes are used to select a single value or multiple values at a time. In C# List Box can be created using Design-Time and Run-Time methods.
以上がC#のリストボックスの詳細内容です。詳細については、PHP 中国語 Web サイトの他の関連記事を参照してください。