ホームページ >ウェブフロントエンド >jsチュートリアル >Lemon Squeezy を使った簡単な支払い | Next.js の統合が簡単に
Lemon Squeezy を使った簡単な支払い | Next.js の統合が簡単に
- WBOYWBOYWBOYWBOYWBOYWBOYWBOYWBOYWBOYWBOYWBOYWBOYWBオリジナル
- 2024-08-26 21:45:21779ブラウズ
導入
多くの起業家にとって、支払いプロセスは究極の忍耐力の試練のように感じられます。ようやくすべてが解けたと思った瞬間、さらに複雑な問題が次々と現れ、順風満帆はまだ遠い夢であることを思い出させます。

あなたも同じように感じますか?レモンスクイージーはあなたのアスピリンです!
この魔法のような支払いポーションはすべてを簡素化するので、支払いの煩わしさを忘れて楽しいことに集中できます。コーディングを複雑にする必要はもうありません。それは、チームに決済ユニコーンがいるようなものです。
なぜレモンスクイーズなのか?
そうですね、税務コンプライアンスの博士号を取得したり、支払いの悩みのために際限なく供給されるアスピリンを必要とせずに SaaS ビジネスを運営できることを想像してみてください。 LemonSqueezy は、支払いやサブスクリプションから世界的な税務コンプライアンスや不正防止に至るまで、すべてを合理化します。
さらに、複数通貨のサポートと、あらゆる種類のデジタル製品を扱う店頭の準備が整っています。それは、退屈な作業をすべて引き受けてくれるテクノロジーに精通したビジネス パートナーがいるようなもので、あなたは最も得意なこと、つまり創造に集中できるのです。デジタル クリエイター、起業家、コーディング ソリューションよりもボタンをクリックすることを好む人に最適です。
プロジェクトのセットアップ
本題に入る前に、完全なコードは私の GitHub リポジトリで見つけることができ、デモは私の Instagram で確認できることだけを言っておきます。さて、GitHub 上のこのプロジェクトについてですが、支払いオプションが 2 つあります。1 つ目は、従来の 1 回限りの支払いです。 2 つ目は、これまでにない豪華なサブスクリプション モデルです。
ただし、このチュートリアルでは、一括して 1 回限りの支払いで進めます。ああ、私の例では、ケーススタディとして毎月のハウスクリーニング サービスを使用しています。少しばかげているように聞こえるかもしれませんが、まあ、これはすべてコーディングのトレーニングの一部です。 ?
1.LemonSqueezyのセットアップ
始めるには、Lemon Squeezy にストアといくつかの製品およびバリエーションを作成しておく必要があります。
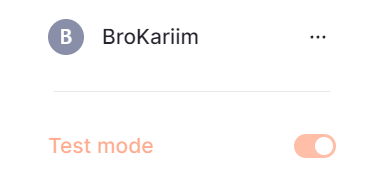
テストモードがオンになっていることを確認してください。ストアを公開すると、オフになります。左下をチェックしてください。
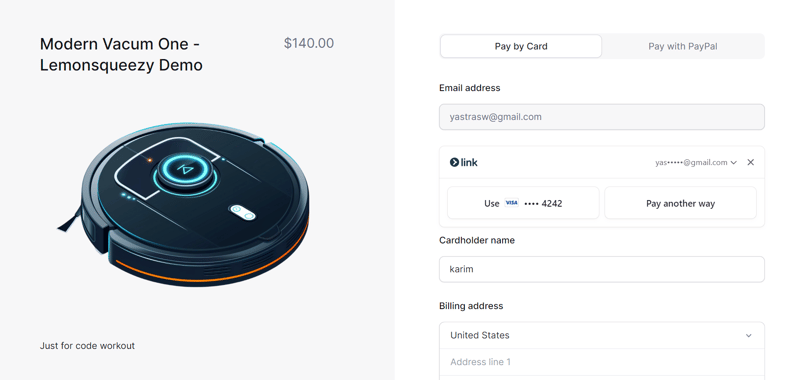
私の製品は次のようになります
次に、https://app.lemonsqueezy.com/settings/api で API キーを生成してストアに接続しましょう。
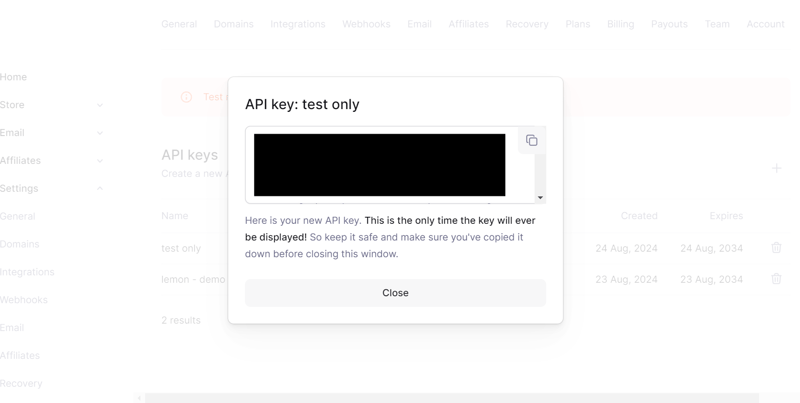
これを環境変数として Next.js プロジェクトに追加します:
LEMONSQUEEZY_API_KEY="[YOUR API KEY]"
2.ルートハンドラーのセットアップ
次に、支払いプロセスを処理するための API ルートを作成します。この部分で必要な最終結果は、後でフロントエンド セクションに渡す checkoutUrl を取得することです。
export const dynamic = "force-dynamic";

export async function POST(req: NextRequest) {
  try {

    const reqData = await req.json();

    if (!reqData.productId) {
      console.error("Product ID is missing");
      return NextResponse.json({ message: "Product ID is required" }, { status: 400 });
    }


    const response = await lemonSqueezyApiInstance.post("/checkouts", {
      data: {
        type: "checkouts",
        attributes: {
          checkout_data: {
            custom: {
              user_id: "123",
            },
          },
        },
        relationships: {
          store: {
            data: {
              type: "stores",
              id: process.env.LEMON_SQUEEZY_STORE_ID?.toString(),
            },
          },
          variant: {
            data: {
              type: "variants",
              id: reqData.productId.toString(),
            },
          },
        },
      },
    });

    const checkoutUrl = response.data.data.attributes.url;
    console.log(response.data);
    return NextResponse.json({ checkoutUrl });
  } catch (error) {
    console.error("Error in POST /api/lemonsqueezy:", error);
    return NextResponse.json({ message: "An error occured" }, { status: 500 });
  }
}
このコードの簡単な説明は次のとおりです:
- まず、export constdynamic = "force-dynamic"; を使用して、ページが常に動的にレンダリングされることを保証します。これはリアルタイム データにとって重要です。
- この API ルートへの POST リクエストを処理する非同期関数を定義します。この関数は最初に製品 ID が提供されているかどうかを確認します。そうでない場合は、エラー メッセージが返されます。
- 次に、lemonsqueezy への API 呼び出しを実行して、ストア ID や製品バリエーションなどの詳細を含む新しいチェックアウト セッションを作成します。
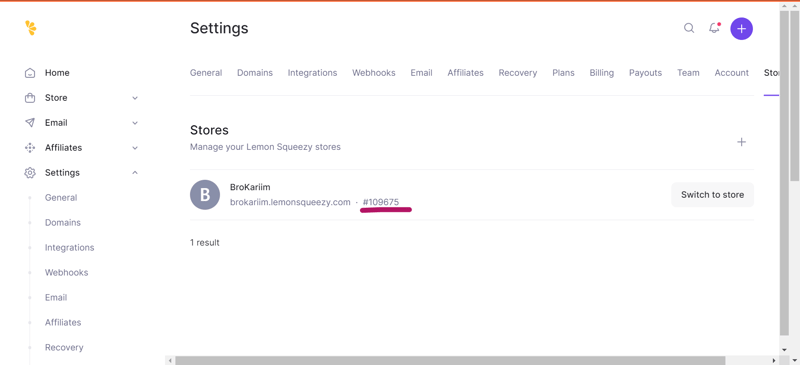
- storeId を取得するには、その設定に移動します
- API 呼び出し後、応答からチェックアウト URL を抽出します。
const checkoutUrl = response.data.data.attributes.url;
- 最後に、応答で次の URL を返します。
return NextResponse.json({ checkoutUrl });
API が正しく動作していることを確認するには、テストする必要があります。これには Postman というツールを使用します。始める前に、製品のvariantIdが必要です。これはLemonSqueezyダッシュボードで見つけることができます。

すべてが正しく動作している場合は、checkoutUrl を含む応答が返されるはずです

3. CreatIng the UI & Call the item data
Now that we've laid the groundwork, our next step is time to make the frontend look good, I am a huge fan of TailwindCSS so i make the pricing card with them
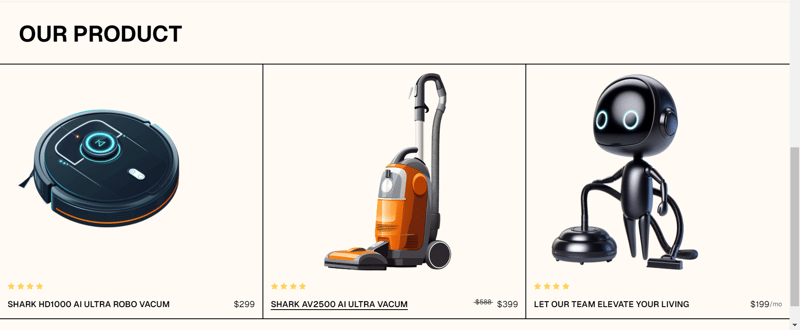
the code is availale here
Next lets set up an async function that calls the API route we just created. The function will send a POST request with the productId and, in return, get the checkout URL. Once you have the URL, open it in a new tab to send the user to the payment page.
 const buyProcut1 = async () => {
    try {
      const response = await axios.post("../api/lemonsqueezy", {
        productId: "495244",
      });

      console.log(response.data);
      window.open(response.data.checkoutUrl, "_blank");
    } catch (error) {
      console.error(error);
      alert("Failed to buy product #1");
    }
  };
That code is about
- Defines an asynchronous function called buyProduct1
- Next send a request to your server with a specific productId, If success opens a new browser tab with the checkout URL
- If anything goes wrong during the process, it catches the problem, logs it, and shows an alert to the user saying the purchase failed.
4. Setup Webhook
Last but not least, we're setting up webhooks to keep track of orders. Head back to your LemonSqueezy dashboard and set up a webhook.
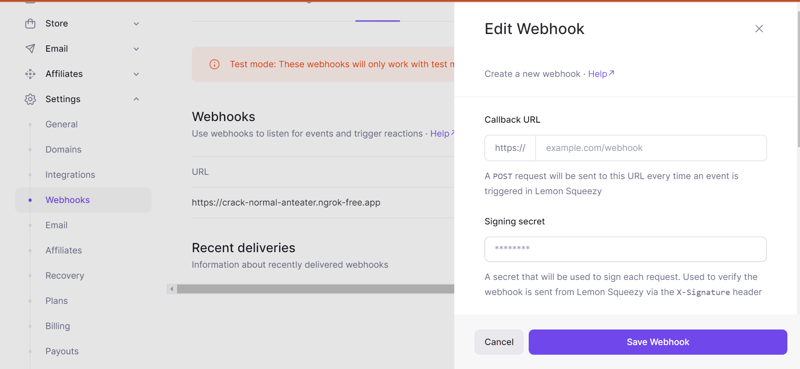
For the URL, you’ll need something publicly accessible, which is tricky during local development. This is where ngrok comes in handy.
ngrok will give you a temporary public URL that forwards to your local machine, You can check this link to setup ngrok in your device :
https://dashboard.ngrok.com/get-started/setup/
Just like before, the code to handle the webhook is already done for you. All you need to do is set it up in your route handler and enjoy the sweet
Let's stay in touch on Instagram, Twitter, and GitHub—where the real magic happens.
Thanks for sticking around! ?

以上がLemon Squeezy を使った簡単な支払い | Next.js の統合が簡単にの詳細内容です。詳細については、PHP 中国語 Web サイトの他の関連記事を参照してください。

