ホームページ >システムチュートリアル >Windowsシリーズ >インターネット接続なしで Windows 11 をインストールおよびセットアップする方法
インターネット接続なしで Windows 11 をインストールおよびセットアップする方法
- PHPzオリジナル
- 2024-08-23 06:32:101193ブラウズ
Windows 11 では、新しいコンピューターのセットアップを完了するには Microsoft アカウントでサインインする必要があります。ただし、アクティブなインターネット接続がない場合、またはローカル ユーザー アカウントを使用したい場合は、次の方法に従って Windows 11 をセットアップできます。
1. Out-of-Box Experience (OOBE) インターネット要件をバイパスします
コマンド プロンプトで OOBE BYPASSNRO コマンドを使用すると、[ネットワークに接続しましょう] 画面をバイパスできます。実行すると、System32 フォルダーに保存されている既存の CMD スクリプト bypassnro.cmd が実行され、Windows レジストリが変更されます。この変更により、インターネット接続なしで Windows 11 のセットアップを完了できるようになります。これを行うには:
- Windows インストール メディアを使用してコンピューターを起動します。すでに [ネットワークに接続しましょう] 画面が表示されている場合は、以下のステップ 6 に進んでください。
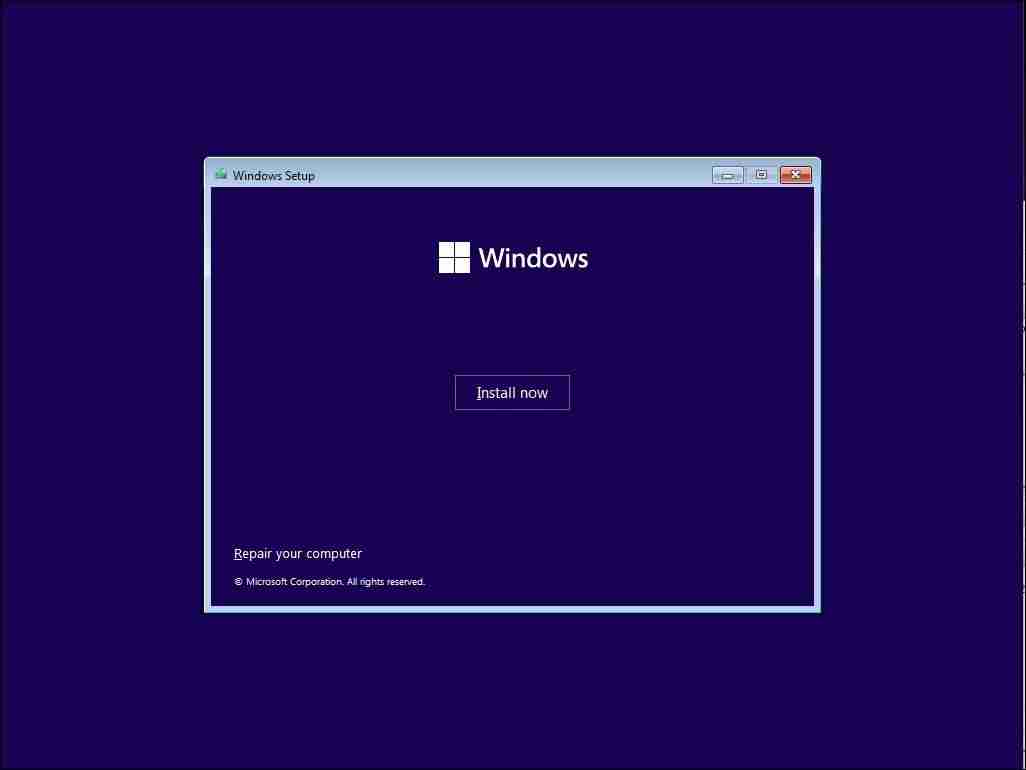
- [Windows セットアップ] ダイアログが表示されたら、希望の言語、時刻、キーボード入力レイアウトを選択し、[次へ] をクリックします。次に、[今すぐインストール] をクリックします。

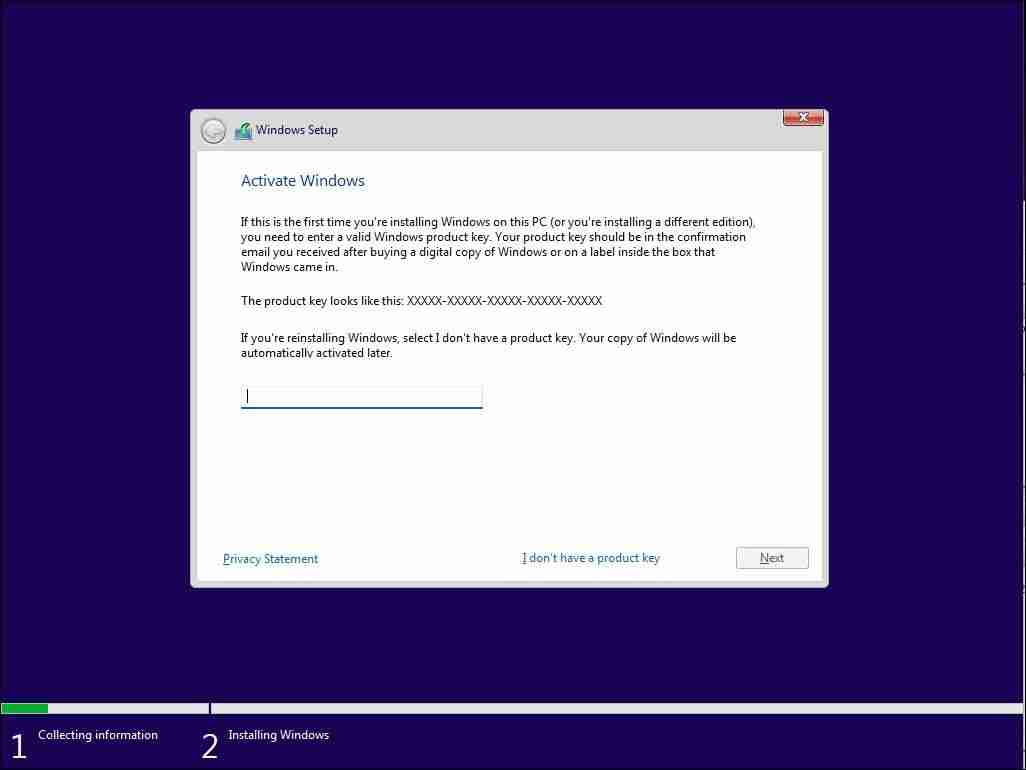
- プロダクト キーを入力して Windows 11 をライセンス認証します。プロダクト キーをお持ちでない場合は、右下隅にある [プロダクト キーがありません] リンクをクリックします。 Windows 10 または以前のバージョンの Windows 11 からアップグレードする場合、OS はコンピューターのハードウェアにリンクされている Windows プロダクト キーを自動的に認識し、検証します。

- 次に、プロンプトが表示されたら、希望する Windows 11 のエディションを選択します。インストール。チェックボックスをオンにして規約に同意し、「次へ」をクリックします。次に、[カスタム: Windows のみをインストール (詳細)] を選択します。
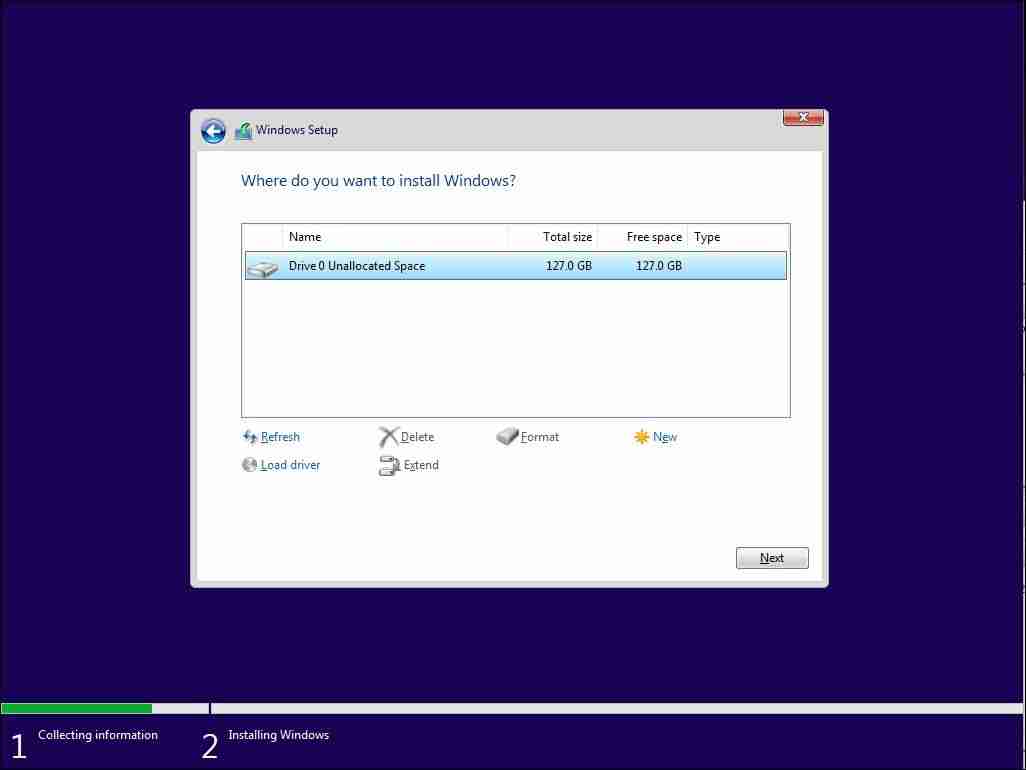
- インストールドライブを選択し、「次へ」をクリックします。 Windows のインストールが完了するまで待ち、コンピューターを再起動します。セットアップ画面で、地域とキーボード レイアウトを選択します。

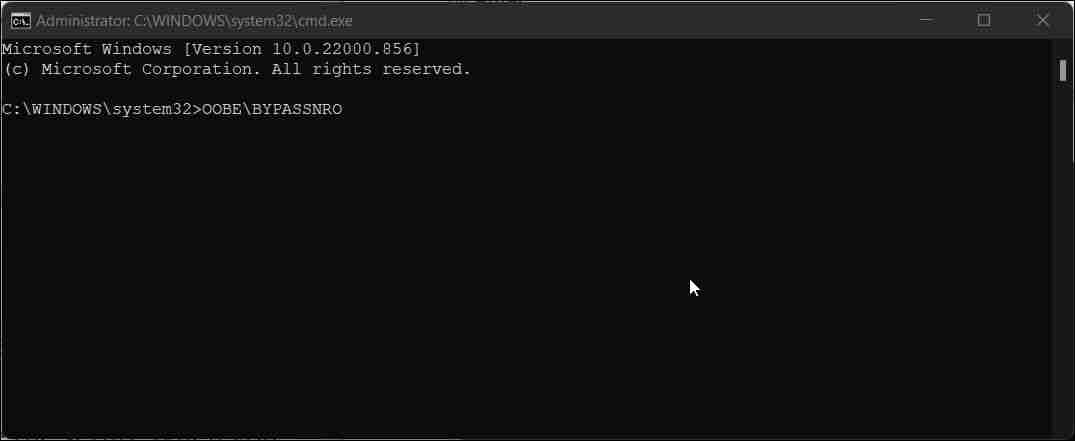
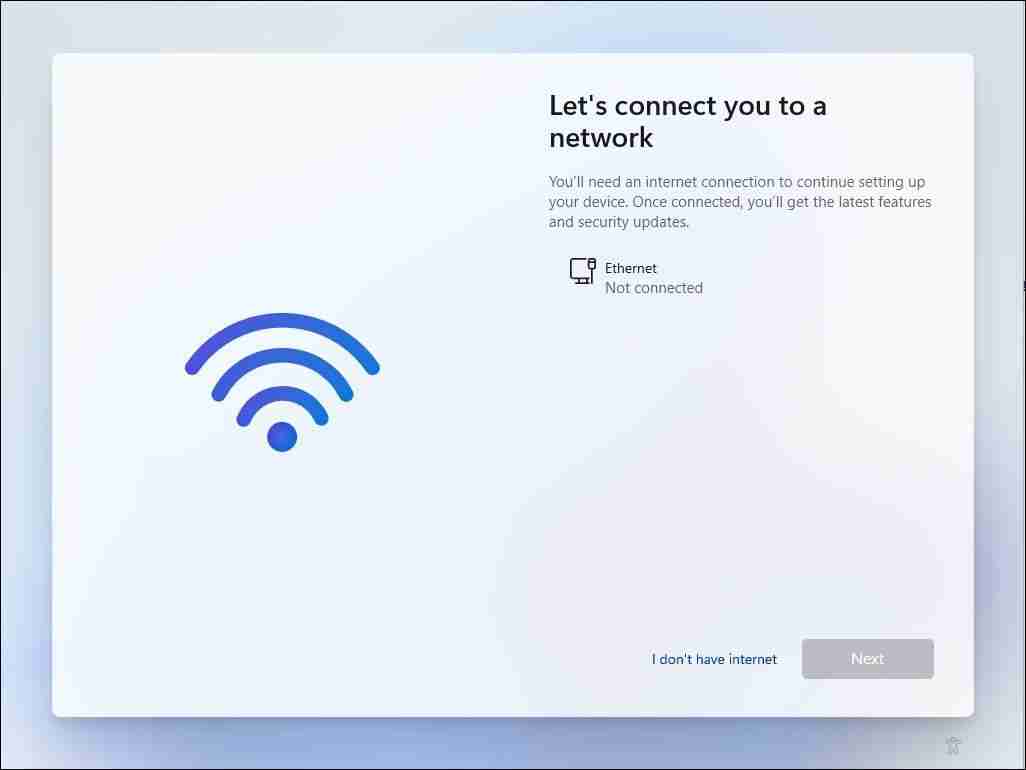
- [ネットワークに接続しましょう] 画面に入ったら、Shift + F10 を押してコマンド プロンプトを起動します。

- コマンド プロンプト ウィンドウで、次のコマンドを入力し、 Enter:
<code class="hljs ">OOBE\BYPASSNRO</code>
を押してください - これで、システムが再起動し、OOBE ダイアログが再起動されます。画面上の指示に従ってセットアップを完了します。 [ネットワークに接続しましょう] 画面が表示されたら、[インターネットがありません] をクリックします。

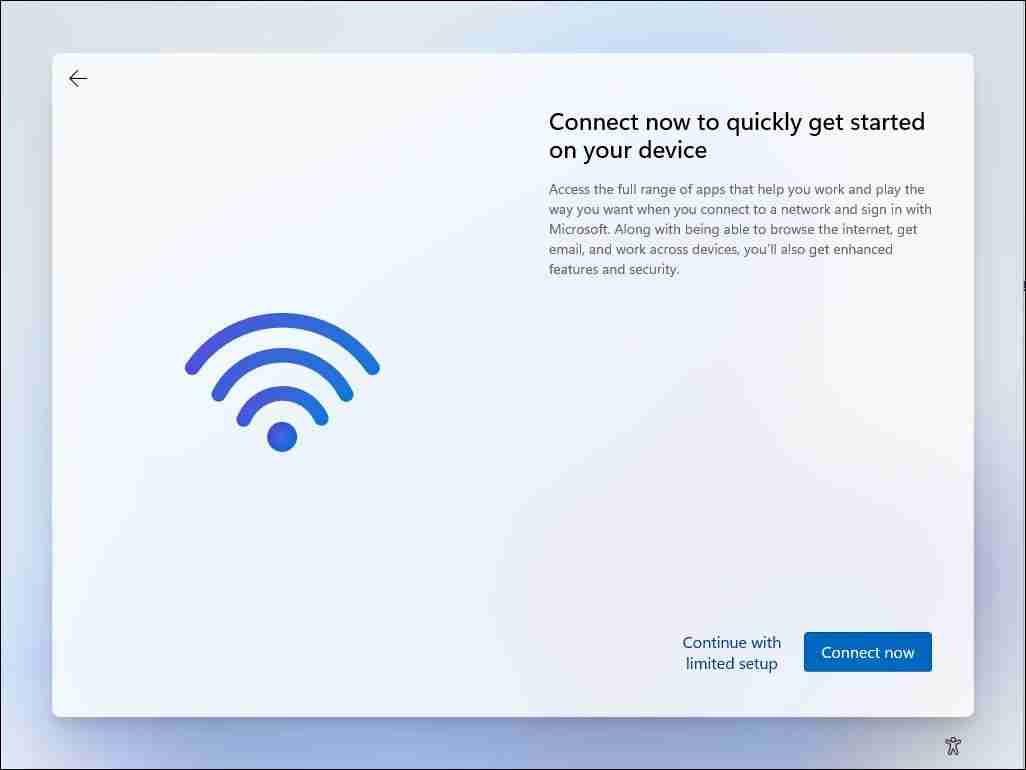
- 次に、[制限付きセットアップで続行] をクリックします。次に、使用許諾契約に同意し、ローカル ユーザー アカウントの作成に進みます。

また、必ずセキュリティの質問を追加してください。これは、パスワードを忘れた場合にローカル ユーザー アカウントを回復するのに役立ちます。完了したら、画面上の指示に従ってセットアップを完了します。
2. タスク マネージャーを使用してネットワーク接続フロー プロセスを終了します
oobenetworkconnectionflow.exe プロセスを終了すると、「ネットワークに接続しましょう」画面をバイパスできます。この段階ではすでに Windows 11 がインストールされているため、コマンド プロンプトを使用してセットアップ ウィザードの上でタスク マネージャーを起動し、プロセスを強制終了できます。
新しい Windows アップデートではそのような回避策にパッチが適用されることが多いため、この方法が常に機能するとは限りません。
タスク マネージャーを使用して Windows 11 のネットワーク設定をスキップするには:
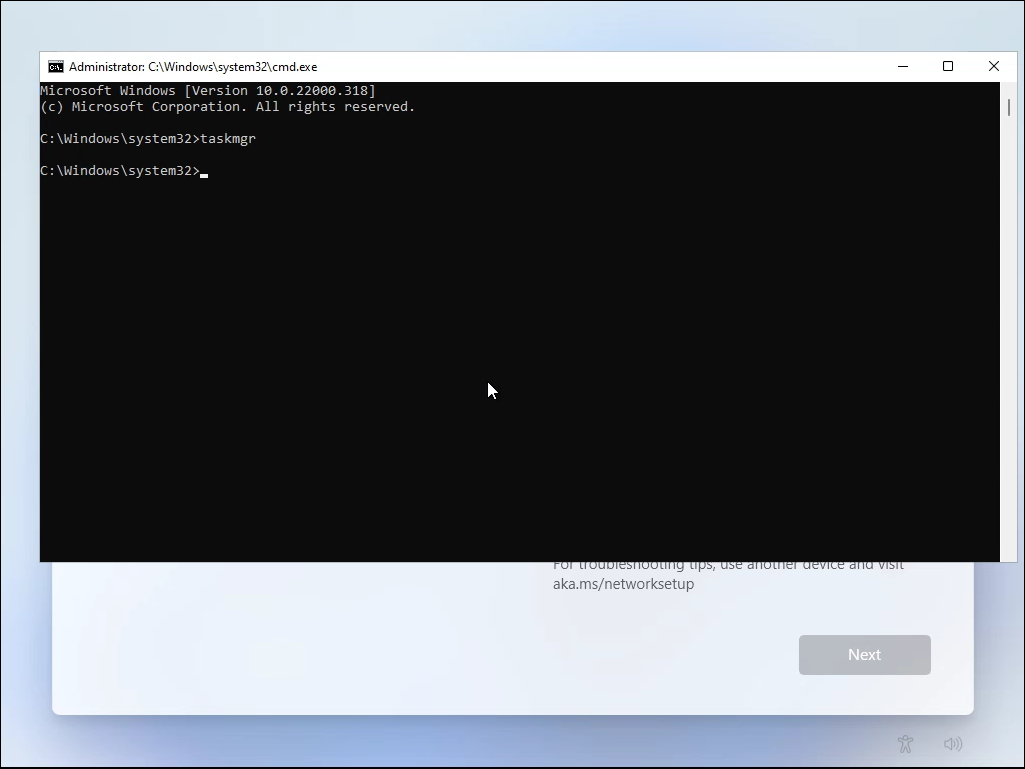
- Assuming you're in the Let's connect you to a network screen, press Shift + F10 to launch the Command Prompt.
- In the Command Prompt window, type taskmgr and hit Enter to launch Task Manager. Alternatively, you can press Ctrl + Shift + Esc to launch it.

- Click More Details to open Task Manager in full view.
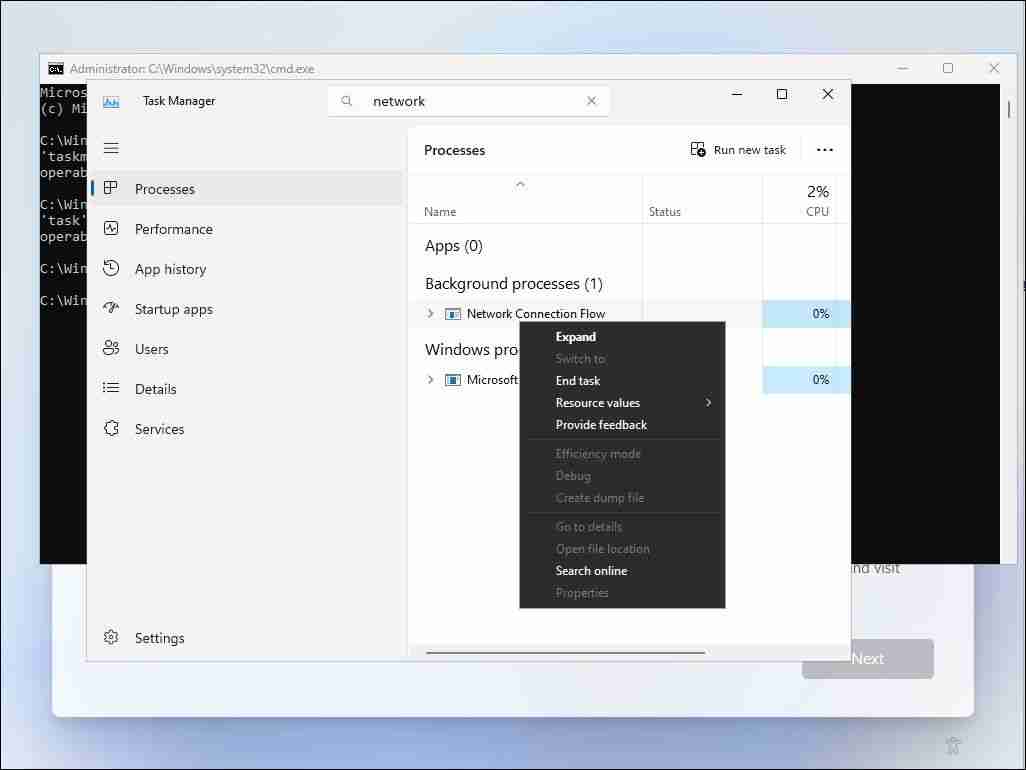
- Head to the Processes tab and use the search bar in Task Manager to find the Network Connection Flow process.

- Select the Network Connection Flow process and then click the End task button. Wait for the process to end, and then close the Task Manager.
- Type exit in the Command Prompt and hit the Enter key.
The installation process will refresh, and you'll be redirected to the setup wizard. It will show some loading animation and then proceed to the next step. Here, enter your name and password to create a local user account in Windows 11 and complete the setup.
Once you finish the setup, connect to the internet. Then, head to Settings > Windows Update and download all the critical security and feature updates. You may also notice a few missing icons after the initial setup. Windows will download these icons when you connect your PC to the internet.
以上がインターネット接続なしで Windows 11 をインストールおよびセットアップする方法の詳細内容です。詳細については、PHP 中国語 Web サイトの他の関連記事を参照してください。


