
ホームページ >ウェブフロントエンド >jsチュートリアル >SST と Docker を使用して Next.js アプリを Hetzner VPS にデプロイする方法
SST と Docker を使用して Next.js アプリを Hetzner VPS にデプロイする方法

- WBOYオリジナル
- 2024-08-13 14:35:33952ブラウズ
私の元のブログ投稿: https://www.prudkohliad.com/articles/deploy-next-js-to-vps-using-sst-2024-08-11
SST は、独自のインフラストラクチャ上で最新のフルスタック アプリケーションを簡単に構築できるフレームワークです。 SST v3 は Pulumi と Terraform を使用します
– SST ドキュメント
このガイドでは、SST と Docker を使用して、Hetzner VPS に Next.js アプリをデプロイします。このガイドは、私の前回の投稿の続編です。ここで意味不明な点が見つかった場合は、そこに答えが見つかる可能性が高くなります – Docker と GitHub Actions を使用して Hetzner 上の VPS に Next.js アプリをデプロイする方法
SSTをプロジェクトに追加する
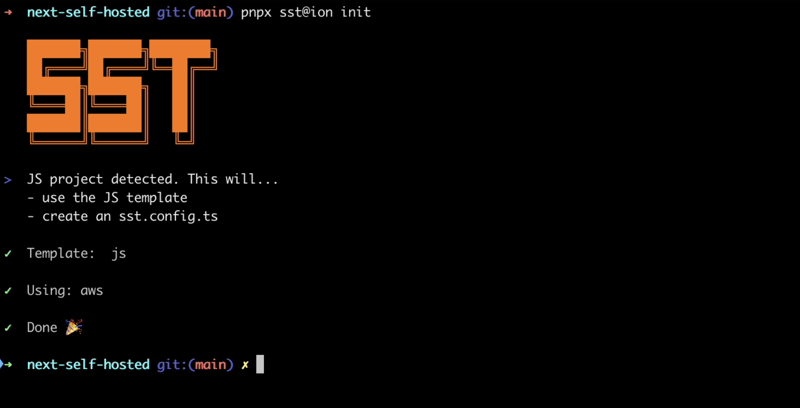
SST をプロジェクトに追加するには、次のコマンドを実行します:
pnpx sst@ion init
これにより、対話型プロンプトが表示されます。 「はい」を選択してから「aws」を選択します:
必要なパッケージがすべてインストールされていることを確認してください:
pnpm install
これにより、すべての構成を追加する sst.config.ts ファイルが作成されます。
また、他のファイル/ディレクトリもいくつか作成されます。これらを .dockerignore に追加しましょう。最終的に Docker イメージになるのは望ましくありません:
# sst
.sst
sst.config.ts
tsconfig.json
現在の sst 構成ファイルは次のようになります:
/// <reference path="./.sst/platform/config.d.ts" />

export default $config({
  app(input) {
    return {
      name: "next-self-hosted",
      removal: input?.stage === "production" ? "retain" : "remove",
      home: "aws",
    };
  },
  async run() {},
});
AWS を使用するつもりはないので、ホームパラメータを「local」に設定しましょう:
/// <reference path="./.sst/platform/config.d.ts" />

export default $config({
  app(input) {
    return {
      name: "next-self-hosted",
      removal: input?.stage === "production" ? "retain" : "remove",
      home: "local",
    };
  },
  async run() {},
});
これで、run() 関数への追加を開始できます。
Hetzner で API トークンを作成する
SST を使用して Hetzner 上に VPS を作成するには、Hetzner API トークンが必要になります。新しいものを生成しましょう。
Hetzner コンソールでプロジェクトを開き、「セキュリティ」タブに移動します。
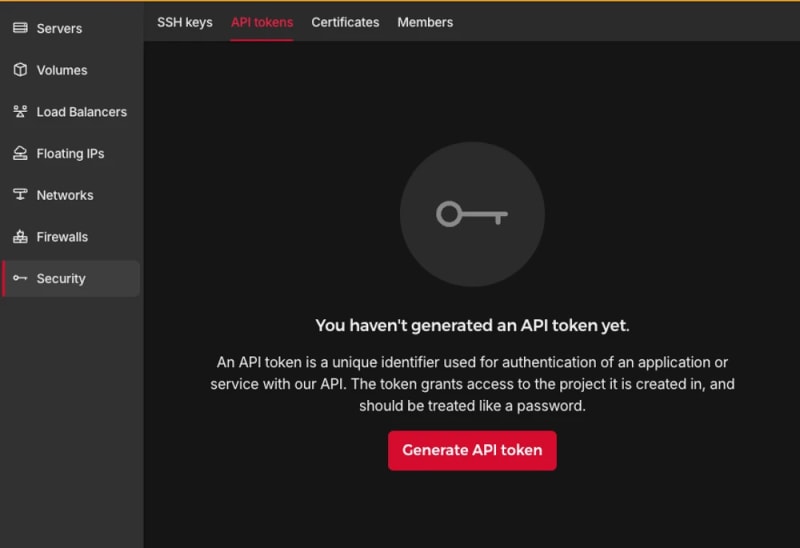
API トークンを生成します:

新しいトークンがプロジェクトに追加されます:

トークンは 1 回だけ表示されます。紛失しないように注意してください。
TLS および Hetzner プロバイダーを追加します:
pnpm sst add tls
pnpm sst add hcloud
pnpm install
SSHキーを生成する
Hetzner VPS の作成後にさらにコマンドを実行するには、作成中に SSH キーが追加されていることを確認する必要があります。これを行うには、SSH トークンをローカルに作成し、その公開部分を Hetzner に追加します。次のコードを run 関数に追加します:
// In the run() function:

// Generate an SSH key
const sshKeyLocal = new tls.PrivateKey("SSH Key - Local", {
  algorithm: "ED25519",
});

// Add the SSH key to Hetzner
const sshKeyHetzner = new hcloud.SshKey("SSH Key - Hetzner", {
  publicKey: sshKeyLocal.publicKeyOpenssh,
});
アプリをデプロイします:
pnpm sst deploy

SST ❍ ion 0.1.90  ready!

➜  App:        next-self-hosted
   Stage:      antonprudkohliad

~  Deploy

|  Created     SSH Key - Local tls:index:PrivateKey
|  Created     SSH Key - Hetzner hcloud:index:SshKey

✓  Complete
新しい SSH キーが Hetzner に追加されたことがわかります:

これで、VPS の作成に進むことができます。
サーバーを作成する
次のコマンドにより、プロジェクト内に新しい VPS が確実に作成されます。
// In the run() function:

// Create a Server on Hetzner
const server = new hcloud.Server("Server", {
  image: "docker-ce",
  serverType: "cx22",
  location: "nbg1",
  sshKeys: [sshKeyHetzner.id],
});
ここでは docker-ce イメージを使用しています。これは、Docker が既にインストールされているからです。 Hetzner Cloud API を使用すると、利用可能なすべてのイメージ、サーバー タイプ、データセンターをリストできます。
サーバーが正しく作成されたことを確認します:
pnpm sst deploy
SST ❍ ion 0.1.90  ready!

➜  App:        next-self-hosted
   Stage:      antonprudkohliad

~  Deploy

|  Created     Server hcloud:index:Server (34.5s)

✓  Complete
新しく作成されたサーバーもコンソールに表示されるはずです:

VPS 上の Docker サーバーに接続する
VPS 上にアプリの Docker イメージを構築し、ネットワーク、ボリューム、コンテナーを作成できるようにするには、ローカル マシンと VPS 上の Docker サーバーの間にブリッジを作成する必要があります。そのためには、Docker プロバイダーが必要になります。
pnpm sst add docker
pnpm install
SSH クライアントがアクセスできるように、秘密 SSH キーをディスクに保存します。 VPS で Docker サーバーへの接続を作成します:
// At the top of the file:
import { resolve as pathResolve } from "node:path";
import { writeFileSync as fsWriteFileSync } from "node:fs";

// In the run() function:

// Store the private SSH Key on disk to be able to pass it to the Docker
// Provider
const sshKeyLocalPath = sshKeyLocal.privateKeyOpenssh.apply((k) => {
  const path = "id_ed25519_hetzner";
  fsWriteFileSync(path, k, { mode: 0o600 });
  return pathResolve(path);
});

// Connect to the Docker Server on the Hetzner Server
const dockerServerHetzner = new docker.Provider("Docker Server - Hetzner", {
  host: $interpolate`ssh://root@${server.ipv4Address}`,
  sshOpts: ["-i", sshKeyLocalPath, "-o", "StrictHostKeyChecking=no"],
});
GitHub リポジトリや Docker イメージに秘密 SSH キー id_ed25519_hetzner が追加されないように、.gitignore と .dockerignore にも必ず追加してください。
デプロイメントをトリガーして変更を確認します:
pnpm sst deploy
SST ❍ ion 0.1.90  ready!

➜  App:        next-self-hosted
   Stage:      antonprudkohliad

~  Deploy

|  Created     Docker Server - Hetzner pulumi:providers:docker

✓  Complete
Build the Docker image
Now we can build the Docker image on the remove Docker server:
// In the run() function:

// Build the Docker image
const dockerImageHetzner = new docker.Image(
  "Docker Image - App - Hetzner",
  {
    imageName: "next-self-hosted/next-self-hosted:latest",
    build: {
      context: pathResolve("./"),
      dockerfile: pathResolve("./Dockerfile"),
      target: "production",
      platform: "linux/amd64",
    },
    skipPush: true,
  },
  {
    provider: dockerServerHetzner,
    dependsOn: [server],
  }
);
Let’s trigger the deployment to see if everything works:
pnpm sst deploy
SST ❍ ion 0.1.90  ready!

➜  App:        next-self-hosted
   Stage:      antonprudkohliad

~  Deploy

|  Log         Starting Docker build
< ... A PRETTY LONG BUILD LOG HERE ... >
|  Log         Image built successfully, local id "sha256:629a6cdfc298c74599a3056278e31c64197a87f6d11aab09573bc9171d2f3362"
|  Created     Docker Image - App - Hetzner docker:index:Image (36.0s)

✓  Complete
Now, let’s check that Docker image made it to the server:
ssh root@116.203.183.180 -i ./id_ed25519_hetzner -o StrictHostKeyChecking=no -C "docker image ls"
REPOSITORY                          TAG       IMAGE ID       CREATED              SIZE
next-self-hosted/next-self-hosted   latest    629a6cdfc298   About a minute ago   712MB
Awesome!
Docker networks
We will create two networks: Public and Internal. The Public network is for services to which NGINX is connected, i.e. for services that have to be exposed to the outside (e.g. the Next.js application or an API server). The Internal network is for services that are not meant to be exposed to the outside e.g. Postgres database, Redis cache:
// In the run() function:

// Setup Docker Networks
const dockerNetworkPublic = new docker.Network(
  "Docker Network - Public",
  { name: "app_network_public" },
  { provider: dockerServerHetzner, dependsOn: [server] }
);
const dockerNetworkInternal = new docker.Network(
  "Docker Network - Internal",
  { name: "app_network_internal" },
  { provider: dockerServerHetzner, dependsOn: [server] }
);
Trigger the deployment:
pnpm sst deploy
SST ❍ ion 0.1.90  ready!

➜  App:        next-self-hosted
   Stage:      antonprudkohliad

~  Deploy

|  Created     Docker Network - Public docker:index:Network (2.3s)
|  Created     Docker Network - Internal docker:index:Network (3.1s)

✓  Complete
Check that networks app_network_internal and app_network_public are present on the remote:
ssh root@116.203.183.180 -i ./id_ed25519_hetzner -o StrictHostKeyChecking=no -C "docker network ls"
NETWORK ID     NAME                   DRIVER    SCOPE
0590360bd4ae   app_network_internal   bridge    local
e3bd8be72506   app_network_public     bridge    local
827fa5ca5de2   bridge                 bridge    local
dc8880514199   host                   host      local
f1481867db18   none                   null      local
Docker volumes
We will create a volume to store the application build files (the .next folder):
// In the run() function:

// Setup Docker Volumes
const dockerVolumeAppBuild = new docker.Volume(
  "Docker Volume - App Build",
  { name: "app_volume_build" },
  { provider: dockerServerHetzner, dependsOn: [server] }
);
Deploy and verify that the docker volume app_volume_build is present on the VPS:
pnpm sst deploy
SST ❍ ion 0.1.90  ready!

➜  App:        next-self-hosted
   Stage:      antonprudkohliad

~  Deploy

|  Created     Docker Volume - App Build docker:index:Volume

✓  Complete

ssh root@116.203.183.180 -i ./id_ed25519_hetzner -o StrictHostKeyChecking=no -C "docker volume ls"
DRIVER    VOLUME NAME
local     app_volume_build
The Build container
We are going to run a one-off container (a.k.a. Init Container) to build the Next.js application and store the result in the .next folder, that will be shared with the main application container through the volume that we have created above:
// In the run() function:

// Run a one-off container to build the app
const dockerAppBuildContainer = new docker.Container(
  "Docker Container - App Build",
  {
    name: "app_container_build",
    image: dockerImageHetzner.imageName,
    volumes: [
      {
        volumeName: dockerVolumeAppBuild.name,
        containerPath: "/app/.next",
      },
    ],
    command: ["pnpm", "build"],
    mustRun: true,
  },
  {
    provider: dockerServerHetzner,
  }
);
Deploy and verify via logs that the build has been successful:
pnpm sst deploy
SST ❍ ion 0.1.90  ready!

➜  App:        next-self-hosted
   Stage:      antonprudkohliad

~  Deploy

|  Created     Docker Container - App Build docker:index:Container (1.1s)

✓  Complete

ssh root@116.203.183.180 -i ./id_ed25519_hetzner -o StrictHostKeyChecking=no -C "docker logs -f app_container_build"

> next-self-hosted@ build /app
> next build

  ▲ Next.js 14.2.5

   Creating an optimized production build ...
 ✓ Compiled successfully
   Linting and checking validity of types ...
   Collecting page data ...
   Generating static pages (0/4) ...
   Generating static pages (1/4)
   Generating static pages (2/4)
   Generating static pages (3/4)
 ✓ Generating static pages (4/4)
   Finalizing page optimization ...
   Collecting build traces ...

Route (app)                              Size     First Load JS
┌ ○ /                                    142 B          87.2 kB
└ ○ /_not-found                          871 B          87.9 kB
+ First Load JS shared by all            87 kB
  ├ chunks/52d5e6ad-40eff88d15e66edb.js  53.6 kB
  ├ chunks/539-e1fa9689ed3badf0.js       31.5 kB
  └ other shared chunks (total)          1.84 kB

○  (Static)  prerendered as static content
The App container
Now we will add a “runner” container, that will use the build output from the Build container, and run next start:
// In the run() function:

const dockerAppContainer = new docker.Container(
  "Docker Container - App",
  {
    name: "app",
    image: dockerImageHetzner.imageName,
    volumes: [
      {
        volumeName: dockerVolumeAppBuild.name,
        containerPath: "/app/.next",
      },
    ],
    networksAdvanced: [
      { name: dockerNetworkPublic.id },
      { name: dockerNetworkInternal.id },
    ],
    command: ["pnpm", "start"],
    restart: "always",
  },
  { provider: dockerServerHetzner, dependsOn: [dockerAppBuildContainer] }
);
Deploy and verify that the app has started successfully:
pnpm sst deploy
SST ❍ ion 0.1.90  ready!

➜  App:        next-self-hosted
   Stage:      antonprudkohliad

~  Deploy

|  Created     Docker Container - App docker:index:Container (1.1s)

✓  Complete

ssh root@116.203.183.180 -i ./id_ed25519_hetzner -o StrictHostKeyChecking=no -C "docker logs -f app"

> next-self-hosted@ start /app
> next start

  ▲ Next.js 14.2.5
  - Local:        http://localhost:3000

 ✓ Starting...
 ✓ Ready in 497ms
The app container might fail, because the build container has not finished building yet, but it will soon recover and function normally.
Add Cloudflare certificates
In order to upload files to the VPS, we need to install the Command provider and the Polumi package:
pnpm sst add @pulumi/command
pnpm add -D @pulumi/pulumi
pnpm install
Make sure that the /root/app and /root/app/certs directories exist on the VPS and upload Cloudflare Origin Server certificates:
// At the top of the file
import { asset as pulumiAsset } from "@pulumi/pulumi";

// In the run() function:

// Make sure that app directory exists
new command.remote.Command("Command - Ensure app directory", {
  create: "mkdir -p /root/app",
  connection: {
    host: server.ipv4Address,
    user: "root",
    privateKey: sshKeyLocal.privateKeyOpenssh,
  },
});

// Make sure that app/certs directory exists
new command.remote.Command("Command - Ensure app/certs directory", {
  create: "mkdir -p /root/app/certs",
  connection: {
    host: server.ipv4Address,
    user: "root",
    privateKey: sshKeyLocal.privateKeyOpenssh,
  },
});

// Copy Certificates to the VPS
new command.remote.CopyToRemote(
  "Copy - Certificates - Key",
  {
    source: new pulumiAsset.FileAsset(
      pathResolve("./certs/cloudflare.key.pem")
    ),
    remotePath: "/root/app/certs/cloudflare.key.pem",
    connection: {
      host: server.ipv4Address,
      user: "root",
      privateKey: sshKeyLocal.privateKeyOpenssh,
    },
  }
);
new command.remote.CopyToRemote(
  "Copy - Certificates - Cert",
  {
    source: new pulumiAsset.FileAsset(
      pathResolve("./certs/cloudflare.cert.pem")
    ),
    remotePath: "/root/app/certs/cloudflare.cert.pem",
    connection: {
      host: server.ipv4Address,
      user: "root",
      privateKey: sshKeyLocal.privateKeyOpenssh,
    },
  }
);
new command.remote.CopyToRemote(
  "Copy - Certificates - Authenticated Origin Pull",
  {
    source: new pulumiAsset.FileAsset(
      pathResolve("./certs/authenticated_origin_pull_ca.pem")
    ),
    remotePath: "/root/app/certs/authenticated_origin_pull_ca.pem",
    connection: {
      host: server.ipv4Address,
      user: "root",
      privateKey: sshKeyLocal.privateKeyOpenssh,
    },
  }
);
Start Nginx
Copy Nginx configuration file to the VPS and start the Nginx container:
// In the run() function:

// Copy Nginx config to the VPS
const commandCopyNginxConfig = new command.remote.CopyToRemote(
  "Copy - Nginx Config",
  {
    source: new pulumiAsset.FileAsset(
      pathResolve("./nginx/production.conf")
    ),
    remotePath: "/root/app/nginx.conf",
    connection: {
      host: server.ipv4Address,
      user: "root",
      privateKey: sshKeyLocal.privateKeyOpenssh,
    },
  }
);

// Run the Nginx container
const dockerNginxContainer = new docker.Container(
  "Docker Container - Nginx",
  {
    name: "app_container_nginx",
    image: "nginx:1.27.0-bookworm",
    volumes: [
      {
        hostPath: "/root/app/nginx.conf",
        containerPath: "/etc/nginx/nginx.conf",
      },
      {
        hostPath: "/root/app/certs",
        containerPath: "/certs",
      },
    ],
    command: ["nginx", "-g", "daemon off;"],
    networksAdvanced: [{ name: dockerNetworkPublic.id }],
    restart: "always",
    ports: [
      {
        external: 443,
        internal: 443,
      },
    ],
    healthcheck: {
      tests: ["CMD", "service", "nginx", "status"],
      interval: "30s",
      timeout: "5s",
      retries: 5,
      startPeriod: "10s",
    },
  },
  { provider: dockerServerHetzner, dependsOn: [dockerAppContainer] }
);

return { ip: server.ipv4Address };
Deploy and verify that the Nginx container is running:
pnpm sst deploy
SST ❍ ion 0.1.90  ready!

➜  App:        next-self-hosted
   Stage:      antonprudkohliad

~  Deploy

|  Deleted     Docker Container - App Build docker:index:Container
|  Created     Command - Ensure app/certs directory command:remote:Command
|  Created     Command - Ensure app directory command:remote:Command
|  Created     Docker Container - App Build docker:index:Container
|  Created     Copy - Certificates - Cert command:remote:CopyToRemote (1.2s)
|  Created     Copy - Nginx Config command:remote:CopyToRemote (1.2s)
|  Created     Copy - Certificates - Key command:remote:CopyToRemote (1.2s)
|  Created     Copy - Certificates - Authenticated Origin Pull command:remote:CopyToRemote (1.2s)
|  Deleted     Docker Container - App docker:index:Container
|  Created     Docker Container - App docker:index:Container (1.2s)
|  Created     Docker Container - Nginx docker:index:Container (7.1s)

✓  Complete
   ip: 116.203.183.180

ssh root@116.203.183.180 -i ./id_ed25519_hetzner -o StrictHostKeyChecking=no -C "docker ps -a"

CONTAINER ID   IMAGE                                      COMMAND                  CREATED         STATUS                     PORTS                          NAMES
9c2cb18db304   nginx:1.27.0-bookworm                      "/docker-entrypoint.…"   3 minutes ago   Up 3 minutes (healthy)     80/tcp, 0.0.0.0:443->443/tcp   app_container_nginx
32e6a4cee8bc   next-self-hosted/next-self-hosted:latest   "docker-entrypoint.s…"   4 minutes ago   Up 3 minutes               3000/tcp                       app
f0c50aa32493   next-self-hosted/next-self-hosted:latest   "docker-entrypoint.s…"   4 minutes ago   Exited (0) 3 minutes ago                                  app_container_build
As you can see, Nginx and the application are running smoothly.
The final check
It’s time to make sure that the DNS record is pointing to the right IP address (yes, it is possible to add this to the SST config too, via the Cloudflare provider):

Then, we can open the application and verify that it works:

Congratulations! We have now completed out SST dive and can enjoy the freshly deployed application ?
Cleaning up
SST makes it very easy to clean up – just run pnpm sst remove and the whole setup will go away:
pnpm sst remove
SST ❍ ion 0.1.90  ready!

➜  App:        next-self-hosted
   Stage:      antonprudkohliad

~  Remove

|  Deleted     Docker Container - Nginx docker:index:Container (1.9s)
|  Deleted     Docker Container - App docker:index:Container
|  Deleted     Docker Container - App Build docker:index:Container
|  Deleted     Docker Image - App - Hetzner docker:index:Image
|  Deleted     Docker Volume - App Build docker:index:Volume (2.1s)
|  Deleted     Docker Network - Public docker:index:Network (3.1s)
|  Deleted     Docker Network - Internal docker:index:Network (3.2s)
|  Deleted     Copy - Nginx Config command:remote:CopyToRemote
|  Deleted     Docker Server - Hetzner pulumi:providers:docker
|  Deleted     Copy - Certificates - Authenticated Origin Pull command:remote:CopyToRemote
|  Deleted     Command - Ensure app/certs directory command:remote:Command
|  Deleted     Copy - Certificates - Key command:remote:CopyToRemote
|  Deleted     Command - Ensure app directory command:remote:Command
|  Deleted     Copy - Certificates - Cert command:remote:CopyToRemote
|  Deleted     Server hcloud:index:Server (16.8s)
|  Deleted     SSH Key - Hetzner hcloud:index:SshKey
|  Deleted     SSH Key - Local tls:index:PrivateKey

✓  Removed
以上がSST と Docker を使用して Next.js アプリを Hetzner VPS にデプロイする方法の詳細内容です。詳細については、PHP 中国語 Web サイトの他の関連記事を参照してください。