


Windows 10 をインストールするための起動可能な USB ドライブを作成するには、もちろん Windows 10 メディア作成ツールを使用する方法が推奨されます。しかし、メディア作成ツールがうまく機能しない場合、または使いたくない場合はどうすればよいでしょうか?心配しないでください。メディア作成ツールを使用せずに、ISO イメージ ファイルから Windows 10 ブート可能 USB ドライブを作成することもできます。
この記事では、Windows 10 をインストールするために ISO から Windows 10 起動可能な USB ドライブを作成する方法を説明します。Windows 10 ISO ファイルをコンピューターにダウンロードしていることを確認してから、以下の方法と手順に従ってください。

- 方法 1: Rufus を使用して ISO から Windows 10 ブート可能 USB を作成する
- 方法 2: ShapeISO を使用して ISO から Windows 10 ブート可能 USB を作成する
- 方法 3: CMD を使用して ISO から Windows 10 ブート可能 USB を作成する
方法 1: Rufus を使用して ISO から Windows 10 ブート可能 USB を作成する
Rufus は、起動可能な USB フラッシュ ドライブまたは Windows To Go ライブ USB ドライブを簡単に作成するためのオープンソース アプリケーションです。 Rufus を使用して ISO イメージから Windows 10 起動可能な USB フラッシュ ドライブを簡単に作成する方法は次のとおりです。
1. USB フラッシュ ドライブをコンピュータに接続し、USB ドライブ上のデータ (存在する場合) を別の場所にバックアップします。
2. Rufus プログラムをコンピューターにダウンロードし、インストールせずに直接実行します。
3. Rufus で、次のオプションを設定して Windows 10 の起動可能な USB フラッシュ ドライブを作成します。
- 「デバイス」ドロップダウン メニューから USB フラッシュ ドライブを選択します。
- 「選択」ボタンをクリックして、Windows 10 ISO ファイルをインポートします。
- 「イメージ オプション」ドロップダウンから標準 Windows インストールを選択します。
- 他のオプションはデフォルト値のままにして、「開始」をクリックします。
- 「OK」をクリックすると、Rufus が Windows 10 起動可能な USB フラッシュ ドライブの作成を開始します。

5.進行状況バーが 100% になり、「準備完了」と表示されたら、Rufus が iSO から Windows 10 起動可能な USB ドライブを正常に作成したことを示します。
 方法 2: ShapeISO を使用して ISO から Windows 10 起動可能な USB を作成する
iSumsoft ShapeISO は、ISO イメージ ファイルから Windows 10 の起動可能な USB ドライブを簡単に作成できる、もう 1 つの強力かつ使いやすいツールです。
ステップ 1: iSumsoft ShapeISO を PC にダウンロードしてインストールします。インストール後、このツールを起動します。
ステップ 2: [書き込み] オプションを選択し、ファイル アイコンをクリックして Windows 10 ISO ファイルをインポートし、[更新] アイコンをクリックして接続されている USB ドライブを表示し、[スタート] ボタンをクリックします。このツールはすぐに Windows 10 ISO ファイルの USB ドライブへの書き込みを開始し、起動可能な Windows 10 USB ドライブを作成します。
 ステップ 3: プロセスが完了するまで待ちます。 ISO イメージが USB ドライブに正常に書き込まれたことがソフトウェア ページに表示されると、Windows 10 の起動可能な USB が作成されます。
 方法 3: CMD を使用して ISO から Windows 10 ブート可能 USB を作成する
ソフトウェアを使用せずに Windows 10 起動可能な USB ドライブを作成したい場合は、Windows コマンド プロンプトを使用して作成できます。コマンド プロンプトを使用して ISO イメージから Windows 10 起動可能な USB フラッシュ ドライブを作成する方法は次のとおりです。
ステップ 1: USB フラッシュドライブを再フォーマットします。
1. USB フラッシュ ドライブをコンピュータに接続し、USB ドライブ上のデータ (存在する場合) を別の場所にバックアップします。
2. Windows の検索ボックスに「cmd」と入力します。コマンド プロンプト アプリのショートカットが検索結果に表示されたら、[管理者として実行] をクリックします。
 3.コマンド プロンプト ウィンドウで、「
」と入力し、Enter キーを押して、diskpart ツールにアクセスします。
4. Type list disk and press Enter to list all disks connected to your computer. Then judge which is your USB flash drive according to the disk size.

5. Type select disk # and press Enter to select your USB flash drive. "#" is the disk number of your USB flash drive.

6. Type clean and press Enter to erase all partitions as well as data on your USB flash drive.

7. Type convert mbr and press Enter to convert the USB flash drive to MBR format.

8. Type create partition primary and press Enter to create a primary partition on the USB flash drive.

9. Type active and press Enter to active the primary partition on the USB flash drive.

10. Type format quick fs=fat32 label="SWM-USB" and press Enter to quickly format the primary partition as FAT32 and set its volume label as SWM-USB.

11. Type assign letter="X" and press Enter to set the drive letter of the partition to X.

12. Type list volume and press Enter to list all volumes on your PC so that you can view the volume details of your USB drive.

13. Type exit and press Enter to exit the diskpart tool, leave the Command Prompt window there or close it.

Step 2: Create Windows 10 bootable USB drive from ISO.
1. Locate the downloaded Windows 10 ISO file and double-click it to mount it to your computer.

2. Windows will automatically assign a DVD drive letter for the mounted ISO image. Write down the DVD drive letter (E: in my case).

3. Go back to the previously Command Prompt window or open a new Command Prompt window as administrator. Then, type robocopy E: X: /E /xf install.wim and press Enter to copy all files except the install.wim file in the mounted Windows 10 ISO image to the root directory of the USB flash drive. Then, wait for the file copy to complete. This takes about three minutes.

4. All files except the install.wim file in the ISO image have been successfully copied to the root directly of the USB flash drive.

5. In this step, you will copy the install.wim file from the ISO image to the USB flash drive. Since the install.wim file is larger than 4GB and the FAT32 formatted USB drive cannot store a single file over 4GB, you need to divide the install.wim file into two install.swm files and save them on the USB flash drive. To do that, type the following dism command and press Enter.
Dism /Split-Image /ImageFile:E:sourcesinstall.wim /SWMFile:X:sourcesinstall.swm /FileSize:2500

6. A few minutes later, the install.swm files are successfully split from the install.wim file and stored in the sources folder in the USB flash drive.

7. Now go to the USB flash drive, open the sources folder, and you will see two install.swm image files.

That's all the steps required to create a Windows 10 bootable USB flash drive from an ISO image using Command Prompt. Then, boot the computer from the USB flash drive and you can install Windows 10 on the computer.
Conclusion:
The above how to create a Windows 10 bootable USB drive from an ISO image file for installing Windows 10. Both Rufus and iSumsoft ShapeISO are good options, they are safe, effective and easy to use. The Command Prompt allows you to successfully create a Windows 10 bootable USB drive from an ISO image without using any software, but the process is cumbersome. You need to make sure you run the correct commands to make the USB drive bootable. If you are not good at using Windows commands, Rufus or iSumsoft ShapeISO is still your best choice.
You may also be interested in How to Make External Hard Drive Bootable for Windows 10.
以上がISO から Windows 10 起動可能な USB フラッシュ ドライブを作成する方法の詳細内容です。詳細については、PHP 中国語 Web サイトの他の関連記事を参照してください。

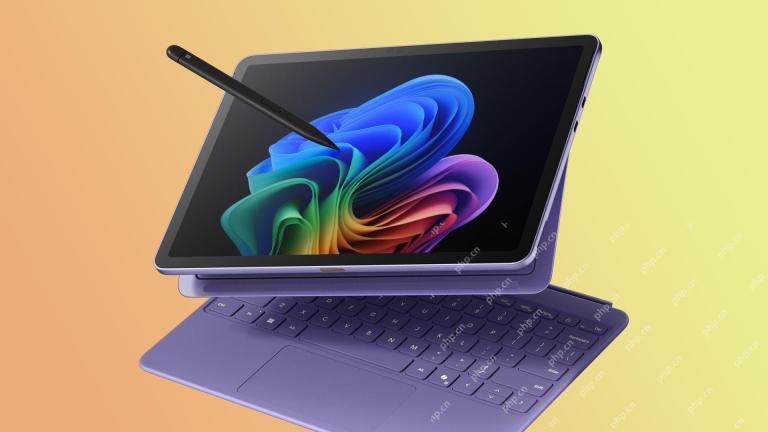 新しいSurface ProはProを感じませんMay 08, 2025 am 06:01 AM
The New Surface Pro:ステップバック? Microsoftの最新のSurface Proは、2つのUSB-Cポートを介して接続を提供し、充電、USB 3.2データ転送、およびDisplayPort 1.4A(60Hzで最大2つの4Kモニター)をサポートします。 ただし、デバイスは電源広告なしで出荷されます
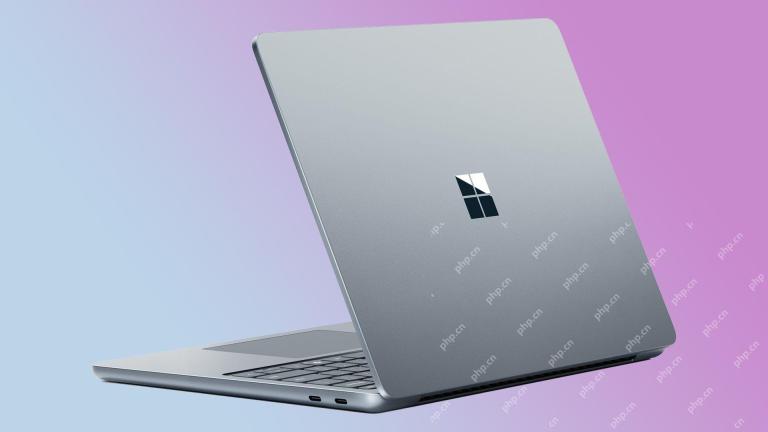 Microsoftは、新しいSurfaceラップトップでMacBook Airに挑戦しますMay 08, 2025 am 03:02 AM
Microsoftの最新のSurfaceラップトップは、MacBook Airに匹敵することを目的としていますが、いくつかの顕著な妥協があります。 表面接続ポートの欠如は、ThunderboltとUSB Doの増大する有病率を反映して、以前のモデルからの大幅な逸脱を示しています
 EclipseのSVNプラグインが常にパスワード入力を求める問題を解決するMay 07, 2025 pm 05:03 PM
1。最近、SVNプラグインを使用してEclipseでリモートウェアハウスコードを管理する場合、パスワードの入力のプロンプトは常にパスワードの入力を求められます。これは特に面倒です。ハードワークの後、私は最終的に問題を解決し、それをあなたと共有しました〜2。SVNプラグインのパスワードメカニズムと問題の原因を分析しました。 SVNプラグインを初めて使用してパスワードを入力すると、パスワードを保存するファイルが生成され、SVNプラグインは毎回デフォルトでユーザー名とパスワード情報を読み取ります。 Eclipseが開始されると、構成情報が自動的にプログラムキャッシュに読み込まれます。 SVNのパスワードが変更された後、再度ログインすることは不可能であり、パスワードに再入力するプロンプトはありません。現時点では、関連する構成ファイルを削除し、SVNプラグインがパスワードの再入力を促すことができます。しかし、EC
 Win8システムの詳細な手順を復元する方法May 07, 2025 pm 05:00 PM
Windows 8でシステムの復元を開始する手順は次のとおりです。1。WindowsキーXを押して、ショートカットメニューを開きます。 2。「コントロールパネル」を選択し、「システムとセキュリティ」を入力し、「システム」をクリックします。 3.「システム保護」を選択し、[システムの復元]をクリックします。 4.管理者パスワードを入力し、復元ポイントを選択します。適切な復元ポイントを選択する場合は、問題が発生する前に復元ポイントを選択するか、システムが適切に実行されている特定の日付を覚えておくことをお勧めします。システムの復元プロセス中に、「システムの復元が完了できない」と遭遇した場合、別の復元ポイントを試すか、「SFC/Scannow」コマンドを使用してシステムファイルを修復できます。復元後、システムの操作ステータスを確認し、ソフトウェアを再インストールまたは構成し、データを再バックし、定期的に新しい復元ポイントを作成する必要があります。
 「モダンオペレーティングシステムオリジナルブック第3版」May 07, 2025 pm 04:57 PM
「Modern Operating Systems(English Edition 3rd Edition)」は、Tanenbaum教授によって書かれた古典的な作品です。 3つのオペレーティングシステムの設計における彼の深い経験により、この本は理論と実践を完全に統合しています。この本の第3版では、プロセス、スレッド、ストレージ管理、ファイルシステム、I/Oデッドロック、インターフェイスデザイン、マルチメディア、パフォーマンストレードオフなど、多くのトピックを詳細に調査し、オペレーティングシステム設計の最新のトレンドを紹介します。この本は、最新のオペレーティングシステムの原則と実践を詳細に説明しているだけでなく、Linuxオペレーティングシステム、Windows Vistaオペレーティングシステム、組み込みオペレーティングシステム、リアルタイムオペレーティングシステム、マルチメディアオペレーティングシステムにも特に注意を払っています。 Windows Vistaと最新のLinux/UNIX操作をカバーします
 .NET COREクイックスタートチュートリアル1。始まり:.NETコアについて話すMay 07, 2025 pm 04:54 PM
1. .NETCOREの起源.NetCoreについて話すとき、その前身.NETについて言及してはなりません。ジャワは当時脚光を浴びていて、マイクロソフトもジャワを支持しました。 Windowsプラットフォーム上のJava仮想マシンは、JVM標準に基づいてMicrosoftによって開発されました。当時の最高のパフォーマンスJava仮想マシンと言われています。ただし、Microsoftには独自の小さなAbacusがあり、WindowsプラットフォームでJavaをバンドルし、Windows固有の機能を追加しようとしています。 Sunのこれに対する不満は、2つの政党間の関係の内訳につながり、Microsoftは.NETを立ち上げました。 .NETは、Javaの設立以来、Javaの多くの機能を借りており、言語機能とフォーム開発のJavaを徐々に上回っています。バージョン1.6のJava
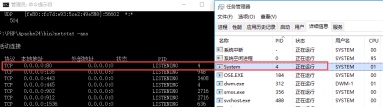 Windows10の下の80ポートがPID 4でシステムによって占有されているという問題を解決しますMay 07, 2025 pm 04:51 PM
1.バックグラウンド最近、好奇心から、Windows 10システムを更新しました。これは非常に簡単に動作し、エクスペリエンスは非常に優れています。ただし、IDEAで開発するとき、ポート80を使用してプロジェクトを開始するとき、ポートが占有されていることがわかります。いくつかの試みの後、私は解決策を見つけました、そして私はあなたとそれを共有します。 2。ソリューション手順1。NetStat-Ano | FindStr "80"コマンドを実行して、ポート80を占めるプロセス番号PIDを確認します。 2。ポート80はシステムサービスによって占有されているため、プロセスを直接終了することはできません。したがって、netshhttpshowservicestateコマンドを使用して、現在のHTTPサービスステータスを表示します。結果は図に示されているように:図から
 Web開発者向けの10の最新ツールMay 07, 2025 pm 04:48 PM
Web開発デザインは有望なキャリア分野です。ただし、この業界は多くの課題にも直面しています。より多くの企業やブランドがオンライン市場に目を向けるにつれて、Web開発者は自分のスキルを実証し、キャリアを成功させる機会があります。ただし、Web開発の需要が増え続けているため、開発者の数も増加しており、その結果、ますます激しい競争が発生しています。しかし、才能と意志があれば、ユニークなデザインやアイデアを作成する新しい方法をいつでも見つけることができるのはエキサイティングです。 Web開発者として、新しいツールとリソースを探し続ける必要があるかもしれません。これらの新しいツールとリソースは、仕事をより便利にするだけでなく、仕事の品質を向上させるため、より多くのビジネスと顧客を獲得するのに役立ちます。 Web開発の傾向は絶えず変化しています。


ホットAIツール

Undresser.AI Undress
リアルなヌード写真を作成する AI 搭載アプリ

AI Clothes Remover
写真から衣服を削除するオンライン AI ツール。

Undress AI Tool
脱衣画像を無料で

Clothoff.io
AI衣類リムーバー

Video Face Swap
完全無料の AI 顔交換ツールを使用して、あらゆるビデオの顔を簡単に交換できます。

人気の記事
ホットツール

ドリームウィーバー CS6
ビジュアル Web 開発ツール

PhpStorm Mac バージョン
最新(2018.2.1)のプロフェッショナル向けPHP統合開発ツール

SecLists
SecLists は、セキュリティ テスターの究極の相棒です。これは、セキュリティ評価中に頻繁に使用されるさまざまな種類のリストを 1 か所にまとめたものです。 SecLists は、セキュリティ テスターが必要とする可能性のあるすべてのリストを便利に提供することで、セキュリティ テストをより効率的かつ生産的にするのに役立ちます。リストの種類には、ユーザー名、パスワード、URL、ファジング ペイロード、機密データ パターン、Web シェルなどが含まれます。テスターはこのリポジトリを新しいテスト マシンにプルするだけで、必要なあらゆる種類のリストにアクセスできるようになります。

SublimeText3 Mac版
神レベルのコード編集ソフト(SublimeText3)

MinGW - Minimalist GNU for Windows
このプロジェクトは osdn.net/projects/mingw に移行中です。引き続きそこでフォローしていただけます。 MinGW: GNU Compiler Collection (GCC) のネイティブ Windows ポートであり、ネイティブ Windows アプリケーションを構築するための自由に配布可能なインポート ライブラリとヘッダー ファイルであり、C99 機能をサポートする MSVC ランタイムの拡張機能が含まれています。すべての MinGW ソフトウェアは 64 ビット Windows プラットフォームで実行できます。

