ホームページ >システムチュートリアル >Windowsシリーズ >Windows 11および10でアップデートキャッシュをクリアする方法
Windows 11および10でアップデートキャッシュをクリアする方法
- PHPzオリジナル
- 2024-06-19 07:06:391435ブラウズ
Windows 11 と Windows 10 の両方で、Windows Update のキャッシュを非常に簡単にクリアできます。保存された更新ファイルを削除するには、グラフィカルな方法またはコマンド ライン オプションを使用できます。利用可能なオプションをご案内します。
Windows Update キャッシュをクリアする必要があるのはなぜですか?
Windows Update のキャッシュをクリアしたい理由はたくさんあります。
アップデートの検索やインストールで問題が発生する可能性がありますが、多くの場合、キャッシュをクリアすると問題が解決します。キャッシュをクリアすると、Windows に必要なすべてのファイルが強制的に再ダウンロードされるため、Windows Update の問題が修正されます。
もう 1 つの理由は、ストレージ スペースを解放することです。更新キャッシュ ファイルは多くの場合、ストレージの膨大な部分を使用しますが、それらのキャッシュされたファイルを削除することで、それを再利用できます。 (Windows は更新プログラムのインストール後に一部の更新ファイルを削除しますが、すべてではありません。)
ファイル エクスプローラーを使用して Windows Update キャッシュをクリアする
更新キャッシュを削除する簡単なグラフィカルな方法は、ファイル エクスプローラーを使用することです。このメソッドは、すべてのアップデート キャッシュ ファイルを削除します。
この方法を使用するには、Windows + R を押して [ファイル名を指定して実行] ダイアログ ボックスを開きます。ボックスに次のように入力して Enter キーを押します:
services.msc
[サービス] ウィンドウで、Windows Update サービスを見つけます。右クリックして「停止」を選択します。後でここに戻ってくるので、このウィンドウは開いたままにしておいてください。
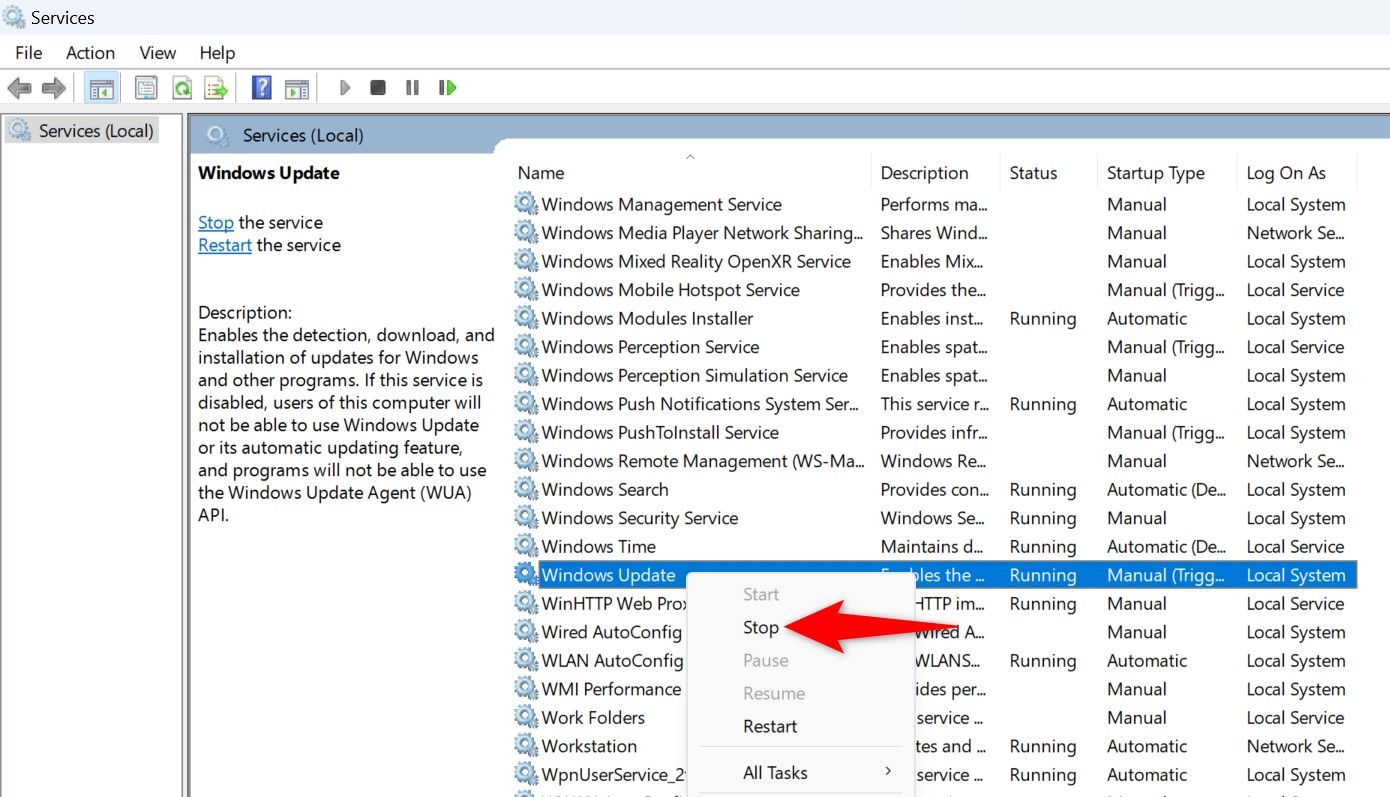
Windows + R を使用して [ファイル名を指定して実行] を再度起動し、ボックスに以下のパスを入力して Enter キーを押します。以下は、Windows Update キャッシュ フォルダーへのパスです。 Windows が C: ドライブにインストールされていることを前提としています。ただし、そうでない場合は、パス内のドライブ文字を変更するだけです。
C:WindowsSoftwareDistribution
Ctrl+A を押して、開いているフォルダー内のすべてのファイルを選択します。選択したファイルを右クリックし、ゴミ箱アイコン (Windows 11) または [削除] (Windows 10) を選択します。
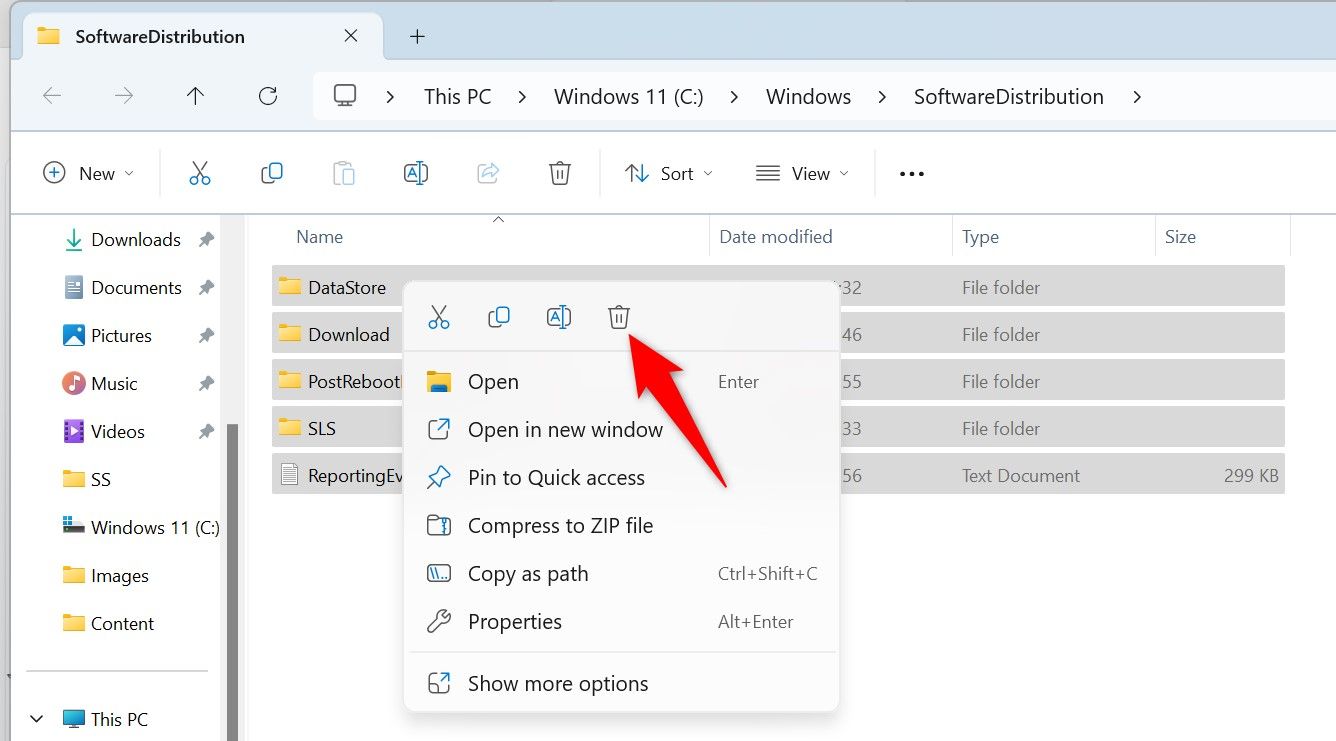
ファイル エクスプローラーを閉じて、ごみ箱を空にします。
次に、「サービス」ウィンドウに戻り、「Windows Update」を右クリックし、「開始」を選択します。
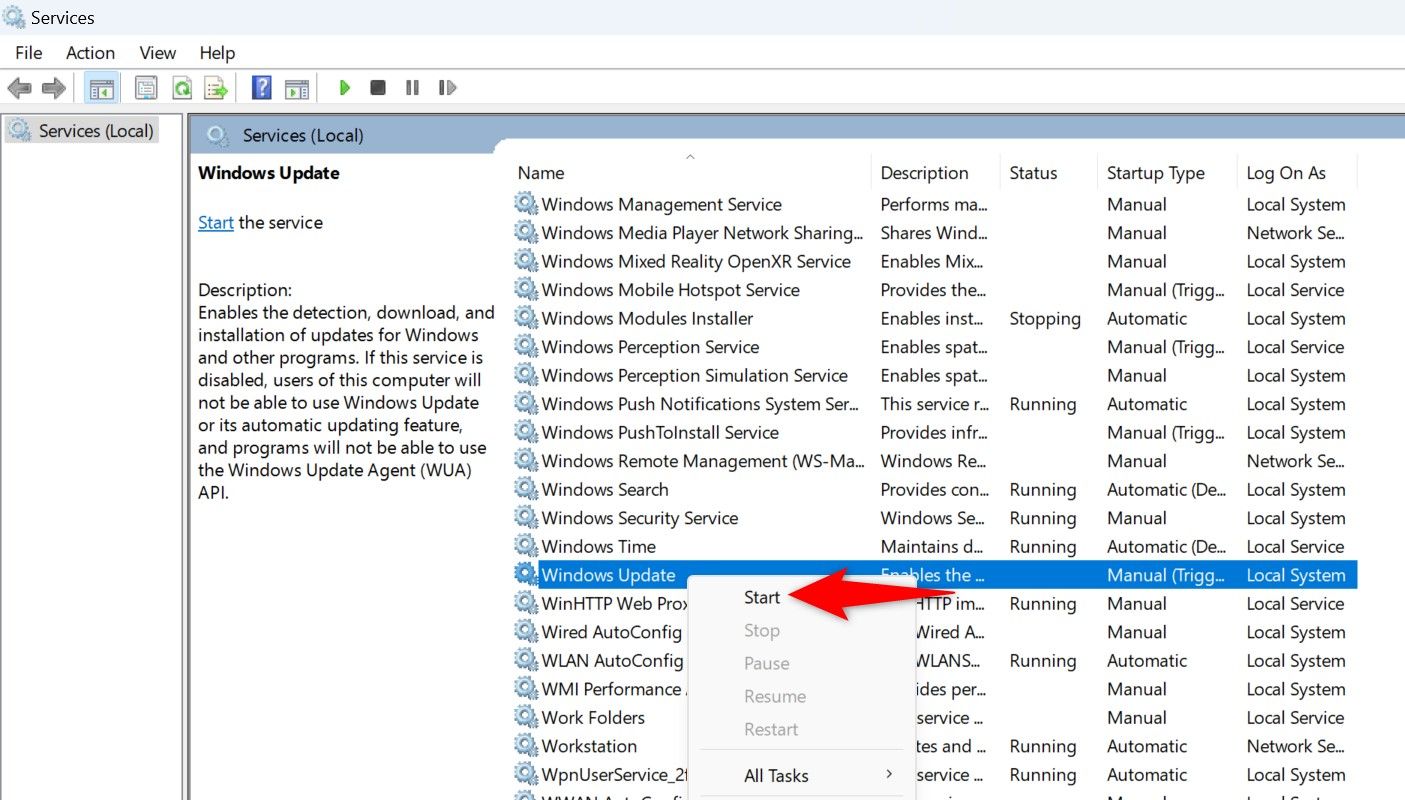
これにより、PC は最新のアップデートを探し続けることができます。
ディスク クリーンアップを使用して Windows Update キャッシュをクリアする
Windows に組み込まれているディスク クリーンアップ ユーティリティは、一部の Windows Update キャッシュ ファイルを削除するのに役立ちます。
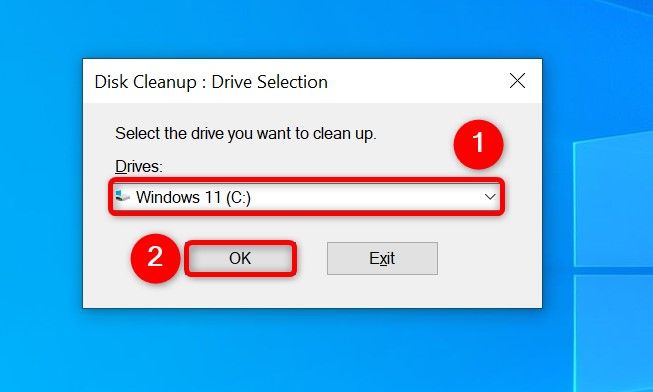
これを使用するには、[スタート] メニューを開き、[ディスク クリーンアップ] を検索して、ユーティリティを起動します。
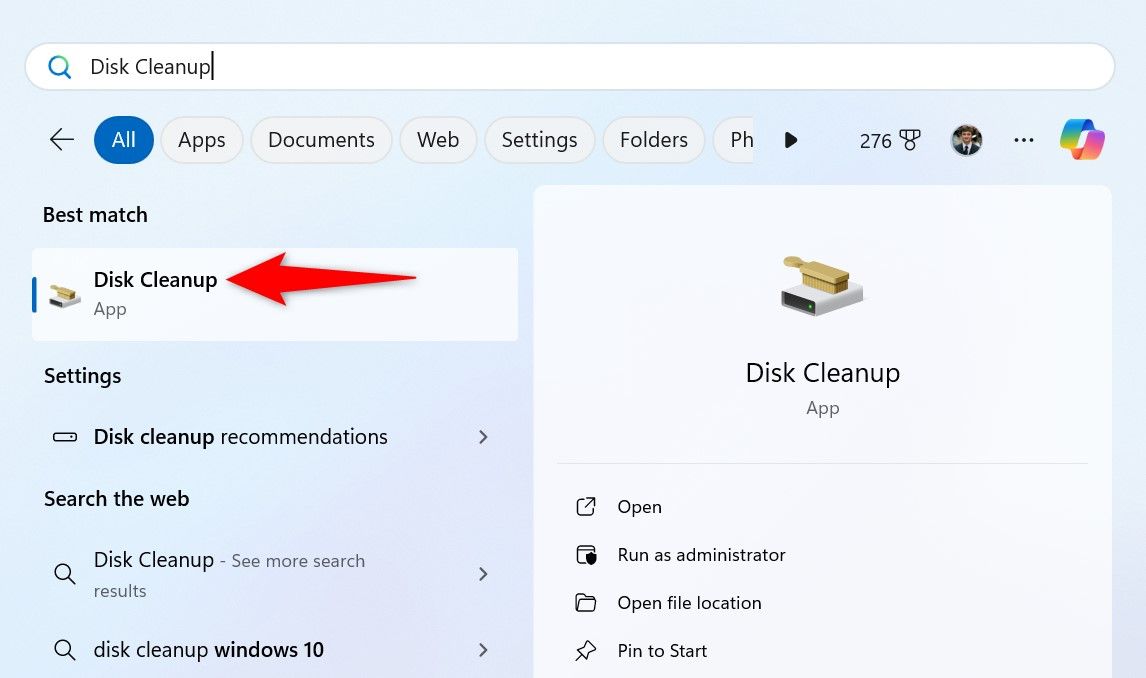
Windows インストール ドライブを選択し、[OK] を選択します。
「システムファイルのクリーンアップ」を選択します。
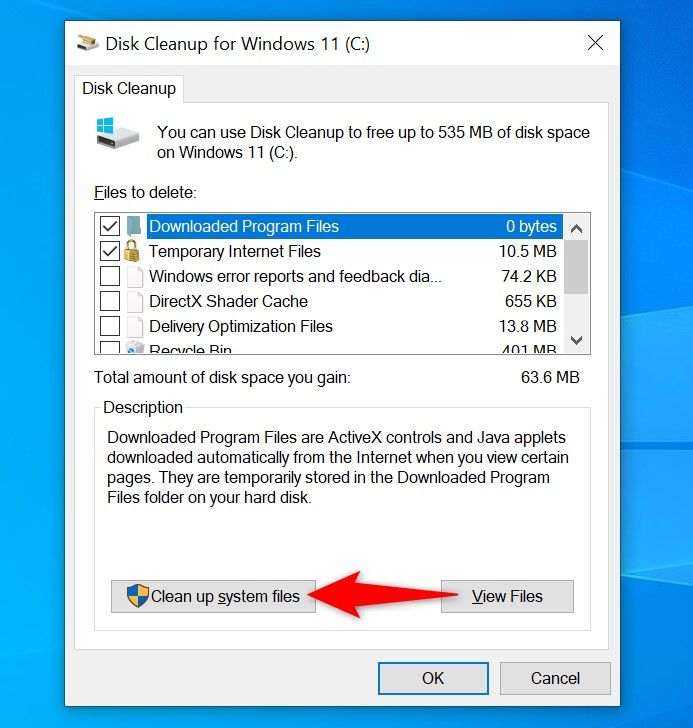
Windows インストールドライブを再度選択し、[OK] を選択します。
ディスク クリーンアップで、「Windows Update クリーンアップ」オプションを有効にします。これらのファイルも削除したい場合は、他のオプションを自由に有効にしてください。次に、下部にある「OK」をクリックします。
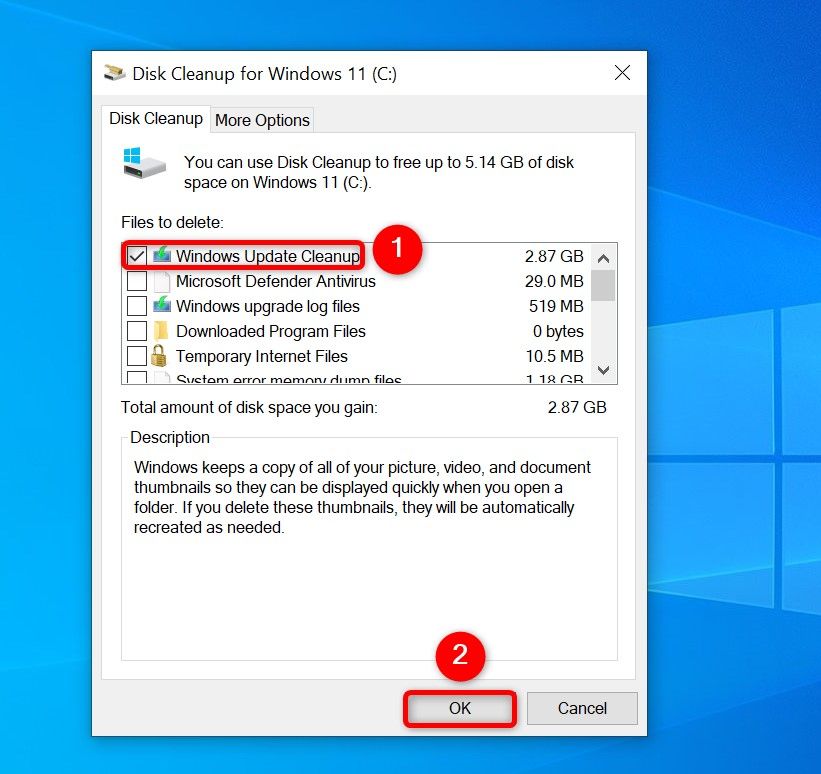
ツールは更新キャッシュ ファイルのクリーンアップを開始します。
コマンド プロンプトを使用して Windows Update キャッシュをクリアする
グラフィカルな方法よりもコマンド ラインの方法を好む場合は、コマンド プロンプト (または PowerShell) でいくつかのコマンドを使用して更新キャッシュを削除します。
まず、スタート メニューを開き、コマンド プロンプトを検索し、[管理者として実行] を選択します。
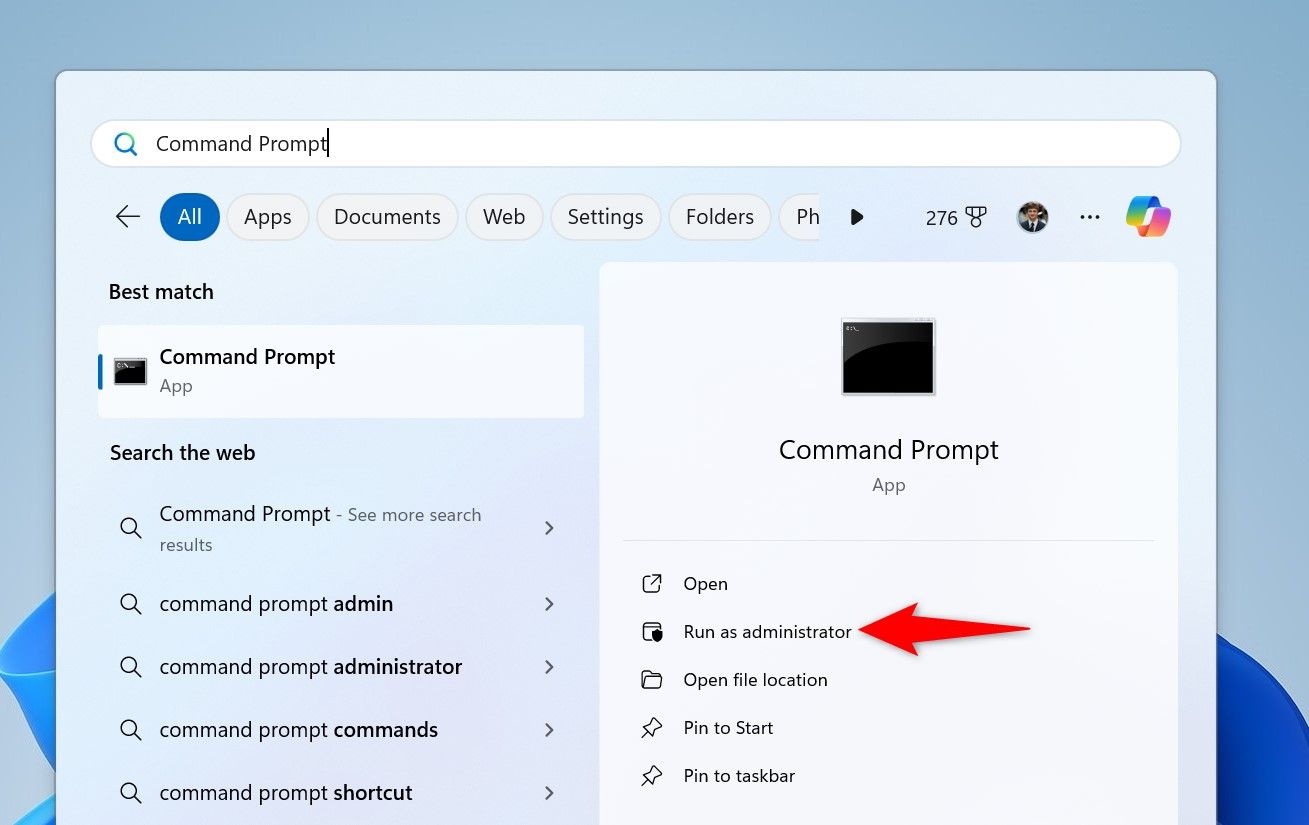
「ユーザー アカウント制御」(UAC) プロンプトで、「はい」を選択します。
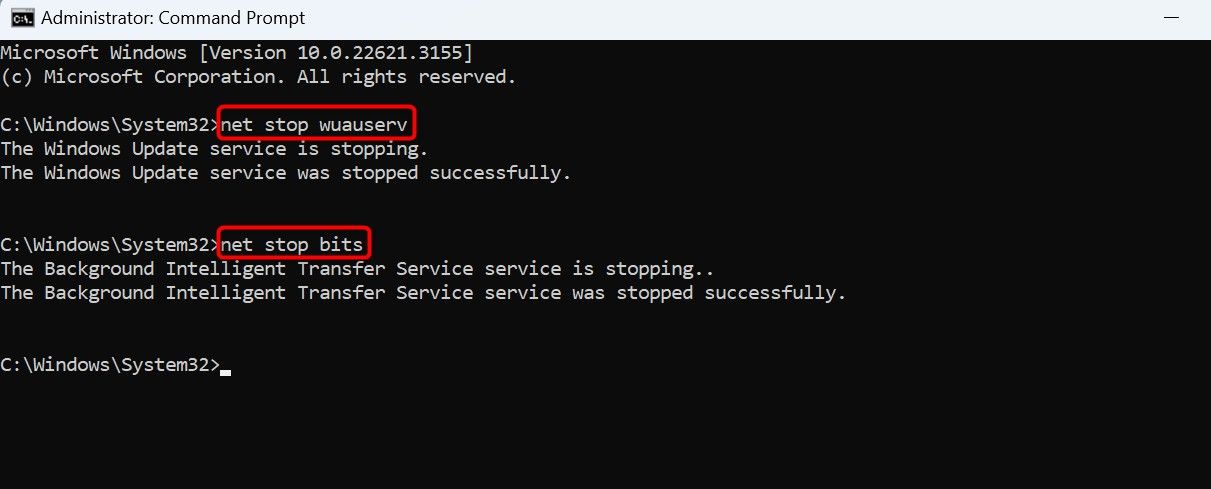
コマンド プロンプトに次の行を入力し、各行の後で Enter キーを押します。最初のコマンドは Windows Update サービスを無効にし、2 番目のコマンドはバックグラウンド インテリジェント転送サービス サービスをオフにします。
<code class="hljs sql">net stop wuauservnet stop bits</code>
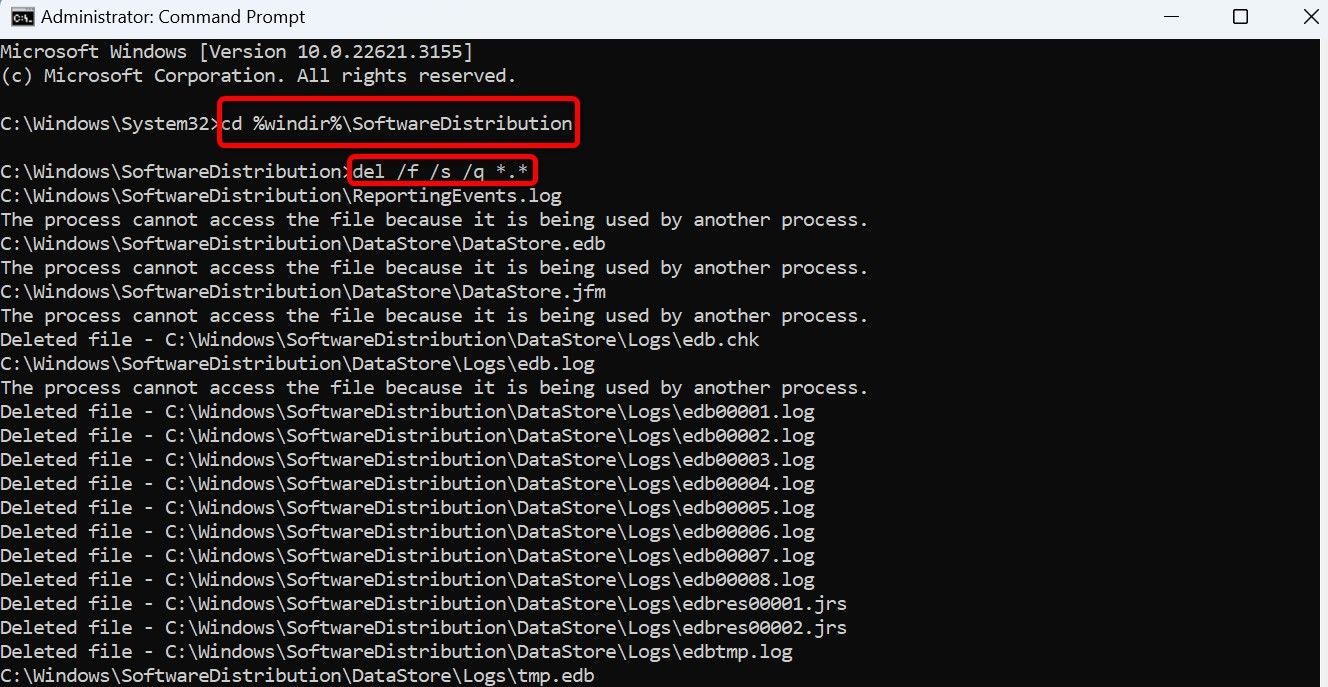
Next up, run the following command to make the Windows Update cache folder the current working directory.
cd %windir%SoftwareDistribution
Type the following command and press Enter to delete the update cache.
del /f /s /q *.*
After clearing the cache, restart the services you stopped above. Do that by typing the following commands and pressing Enter after each line.
<code class="hljs sql">net start wuauservnet start bits</code>
You’re done.
Use a Script to Clear Update Cache in a Single-Click
You can make a batch file out of the commands above to clear your Windows Update cache in just a single click. This is a convenient method if you delete your update cache files often.
To make that script, open the Start Menu, search for Notepad, and launch the app. Copy the code below and paste it in your Notepad document.
<code class="hljs xml">net stop wuauservnet stop bitscd %windir%SoftwareDistributiondel /f /s /q *.*net start wuauservnet start bits</code>
Save the file by choosing File > Save from the menu bar.
In the "Save As" window, select the folder where you want to save the script. Click the "Save as Type" drop-down menu and choose "All Files." Select the "File Name" field and enter a name of your choice. Then, append .bat at the end of the file name. This ensures Notepad saves the file as a batch script.
Then, click "Save."
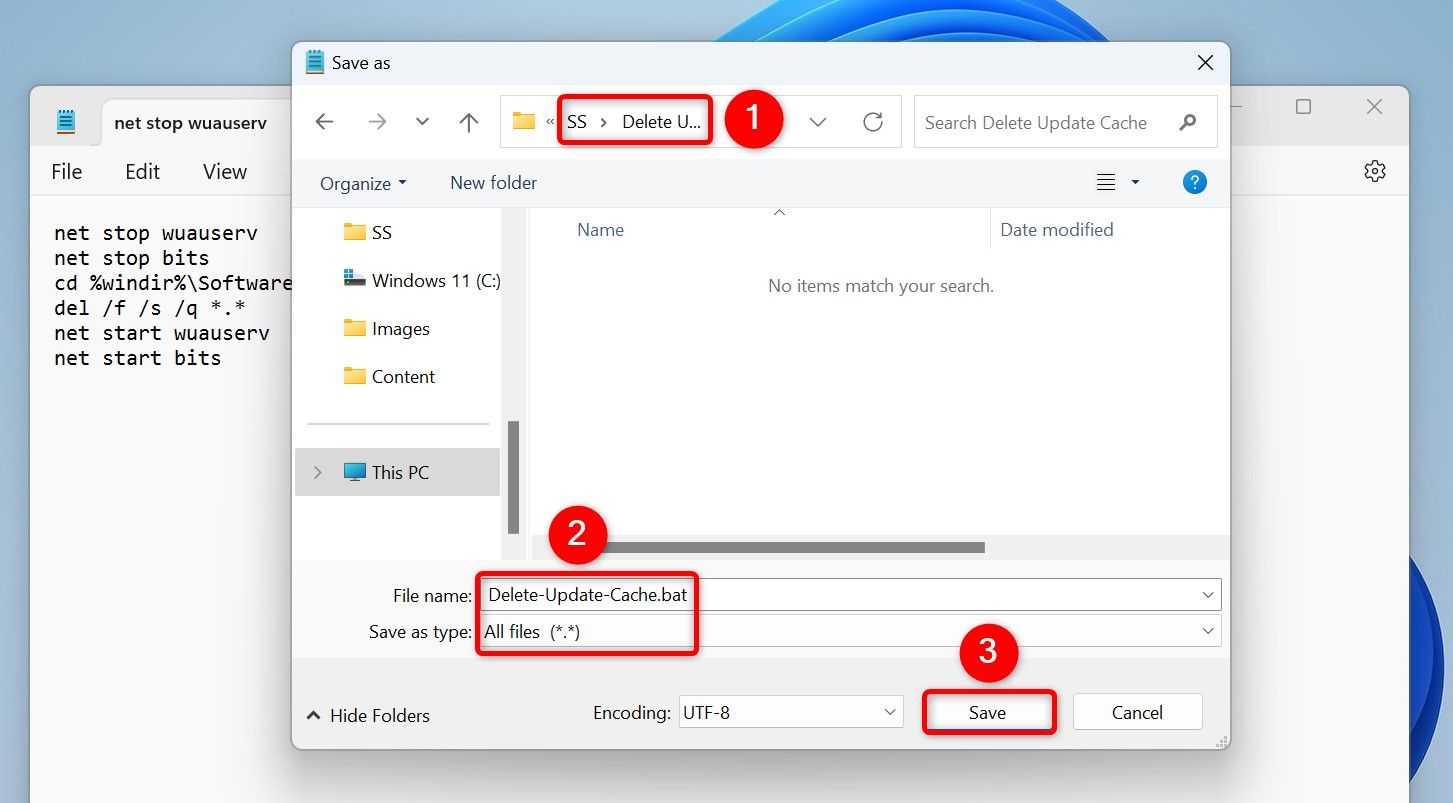
In the future, to clear your Windows Update cache using the script, right-click the script file and select "Run as Administrator." In the User Account Control prompt, choose "Yes." The script will stop certain services, deletes the update cache files, and restarts the stopped services.
And that’s how you get rid of the update cache files using various ways on your Windows 11 or Windows 10 computer. We hope you find the methods useful.
以上がWindows 11および10でアップデートキャッシュをクリアする方法の詳細内容です。詳細については、PHP 中国語 Web サイトの他の関連記事を参照してください。

