HelloWorld程序 学习任何程序的第一步,都是编写HelloWorld程序,我们也不例外,看下如何通过Java编写一个HelloWorld的程序。 首先,要通过Java操作Mongodb,必须先下载Mongodb的Java驱动程序,可以在这里下载。 新建立一个Java工程,将下载的驱动程序放在库
HelloWorld程序
学习任何程序的第一步,都是编写HelloWorld程序,我们也不例外,看下如何通过Java编写一个HelloWorld的程序。
首先,要通过Java操作Mongodb,必须先下载Mongodb的Java驱动程序,可以在这里下载。
新建立一个Java工程,将下载的驱动程序放在库文件路径下,程序代码如下:
package?com.mkyong.core;
import?java.net.UnknownHostException;
import?com.mongodb.BasicDBObject;
import?com.mongodb.DB;
import?com.mongodb.DBCollection;
import?com.mongodb.DBCursor;
import?com.mongodb.Mongo;
import?com.mongodb.MongoException;
/**
* Java + MongoDB Hello world Example
*?
*/
public?class?App {
public?static?void?main(String[] args) {
try?{
//实例化Mongo对象,连接27017端口
????????????Mongo mongo?=?new?Mongo(“localhost”,?27017);
//连接名为yourdb的数据库,假如数据库不存在的话,mongodb会自动建立
????????????DB db?=?mongo.getDB(“yourdb”);
//?Get collection from MongoDB, database named “yourDB”
//从Mongodb中获得名为yourColleection的数据集合,如果该数据集合不存在,Mongodb会为其新建立
????????????DBCollection collection?=?db.getCollection(“yourCollection”);
//?使用BasicDBObject对象创建一个mongodb的document,并给予赋值。
????????????BasicDBObject document?=?new?BasicDBObject();
document.put(“id”,?1001);
document.put(“msg”,?”hello world mongoDB in Java”);
//将新建立的document保存到collection中去
????????????collection.insert(document);
//?创建要查询的document
????????????BasicDBObject searchQuery?=?new?BasicDBObject();
searchQuery.put(“id”,?1001);
//?使用collection的find方法查找document
????????????DBCursor cursor?=?collection.find(searchQuery);
//循环输出结果
????????????while?(cursor.hasNext()) {
System.out.println(cursor.next());
}
System.out.println(“Done”);?
}?catch?(UnknownHostException e) {
e.printStackTrace();
}?catch?(MongoException e) {
e.printStackTrace();
}
}
}
最后,输出的结果为:
{?”_id”?: {?”$oid”?:?”4dbe5596dceace565d229dc3″} ,?
“id”?:?1001?,?”msg”?:?”hello world mongoDB in Java”}
Done
在上面的例子中,演示了使用Java对Mongodb操作的重要方法和步骤,首先通过创建Mongodb对象,传入构造函数的参数是Mongodb的数据库所在地址和端口,然后使用
getDB方法获得要连接的数据库名,使用getCollection获得数据集合的名,然后通过新建立BasicDBObject对象去建立document,最后通过collection的insert方法,将建立的document保存到数据库中去。而collection的find方法,则是用来在数据库中查找document。
从Mongodb中获得collection数据集
在Mongodb中,可以通过如下方法获得数据库中的collection:
DBCollection collection?=?db.getCollection(“yourCollection”);
如果你不知道collection的名称,可以使用db.getCollectionNames()获得集合,然后再遍历,如下:
DB db?=?mongo.getDB(“yourdb”);
Set collections?=?db.getCollectionNames();
for(String collectionName : collections){
System.out.println(collectionName);
}
完成的一个例子如下:
package?com.mkyong.core;
import?java.net.UnknownHostException;
import?java.util.Set;
import?com.mongodb.DB;
import?com.mongodb.DBCollection;
import?com.mongodb.Mongo;
import?com.mongodb.MongoException;
/**
* Java : Get collection from MongoDB
*?
*/
public?class?GetCollectionApp {
public?static?void?main(String[] args) {
try?{
Mongo mongo?=?new?Mongo(“localhost”,?27017);
DB db?=?mongo.getDB(“yourdb”);
Set
for?(String collectionName : collections) {
System.out.println(collectionName);
}
DBCollection collection?=?db.getCollection(“yourCollection”);
System.out.println(collection.toString());
System.out.println(“Done”);
}?catch?(UnknownHostException e) {
e.printStackTrace();
}?catch?(MongoException e) {
e.printStackTrace();
}
}
}
Mongodb中如何插入数据
下面,讲解下如何使用4种方式,将JSON数据插入到Mongodb中去。首先我们准备JSON
格式的数据,如下:
{
“database”?:?”mkyongDB”,
“table”?:?”hosting”,
“detail”?:
{
records :?99,
index :?”vps_index1″,
active :?”true”
}
}
}
我们希望用不同的方式,通过JAVA代码向Mongodb插入以上格式的JSON数据
第一种方法,是使用BasicDBObject,方法如下代码所示:
BasicDBObject document?=?new?BasicDBObject();
document.put(“database”,?”mkyongDB”);
document.put(“table”,?”hosting”);
BasicDBObject documentDetail?=?new?BasicDBObject();
documentDetail.put(“records”,?”99″);
documentDetail.put(“index”,?”vps_index1″);
documentDetail.put(“active”,?”true”);
document.put(“detail”, documentDetail);
collection.insert(document);
第二种方法是使用BasicDBObjectBuilder对象,如下代码所示:
BasicDBObjectBuilder documentBuilder?=?BasicDBObjectBuilder.start()
.add(“database”,?”mkyongDB”)
.add(“table”,?”hosting”);
BasicDBObjectBuilder documentBuilderDetail?=?BasicDBObjectBuilder.start()
.add(“records”,?”99″)
.add(“index”,?”vps_index1″)
.add(“active”,?”true”);
documentBuilder.add(“detail”, documentBuilderDetail.get());
collection.insert(documentBuilder.get());
第三种方法是使用Map对象,代码如下:
Map documentMap?=new?HashMap();
documentMap.put(“database”,?”mkyongDB”);
documentMap.put(“table”,?”hosting”);
Map documentMapDetail?=new?HashMap();
documentMapDetail.put(“records”,?”99″);
documentMapDetail.put(“index”,?”vps_index1″);
documentMapDetail.put(“active”,?”true”);
documentMap.put(“detail”, documentMapDetail);
collection.insert(new?BasicDBObject(documentMap));
第四种方法,也就是最简单的,即直接插入JSON格式数据
String json?=”{‘database’ : ‘mkyongDB’,'table’ : ‘hosting’,”+
“‘detail’ : {‘records’ : 99, ‘index’ : ‘vps_index1′, ‘active’ : ‘true’}}}”;
DBObject dbObject?=(DBObject)JSON.parse(json);
collection.insert(dbObject);
这里使用了JSON的parse方法,将解析后的JSON字符串转变为DBObject对象后再直接插入到collection中去。
完整的代码如下所示:
packagecom.mkyong.core;
importjava.net.UnknownHostException;
importjava.util.HashMap;
importjava.util.Map;
importcom.mongodb.BasicDBObject;
importcom.mongodb.BasicDBObjectBuilder;
importcom.mongodb.DB;
importcom.mongodb.DBCollection;
importcom.mongodb.DBCursor;
importcom.mongodb.DBObject;
importcom.mongodb.Mongo;
importcom.mongodb.MongoException;
importcom.mongodb.util.JSON;
/**
* Java MongoDB : Insert a Document
*
*/
publicclass InsertDocumentApp {
publicstaticvoid main(String[] args){
try{
Mongo mongo?=new?Mongo(“localhost”,?27017);
DB db?=?mongo.getDB(“yourdb”);
//?get a single collection
DBCollection collection?=?db.getCollection(“dummyColl”);
//?BasicDBObject example
System.out.println(“BasicDBObject example…”);
BasicDBObject document?=new?BasicDBObject();
document.put(“database”,?”mkyongDB”);
document.put(“table”,?”hosting”);
BasicDBObject documentDetail?=new?BasicDBObject();
documentDetail.put(“records”,?”99″);
documentDetail.put(“index”,?”vps_index1″);
documentDetail.put(“active”,?”true”);
document.put(“detail”, documentDetail);
collection.insert(document);
DBCursor cursorDoc?=?collection.find();
while(cursorDoc.hasNext()){
System.out.println(cursorDoc.next());
}
collection.remove(new?BasicDBObject());
//?BasicDBObjectBuilder example
System.out.println(“BasicDBObjectBuilder example…”);
BasicDBObjectBuilder documentBuilder?=?BasicDBObjectBuilder.start()
.add(“database”,?”mkyongDB”)
.add(“table”,?”hosting”);
BasicDBObjectBuilder documentBuilderDetail?=?BasicDBObjectBuilder.start()
.add(“records”,?”99″)
.add(“index”,?”vps_index1″)
.add(“active”,?”true”);
documentBuilder.add(“detail”, documentBuilderDetail.get());
collection.insert(documentBuilder.get());
DBCursor cursorDocBuilder?=?collection.find();
while(cursorDocBuilder.hasNext()){
System.out.println(cursorDocBuilder.next());
}
collection.remove(new?BasicDBObject());
//?Map example
System.out.println(“Map example…”);
Map documentMap?=new?HashMap();
documentMap.put(“database”,?”mkyongDB”);
documentMap.put(“table”,?”hosting”);
Map documentMapDetail?=new?HashMap();
documentMapDetail.put(“records”,?”99″);
documentMapDetail.put(“index”,?”vps_index1″);
documentMapDetail.put(“active”,?”true”);
documentMap.put(“detail”, documentMapDetail);
collection.insert(new?BasicDBObject(documentMap));
DBCursor cursorDocMap?=?collection.find();
while(cursorDocMap.hasNext()){
System.out.println(cursorDocMap.next());
}
collection.remove(new?BasicDBObject());
//?JSON parse example
System.out.println(“JSON parse example…”);
String json?=”{‘database’ : ‘mkyongDB’,'table’ : ‘hosting’,”+
“‘detail’ : {‘records’ : 99, ‘index’ : ‘vps_index1′, ‘active’ : ‘true’}}}”;
DBObject dbObject?=(DBObject)JSON.parse(json);
collection.insert(dbObject);
DBCursor cursorDocJSON?=?collection.find();
while(cursorDocJSON.hasNext()){
System.out.println(cursorDocJSON.next());
}
collection.remove(new?BasicDBObject());
}catch(UnknownHostException e){
e.printStackTrace();
}catch(MongoException e){
e.printStackTrace();
}
}
}
更新Document
假设如下的JSON格式的数据已经保存到Mongodb中去了,现在要更新相关的数据。
{“_id”?: {“$oid”?:?”x”} ,?”hosting”?:?”hostA”?,?”type”?:?”vps”?,?”clients”?:?1000}
{“_id”?: {“$oid”?:?”x”} ,?”hosting”?:?”hostB”?,?”type”?:?”dedicated server”?,?”clients”?:?100}
{“_id”?: {“$oid”?:?”x”} ,?”hosting”?:?”hostC”?,?”type”?:?”vps”?,?”clients”?:?900}
? 假设现在要将hosting中值为hostB的进行更新,则可以使用如下的方法:
BasicDBObject newDocument?=new?BasicDBObject();
newDocument.put(“hosting”,?”hostB”);
newDocument.put(“type”,?”shared host”);
newDocument.put(“clients”,?111);
collection.update(new?BasicDBObject().append(“hosting”,?”hostB”), newDocument);
? 可以看到,这里依然使用了BasicDBObject对象,并为其赋值了新的值后,然后使用collection的update方法,即可更新该对象。
更新后的输出如下:
{“_id”?: {“$oid”?:?”x”} ,?”hosting”?:?”hostA”?,?”type”?:?”vps”?,?”clients”?:?1000}
{“_id”?: {“$oid”?:?”x”} ,?”hosting”?:?”hostB”?,?”type”?:?”shared host”?,?”clients”?:?111}
{“_id”?: {“$oid”?:?”x”} ,?”hosting”?:?”hostC”?,?”type”?:?”vps”?,?”clients”?:?900}
? 另外,还可以使用mongodb中的$inc修饰符号去对某个值进行更新,比如,要将hosting值为hostB的document的clients的值得更新为199(即100+99=199),可以这样:
BasicDBObject newDocument?=new?BasicDBObject().append(“$inc”,
new?BasicDBObject().append(“clients”,?99));
collection.update(new?BasicDBObject().append(“hosting”,?”hostB”), newDocument);
? 则输出如下:
{“_id”?: {“$oid”?:?”x”} ,?”hosting”?:?”hostA”?,?”type”?:?”vps”?,?”clients”?:?1000}
{“_id”?: {“$oid”?:?”x”} ,?”hosting”?:?”hostB”?,?”type”?:?”dedicated server”?,?”clients”?:?199}
{“_id”?: {“$oid”?:?”x”} ,?”hosting”?:?”hostC”?,?”type”?:?”vps”?,?”clients”?:?900}
? 接下来,讲解$set修饰符的使用。比如要把hosting中值为hostA的document中的
type的值进行修改,则可以如下实现:
BasicDBObject newDocument3?=new?BasicDBObject().append(“$set”,
new?BasicDBObject().append(“type”,?”dedicated server”));
collection.update(new?BasicDBObject().append(“hosting”,?”hostA”), newDocument3);
? 则输出如下,把type的值从vps改为dedicated server:
{“_id”?: {“$oid”?:?”x”} ,?”hosting”?:?”hostB”?,?”type”?:?”dedicated server”?,?”clients”?:?100}
{“_id”?: {“$oid”?:?”x”} ,?”hosting”?:?”hostC”?,?”type”?:?”vps”?,?”clients”?:?900}
{“_id”?: {“$oid”?:?”x”} ,?”hosting”?:?”hostA”?,?”clients”?:?1000?,?”type”?:?”dedicated server”}
? 要注意的是,如果不使用$set的修饰符,而只是如下代码:
BasicDBObject newDocument3?=new?BasicDBObject().append(“type”,?”dedicated server”);
collection.update(new?BasicDBObject().append(“hosting”,?”hostA”), newDocument3);
? 则会将所有的三个document的type类型都改为dedicated server了,因此要使用$set以更新特定的document的特定的值。
如果要更新多个document中相同的值,可以使用$multi,比如,要把所有vps为type的document,将它们的clients的值更新为888,可以如下实现:
BasicDBObject updateQuery?=new?BasicDBObject().append(“$set”,
new?BasicDBObject().append(“clients”,?”888″));
collection.update(new?BasicDBObject().append(“type”,?”vps”), updateQuery,?false,?true);
输出如下:
{“_id”?: {“$oid”?:?”x”} ,?”hosting”?:?”hostA”?,?”clients”?:?”888″?,?”type”?:?”vps”}
{“_id”?: {“$oid”?:?”x”} ,?”hosting”?:?”hostB”?,?”type”?:?”dedicated server”?,?”clients”?:?100}
{“_id”?: {“$oid”?:?”x”} ,?”hosting”?:?”hostC”?,?”clients”?:?”888″?,?”type”?:?”vps”}
最后,还是给出更新document的完整例子:
package?com.liao;
import?java.net.UnknownHostException;
import?com.mongodb.BasicDBObject;
import?com.mongodb.DB;
import?com.mongodb.DBCollection;
import?com.mongodb.DBCursor;
import?com.mongodb.Mongo;
import?com.mongodb.MongoException;
publicclass UpdateDocumentApp {
publicstaticvoid printAllDocuments(DBCollection collection){
DBCursor cursor?=?collection.find();
while?(cursor.hasNext()) {
System.out.println(cursor.next());
}
}
publicstaticvoid removeAllDocuments(DBCollection collection){
collection.remove(new?BasicDBObject());
}
publicstaticvoid insertDummyDocuments(DBCollection collection){
BasicDBObject document?=?new?BasicDBObject();
document.put(“hosting”,?”hostA”);
document.put(“type”,?”vps”);
document.put(“clients”,?1000);
BasicDBObject document2?=?new?BasicDBObject();
document2.put(“hosting”,?”hostB”);
document2.put(“type”,?”dedicated server”);
document2.put(“clients”,?100);
BasicDBObject document3?=?new?BasicDBObject();
document3.put(“hosting”,?”hostC”);
document3.put(“type”,?”vps”);
document3.put(“clients”,?900);
collection.insert(document);
collection.insert(document2);
collection.insert(document3);
}
publicstaticvoid main(String[] args) {
try?{
Mongo mongo?=?new?Mongo(“localhost”,?27017);
DB db?=?mongo.getDB(“yourdb”);
DBCollection collection?=?db.getCollection(“dummyColl”);
System.out.println(“Testing 1…”);
insertDummyDocuments(collection);
//find hosting = hostB, and update it with new document
BasicDBObject newDocument?=?new?BasicDBObject();
newDocument.put(“hosting”,?”hostB”);
newDocument.put(“type”,?”shared host”);
newDocument.put(“clients”,?111);
collection.update(new?BasicDBObject().append(“hosting”,?”hostB”), newDocument);
printAllDocuments(collection);
removeAllDocuments(collection);
System.out.println(“Testing 2…”);
insertDummyDocuments(collection);
BasicDBObject newDocument2?=?new?BasicDBObject().append(“$inc”,
new?BasicDBObject().append(“clients”,?99));
collection.update(new?BasicDBObject().append(“hosting”,?”hostB”), newDocument2);
printAllDocuments(collection);
removeAllDocuments(collection);
System.out.println(“Testing 3…”);
insertDummyDocuments(collection);
BasicDBObject newDocument3?=?new?BasicDBObject().append(“$set”,
new?BasicDBObject().append(“type”,?”dedicated server”));
collection.update(new?BasicDBObject().append(“hosting”,?”hostA”), newDocument3);
printAllDocuments(collection);
removeAllDocuments(collection);
System.out.println(“Testing 4…”);
insertDummyDocuments(collection);
BasicDBObject updateQuery?=?new?BasicDBObject().append(“$set”,
new?BasicDBObject().append(“clients”,?”888″));
collection.update(
new?BasicDBObject().append(“type”,?”vps”), updateQuery,?false,?true);
printAllDocuments(collection);
removeAllDocuments(collection);
System.out.println(“Done”);
}?catch?(UnknownHostException e) {
e.printStackTrace();
}?catch?(MongoException e) {
e.printStackTrace();
}
}
}
查询Document
下面学习如何查询document,先用下面的代码往数据库中插入1-10数字:
for(int?i=1; i?
collection.insert(new?BasicDBObject().append(“number”, i));
}
? 接下来,看下如下的例子:
1) 获得数据库中的第一个document:
DBObject doc?=?collection.findOne();
System.out.println(dbObject);
? 输出为:
{“_id”?: {“$oid”?:?”4dc7f7b7bd0fb9a86c6c80bd”} ,?”number”?:?1}
? 2)获得document的集合
DBCursor cursor?=?collection.find();
while(cursor.hasNext()){
System.out.println(cursor.next());
}
? 这里,使用collection.find()方法,获得当前数据库中所有的documents对象集合
然后通过对DBCursor对象集合的遍历,即可输出当前所有documents。输出如下:
{“_id”?: {“$oid”?:?”4dc7f7b7bd0fb9a86c6c80bd”} ,?”number”?:?1}
//……….中间部分省略,为2到9的输出
{“_id”?: {“$oid”?:?”4dc7f7b7bd0fb9a86c6c80c6″} ,?”number”?:?10}
? 3) 获取指定的document
比如要获得number=5的document对象内容,可以使用collection的find方法即可,如下:
BasicDBObject query?=new?BasicDBObject();
query.put(“number”,?5);
DBCursor cursor?=?collection.find(query);
while(cursor.hasNext()){
System.out.println(cursor.next());
}
? 即输出:
{“_id”?: {“$oid”?:?”4dc7f7b7bd0fb9a86c6c80c1″} ,?”number”?:?5}
? 4) 使用in操作符号
在mongodb中,也可以使用in操作符,比如要获得number=9和number=10的document对象,可以如下操作:
BasicDBObject query?=new?BasicDBObject();
List list?=new?ArrayList();
list.add(9);
list.add(10);
query.put(“number”,?new?BasicDBObject(“$in”, list));
DBCursor cursor?=?collection.find(query);
while(cursor.hasNext()){
System.out.println(cursor.next());
}
? 这里使用了一个List,并将list传入到BasicDBObject的构造函数中,并使用了in操作符号,输出如下:
{“_id”?: {“$oid”?:?”4dc7f7b7bd0fb9a86c6c80c5″} ,?”number”?:?9}
{“_id”?: {“$oid”?:?”4dc7f7b7bd0fb9a86c6c80c6″} ,?”number”?:?10}
5) 使用>,
在mongodb中,也可以使用比如>,5的document集合,则使用“$gt”即可,同理,小于关系则使用$lt,例子如下:
BasicDBObject query?=new?BasicDBObject();
query.put(“number”,?new?BasicDBObject(“$gt”,?5));
DBCursor cursor?=?collection.find(query);
while(cursor.hasNext()){
System.out.println(cursor.next());
}
? 输出如下:
{“_id”?: {“$oid”?:?”4dc7f7b7bd0fb9a86c6c80c2″} ,?”number”?:?6}
{“_id”?: {“$oid”?:?”4dc7f7b7bd0fb9a86c6c80c3″} ,?”number”?:?7}
{“_id”?: {“$oid”?:?”4dc7f7b7bd0fb9a86c6c80c4″} ,?”number”?:?8}
{“_id”?: {“$oid”?:?”4dc7f7b7bd0fb9a86c6c80c5″} ,?”number”?:?9}
{“_id”?: {“$oid”?:?”4dc7f7b7
 如何在Go中使用命名管道?May 11, 2023 pm 04:22 PM
命名管道是一种在操作系统中相对比较低级的进程通信方式,它是一种以文件为中介的进程通信方式。在Go语言中,通过os包提供了对命名管道的支持。在本文中,我们将介绍如何在Go中使用命名管道来实现进程间通信。一、命名管道的概念命名管道是一种特殊的文件,可以被多个进程同时访问。在Linux系统中,命名管道是一种特殊的文件类型,它们存在于文件系统的某个位置上,并且可以在
 如何在Go中使用第三方库?May 11, 2023 pm 03:30 PM
在Go语言中,使用第三方库是非常方便的。许多优秀的第三方库和框架可以帮助我们快速地开发应用程序,同时也减少了我们自己编写代码的工作量。但是如何正确地使用第三方库,确保其稳定性和可靠性,是我们必须了解的一个问题。本文将从以下几个方面介绍如何使用第三方库,并结合具体例子进行讲解。一、第三方库的获取Go语言中获取第三方库有以下两种方式:1.使用goget命令首先
 如何在PHP中使用协程?May 12, 2023 am 08:10 AM
随着传统的多线程模型在高并发场景下的性能瓶颈,协程成为了PHP编程领域的热门话题。协程是一种轻量级的线程,能够在单线程中实现多任务的并发执行。在PHP的语言生态中,协程得到了广泛的应用,比如Swoole、Workerman等框架就提供了对协程的支持。那么,如何在PHP中使用协程呢?本文将介绍一些基本的使用方法以及常见的注意事项,帮助读者了解协程的运作原理,以
 如何在PHP中使用变量函数May 18, 2023 pm 03:52 PM
变量函数是指可以使用变量来调用函数的一种特殊语法。在PHP中,变量函数是非常有用的,因为它可以让我们更加灵活地使用函数。在本文中,我们将介绍如何在PHP中使用变量函数。定义变量函数在PHP中,变量函数的定义方式非常简单,只需要将要调用的函数名赋值给一个变量即可。例如,下面的代码定义了一个变量函数:$func='var_dump';这里将var_dump函
 如何在Go中使用WebSocket?May 11, 2023 pm 04:17 PM
近年来,WebSocket技术已经成为了Web开发中不可或缺的一部分。WebSocket是一种在单个TCP连接上进行全双工通信的协议,它使得客户端和服务器之间的通信更加流畅和高效。如今,很多现代的Web应用程序都使用了WebSocket技术,例如实时聊天、在线游戏以及实时数据可视化等。Go语言作为一个现代的编程语言,自然也提供了很好的支持WebSock
 如何在 Windows 11 中按需使用 OneDrive 的文件Apr 14, 2023 pm 12:34 PM
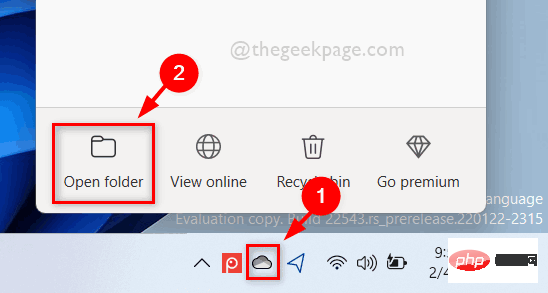
<p>Windows 系统上的 OneDrive 应用程序允许您将文件存储在高达 5 GB 的云上。OneDrive 应用程序中还有另一个功能,它允许用户选择一个选项,是将文件保留在系统空间上还是在线提供,而不占用您的系统存储空间。此功能称为按需文件。在这篇文章中,我们进一步探索了此功能,并解释了有关如何在 Windows 11 电脑上的 OneDrive 中按需使用文件的各种选项。</p><h2>如何使用 On
 如何在Go中使用音频处理?May 11, 2023 pm 04:37 PM
随着音频处理在各种应用场景中的普及,越来越多的程序员开始使用Go编写音频处理程序。Go语言作为一种现代化的编程语言,具有优秀的并发性和高效率的特点,使用它进行音频处理十分方便。本文将介绍如何在Go中使用音频处理技术,包括读取、写入、处理和分析音频数据等方面的内容。一、读取音频数据在Go中读取音频数据有多种方式。其中比较常用的是使用第三方库进行读取,比如go-
 如何在PHP中使用数据聚合函数May 18, 2023 pm 02:51 PM
数据聚合函数是一种用于处理数据库表中多行数据的函数。在PHP中使用数据聚合函数可以使得我们方便地进行数据分析和处理,例如求和、平均数、最大值、最小值等。下面将介绍如何在PHP中使用数据聚合函数。一、介绍常用的数据聚合函数COUNT():计算某一列的行数。SUM():计算某一列的总和。AVG():计算某一列的平均值。MAX():取出某一列的最大值。MIN():


ホットAIツール

Undresser.AI Undress
リアルなヌード写真を作成する AI 搭載アプリ

AI Clothes Remover
写真から衣服を削除するオンライン AI ツール。

Undress AI Tool
脱衣画像を無料で

Clothoff.io
AI衣類リムーバー

AI Hentai Generator
AIヘンタイを無料で生成します。

人気の記事

ホットツール

SublimeText3 Mac版
神レベルのコード編集ソフト(SublimeText3)

mPDF
mPDF は、UTF-8 でエンコードされた HTML から PDF ファイルを生成できる PHP ライブラリです。オリジナルの作者である Ian Back は、Web サイトから「オンザフライ」で PDF ファイルを出力し、さまざまな言語を処理するために mPDF を作成しました。 HTML2FPDF などのオリジナルのスクリプトよりも遅く、Unicode フォントを使用すると生成されるファイルが大きくなりますが、CSS スタイルなどをサポートし、多くの機能強化が施されています。 RTL (アラビア語とヘブライ語) や CJK (中国語、日本語、韓国語) を含むほぼすべての言語をサポートします。ネストされたブロックレベル要素 (P、DIV など) をサポートします。

SublimeText3 中国語版
中国語版、とても使いやすい

EditPlus 中国語クラック版
サイズが小さく、構文の強調表示、コード プロンプト機能はサポートされていません

VSCode Windows 64 ビットのダウンロード
Microsoft によって発売された無料で強力な IDE エディター


