LinearLayout (mise en page linéaire)
Introduction à cette rubrique
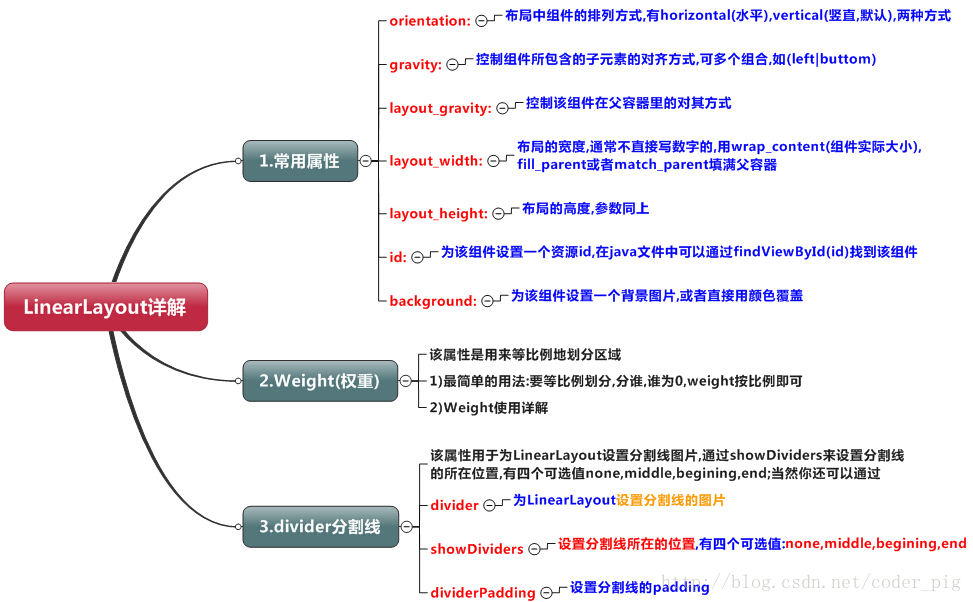
Cette section commence par la mise en page sous Android. Il existe six mises en page principales dans Android, à savoir : LinearLayout (mise en page linéaire), RelativeLayout (mise en page relative), TableLayout (mise en page de table) FrameLayout (mise en page en cadre), AbsoluteLayout (mise en page absolue), GridLayout (mise en page en grille) Ce que nous allons expliquer aujourd'hui, c'est la première mise en page, LinearLayout (mise en page linéaire), notre utilisation de l'adaptation d'écran Le plus couramment utilisé est le poids (attribut poids) de LinearLayout. Dans cette section, nous l'analyserons en détail. LinearLayout, y compris certains attributs de base, l'utilisation de l'attribut Weight et comment calculer la proportion, en plus Dira le prochain attribut moins utilisé : android:divider dessine un soulignement !
-
Tableau d'apprentissage pour cette section
2. Explication détaillée de l'attribut de poids :
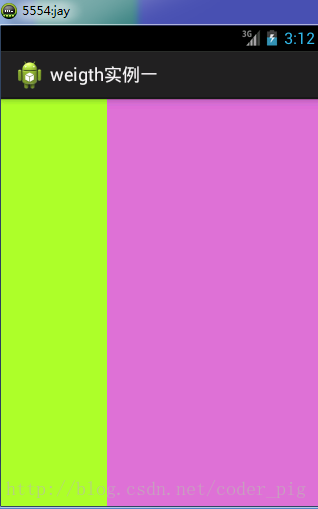
①L'utilisation la plus simple :
Comme le montre l'image :
Code d'implémentation :
xmlns:tools="http://schemas.android.com/tools"
android:id ="@+id/LinearLayout1"
android:layout_width="match_parent"
android:layout_height="match_parent"
android:orientation="horizontal">
<LinearLayout
android:layout_width="0dp"
android:layout_height="fill_parent"
android:background="../ style/images/android-tutorial-linearlayout. html"
android:layout_weight="1"/>
<LinearLayout
android:layout_width="0dp"
android:layout_height="fill_parent"
android:background="../style/images/android-tutorial -linearlayout.html"
android:layout_weight="2"/>
</LinearLayout>
Pour obtenir le premier effet 1:1, il vous suffit de modifier les poids des deux LinearLayouts en 1 et 1 respectivement. Résumé d'utilisation : Divisez la direction horizontale proportionnellement : définissez l'attribut android:width de la vue concernée sur 0dp, puis définissez-le sur Android. L'attribut de poids peut être défini sur une proportion ; par analogie, dans le sens vertical, définissez simplement android:height sur 0dp, puis définissez l'attribut de poids ! Vous pouvez écrire votre propre division verticale à proportion égale et découvrir une utilisation simple !
② Explication détaillée de l'attribut de poids :
Bien sûr, si nous n'utilisons pas la méthode ci-dessus pour définir 0dp et utilisons directement wrap_content et match_parent, Ensuite, vous devez analyser l'attributweight, qui est divisé en deux situations, wrap_content et match_parent ! Regardez aussi Que l'orientation de LinearLayout soit horizontale ou verticale, cela détermine la direction à diviser de manière égale.
1) wrap_content est relativement simple, juste proportionnel
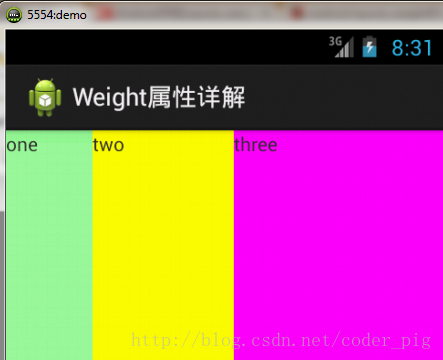
Code d'implémentation :
xmlns:tools="http://schemas.android.com/tools"
android:id ="@+id/LinearLayout1"
android:layout_width="match_parent"
android:layout_height="match_parent"
android:orientation="horizontal" >
<TextView
android:layout_weight="1"
android:layout_width="wrap_content"
android:layout_height="fill_parent"
android:text="one"
android:background="../style/images/android-tutorial-linearlayout.html"
/>
<TextView
android:layout_weight="2"
android:layout_width="wrap_content"
android:layout_height="fill_parent"
android:text="two"
android :background="../style/images/android-tutorial-linearlayout.html"
/>
<TextView
android:layout_weight="3"
android:layout_width="wrap_content"
android:layout_height="fill_parent"
android:text="trois"
android :background="../style/images/android-tutorial-linearlayout.html"
/>
</LinearLayout>
2) match_parent(fill_parent) : Cela doit être calculé
Écrivons ce code simple :
xmlns:tools="http://schemas.android.com/tools"
android:id="@+id/LinearLayout1"
android:layout_width="match_parent"
android:layout_height="match_parent" >
<TextView
android:layout_weight="1"
android:layout_width="fill_parent"
android:layout_height="fill_parent"
android:text="one"
android:background="../style/images/android-tutorial-linearlayout.html"
/>
<TextView
android:layout_weight="2"
android:layout_width="fill_parent"
android:layout_height="fill_parent"
android:text="two"
android:background="../style/images/android-tutorial-linearlayout.html"
/>
<TextView
android:layout_weight="3"
android:layout_width="fill_parent"
android:layout_height="fill_parent"
android:text="three"
android:background="../style/images/android-tutorial-linearlayout.html"
/>
</LinearLayout>
Rendu d'opération :
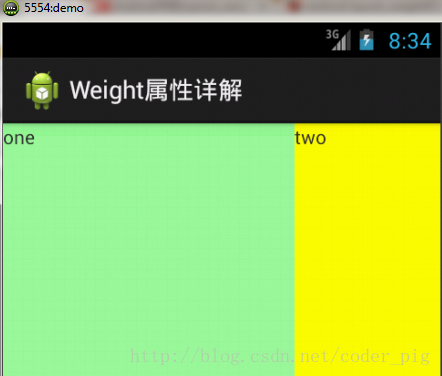
À ce moment-là, vous vous poserez des questions : comment est-ce possible ? Le rapport est de 2 : 1, alors où sont passés trois ? C'est clairement dans le code Pour trois, 3 est également défini, et le rapport de 1 et 2 est faux, 1:2:3 devient 2:1:0. Comment cela a-t-il pu se produire ? Réponse : Ce n’est en fait pas si simple ici. Il faut encore le calculer. Il existe plusieurs algorithmes donnés sur Internet. Voici celui de l’auteur. Celui qui me semble plus facile à comprendre : étape 1 : Tout le monde est fill_parent, mais il n'y a qu'un seul écran, alors 1 - 3 = - 2 fill_parentétape 2 : Le ratio à son tour est 1 /6,2/6,3/6étape 3 :Premier arrivé, premier servi, premier attribué à un, calcul : 1 - 2 * (1/6) = 2/3 fill_parent À côté de deux, calculez : 1 - 2 * (2/6) = 1/3 fill_parent Enfin, calculez 1 - 2 * (3/6) = 0 fill_parentétape 4 : Le résultat final est donc : un occupe deux parts, deux occupe une part et trois n'ont rien Ce qui précède est la raison pour laquelle trois n’apparaissent pas. Peut-être que vous êtes encore un peu confus après l’avoir lu. Essayons avec quelques exemples supplémentaires et vous le saurez !
Le rapport est : 1:1:1
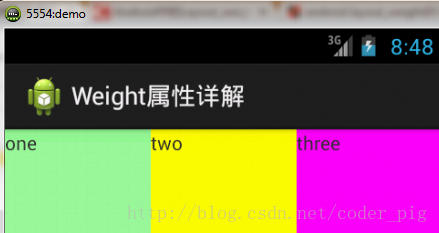
Calculez-le selon la méthode de calcul ci-dessus, le résultat est : 1/3 1/3 1/3, c'est vrai
Alors réessayons : 2:3:4
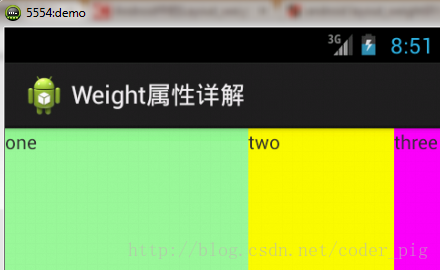
Résultats du calcul : 5/9 3/9 1/9 En comparant les rendus, 5:3:1 est correct, vous devez donc noter cette méthode de calcul !
③Définissez l'attribut de poids dans le code Java :
LayoutParams.WRAP_CONTENT, 1));
3. Définissez la ligne de séparation pour LinearLayout
Dans de nombreux développements d'interfaces, certains soulignements ou lignes de séparation sont définis pour rendre l'interface plus ordonnée et plus belle, comme le Kugou suivant Page d'inscription musicale :
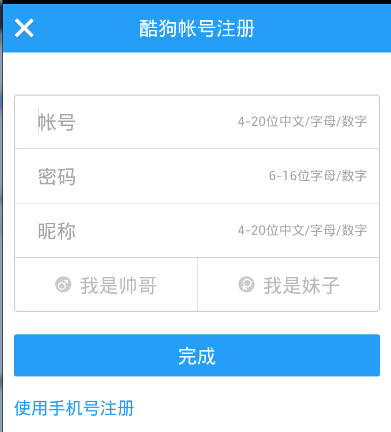
Pour ce genre de ligne, nous avons généralement deux méthodes ① ajouter directement une vue dans la mise en page. La fonction de cette vue est uniquement d'afficher une ligne, et le code est également très simple :
android:layout_width="match_parent"
android:layout_height="1px"
android:background="../style/images/android-tutorial-linearlayout.html" />
Il s'agit d'une ligne noire dans le sens horizontal. Bien sûr, vous pouvez également la changer en d'autres couleurs ou utiliser des images.

②La deuxième méthode consiste à utiliser un attribut diviseur de LinearLayout pour définir directement la ligne de séparation pour LinearLayout. Ici, vous devez préparer vous-même une photo de la ligne 1) Android : diviseur définit l’image comme ligne de démarcation 2) android:showDividers définit la position de la ligne de démarcation, aucune (aucune), début (début), fin (fin), milieu (entre chaque deux composants) 3)dividerPadding définit le remplissage de la ligne de séparation
Exemple d'utilisation :
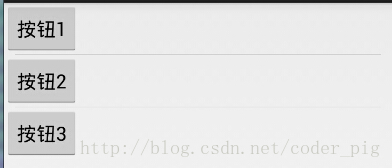

Code d'implémentation :
xmlns:tools="http://schemas.android.com/tools"
android:id ="@+id/LinearLayout1"
android:layout_width="match_parent"
android:layout_height="match_parent"
android:divider="@drawable/ktv_line_div"
android:orientation="vertical "
android:showDividers="middle"
android:dividerPadding="10dp"
tools:context="com.jay.example.linearlayoutdemo.MainActivity" >
<Bouton
android:layout_width="wrap_content"
android:layout_height="wrap_content"
android:text="按钮1" />
<Bouton
android:layout_width="wrap_content"
android:layout_height="wrap_content"
android:text="按钮2" />
<Bouton
android:layout_width="wrap_content"
android:layout_height="wrap_content"
android:text="按钮3" />
</LinearLayout>
4. Exemple simple de LinearLayout :
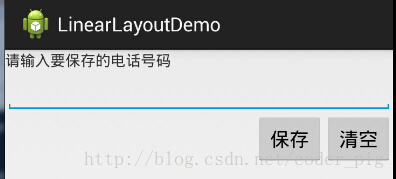
Le code d'implémentation est le suivant :
xmlns:tools="http://schemas.android.com/tools"
android:id ="@+id/LinearLayout1"
android:layout_width="fill_parent"
android:layout_height="fill_parent"
android:orientation="vertical"
tools:context=".MainActivity" > ;
<TextView
android:layout_width="wrap_content"
android:layout_height="wrap_content"
android:text="请输入要保存的电话号码"/>
<EditText
android:layout_width="fill_parent"
android:layout_height="wrap_content"/>
<LinearLayout
android:layout_width="fill_parent"
android:layout_height="wrap_content"
android:orientation="horizontal"
android:gravity="right">
<Bouton
android:layout_width="wrap_content"
android:layout_height="wrap_content"
android:text="保存"/>
<Bouton
android:layout_width="wrap_content"
android:layout_height="wrap_content"
android:text="清空"/>
</LinearLayout>
</LinearLayout>
5. Remarques :
Un problème très important lors de l'utilisation de Layout_gravity !!! Contenu des questions : Comment organiser deux TextViews dans la direction horizontale d'un LinearLayout et vouloir qu'un soit à gauche et un à droite ? Peut-être laisserez-vous échapper : « Réglez simplement une gauche et une droite pour la gravité ! » Est-ce vraiment aussi simple que cela ? L'avez-vous essayé ? Écrivez une mise en page simple et vous constaterez que cela se retourne contre vous : Le code est le suivant :
xmlns:tools="http://schemas.android.com/tools"
android:layout_width ="match_parent"
android:layout_height="match_parent"
android:orientation="horizontal"
tools:context="com.jay.example.getscreendemo.MainActivity"
<TextView
android:layout_width="wrap_content"
android:layout_height="200dp"
android:layout_gravity="left"
android:background="../style/ images/android- tutoriel-linearlayout.html"
android:gravity="center"
android:text="O(∩_∩)Ohaha~" />
<TextView
android : layout_width="wrap_content"
android:layout_height="200dp"
android:layout_gravity="right"
android:background="../style/images/android-tutorial-linearlayout.html"
android:gravity="center"
android:text="(*^__^*) Hé hé..." />
</LinearLayout>
Graphique des résultats d'exécution :
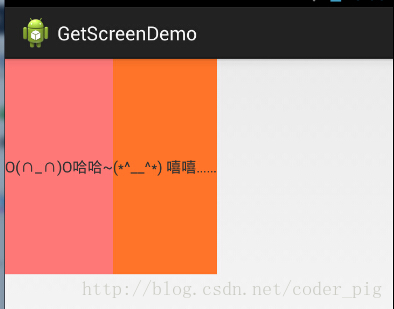
Lorsque vous voyez cela, vous direz : Oups, ça ne marche vraiment pas. Que diriez-vous d'ajouter un attribut gravitation=left au LinearLayout externe, puis de définir le second ? Le layout_gravity de TextView est correct. Eh bien, essayons :
xmlns:tools="http://schemas.android.com/tools"
android:layout_width ="match_parent"
android:layout_height="match_parent"
android:orientation="horizontal"
android:gravity="left"
tools:context="com.jay.example.getscreendemo. MainActivity" >
<TextView
android:layout_width="wrap_content"
android:layout_height="200dp"
android:background="../ style/images/android- tutoriel-linearlayout.html"
android:gravity="center"
android:text="O(∩_∩)Ohaha~" />
<TextView
android : layout_width="wrap_content"
android:layout_height="200dp"
android:layout_gravity="right"
android:background="../style/images/android-tutorial-linearlayout.html"
android:gravity="center"
android:text="(*^__^*) Hé hé..." />
</LinearLayout>
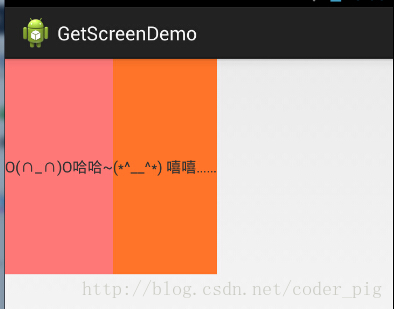
Le résultat est toujours le même :
Bon, je suis à bout de nerfs, que dois-je faire ?
Lorsque android:orientation="vertical" est utilisé, seul le paramètre horizontal prendra effet, et le paramètre vertical ne le sera pas. C'est-à-dire : gauche, droite, center_horizontal sont valides. Lorsque android:orientation="horizontal" est utilisé, seul le paramètre vertical prend effet, et pas le paramètre horizontal. Autrement dit : top, bottom, center_vertical sont valides.
Cependant, cette méthode semble inutile. Par exemple: Si vous ne pouvez définir l'alignement gauche et droit que dans le sens vertical, l'effet suivant apparaîtra :

Ce n’est évidemment pas le résultat que nous souhaitons ! Pour résumer, soit une mise en page selon les règles données ci-dessus, mais dans ce cas, utilisez la mise en page relative RelativeLayout ! Il n'y a aucune raison spécifique donnée sur Internet. Ils disent tous que c'est un changement. Certains disent que cela est lié à la priorité d'orientation. , notons-le pour l'instant, et je l'expliquerai plus tard si je connais la raison. Comme je l'ai déjà mentionné à propos de l'adaptation à l'écran, la mise en page est toujours recommandée ! Disposition relative !


