
Maison >interface Web >tutoriel HTML >Ajout d'options de type de couleur et de type de téléchargement : guide étape par étape du débutant sur Titan Framework
Ajout d'options de type de couleur et de type de téléchargement : guide étape par étape du débutant sur Titan Framework

- WBOYWBOYWBOYWBOYWBOYWBOYWBOYWBOYWBOYWBOYWBOYWBOYWBoriginal
- 2023-09-01 11:13:09947parcourir
Il est très courant d’ajouter des options de couleurs dynamiques aux thèmes WordPress. Titan Framework vous permet de créer des options de couleurs. Voyons comment ajouter un sélecteur de couleurs dans le panneau d'administration, la méta-boîte ou la section de personnalisation de thème à l'aide du framework Titan.
Options de type de couleur dans Titan Framework
Il existe un champ de type color dans le framework Titan comme indiqué ci-dessous :
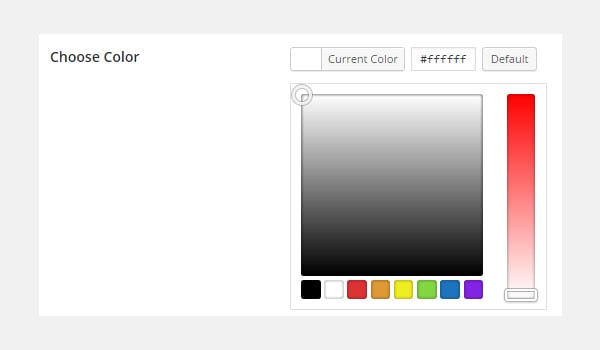
Cette option charge toute la palette de couleurs dans laquelle vous pouvez choisir n'importe quelle couleur. Pour ajouter cette option dans Titan Framework, vous devez comprendre les paramètres qu'elle transporte, ces paramètres sont :
- Nom : Il contrôle le nom d'affichage de l'option.
- id : Ce paramètre attribue un nom unique qui est utilisé tout au long du processus pour récupérer la valeur de l'option enregistrée.
- desc : Ce paramètre ajoute une courte description avec le nom de l'option.
-
default : définissez la valeur
colorpar défaut. - Aperçu en direct : (Facultatif) Il est utile d'afficher un aperçu en direct des modifications dans la section de personnalisation du thème.
-
css : (Facultatif) Lorsque vous ajoutez l'option
colordans la page d'administration et/ou la section de personnalisation du thème, elle génère automatiquement du CSS.
Ce que tous ces paramètres ont en commun est leur type, qui est String.
Conteneurs disponibles pour les options de type de couleur
Cette option peut être ajoutée dans les domaines suivants :
- Panneau d'administration
- Gérer les onglets
- Méta-Boîte
- Section de personnalisation de thème
Comment les options de zone de texte sont-elles créées ?
Suivez ces étapes pour créer des color options de type dans ces conteneurs :
- Récupérez l'instance via la fonction
getInstance(). - Créez des options via la fonction
createOption(). - Obtenez la valeur enregistrée grâce à la fonction
getOption().
Vous pouvez vous référer à mon article précédent pour en savoir plus sur la création de ces conteneurs.
Créez des options de type de couleur dans le panneau d'administration
Exemple de déclaration
Je vais d'abord créer une option de type color dans le panneau d'administration :
<?php
    /**
     *
     * Create the options
     *
     */
    $aa_panel->createOption( array(

        'id'      => 'aa_color', // The ID which will be used to get the value of this option
        'type'    => 'color', // Type of option we are creating
        'name'    => 'My Color Option', // Name of the option which will be displayed in the admin panel
        'desc'    => 'This is our option', // Description of the option which will be displayed in the admin panel
        'default' => '#fffff' // Default value of the option which will be displayed in the admin panel

    ) );
J'ai créé une option de type $aa_panel 中创建了一个 color 类型选项。然后,通过 createOption() 函数,我添加了一个 color 类型选项,其 ID 为 aa_color。该函数采用选项类型支持的参数数组。因此,会相应地使用 id、type、name、desc 和默认参数。请注意 id 的值,即aa_color dans le panneau d'administration $aa_panel. Ensuite, via la fonction
avec l'ID aa_color. Cette fonction prend un tableau d'arguments pris en charge par le type d'option. Par conséquent, les paramètres id, type, name, desc et default sont utilisés en conséquence. Veuillez noter que la valeur de id, c'est-à-dire aa_color, doit toujours être unique. 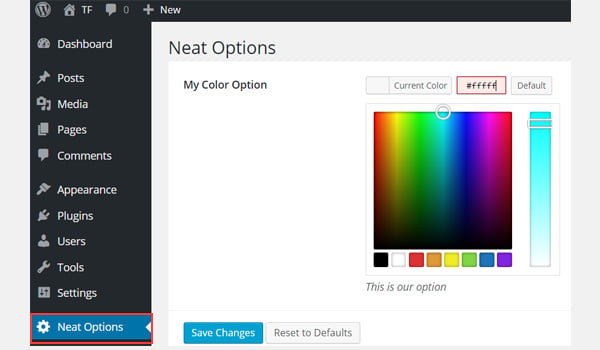
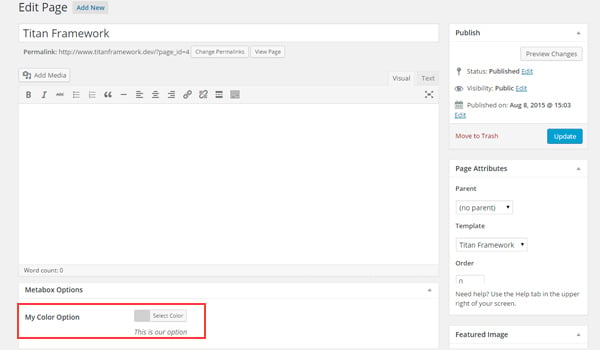
La capture d'écran ci-dessus montre une coloroption appelée Mon option de couleur dans le panneau d'administration
.
Exemple d'utilisation
Obtenons la valeur de l'option enregistrée. get<em></em>Instance() 函数获取唯一实例。然后使用 getOption() 函数,并将 color 类型选项的 ID 注册为参数。将其值保存到新变量 $aa_color_val 中,然后在前端 echo
<?php
// 1. Get the titan framework instance and save it to a variable
$titan = TitanFramework::getInstance( 'neat' ); // we will initialize $titan only once for every file where we use it.
// 2. Get the value via ID using getOption function
$aa_color_val = $titan->getOption( 'aa_color' );

/**
 *
 * Print Admin panel options
 *
 */
 <h3> <?php echo $aa_color_val; ?> </h3>
Pour récupérer une valeur d'option enregistrée, récupérez l'instance unique via la fonction
get<h4></h4>Instance(). Utilisez ensuite la fonction et enregistrez l'ID de l'option de type #cecece en tant que paramètre. Enregistrez sa valeur dans une nouvelle variable $aa_color_val puis faites écho à cette variable sur le front-end.
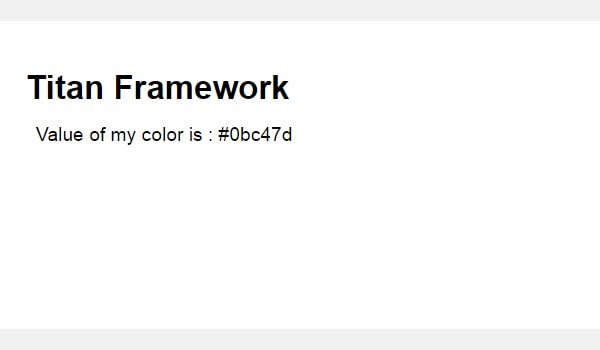
Afficher les résultats sur le frontend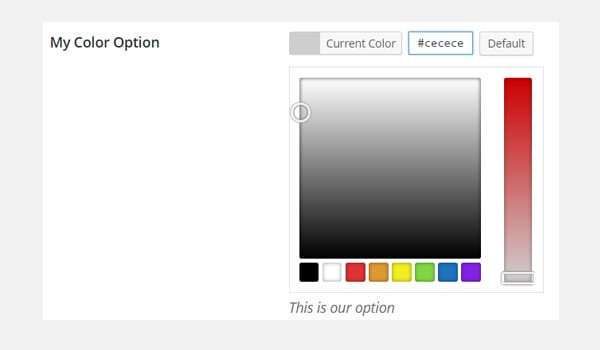
et que j'enregistre sa valeur.

Maintenant, selon le code, la valeur hexadécimale de la couleur sélectionnée sera imprimée comme indiqué ci-dessous.
Plus loin dans cet article, je montrerai également comment utiliser cette option comme attribut de style.Nous ne l'imprimerons pas comme ceci dans le thème de production, mais l'utiliserons plutôt comme un style en ligne, ou utiliserons Titan Framework pour générer automatiquement le fichier CSS, mais cela sera discuté plus tard dans la série et sort du cadre de cet article.
$aa_tab1 内创建了一个 color 类型选项。该选项的 ID 为 aa_color_in_tab1_panel2Créez des options de type de couleur dans l'onglet d'administration
<?php

    // Create options for $aa_panel2 inside the $aa_tab1
    $aa_tab1->createOption( array(

        'id'      => 'aa_color_in_tab1_panel2', // IDs should always be unique. The ID which will be used to get the value of this option
        'type'    => 'color', // Type of option we are creating
        'name'    => 'My Color Option', // Name of the option which will be displayed in the admin panel
        'desc'    => 'This is our option', // Description of the option which will be displayed in the admin panel
        'default' => '#fffff' // Default value of the option which will be displayed in the admin panel

    ) );
🎜Cette fois, j'ai créé une option de type 🎜 dans l'onglet d'administration $aa_tab1. L'ID de cette option est aa_color_in_tab1_panel2, qui doit être unique. 🎜
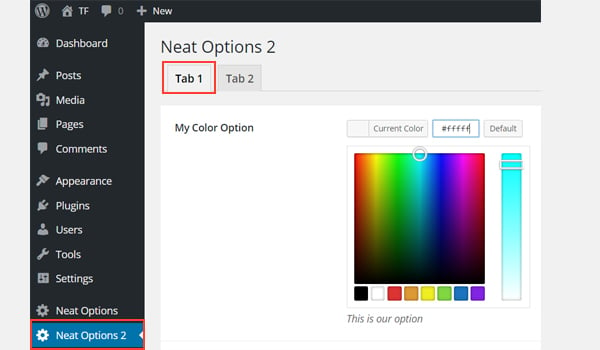
您可以在管理的选项卡 1 中找到 color 选项面板Neat Options 2。
用法示例
现在我将获取保存的选项值。
<?php
// 1. Get the titan framework instance and save it to a variable
$titan = TitanFramework::getInstance( 'neat' ); // we will initialize $titan only once for every file where we use it.
// Value of tab.
$aa_color_in_tab1_panel2_val = $titan->getOption( 'aa_color_in_tab1_panel2' );

/**
 *
 * Print Admin tab options
 *
 */
 <div>
    Value of my color is : <?php echo $aa_color_in_tab1_panel2_val; ?>
 </div>
我将通过 getInstance() 函数获取一个实例,然后使用 getOption() 函数。在此函数(第 5 行)内,我输入 ID aa_color_in_tab1_panel2 作为其参数。最后,我创建了一个div并以文本形式打印了保存的值。
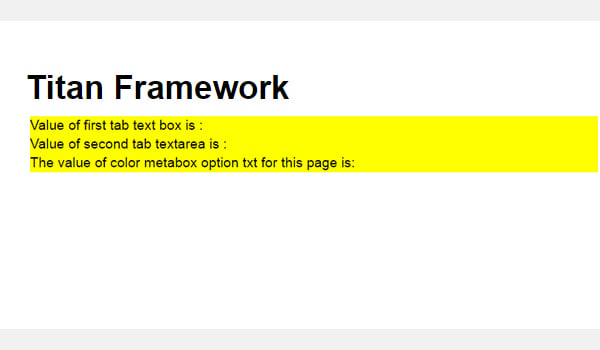
在前端显示结果
这次我选择了 #0bc47d 作为我的颜色值。因此,输出将像这样打印:
在 Metabox 内创建颜色类型选项
声明示例
<?php
    /**
     *
     * Create the options for metabox
     *
     */
    $aa_metbox->createOption( array(

        'id'      => 'aa_mb_color', // The ID which will be used to get the value of this option
        'type'    => 'color', // Type of option we are creating
        'name'    => 'My Color Option', // Name of the option which will be displayed in the admin panel
        'desc'    => 'This is our option', // Description of the option which will be displayed
        'default' => '#fffff' // Default value of the option which will be displayed

    ) );
现在,我将通过 createOption() 函数在元框 $aa_metbox 中创建一个 color 类型选项。该选项的 ID 为 aa_mb_color,用于检索保存的选项值。元框出现在所有帖子/页面编辑屏幕上。
您可以在页面编辑结束时显示的元框中找到 color 类型选项屏幕。
用法示例
接下来我将获取选项值。
<?php
// 1. Get the titan framework instance and save it to a variable
$titan = TitanFramework::getInstance( 'neat' ); // we will initialize $titan only once for every file where we use it.
/**
 *
 * Getting Values.
 *
 * Notice the use of get_the_ID(). It is because metabox is created for all
 * the post types we defined. TO get the value of a metabox option for a specific page/post
 * we need to give getOptions() function the ID of our post/page. Which is done like this.
 *
 */
$aa_mb_color_val = $titan->getOption( 'aa_mb_color', get_the_ID() );

/**
 *
 * Print metabox options
 *
 */

<div class="aa_content" style= "background: <?php echo $aa_mb_color_val; ?>;"></div>
现在,这段代码与为管理面板和选项卡编写的代码有些不同。但是,getInstance() 和 getOption() 函数的使用是相同的。差异在于第 13 行,其中 getOption() 函数带有两个参数:
-
aa_mb_color,颜色类型选项ID -
get_the_ID()函数,返回当前帖子/页面/帖子类型的 ID
接下来看第 19 行,我在 div 中使用了内联 CSS 样式。这意味着 color 类型选项的值在前端显示为颜色。
在前端显示结果
我选择 #ffff00 作为我的十六进制颜色值并发布了该页面。这是我得到的:
现在您可以在上面的屏幕截图中看到保存的值显示为颜色,并且整个 div 更改其背景颜色.
在主题定制器中创建颜色类型选项
声明示例
<?php

    /**
     *
     * Create the options for $aa_section1
     *
     */

    // Body bg color
    $aa_section1->createOption( array(

        'id'      => 'aa_sec_body_bg_clr', // The ID which will be used to get the value of this option
        'type'    => 'color', // Type of option we are creating
        'name'    => 'Site Background Color',// Name of the option which will be displayed in the admin panel
        'default' => '#fff' // Default value of our option

    ) );
createOption() 函数在主题定制器部分 $aa_section1 中添加 color 类型选项。该选项的ID是aa_sec_body_bg_clr,用于设置body背景颜色。
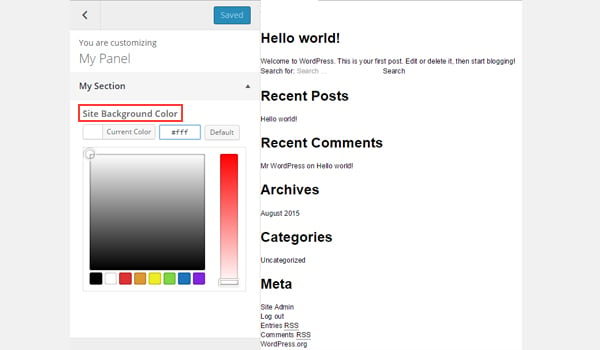
屏幕截图显示了一个名为网站背景颜色的 color 选项定制器面板我的部分。
用法示例
最后,我将获得保存的选项值。
<?php
// 1. Get the titan framework instance and save it to a variable
$titan = TitanFramework::getInstance( 'neat' ); // we will initialize $titan only once for every file where we use it.

// Body bg color
$aa_sec_body_bg_clr_val = $titan->getOption( 'aa_sec_body_bg_clr' );

/**
 *
 * Print customizer options
 *
 */

<style>
/* ----------------------------------------------------------------------------
 * CSS values from customizer
 * ------------------------------------------------------------------------- */
    body{
        background: <?php echo $aa_sec_body_bg_clr_val; ?> !important;

    }
    h1,
    h2,
    h3,
    h4,
    h5,
    h6,
    a,

</style>
一切都几乎相同,除了我通过 <style></style> 标记内的内部 CSS 样式获取保存的值(第 12 到 28 行)。第 16 行显示了 echo 命令,该命令打印变量 $aa_sec_body_bg_clr_val 的值。
在前端显示结果
这次我选择 #eeee22 作为 color 的十六进制值。所以,这是实时预览:
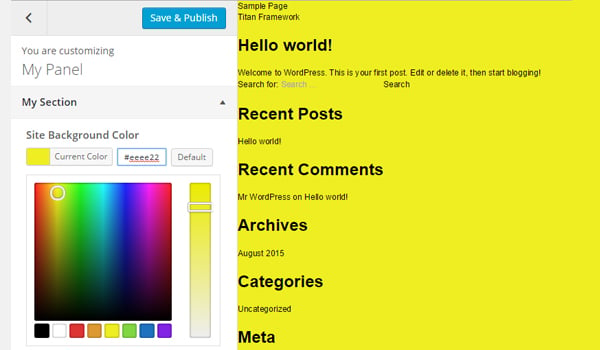
我的网站背景颜色从 #ffffff 更改为 #eeee22。酷!
上传文件
图像在使您的网络内容引人入胜且引人注目方面发挥着至关重要的作用。 WordPress 架构提供了 CPT(自定义帖子类型),用于通过媒体库添加图像。但是如果您想在其他地方添加图像上传器怎么办?
创建此类选项的方法有多种,而 Titan Framework 还提供图像上传器作为其选项类型之一。因此,让我们看看如何使用几行代码在管理面板、元框或主题定制器部分中添加媒体上传选项。
Titan Framework 中的上传类型选项
Titan Framework 中有一个 upload 类型选项,可添加不同格式的图像文件,例如jpg、jpeg、gif、png 等。看起来像这样:

此选项具有以下一组参数:
-
名称:此参数显示
upload选项的名称。 - id:它指定一个唯一的名称,用于获取保存的选项值。
- desc:它添加带有选项名称的一行描述。
-
大小:(可选)此参数定义可在
css参数(稍后解释)中使用的图像大小。它仅采用wp_get_attachment_image_src()函数的$size参数中定义的值(了解更多信息)。 - 默认:(可选)设置默认图像。
- livepreview:(可选)您可以使用此参数在主题定制器部分中找到更改的实时预览。
-
css:(可选)当您在管理页面和/或主题定制器部分添加
upload类型选项时,它会生成 CSS。 - 占位符:(可选)当此选项类型为空时,此参数会显示虚拟文本。
上传类型选项的可用容器
可以在内部添加 upload 类型选项:
- 管理面板
- 管理选项卡
- 元框
- 主题定制器部分
如果您想了解有关这些容器的创建的更多信息,请浏览本系列之前的文章。
但是,此选项是通过以下步骤添加的:
- 调用
getInstance()函数。 - 通过
createOption()函数创建选项类型。 - 通过
getOption()函数获取保存的选项值。
在管理面板中创建上传类型选项
声明示例
让我们编写它的代码。
<?php
    /**
     * Create the options
     *
     * Now we will create options for our panel that we just created called $aa_panel
     *
     */
    $aa_panel->createOption( array(
        'id'   => 'aa_img_id', // The ID which will be used to get the value of this option
        'type' => 'upload', // Type of option we are creating
        'name' => 'My Upload Option', // Name of the option which will be displayed in the admin panel
        'desc' => 'This is our option' // Description of the option which will be displayed in the admin panel
    ) );
我将通过 createOption() 函数在管理面板 $aa_panel 中添加一个 upload 类型选项。该函数采用一系列参数,例如id、type、name和desc。保持您的 ID 唯一,因为这些 ID 将在整个过程中用于检索保存的值。所以,这里的 ID 是 aa_img_id。
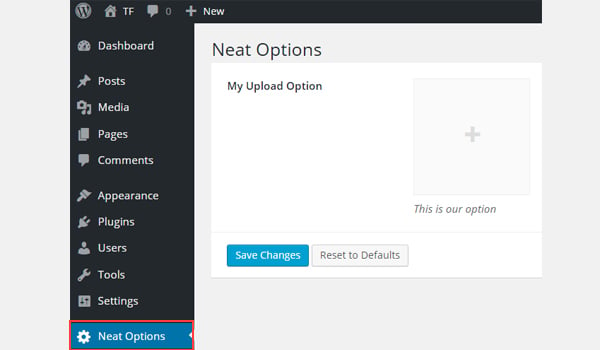
在上面的屏幕截图中,您可以在 我的上传选项 中找到一个名为我的上传选项的图片上传器strong>Neat Options 管理面板。
用法示例
现在我将进入重要部分:检索保存的选项值。
<?php
// 1. Get the titan framework instance and save it to a variable
$titan = TitanFramework::getInstance( 'neat' ); // we will initialize $titan only once for every file where we use it.

// 2. Get the value via ID using getOption function
$aa_img_id_val = $titan->getOption( 'aa_img_id' );


/**
 *  Print the value saved in aa_img_id option
 */
$aa_img_URL_val= 'http://placehold.it/500x500';
if ( is_numeric( $aa_img_id_val ) ) {
    $aa_img_attachment = wp_get_attachment_image_src( $aa_img_id_val );
    $aa_img_URL_val = $aa_img_attachment[0];
}
?>

    <h2>The image is shown below:</h2>
    <img src='<?php echo $aa_img_URL_val; ?>' />
获取 upload 类型选项值的过程与我之前讨论过的选项有些不同。那么,让我解释一下它的代码。
第 3 行和第 6 行非常相似,我在其中调用了 getInstance() 函数来调用唯一实例,该实例最好是您的主题名称(这就是为什么 neat 在我的例子中)。然后我使用了 getOption() 函数,在该函数中我将我的 upload 选项的 ID 作为参数写入。我将其值保存在变量 $aa_img_id_val 中。
接下来,我使用了 if 语句,该语句调用 is_numeric() 函数来检查 $ 的值是否为aa_img_id_val 是一个数字。如果为真,则会进一步处理代码。
为了通过附件 ID 获取上传图像值的源网址,我创建了一个新变量 $aa_img_URL_val(第 12 行),并为其分配了占位符图像(避免任何垃圾值和给它一个演示占位符图像)。
附件ID可用于获取上传图片的URL;在这方面,我使用了 WordPress 的 wp_get_attachment_image_src() 函数(第 14 行)。此函数返回一个图像对象数组,其中包含位置“0”处图像 src url 的值(在 Codex 中了解更多信息)。
参数 $aa_img_id_val 保存了 aa_img_id 的 ID。该函数的整体输出保存在新变量 $aa_img_attachment 中。
现在,正如我们所知,wp_get_attachment_image_sr()函数返回src url位于数组的位置“0”,因此我定义了它在数组中的确切位置,即 $aa_img_attachment[0](第 15 行)。然后我将该值分配给 $aa_img_URL_val,它最初带有一个占位符图像。现在 $aa_img_URL_val 拥有所选图像的源 URL。
最后(第 19 行),我只是通过 echo 命令打印了图像。我建议在此处使用 esc_url() 函数,该函数会转义您的图像 URL。我不会详细讨论,因为它超出了本文的范围。但这是修改第 #19 行的方法:
<img src='<?php echo esc_url( $aa_img_URL_val ); ?>' />
在前端显示结果
假设我上传了此图像并保存了设置。
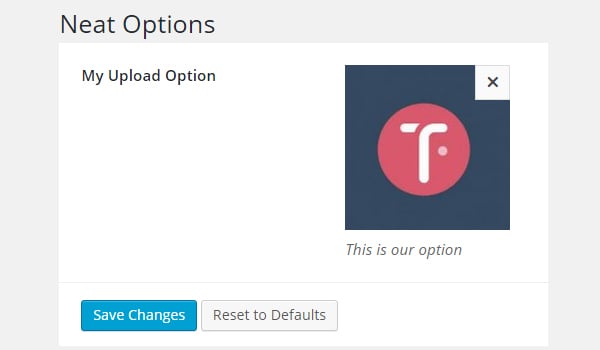
所以,这就是它在前端的显示方式。

在“管理”选项卡中创建上传类型选项
声明示例
现在我将在管理选项卡中创建此选项。
<?php
    // Create options for $aa_panel2 inside the $aa_tab1
    $aa_tab1->createOption( array(

        'id'   => 'aa_img_in_tab1_panel2', // IDs should always be unique. The ID which will be used to get the value of this option
        'type' => 'upload', // Type of option we are creating
        'name' => 'My Upload Option', // Name of the option which will be displayed in the admin panel
        'desc' => 'This is our option' // Description of the option which will be displayed in the admin panel

    ) );
在管理选项卡 $aa_tab1 内创建 ID 为 aa_img_in_tab1_panel2 的 upload 选项。
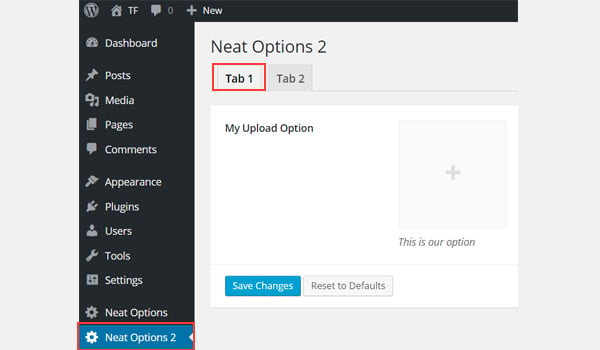
您可以在管理面板Neat Options 2标签 1 内找到此选项/strong>.
用法示例
让我们获取保存的值。
<?php
// 1. Get the titan framework instance and save it to a variable
$titan = TitanFramework::getInstance( 'neat' ); // we will initialize $titan only once for every file where we use it.

// 2. Get the value via ID using getOption function
$aa_img_in_tab1_panel2_val = $titan->getOption( 'aa_img_in_tab1_panel2' );


/**
 * Print the value saved in option
 */
$aa_img_in_tab1_panel2_URL_val= 'http://placehold.it/500x500';
if ( is_numeric( $aa_img_in_tab1_panel2_val ) ) {
    $aa_img_in_tab1_panel2_attachment = wp_get_attachment_image_src($aa_img_in_tab1_panel2_val );
    $aa_img_in_tab1_panel2_URL_val = $aa_img_in_tab1_panel2_attachment[0];
}
?>
    <h2>The image in Tab 1 is shown below:</h2>
    <img src='<?php echo $aa_img_in_tab1_panel2_URL_val; ?>' />
在前端显示结果
我再次上传了相同的图像并保存了它。在前端看起来像这样:
在 Metabox 内创建上传类型选项
声明示例
现在我将在元框中创建此选项。
<?php
    /**
     * Create the options for metabox
     *
     */
    $aa_metbox->createOption( array(

            'id'   => 'aa_mb_img', // The ID which will be used to get the value of this option
            'type' => 'upload', // Type of option we are creating
            'name' => 'My Upload Option', // Name of the option which will be displayed in the admin panel
            'desc' => 'This is our option' // Description of the option which will be displayed in the admin panel

        ) );
upload 类型选项是通过 createOption() 函数在元盒 $aa_metbox 内创建的。它出现在所有页面/帖子编辑屏幕上。
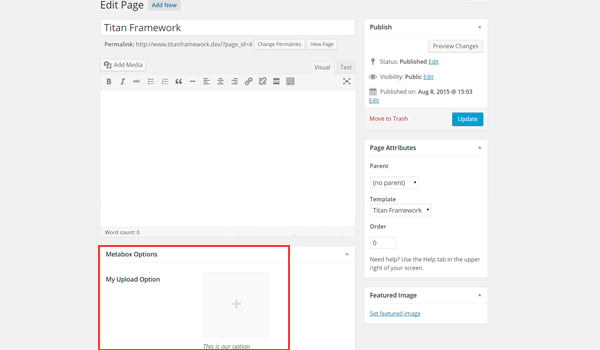
在上面的屏幕截图中,您可以在元框中找到一个名为我的上传选项的图片上传器在页面编辑屏幕的末尾。
用法示例
使用以下代码。
<?php
// 1. Get the titan framework instance and save it to a variable
$titan = TitanFramework::getInstance( 'neat' ); // we will initialize $titan only once for every file where we use it.
/**
    Getting values for metabox
 */

/**
 *
 *
 * Notice the use of get_the_ID(). It is because metabox is created for all
 * the post types we defined. TO get the value of a metabox option for a specific page/post
 * we need to give getOptions() function the ID of our post/page. Which is done like this.
 *
 */
$aa_mb_img_val = $titan->getOption( 'aa_mb_img', get_the_ID() );

/**
 * Print the value saved in option
 */
$aa_mb_img_URL_val= 'http://placehold.it/500x500';
if ( is_numeric( $aa_mb_img_val ) ) {
    $aa_mb_img_attachment = wp_get_attachment_image_src($aa_mb_img_val );
    $aa_mb_img_URL_val =  $aa_mb_img_attachment[0];
}
?>
    <h2>The image in Metabox is shown below:</h2>
    <img src='<?php echo $aa_mb_img_URL_val; ?>' />
在前端显示结果
我们在前端查看结果:
在主题定制器部分中创建上传类型选项
声明示例
最后,我将在定制器中创建一个图像上传器字段。
<?php
    /**
     *
     * Create the options for $aa_section1
     *
     */

    $aa_section1->createOption( array(

        'id'   => 'aa_sec_img', // The ID which will be used to get the value of this option
        'type' => 'upload', // Type of option we are creating
        'name' => 'My Upload Option',// Name of the option which will be displayed in the admin panel
        'desc' => 'This is our option' // Description of our option

    ) );
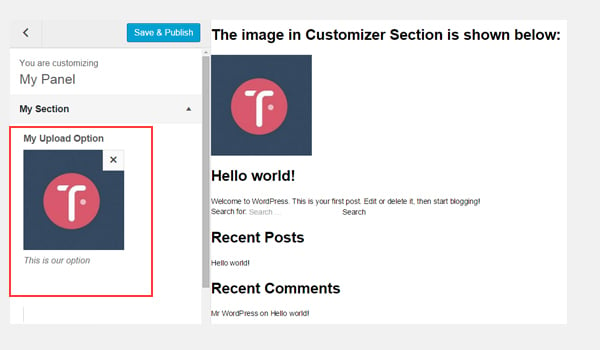
upload 类型选项显示在主题定制器部分 $aa_section1 内。它的 ID 是 aa_sec_img。
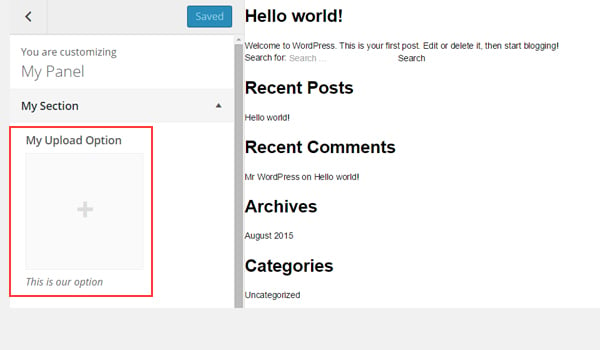
您可以在上图中的我的部分自定义面板中找到上传者字段。
用法示例
使用以下代码获取值:
<?php
// 1. Get the titan framework instance and save it to a variable
$titan = TitanFramework::getInstance( 'neat' ); // we will initialize $titan only once for every file where we use it.

// Sec Img
$aa_sec_img_val = $titan->getOption( 'aa_sec_img' );

/**
 * Print the value saved in option
 */

$aa_sec_img_URL_val= 0;
if ( is_numeric( $aa_sec_img_val ) ) {
    $aa_sec_img_attachment = wp_get_attachment_image_src($aa_sec_img_val );
    $aa_sec_img_URL_val =  $aa_sec_img_attachment[0];
}

?>
    <h1>The image in Customizer Section is shown below:</h1>
    <img src='<?php echo $aa_sec_img_URL_val; ?>' />
在前端显示结果
让我们上传实时预览屏幕截图:
结论
就是这样!
颜色选项很容易使用 Titan Framework 实现。在接下来的文章中,我将向您展示如何通过此选项自动生成 CSS 文件或使用它来创建实时预览作品。
我们还介绍了如何使用 Titan Framework 引入上传选项。您可以通过多种方式在 WordPress 插件或主题中使用此选项。例如,您可以允许用户选择徽标或自定义背景图片。
仔细阅读,如果您有任何疑问,请将其留在下面的评论框中,或者您可以在 Twitter 上联系我。
Ce qui précède est le contenu détaillé de. pour plus d'informations, suivez d'autres articles connexes sur le site Web de PHP en chinois!