Maison >base de données >Redis >Comment Springboot implémente l'analyse du code source du verrouillage réentrant distribué Redis basée sur Redisson
Comment Springboot implémente l'analyse du code source du verrouillage réentrant distribué Redis basée sur Redisson
- WBOYWBOYWBOYWBOYWBOYWBOYWBOYWBOYWBOYWBOYWBOYWBOYWBavant
- 2023-06-02 23:21:421236parcourir
1. Introduction
Nous utilisons Redis pour implémenter des verrous distribués. Au début, nous utilisons généralement SET resource-name anystring NX EX max-lock-time pour. verrouillage. , utilisez le script Lua pour garantir l'atomicité afin de libérer le verrou. Cette implémentation manuelle est plus gênante. Le site officiel de Redis indique également clairement que la version Java utilise Redisson pour l'implémenter. L'éditeur a également consulté le site officiel et l'a lentement compris, et a pris un gros plan pour l'enregistrer. Du site officiel à l'intégration de Springboot en passant par l'interprétation du code source, prenons un seul nœud comme exemple. SET resource-name anystring NX EX max-lock-time进行加锁,使用Lua脚本保证原子性进行实现释放锁。这样手动实现比较麻烦,对此Redis官网也明确说Java版使用Redisson来实现。小编也是看了官网慢慢的摸索清楚,特写此记录一下。从官网到整合Springboot到源码解读,以单节点为例。
二、为什么使用Redisson
1. 我们打开官网
redis中文官网
2. 我们可以看到官方让我们去使用其他
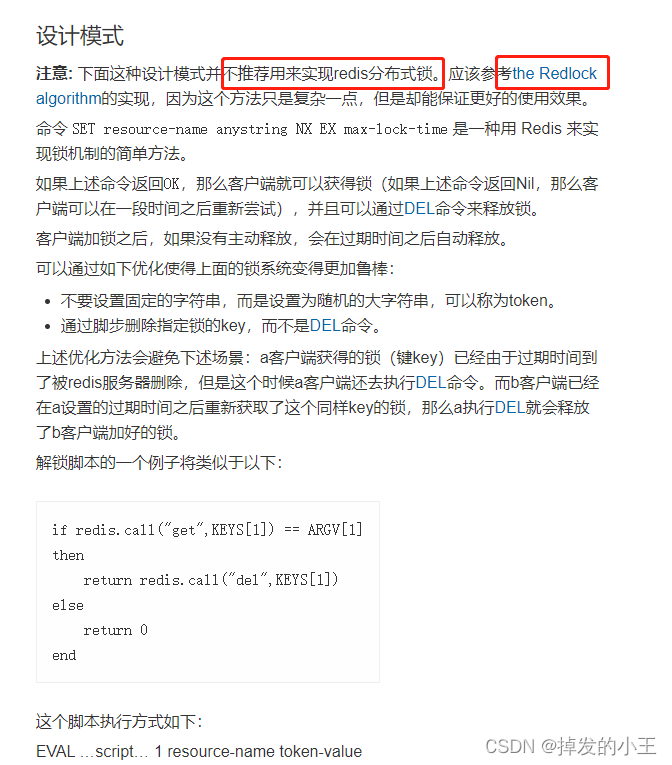
3. 打开官方推荐
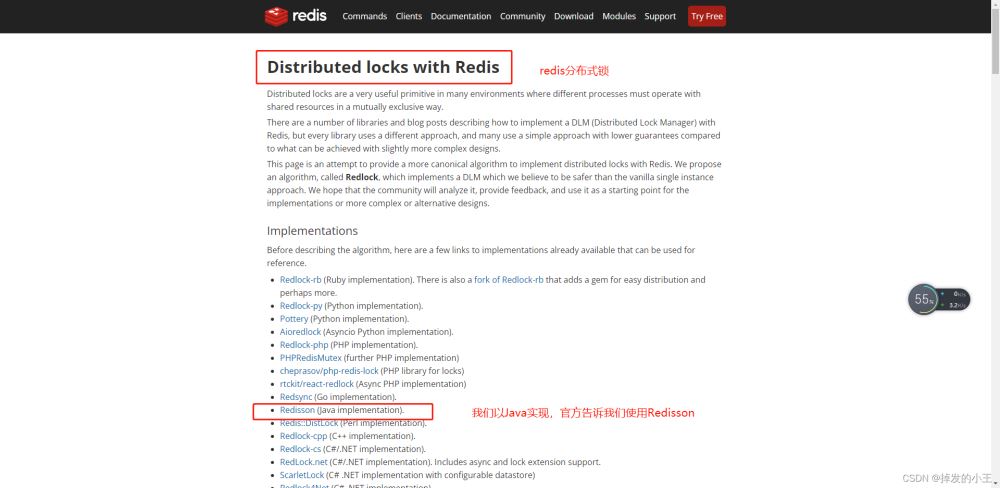
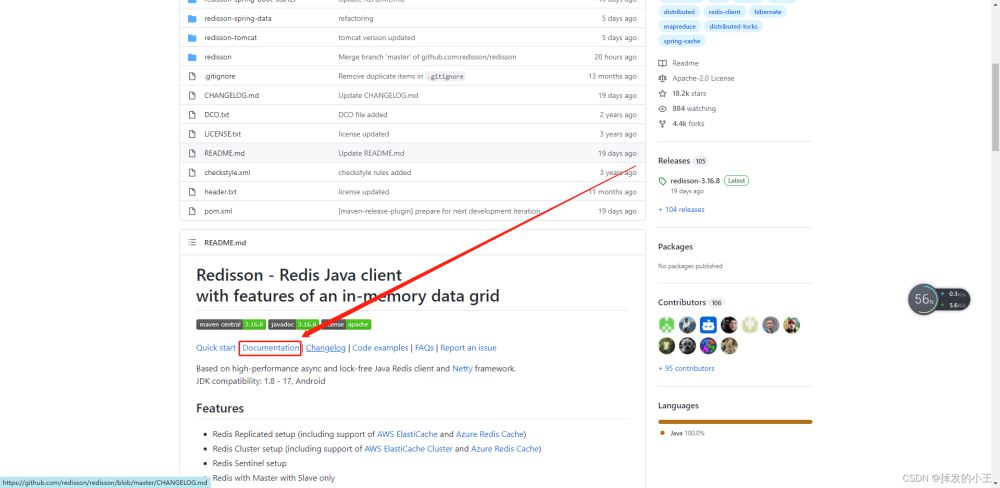
4. 找到文档
Redisson地址
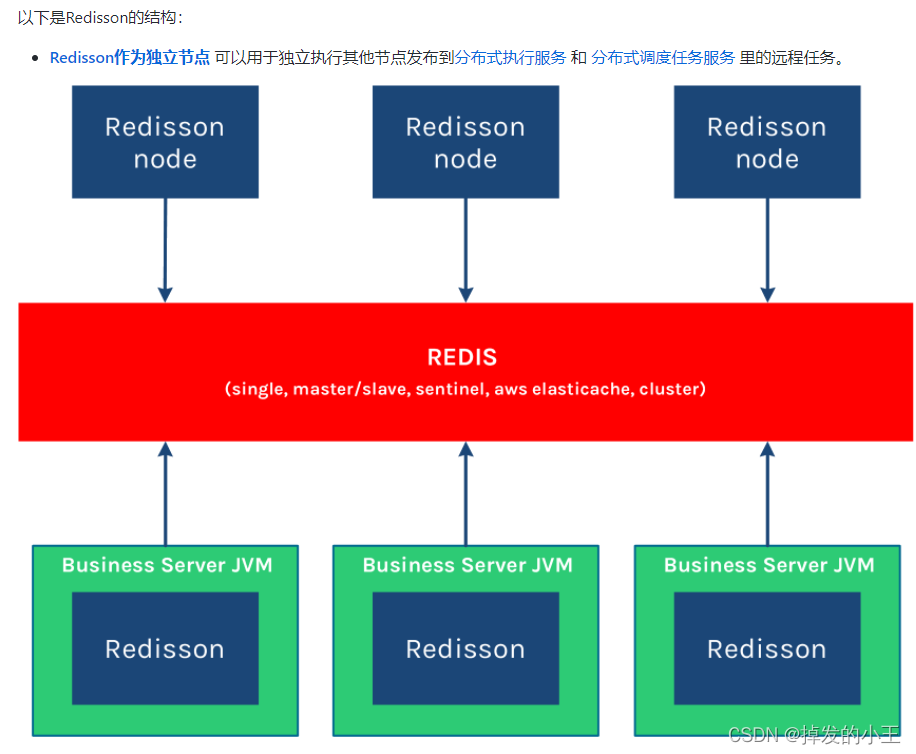
5. Redisson结构
三、Springboot整合Redisson
1. 导入依赖
<dependency>
    <groupId>org.springframework.boot</groupId>
    <artifactId>spring-boot-starter-data-redis</artifactId>
</dependency>
<dependency>
    <groupId>redis.clients</groupId>
    <artifactId>jedis</artifactId>
</dependency>
<!--redis分布式锁-->
<dependency>
    <groupId>org.redisson</groupId>
    <artifactId>redisson</artifactId>
    <version>3.12.0</version>
</dependency>
2. 以官网为例查看如何配置

3. 编写配置类
import org.redisson.Redisson;
import org.redisson.api.RedissonClient;
import org.redisson.config.Config;
import org.springframework.context.annotation.Bean;
import org.springframework.context.annotation.Configuration;

/**
 * @author wangzhenjun
 * @date 2022/2/9 9:57
 */
@Configuration
public class MyRedissonConfig {

    /**
     * 所有对redisson的使用都是通过RedissonClient来操作的
     * @return
     */
    @Bean(destroyMethod="shutdown")
    public RedissonClient redisson(){
        // 1. 创建配置
        Config config = new Config();
        // 一定要加redis://
        config.useSingleServer().setAddress("redis://192.168.17.130:6379");
        // 2. 根据config创建出redissonClient实例
        RedissonClient redissonClient = Redisson.create(config);
        return redissonClient;
    }
}
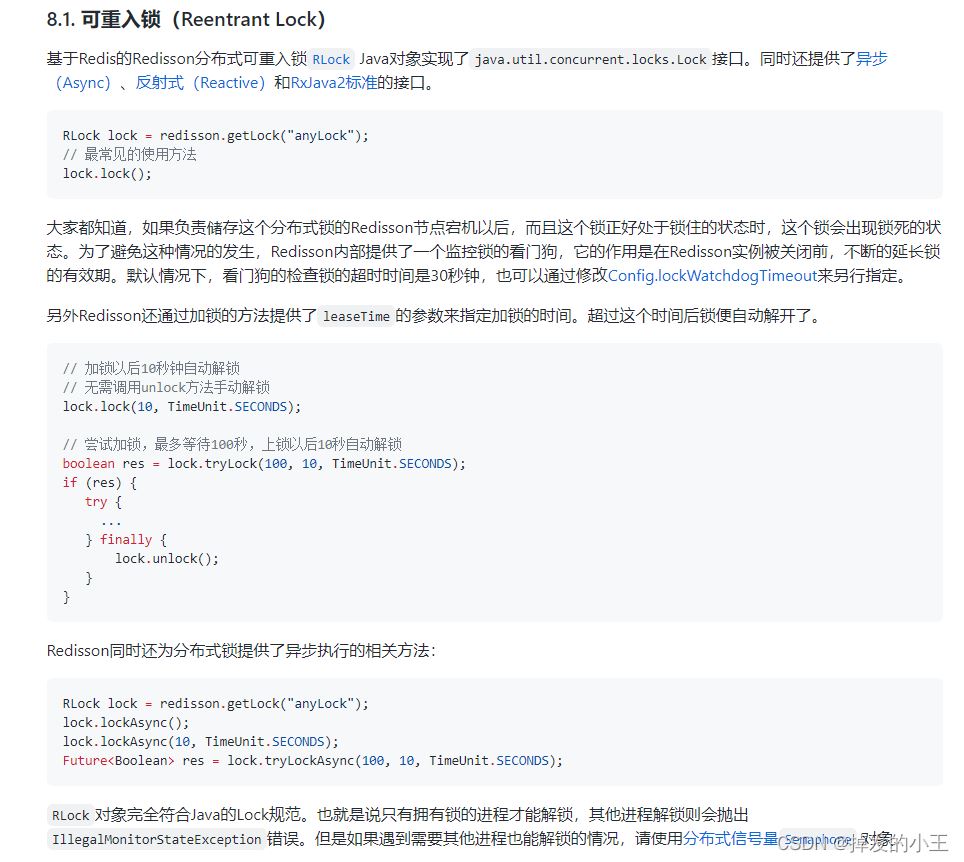
4. 官网测试加锁例子
5. 根据官网简单Controller接口编写
@ResponseBody
@GetMapping("/hello")
public String hello(){
    // 1.获取一把锁,只要锁名字一样,就是同一把锁
    RLock lock = redisson.getLock("my-lock");
    // 2. 加锁
    lock.lock();// 阻塞试等待  默认加的都是30s
    // 带参数情况
    // lock.lock(10, TimeUnit.SECONDS);// 10s自动解锁,自动解锁时间一定要大于业务的执行时间。
    try {
        System.out.println("加锁成功" + Thread.currentThread().getId());
        Thread.sleep(30000);
    } catch (InterruptedException e) {
        e.printStackTrace();
    } finally {
        // 3. 解锁
        System.out.println("解锁成功:" + Thread.currentThread().getId());
        lock.unlock();
    }
    return "hello";
}
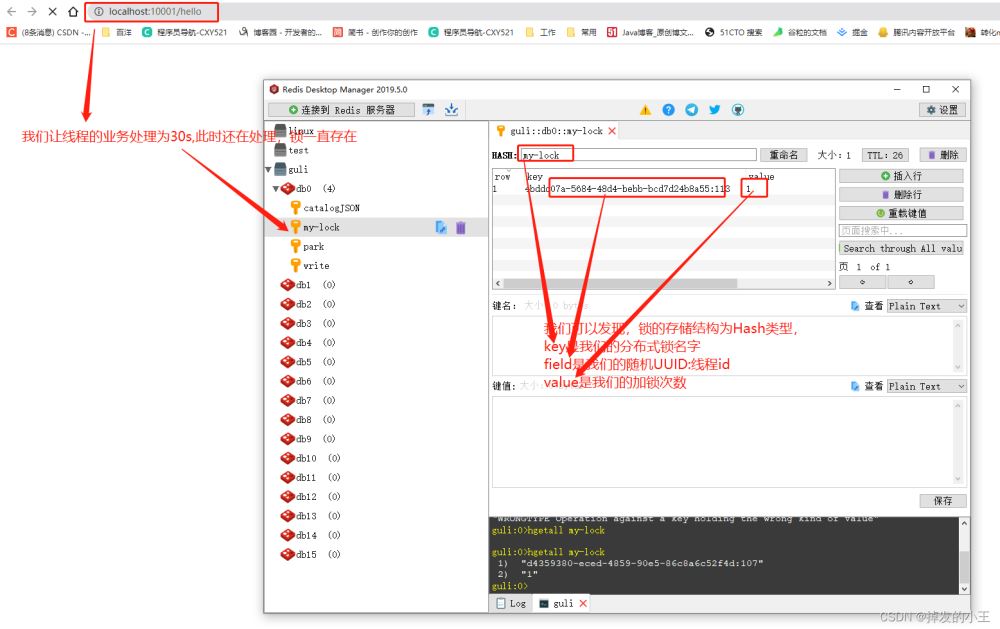
6. 测试
四、lock.lock()源码分析
1. 打开RedissonLock实现类

2. 找到实现方法
@Override
public void lock() {
    try {
    	// 我们发现不穿过期时间源码默认过期时间为-1
        lock(-1, null, false);
    } catch (InterruptedException e) {
        throw new IllegalStateException();
    }
}
3. 按住Ctrl进去lock方法
private void lock(long leaseTime, TimeUnit unit, boolean interruptibly) throws InterruptedException {
	// 获取线程的id,占有锁的时候field的值为UUID:线程号id
    long threadId = Thread.currentThread().getId();
    // 尝试获得锁
    Long ttl = tryAcquire(leaseTime, unit, threadId);
    // lock acquired 获得锁,返回
    if (ttl == null) {
        return;
    }
	// 这里说明获取锁失败,就通过线程id订阅这个锁
    RFuture<RedissonLockEntry> future = subscribe(threadId);
    if (interruptibly) {
        commandExecutor.syncSubscriptionInterrupted(future);
    } else {
        commandExecutor.syncSubscription(future);
    }

    try {
    	// 这里进行自旋,不断尝试获取锁
        while (true) {
        	// 继续尝试获取锁
            ttl = tryAcquire(leaseTime, unit, threadId);
            // lock acquired 获取成功
            if (ttl == null) {
            	// 直接返回,挑出自旋
                break;
            }

            // waiting for message 继续等待获得锁
            if (ttl >= 0) {
                try {
                    future.getNow().getLatch().tryAcquire(ttl, TimeUnit.MILLISECONDS);
                } catch (InterruptedException e) {
                    if (interruptibly) {
                        throw e;
                    }
                    future.getNow().getLatch().tryAcquire(ttl, TimeUnit.MILLISECONDS);
                }
            } else {
                if (interruptibly) {
                    future.getNow().getLatch().acquire();
                } else {
                    future.getNow().getLatch().acquireUninterruptibly();
                }
            }
        }
    } finally {
     	// 取消订阅
        unsubscribe(future, threadId);
    }
//        get(lockAsync(leaseTime, unit));
}
4. 进去尝试获取锁方法

private Long tryAcquire(long leaseTime, TimeUnit unit, long threadId) {
	// 直接进入异步方法
    return get(tryAcquireAsync(leaseTime, unit, threadId));
}

private <T> RFuture<Long> tryAcquireAsync(long leaseTime, TimeUnit unit, long threadId) {
    // 这里进行判断如果没有设置参数leaseTime = -1
    if (leaseTime != -1) {
        return tryLockInnerAsync(leaseTime, unit, threadId, RedisCommands.EVAL_LONG);
    }
    // 此方法进行获得锁,过期时间为看门狗的默认时间
    // private long lockWatchdogTimeout = 30 * 1000;看门狗默认过期时间为30s
    // 加锁和过期时间要保证原子性,这个方法后面肯定调用执行了Lua脚本,我们下面在看
    RFuture<Long> ttlRemainingFuture = tryLockInnerAsync(commandExecutor.getConnectionManager().getCfg().getLockWatchdogTimeout(), TimeUnit.MILLISECONDS, threadId, RedisCommands.EVAL_LONG);
    // 开启一个定时任务进行不断刷新过期时间
    ttlRemainingFuture.onComplete((ttlRemaining, e) -> {
        if (e != null) {
            return;
        }
        // lock acquired 获得锁
        if (ttlRemaining == null) {
        	// 刷新过期时间方法,我们下一步详细说一下
            scheduleExpirationRenewal(threadId);
    });
    return ttlRemainingFuture;
5. 查看tryLockInnerAsync()方法
<T> RFuture<T> tryLockInnerAsync(long leaseTime, TimeUnit unit, long threadId, RedisStrictCommand<T> command) {
internalLockLeaseTime = unit.toMillis(leaseTime);
return commandExecutor.evalWriteAsync(getName(), LongCodec.INSTANCE, command,
// 首先判断锁是否存在
"if (redis.call('exists', KEYS[1]) == 0) then " +
// 存在则获取锁
"redis.call('hset', KEYS[1], ARGV[2], 1); " +
// 然后设置过期时间
"redis.call('pexpire', KEYS[1], ARGV[1]); " +
"return nil; " +
"end; " +
// hexists查看哈希表的指定字段是否存在,存在锁并且是当前线程持有锁
"if (redis.call('hexists', KEYS[1], ARGV[2]) == 1) then " +
// hincrby自增一
"redis.call('hincrby', KEYS[1], ARGV[2], 1); " +
// 锁的值大于1,说明是可重入锁,重置过期时间
"redis.call('pexpire', KEYS[1], ARGV[1]); " +
"return nil; " +
"end; " +
// 锁已存在,且不是本线程,则返回过期时间ttl
"return redis.call('pttl', KEYS[1]);",
Collections.<Object>singletonList(getName()), internalLockLeaseTime, getLockName(threadId));
}6. 进入4留下的定时任务scheduleExpirationRenewal()方法
一步步往下找源码:scheduleExpirationRenewal --->renewExpiration
根据下面源码,定时任务刷新时间为:internalLockLeaseTime / 3,是看门狗的1/3,即为10s刷新一次
private void renewExpiration() {
ExpirationEntry ee = EXPIRATION_RENEWAL_MAP.get(getEntryName());
if (ee == null) {
return;
}
Timeout task = commandExecutor.getConnectionManager().newTimeout(new TimerTask() {
@Override
public void run(Timeout timeout) throws Exception {
ExpirationEntry ent = EXPIRATION_RENEWAL_MAP.get(getEntryName());
if (ent == null) {
return;
}
Long threadId = ent.getFirstThreadId();
if (threadId == null) {
return;
}
RFuture<Boolean> future = renewExpirationAsync(threadId);
future.onComplete((res, e) -> {
if (e != null) {
log.error("Can't update lock " + getName() + " expiration", e);
return;
}
if (res) {
// reschedule itself
renewExpiration();
}
});
}
}, internalLockLeaseTime / 3, TimeUnit.MILLISECONDS);
ee.setTimeout(task);
}五、lock.lock(10, TimeUnit.SECONDS)源码分析
1. 打开实现类
@Override
public void lock(long leaseTime, TimeUnit unit) {
    try {
    	// 这里的过期时间为我们输入的10
        lock(leaseTime, unit, false);
    } catch (InterruptedException e) {
        throw new IllegalStateException();
    }
}
2. 方法lock()实现展示,同三.3源码
3. 直接来到尝试获得锁tryAcquireAsync()方法
private <T> RFuture<Long> tryAcquireAsync(long leaseTime, TimeUnit unit, long threadId) {
    // 这里进行判断如果没有设置参数leaseTime = -1,此时我们为10
    if (leaseTime != -1) {
    	// 来到此方法
        return tryLockInnerAsync(leaseTime, unit, threadId, RedisCommands.EVAL_LONG);
    }
    // 此处省略后面内容,前面以详细说明。。。。
}
4. 打开tryLockInnerAsync()方法
我们不难发现和没有传过期时间的方法一样,只不过leaseTime的值变了。
<T> RFuture<T> tryLockInnerAsync(long leaseTime, TimeUnit unit, long threadId, RedisStrictCommand<T> command) {
internalLockLeaseTime = unit.toMillis(leaseTime);
return commandExecutor.evalWriteAsync(getName(), LongCodec.INSTANCE, command,
// 首先判断锁是否存在
"if (redis.call('exists', KEYS[1]) == 0) then " +
// 存在则获取锁
"redis.call('hset', KEYS[1], ARGV[2], 1); " +
// 然后设置过期时间
"redis.call('pexpire', KEYS[1], ARGV[1]); " +
"return nil; " +
"end; " +
// hexists查看哈希表的指定字段是否存在,存在锁并且是当前线程持有锁
"if (redis.call('hexists', KEYS[1], ARGV[2]) == 1) then " +
// hincrby自增一
"redis.call('hincrby', KEYS[1], ARGV[2], 1); " +
// 锁的值大于1,说明是可重入锁,重置过期时间
"redis.call('pexpire', KEYS[1], ARGV[1]); " +
"return nil; " +
"end; " +
// 锁已存在,且不是本线程,则返回过期时间ttl
"return redis.call('pttl', KEYS[1]);",
Collections.<Object>singletonList(getName()), internalLockLeaseTime, getLockName(threadId));
}六、lock.unlock()源码分析
1. 打开方法实现
@Override
public void unlock() {
    try {
    	// 点击进入释放锁方法
        get(unlockAsync(Thread.currentThread().getId()));
    } catch (RedisException e) {
        if (e.getCause() instanceof IllegalMonitorStateException) {
            throw (IllegalMonitorStateException) e.getCause();
        } else {
            throw e;
        }
    }

//        Future<Void> future = unlockAsync();
//        future.awaitUninterruptibly();
//        if (future.isSuccess()) {
//            return;
//        }
//        if (future.cause() instanceof IllegalMonitorStateException) {
//            throw (IllegalMonitorStateException)future.cause();
//        }
//        throw commandExecutor.convertException(future);
}
2. 打开unlockAsync()方法
@Override
public RFuture<Void> unlockAsync(long threadId) {
    RPromise<Void> result = new RedissonPromise<Void>();
    // 解锁方法,后面展开说
    RFuture<Boolean> future = unlockInnerAsync(threadId);
	// 完成
    future.onComplete((opStatus, e) -> {
        if (e != null) {
        	// 取消到期续订
            cancelExpirationRenewal(threadId);
            // 将这个未来标记为失败并通知所有人
            result.tryFailure(e);
            return;
        }
		// 状态为空,说明解锁的线程和当前锁不是同一个线程
        if (opStatus == null) {
            IllegalMonitorStateException cause = new IllegalMonitorStateException("attempt to unlock lock, not locked by current thread by node id: "
                    + id + " thread-id: " + threadId);
            result.tryFailure(cause);
            return;
        }

        cancelExpirationRenewal(threadId);
        result.trySuccess(null);
    });

    return result;
}
3. 打开unlockInnerAsync()
1 Nous ouvrons le site officiel
🎜site officiel chinois de redis🎜2.  🎜3. Ouvrez la recommandation officielle
🎜 🎜
🎜4. Retrouvez le document
🎜Adresse de Redisson🎜🎜 🎜🎜5. Structure de Redisson🎜🎜
 🎜🎜3. Springboot intègre Redisson🎜
1. Importer les dépendances h4>protected RFuture<Boolean> unlockInnerAsync(long threadId) {
return commandExecutor.evalWriteAsync(getName(), LongCodec.INSTANCE, RedisCommands.EVAL_BOOLEAN,
// 判断释放锁的线程和已存在锁的线程是不是同一个线程,不是返回空
"if (redis.call('hexists', KEYS[1], ARGV[3]) == 0) then " +
"return nil;" +
"end; " +
// 释放锁后,加锁次数减一
"local counter = redis.call('hincrby', KEYS[1], ARGV[3], -1); " +
// 判断剩余数量是否大于0
"if (counter > 0) then " +
// 大于0 ,则刷新过期时间
"redis.call('pexpire', KEYS[1], ARGV[2]); " +
"return 0; " +
"else " +
// 释放锁,删除key并发布锁释放的消息
"redis.call('del', KEYS[1]); " +
"redis.call('publish', KEYS[2], ARGV[1]); " +
"return 1; "+
"end; " +
"return nil;",
Arrays.<Object>asList(getName(), getChannelName()), LockPubSub.UNLOCK_MESSAGE, internalLockLeaseTime, getLockName(threadId));
} 2. Prenez le site officiel comme exemple pour voir comment le configurer
🎜 🎜
🎜3. Écrire la classe de configuration
rrreee4. Exemple de verrouillage de test de site officiel🎜 🎜
🎜5. Écrit selon l'interface simple du contrôleur du site officiel
rrreee6. Test
🎜 🎜🎜4. Analyse du code source Lock.lock()🎜
1 . Ouvrez la classe d'implémentation RedissonLock
🎜 🎜
🎜 2. Trouvez la méthode d'implémentation
rrreee3. Maintenez la touche Ctrl enfoncée pour entrer la méthode de verrouillage
rrreee4. Entrez et essayez d'obtenir la méthode de verrouillage
🎜 🎜rrreee
5. Afficher la méthode tryLockInnerAsync()
rrreee6. Entrez la méthode planningExpirationRenewal() de la tâche planifiée laissée dans 4
🎜Rechercher le code source étape par étape : planningExpirationRenewal --->renewExpiration🎜🎜Selon le code source ci-dessous, la tâche planifiée L'heure d'actualisation est : internalLockLeaseTime / 3, soit 1/3 du chien de garde, c'est-à-dire actualisé une fois tous les 10 secondes🎜rrreee🎜5. Lock.lock(10, TimeUnit.SECONDS) analyse du code source🎜🎜1 Ouvrez la classe d'implémentation🎜rrreee🎜2 La méthode lock() implémente l'affichage, comme dans la version 3.3. code source 🎜🎜3. Allez directement pour essayer d'obtenir la méthode tryAcquireAsync() de verrouillage 🎜rrreee🎜4. Ouvrez La méthode tryLockInnerAsync()🎜🎜Ce n'est pas difficile à faire. constatez que c'est la même chose que la méthode sans dépasser le délai d'expiration, sauf que la valeur de leaseTime a changé. 🎜rrreee🎜 6. Analyse du code source Lock.unlock() 🎜🎜1. Implémentation de la méthode ouverte 🎜rrreee🎜2 Méthode ouverte unlockAsync() 🎜rrreee🎜3. / code>Méthode 🎜rrreee
 🎜
🎜5. Écrit selon l'interface simple du contrôleur du site officiel
rrreee6. Test
🎜 🎜🎜4. Analyse du code source Lock.lock()🎜
1 . Ouvrez la classe d'implémentation RedissonLock
🎜 🎜
🎜2. Trouvez la méthode d'implémentation
rrreee3. Maintenez la touche Ctrl enfoncée pour entrer la méthode de verrouillage
rrreee4. Entrez et essayez d'obtenir la méthode de verrouillage
🎜 🎜rrreee
5. Afficher la méthode tryLockInnerAsync()
rrreee6. Entrez la méthode planningExpirationRenewal() de la tâche planifiée laissée dans 4
🎜Rechercher le code source étape par étape : planningExpirationRenewal --->renewExpiration🎜🎜Selon le code source ci-dessous, la tâche planifiée L'heure d'actualisation est : internalLockLeaseTime / 3, soit 1/3 du chien de garde, c'est-à-dire actualisé une fois tous les 10 secondes🎜rrreee🎜5. Lock.lock(10, TimeUnit.SECONDS) analyse du code source🎜🎜1 Ouvrez la classe d'implémentation🎜rrreee🎜2 La méthodelock() implémente l'affichage, comme dans la version 3.3. code source 🎜🎜3. Allez directement pour essayer d'obtenir la méthode tryAcquireAsync() de verrouillage 🎜rrreee🎜4. Ouvrez La méthode tryLockInnerAsync()🎜🎜Ce n'est pas difficile à faire. constatez que c'est la même chose que la méthode sans dépasser le délai d'expiration, sauf que la valeur de leaseTime a changé. 🎜rrreee🎜 6. Analyse du code source Lock.unlock() 🎜🎜1. Implémentation de la méthode ouverte 🎜rrreee🎜2 Méthode ouverte unlockAsync() 🎜rrreee🎜3. / code>Méthode 🎜rrreeeCe qui précède est le contenu détaillé de. pour plus d'informations, suivez d'autres articles connexes sur le site Web de PHP en chinois!

