
Maison >base de données >tutoriel mysql >Comment déployer php7.1 et activer l'extension MySQL sous CentOS7
Comment déployer php7.1 et activer l'extension MySQL sous CentOS7

- WBOYWBOYWBOYWBOYWBOYWBOYWBOYWBOYWBOYWBOYWBOYWBOYWBavant
- 2023-05-28 15:01:061852parcourir
Installation simple (méthode miam)
Installer la source du logiciel
Ajouter la source epel
[root@opstrip.com opt]# rpm --import /etc/pki/rpm-gpg/rpm-gpg-key*
[root@opstrip.com opt]# rpm -uvh http://mirrors.rit.edu/fedora/epel//7/x86_64/e/epel-release-7-9.noarch.rpm
Ajouter la source remi
[root@opstrip.com opt]# rpm -uvh http://rpms.remirepo.net/enterprise/remi-release-7.rpm
Installer et mettre à jour le logiciel
Installer l'utilitaire yum-config-manager
[root@opstrip.com opt]# yum -y install yum-utils
Up date Après la version actuelle du logiciel du système
[root@opstrip.com opt]# yum -y update
est mise à jour, vous pouvez installer la version php requise.
Installer php
Une fois les préparatifs ci-dessus terminés, vous pouvez installer la version php requise.
Pour php5.4
[root@opstrip.com opt]# yum -y install php
Vous pouvez essayer yum search php54 pour rechercher des packages logiciels installables avant l'installation.
Pour php7.0
[root@opstrip.com opt]# yum-config-manager --enable remi-php70
[root@opstrip.com opt]# yum -y install php php-opcache
Vous pouvez essayer yum search php70 pour rechercher des packages logiciels installables avant l'installation. yum search php70搜索可安装的软件包。
对于php7.1
[root@opstrip.com opt]# yum-config-manager --enable remi-php71
[root@opstrip.com opt]# yum -y install php php-opcache
安装前可尝试yum search php71搜索可安装的软件包。
完成后还需要添加php常用扩展:
[root@opstrip.com opt]# yum -y install php-mysql php-gd php-ldap php-odbc php-pear php-xml php-xmlrpc php-mbstring php-soap curl curl-devel
对于nginx
[root@opstrip.com opt]# yum -y install nginx nginx-mod-http-perl nginx-mod-stream nginx-filesystem nginx-mod-mail nginx-mod-http-image-filter nginx-all-modules nginx-mod-http-geoip nginx-mod-http-xslt-filter
安装前仍建议尝试yum search nginx搜索可安装的软件包。
安装完成后配置php及nginx并启动用以测试phpinfo页面,这时候应该能正常显示。
源码编译安装
安装前的准备
下载php安装包
[root@opstrip.com opt]# wget -o php-7.1.5.tar.gz http://cn2.php.net/distributions/php-7.1.5.tar.gz
解压
[root@opstrip.com opt]# tar xf php-7.1.5.tar.gz
安装依赖包
[root@opstrip.com php-7.1.5]# yum install -y libxml2 libxml2-devel openssl openssl-devel bzip2 bzip2-devel libcurl libcurl-devel libjpeg libjpeg-devel libpng libpng-devel freetype freetype-devel gmp gmp-devel libmcrypt libmcrypt-devel readline readline-devel libxslt libxslt-devel
配置安装
编译配置
[root@opstrip.com opt]# cd php-7.1.5
[root@opstrip.com php-7.1.5]# ./configure \
--prefix=/usr/local/php \
--with-config-file-path=/etc \
--enable-fpm \
--with-fpm-user=nginx \
--with-fpm-group=nginx \
--enable-inline-optimization \
--disable-debug \
--disable-rpath \
--enable-shared \
--enable-soap \
--with-libxml-dir \
--with-xmlrpc \
--with-openssl \
--with-mcrypt \
--with-mhash \
--with-pcre-regex \
--with-sqlite3 \
--with-zlib \
--enable-bcmath \
--with-iconv \
--with-bz2 \
--enable-calendar \
--with-curl \
--with-cdb \
--enable-dom \
--enable-exif \
--enable-fileinfo \
--enable-filter \
--with-pcre-dir \
--enable-ftp \
--with-gd \
--with-openssl-dir \
--with-jpeg-dir \
--with-png-dir \
--with-zlib-dir \
--with-freetype-dir \
--enable-gd-native-ttf \
--enable-gd-jis-conv \
--with-gettext \
--with-gmp \
--with-mhash \
--enable-json \
--enable-mbstring \
--enable-mbregex \
--enable-mbregex-backtrack \
--with-libmbfl \
--with-onig \
--enable-pdo \
--with-mysqli=mysqlnd \
--with-pdo-mysql=mysqlnd \
--with-zlib-dir \
--with-pdo-sqlite \
--with-readline \
--enable-session \
--enable-shmop \
--enable-simplexml \
--enable-sockets \
--enable-sysvmsg \
--enable-sysvsem \
--enable-sysvshm \
--enable-wddx \
--with-libxml-dir \
--with-xsl \
--enable-zip \
--enable-mysqlnd-compression-support \
--with-pear \
--enable-opcache
具体可以参考php官方安装说明文档:
编译安装
[root@opstrip.com php-7.1.5]# make && make install
配置环境变量:
在/etc/profile末尾追加export path=$path:/usr/local/php/bin,然后执行source /etc/profile生效后查看php版本:
[root@opstrip.com php-7.1.5]# php -v
php 7.1.5 (cli) (built: may 31 2017 16:12:38) ( nts )
copyright (c) 1997-2017 the php group
zend engine v3.1.0, copyright (c) 1998-2017 zend technologies
安装后的配置
配置php-fpm
安装完成后可以通过sapi/fpm/php-fpm.server
[root@opstrip.com php-7.1.5]# mkdir -p /etc/php-fpm.d
[root@opstrip.com php-7.1.5]# cp php.ini-production /etc/php.ini
[root@opstrip.com php-7.1.5]# cp sapi/fpm/php-fpm.service /usr/lib/systemd/system/
[root@opstrip.com php-7.1.5]# cp sapi/fpm/www.conf /etc/php-fpm.d/
Vous pouvez essayer
yum search php71 pour rechercher des packages logiciels installables avant l'installation.
Une fois terminé, vous devez ajouter des extensions PHP courantes :
[root@opstrip.com php-7.1.5]# vi /usr/lib/systemd/system/php-fpm.service
# it's not recommended to modify this file in-place, because it
# will be overwritten during upgrades. if you want to customize,
# the best way is to use the "systemctl edit" command.

[unit]
description=the php fastcgi process manager
after=network.target

[service]
type=simple
pidfile=/var/run/php-fpm.pid
execstart=/usr/local/php/sbin/php-fpm --nodaemonize --fpm-config /etc/php-fpm.conf
execreload=/bin/kill -usr2 $mainpid
privatetmp=true

[install]
wantedby=multi-user.target
Pour nginx
[root@opstrip.com php-7.1.5]# systemctl enable php-fpm.service
[root@opstrip.com php-7.1.5]# systemctl start php-fpm.service
Il est toujours recommandé d'essayer yum search nginx pour rechercher les packages logiciels installables avant l'installation.
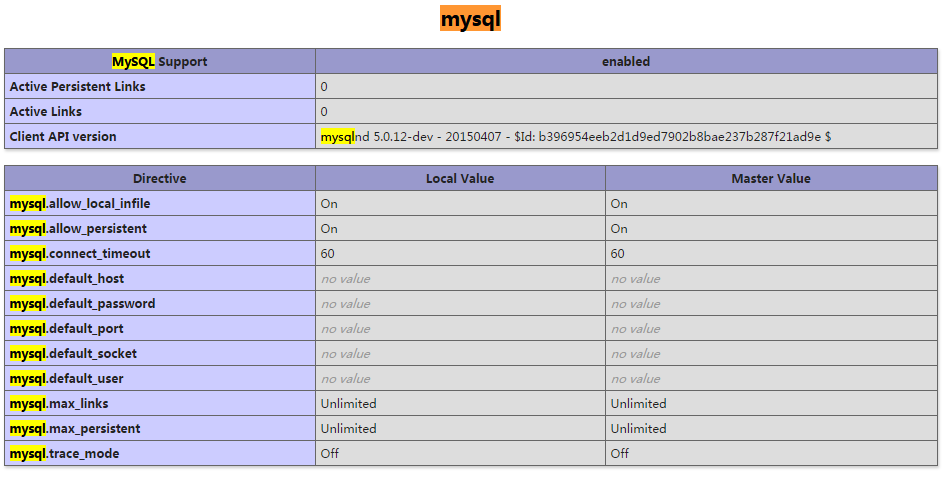
Une fois l'installation terminée, configurez php et nginx et démarrez-le pour tester la page phpinfo. Elle devrait s'afficher normalement à ce moment.
Compilation et installation du code source
Préparation avant l'installation
Télécharger le package d'installation php[root@opstrip.com php-7.1.5]# ls ext
bcmath dom gd json oci8 pdo_firebird posix skeleton sysvsem xmlwriter
bz2 enchant gettext ldap odbc pdo_mysql pspell snmp sysvshm xsl
calendar exif gmp libxml opcache pdo_oci readline soap tidy zip
com_dotnet ext_skel hash mbstring openssl pdo_odbc recode sockets tokenizer zlib
ctype ext_skel_win32.php iconv mcrypt pcntl pdo_pgsql reflection spl wddx
curl fileinfo imap mysql pcre pdo_sqlite session sqlite3 xml
date filter interbase mysqli pdo pgsql shmop standard xmlreader
dba ftp intl mysqlnd pdo_dblib phar simplexml sysvmsg xmlrpc
Décompresser
[root@opstrip.com ext]# git clone https://github.com/php/pecl-database-mysql mysql --recursive
cloning into 'mysql'...
remote: counting objects: 145, done.
remote: total 145 (delta 0), reused 0 (delta 0), pack-reused 145
receiving objects: 100% (145/145), 88.41 kib | 0 bytes/s, done.
resolving deltas: 100% (65/65), done.
checking connectivity... done.
Installer les packages de dépendances
[root@opstrip.com ext]# cd mysql
[root@opstrip.com mysql]# ls
config.m4 config.w32 credits license mysql.mak mysql_mysqlnd.h package.xml php_mysql.c php_mysql.h php_mysql_structs.h readme.md tests
[root@opstrip.com mysql]# /usr/local/php/bin/phpize
configuring for:
php api version:   20151012
zend module api no:  20151012
zend extension api no: 320151012
[root@opstrip.com mysql]# ./configure --with-php-config=/usr/local/php/bin/php-config
Configuration et installation
Compiler la configuration[root@opstrip.com mysql]# make && make install [root@opstrip.com mysql]# ls /usr/local/php/lib/php/extensions/no-debug-non-zts-20160303/ mysql.so opcache.a opcache.soPour plus de détails, s'il vous plaît reportez-vous aux instructions d'installation officielles de PHP Documentation : Compilez et installez
extension = "mysql.so"Configurez les variables d'environnement :
Ajoutez export path=$path:/usr/local/php/bin à la fin de /etc/profile, puis exécutez source /etc/profile Vérifiez la version de php après avoir pris effet :
rrreee
Configuration après l'installation
Configurez php-fpm
 Une fois l'installation terminée , vous pouvez passer
 sapi/fpm/php-fpm.server Pour démarrer php-fpm. Cependant, pour faciliter la gestion future, il est généralement nécessaire de placer les fichiers de configuration dans le répertoire /etc et d'ajouter php-fpm.server au service systemctl. Comme suit :
Ce qui précède est le contenu détaillé de. pour plus d'informations, suivez d'autres articles connexes sur le site Web de PHP en chinois!