Maison >Java >javaDidacticiel >Quelle est la méthode de déploiement et d'intégration de Java Seata
Quelle est la méthode de déploiement et d'intégration de Java Seata
- WBOYavant
- 2023-05-14 14:55:06796parcourir
Déploiement et intégration de Seata
1. Déployer le serveur tc de Seata
1) Télécharger
Nous devons d'abord télécharger le package Seata-server

2) Décompresser
Décompressez ce package zip dans un fichier non-. Annuaire chinois, sa structure de répertoire est la suivante :
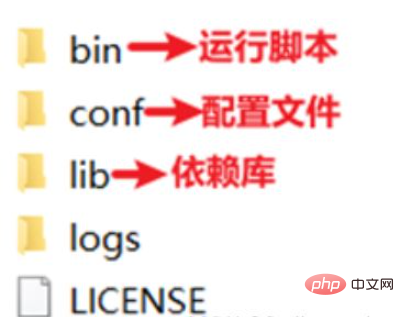
3) Modifier la configuration
Modifier le fichierregistre.conf dans le répertoire conf :
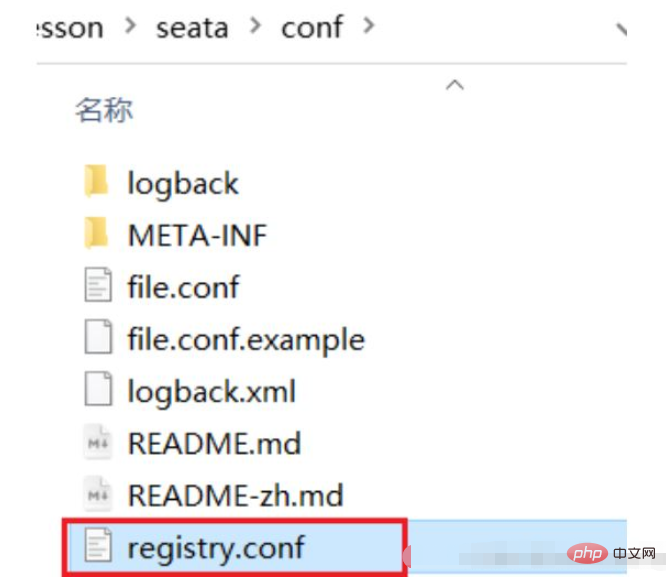
Le contenu est le suivant :
registry {
  # tc服务的注册中心类,这里选择nacos,也可以是eureka、zookeeper等
  type = "nacos"

  nacos {
    # seata tc 服务注册到 nacos的服务名称,可以自定义
    application = "seata-tc-server"
    serverAddr = "127.0.0.1:8848"
    group = "DEFAULT_GROUP"
    namespace = ""
    cluster = "SH"
    username = "nacos"
    password = "nacos"
  }
}

config {
  # 读取tc服务端的配置文件的方式,这里是从nacos配置中心读取,这样如果tc是集群,可以共享配置
  type = "nacos"
  # 配置nacos地址等信息
  nacos {
    serverAddr = "127.0.0.1:8848"
    namespace = ""
    group = "SEATA_GROUP"
    username = "nacos"
    password = "nacos"
    dataId = "seataServer.properties"
  }
}
4) Ajouter configuration dans nacos
Attention particulière, afin de permettre aux clusters de services tc de partager des configurations, nous avons choisi nacos comme centre de configuration unifié. Par conséquent, le fichier de configuration du serveurseataServer.properties doit être configuré dans nacos.
Le format est le suivant :
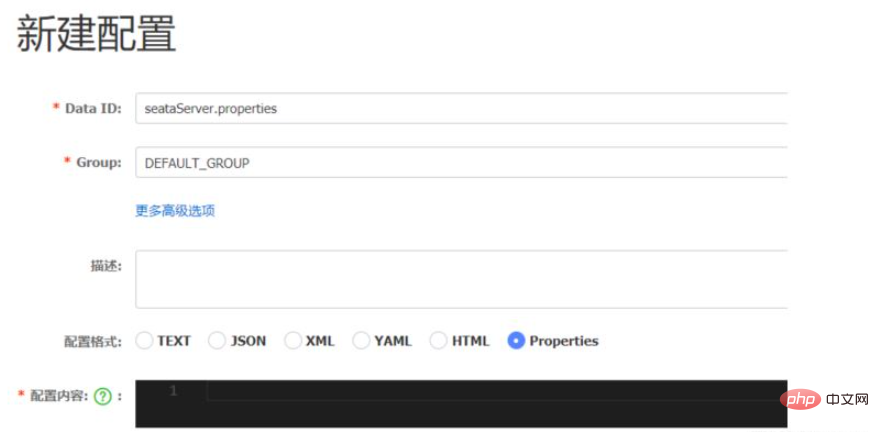
Le contenu de la configuration est le suivant :
# 数据存储方式,db代表数据库
store.mode=db
store.db.datasource=druid
store.db.dbType=mysql
store.db.driverClassName=com.mysql.jdbc.Driver
store.db.url=jdbc:mysql://127.0.0.1:3306/seata?useUnicode=true&rewriteBatchedStatements=true
store.db.user=root
store.db.password=123
store.db.minConn=5
store.db.maxConn=30
store.db.globalTable=global_table
store.db.branchTable=branch_table
store.db.queryLimit=100
store.db.lockTable=lock_table
store.db.maxWait=5000
# 事务、日志等配置
server.recovery.committingRetryPeriod=1000
server.recovery.asynCommittingRetryPeriod=1000
server.recovery.rollbackingRetryPeriod=1000
server.recovery.timeoutRetryPeriod=1000
server.maxCommitRetryTimeout=-1
server.maxRollbackRetryTimeout=-1
server.rollbackRetryTimeoutUnlockEnable=false
server.undo.logSaveDays=7
server.undo.logDeletePeriod=86400000

# 客户端与服务端传输方式
transport.serialization=seata
transport.compressor=none
# 关闭metrics功能,提高性能
metrics.enabled=false
metrics.registryType=compact
metrics.exporterList=prometheus
metrics.exporterPrometheusPort=9898
L'adresse de la base de données, le nom d'utilisateur et le mot de passe doivent être modifiés par vos propres informations de base de données.
5) Créer des tables de base de données
Remarque spéciale : lorsque le service tc gère des transactions distribuées, il doit enregistrer les données liées aux transactions dans la base de données. Vous devez créer ces tables à l'avance.
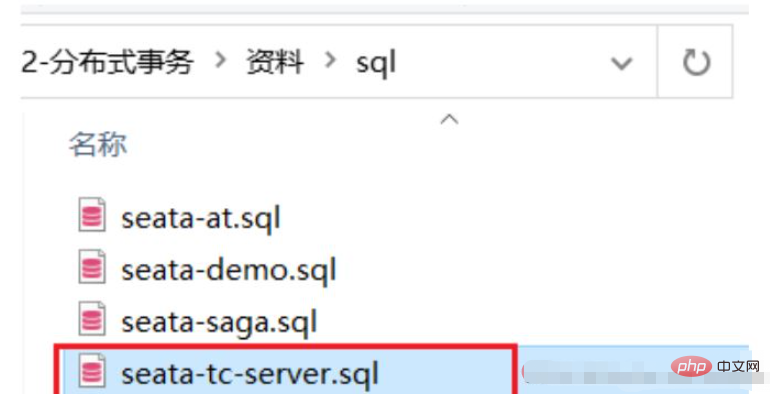
Créez une nouvelle base de données nommée Seata et exécutez le fichier SQL fourni dans le matériel de pré-cours :
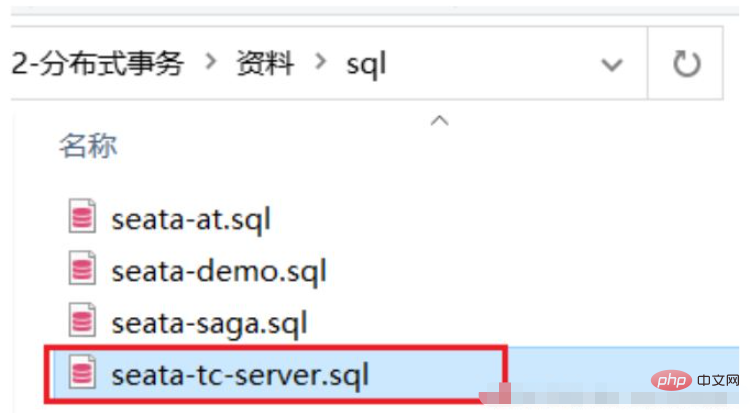
Ces tables enregistrent principalement les transactions globales, les transactions de branche et les informations de verrouillage global :
SET NAMES utf8mb4;
SET FOREIGN_KEY_CHECKS = 0;

-- ----------------------------
-- 分支事务表
-- ----------------------------
DROP TABLE IF EXISTS `branch_table`;
CREATE TABLE `branch_table`  (
  `branch_id` bigint(20) NOT NULL,
  `xid` varchar(128) CHARACTER SET utf8 COLLATE utf8_general_ci NOT NULL,
  `transaction_id` bigint(20) NULL DEFAULT NULL,
  `resource_group_id` varchar(32) CHARACTER SET utf8 COLLATE utf8_general_ci NULL DEFAULT NULL,
  `resource_id` varchar(256) CHARACTER SET utf8 COLLATE utf8_general_ci NULL DEFAULT NULL,
  `branch_type` varchar(8) CHARACTER SET utf8 COLLATE utf8_general_ci NULL DEFAULT NULL,
  `status` tinyint(4) NULL DEFAULT NULL,
  `client_id` varchar(64) CHARACTER SET utf8 COLLATE utf8_general_ci NULL DEFAULT NULL,
  `application_data` varchar(2000) CHARACTER SET utf8 COLLATE utf8_general_ci NULL DEFAULT NULL,
  `gmt_create` datetime(6) NULL DEFAULT NULL,
  `gmt_modified` datetime(6) NULL DEFAULT NULL,
  PRIMARY KEY (`branch_id`) USING BTREE,
  INDEX `idx_xid`(`xid`) USING BTREE
) ENGINE = InnoDB CHARACTER SET = utf8 COLLATE = utf8_general_ci ROW_FORMAT = Compact;

-- ----------------------------
-- 全局事务表
-- ----------------------------
DROP TABLE IF EXISTS `global_table`;
CREATE TABLE `global_table`  (
  `xid` varchar(128) CHARACTER SET utf8 COLLATE utf8_general_ci NOT NULL,
  `transaction_id` bigint(20) NULL DEFAULT NULL,
  `status` tinyint(4) NOT NULL,
  `application_id` varchar(32) CHARACTER SET utf8 COLLATE utf8_general_ci NULL DEFAULT NULL,
  `transaction_service_group` varchar(32) CHARACTER SET utf8 COLLATE utf8_general_ci NULL DEFAULT NULL,
  `transaction_name` varchar(128) CHARACTER SET utf8 COLLATE utf8_general_ci NULL DEFAULT NULL,
  `timeout` int(11) NULL DEFAULT NULL,
  `begin_time` bigint(20) NULL DEFAULT NULL,
  `application_data` varchar(2000) CHARACTER SET utf8 COLLATE utf8_general_ci NULL DEFAULT NULL,
  `gmt_create` datetime NULL DEFAULT NULL,
  `gmt_modified` datetime NULL DEFAULT NULL,
  PRIMARY KEY (`xid`) USING BTREE,
  INDEX `idx_gmt_modified_status`(`gmt_modified`, `status`) USING BTREE,
  INDEX `idx_transaction_id`(`transaction_id`) USING BTREE
) ENGINE = InnoDB CHARACTER SET = utf8 COLLATE = utf8_general_ci ROW_FORMAT = Compact;

SET FOREIGN_KEY_CHECKS = 1;
6) Démarrez le service TC
Entrez le répertoire bin, exécutez Seata-server.bat dedans :
Après un démarrage réussi, Seata-server aurait dû être enregistré auprès du centre d'enregistrement Nacos.
Ouvrez le navigateur, visitez l'adresse nacos : http://localhost:8848, puis entrez dans la page de la liste des services. Vous pouvez voir les informations du serveur Seata-tc :

2. Intégration des microservices Seata 1) Introduire les dépendances
1) Introduire les dépendances
Tout d'abord, nous devons introduire les dépendances Seata dans le microservice :
<dependency>
    <groupId>com.alibaba.cloud</groupId>
    <artifactId>spring-cloud-starter-alibaba-seata</artifactId>
    <exclusions>
        <!--版本较低,1.3.0,因此排除-->
        <exclusion>
            <artifactId>seata-spring-boot-starter</artifactId>
            <groupId>io.seata</groupId>
        </exclusion>
    </exclusions>
</dependency>
<!--seata starter 采用1.4.2版本-->
<dependency>
    <groupId>io.seata</groupId>
    <artifactId>seata-spring-boot-starter</artifactId>
    <version>${seata.version}</version>
</dependency>
2) Modifier le fichier de configuration
Vous devez modifier le fichier application.yml et ajouter quelques configurations :
seata:
  registry: # TC服务注册中心的配置,微服务根据这些信息去注册中心获取tc服务地址
    # 参考tc服务自己的registry.conf中的配置
    type: nacos
    nacos: # tc
      server-addr: 127.0.0.1:8848
      namespace: ""
      group: DEFAULT_GROUP
      application: seata-tc-server # tc服务在nacos中的服务名称
      cluster: SH
  tx-service-group: seata-demo # 事务组,根据这个获取tc服务的cluster名称
  service:
    vgroup-mapping: # 事务组与TC服务cluster的映射关系
      seata-demo: SH
3. Service TC élevé Disponible et reprise après sinistre hors site 1) Simulez un cluster TC pour la reprise après sinistre hors site
1) Simulez un cluster TC pour la reprise après sinistre hors site
Prévoyez de démarrer deux nœuds de service Seata TC :
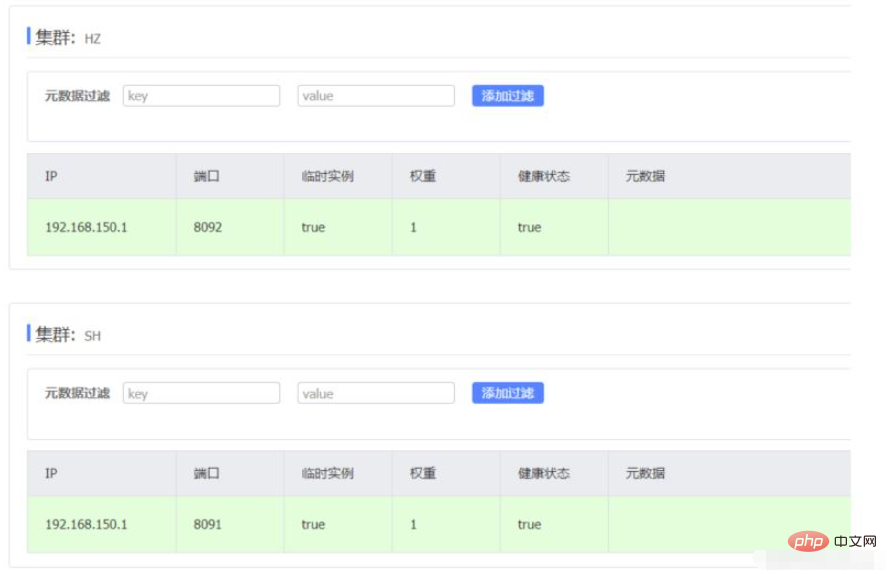
| Nom du nœud | Adresse IP | Numéro de port | Nom du cluster |
|---|---|---|---|
| seata | 127.0.0.1 | 8091 | SH |
| seata2 | 127.0.0.1 | 8 092 | HZ |
Nous avons commencé avant un service Seata, le port est 8091 et le nom du cluster est SH.
Maintenant, copiez le répertoire Seata et nommez-le Seata2
Modifiez le contenu de Seata2/conf/registry.conf comme suit :
registry {
  # tc服务的注册中心类,这里选择nacos,也可以是eureka、zookeeper等
  type = "nacos"

  nacos {
    # seata tc 服务注册到 nacos的服务名称,可以自定义
    application = "seata-tc-server"
    serverAddr = "127.0.0.1:8848"
    group = "DEFAULT_GROUP"
    namespace = ""
    cluster = "HZ"
    username = "nacos"
    password = "nacos"
  }
}

config {
  # 读取tc服务端的配置文件的方式,这里是从nacos配置中心读取,这样如果tc是集群,可以共享配置
  type = "nacos"
  # 配置nacos地址等信息
  nacos {
    serverAddr = "127.0.0.1:8848"
    namespace = ""
    group = "SEATA_GROUP"
    username = "nacos"
    password = "nacos"
    dataId = "seataServer.properties"
  }
}
Entrez le répertoire Seata2/bin, puis exécutez la commande :
seata-server.bat -p 8092
Ouvrez le nacos console et vérifiez la liste des services :

Cliquez pour plus de détails :
2) Configurez le mappage du groupe de transactions vers nacos
Ensuite, nous devons configurer la relation de mappage entre tx-service-group et le cluster vers la configuration nacos centre.
Créez une nouvelle configuration :
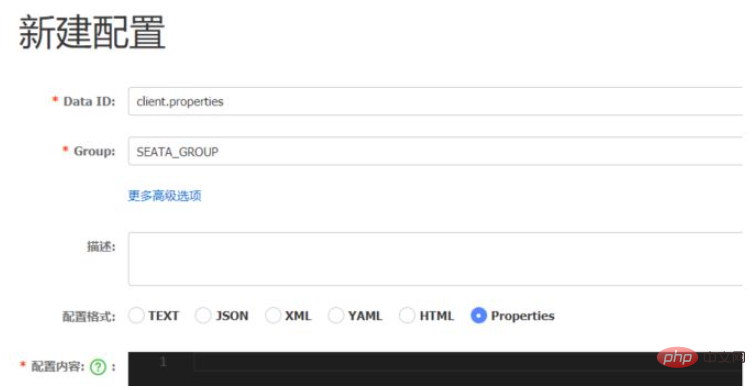
Le contenu de la configuration est le suivant :
# 事务组映射关系
service.vgroupMapping.seata-demo=SH

service.enableDegrade=false
service.disableGlobalTransaction=false
# 与TC服务的通信配置
transport.type=TCP
transport.server=NIO
transport.heartbeat=true
transport.enableClientBatchSendRequest=false
transport.threadFactory.bossThreadPrefix=NettyBoss
transport.threadFactory.workerThreadPrefix=NettyServerNIOWorker
transport.threadFactory.serverExecutorThreadPrefix=NettyServerBizHandler
transport.threadFactory.shareBossWorker=false
transport.threadFactory.clientSelectorThreadPrefix=NettyClientSelector
transport.threadFactory.clientSelectorThreadSize=1
transport.threadFactory.clientWorkerThreadPrefix=NettyClientWorkerThread
transport.threadFactory.bossThreadSize=1
transport.threadFactory.workerThreadSize=default
transport.shutdown.wait=3
# RM配置
client.rm.asyncCommitBufferLimit=10000
client.rm.lock.retryInterval=10
client.rm.lock.retryTimes=30
client.rm.lock.retryPolicyBranchRollbackOnConflict=true
client.rm.reportRetryCount=5
client.rm.tableMetaCheckEnable=false
client.rm.tableMetaCheckerInterval=60000
client.rm.sqlParserType=druid
client.rm.reportSuccessEnable=false
client.rm.sagaBranchRegisterEnable=false
# TM配置
client.tm.commitRetryCount=5
client.tm.rollbackRetryCount=5
client.tm.defaultGlobalTransactionTimeout=60000
client.tm.degradeCheck=false
client.tm.degradeCheckAllowTimes=10
client.tm.degradeCheckPeriod=2000

# undo日志配置
client.undo.dataValidation=true
client.undo.logSerialization=jackson
client.undo.onlyCareUpdateColumns=true
client.undo.logTable=undo_log
client.undo.compress.enable=true
client.undo.compress.type=zip
client.undo.compress.threshold=64k
client.log.exceptionRate=100
3) Le microservice lit la configuration nacos
Ensuite, vous devez modifier le fichier application.yml de chaque microservice pour autoriser le microservice pour lire nacos Le fichier client.properties dans :
seata:
  config:
    type: nacos
    nacos:
      server-addr: 127.0.0.1:8848
      username: nacos
      password: nacos
      group: SEATA_GROUP
      data-id: client.properties
Redémarrez le microservice. Maintenant, si le microservice est connecté au cluster SH de tc ou au cluster HZ de tc, il est déterminé par client.properties de nacos.
lient.log.exceptionRate=100
## 3.微服务读取nacos配置

接下来,需要修改每一个微服务的application.yml文件,让微服务读取nacos中的client.properties文件:

```yaml
seata:
  config:
    type: nacos
    nacos:
      server-addr: 127.0.0.1:8848
      username: nacos
      password: nacos
      group: SEATA_GROUP
      data-id: client.properties
Redémarrez le microservice. Désormais, le fait que le microservice soit connecté au cluster SH de tc ou au cluster HZ de tc est déterminé par client.properties de nacos.
Ce qui précède est le contenu détaillé de. pour plus d'informations, suivez d'autres articles connexes sur le site Web de PHP en chinois!

