Maison >Opération et maintenance >Nginx >Comment créer un environnement .NET Core2.0+Nginx+Supervisor sous le système Centos7
Comment créer un environnement .NET Core2.0+Nginx+Supervisor sous le système Centos7
- PHPzavant
- 2023-05-12 20:13:18965parcourir
1. Introduction au noyau Linux .net
Historiquement, Microsoft n'a fourni le support .net que pour sa propre plate-forme, ce qui signifie que ce framework multiplateforme "théoriquement" ne peut être pris en charge que sur Linux et Macos par Fourni par projets tiers (tels que mono.net).
Jusqu'à ce que Microsoft lance un noyau .net entièrement open source. Cette plateforme open source est compatible avec le standard .NET et fournit des API totalement cohérentes sur Windows, Linux et macOS. Bien que ce framework .net compact ne soit qu’un sous-ensemble du .net standard, il est déjà assez puissant.
D'une part, ce petit framework permet à certaines applications fonctionnelles de s'exécuter sur trois plateformes en même temps (tout comme certains scripts python fonctionnels). D'autre part, il permet également au personnel d'exploitation et de maintenance du serveur d'utiliser asp The . net service est déployé sur un serveur Linux (en particulier pour les serveurs qui ont des difficultés à exécuter des serveurs Windows).
2. Préparation avant le déploiement de l'environnement Linux .net core2.0
1. Description de l'environnement :
Système serveur : centos 7.2.1511
2. Préparation avant l'installation (éteindre le pare-feu, éteindre selinux )
1) Fermez le pare-feu :
systemctl stop firewalld.service #停止firewall
systemctl disable firewalld.service #禁止firewall开机启动
firewall-cmd --state #查看默认防火墙状态(关闭后显示notrunning,开启后显示running)
2) Fermez selinux
sed -i "s/selinux=enforcing/selinux=disabled/g" /etc/selinux/config
Affichez le fichier modifié comme suit :
[root@localhost ~]# cat /etc/selinux/config

# this file controls the state of selinux on the system.
# selinux= can take one of these three values:
#   enforcing - selinux security policy is enforced.
#   permissive - selinux prints warnings instead of enforcing.
#   disabled - no selinux policy is loaded.
selinux=disabled
# selinuxtype= can take one of three two values:
#   targeted - targeted processes are protected,
#   minimum - modification of targeted policy. only selected processes are protected.
#   mls - multi level security protection.
selinuxtype=targeted
3) Redémarrez centos
reboot
3. Centos déploie l'environnement .net core2.0
. 1. Ajoutez des produits dotnet
Avant d'installer .net core, vous devez vous inscrire au flux de produits Microsoft. Cela ne doit être fait qu’une seule fois. Tout d’abord, enregistrez votre clé de signature Microsoft, puis ajoutez votre flux de produits Microsoft.
rpm --import https://packages.microsoft.com/keys/microsoft.asc
sh -c 'echo -e "[packages-microsoft-com-prod]nname=packages-microsoft-com-prod nbaseurl=https://packages.microsoft.com/yumrepos/microsoft-rhel7.3-prodnenabled=1ngpgcheck=1ngpgkey=https://packages.microsoft.com/keys/microsoft.asc" > /etc/yum.repos.d/dotnetdev.repo'
2.Installez .net core sdk
Avant l'étape suivante, veuillez supprimer toute version d'aperçu précédente de .net de votre système.
Les commandes suivantes mettent à jour la liste des produits à installer, installent les composants requis pour .net core, puis installent le SDK .net core.
yum update
yum install libunwind libicu -y
yum install dotnet-sdk-2.0.0 -y
3. Vérifiez si dotnet est installé avec succès et vérifiez la version
dotnet --info
dotnet --version
4 Testez l'environnement .net core2.0
1. Initialisez un environnement de test dans le répertoire personnel et affichez le "hello world". contenu (méthode de test 1, peut être ignorée)
cd /home
dotnet new console -o hwapp
cd hwapp
dotnet run
Le contenu vide de sortie est le suivant :
[root@localhost hwapp]# dotnet run
hello world!
2 Téléchargez la page d'instance de .net core pour le test (méthode de test 2, recommandée)
centos sous .net core. 2 cas de test d'environnement (téléchargez-le dans le répertoire /home ou dans un répertoire personnalisé)
Adresse de téléchargement :
http://down.51cto.com/data/2334968
Exécutez la commande suivante
cd /home/webapplication1
dotnet restore  //如果使过用测试方式一,就需先执行这命令重新加载一下当前新的网站文件
dotnet run
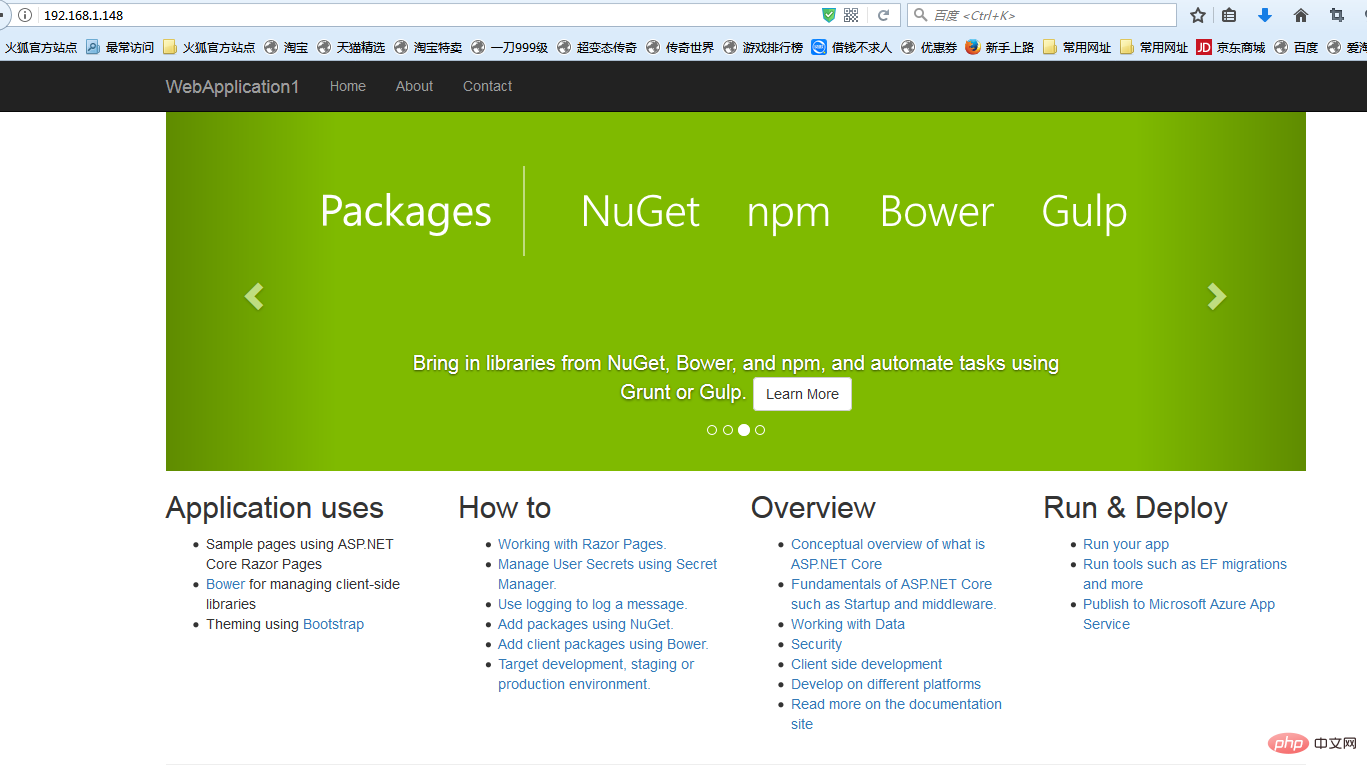
Comme indiqué ci-dessous après l'exécution :

Via ie Visitez la page de test

5. Installez et configurez nginx pour transférer les applications principales asp.net
1. Installez l'environnement nginx
[root@localhost ~]#curl -o nginx.rpm http://nginx.org/packages/centos/7/noarch/rpms/nginx-release-centos-7-0.el7.ngx.noarch.rpm
[root@localhost ~]#rpm -ivh nginx.rpm
[root@localhost ~]#yum install nginx -y
Entrez : systemctl start nginx to démarrez nginx.
[root@localhost ~]# systemctl start nginx
Enter : systemctl permet à nginx de configurer le démarrage de nginx (Linux exécutera automatiquement nginx lorsqu'il s'arrêtera et redémarrera, pas besoin de se connecter pour saisir des commandes)
[root@localhost ~]#systemctl enable nginx
created symlink from /etc/systemd/system/multi-user.target.wants/nginx.service to /usr/lib/systemd/system/nginx.service.
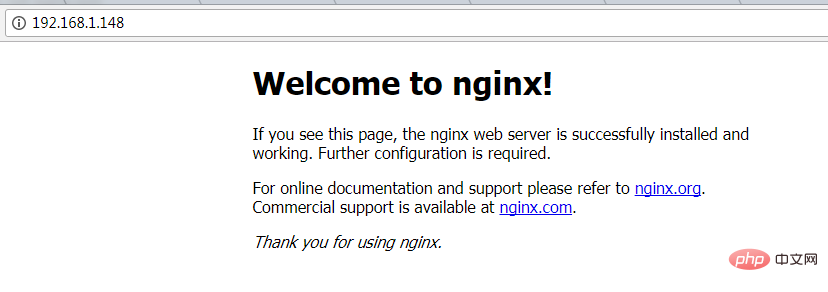
2. Vérifiez si vous pouvez accéder à
[root@localhost nginx-1.8.1]# ps -ef|grep nginx
root   14626   1 0 08:47 ?    00:00:00 nginx: master process nginx
nginx   14627 14626 0 08:47 ?    00:00:00 nginx: worker process
root   14636  3269 0 08:49 pts/1  00:00:00 grep --color=auto nginx

. nginx via IE Commandes d'exploitation fréquemment utilisées
systemctl start nginx.service à
systemctl status nginx.service #Afficher le statut actuel du service systemctl restart nginx.service #Redémarrer le service systemctl list- unités –type=service #Afficher tous les services démarrés 4. Configuration du pare-feu (si le système dispose d'un pare-feu, vous devez écrire des règles) Commande : pare-feu-cmd –zone=public –add-port=80/tcp – permanent (ouvrir le port 80) Commande : systemctl restart firewalld (redémarrez le pare-feu pour que la configuration prenne effet immédiatement) 5. Configurez nginx vers asp.net Forwarding des applications principalesModifiez le fichier /etc/nginx/conf. fichier d/default.conf. Remplacez le contenu du fichier parserver {
listen 80;
location / {
proxy_pass http://localhost:88;
proxy_http_version 1.1;
proxy_set_header upgrade $http_upgrade;
proxy_set_header connection keep-alive;
proxy_set_header host $host;
proxy_cache_bypass $http_upgrade;
}
} Rechargez nignx[root@localhost nginx]# nginx -s reloadLa configuration de Nginx est terminée6. Ouvrez dotnet pour tester
[root@localhost ~]# cd /home/webapplication1/
[root@localhost webapplication1]# dotnet run
using launch settings from /home/webapplication1/properties/launchsettings.json...
hosting environment: development
content root path: /home/webapplication1
now listening on: http://[::]:88
application started. press ctrl+c to shut down.
Accès via le port IP 80 6. Configurez le service gardien ( superviseur)

问题1:asp.net core应用程序运行在shell之中,如果关闭shell则会发现asp.net core应用被关闭,从而导致应用无法访问,这种情况当然是我们不想遇到的,而且生产环境对这种情况是零容忍的。
问题2:如果asp.net core进程意外终止那么需要人为连进shell进行再次启动,往往这种操作都不够及时。
问题3:如果服务器宕机或需要重启我们则还是需要连入shell进行启动。
为了解决这个问题,我们需要有一个程序来监听asp.net core 应用程序的状况。在应用程序停止运行的时候立即重新启动。这边我们用到了supervisor这个工具,supervisor使用python开发的。
1.安装supervisor
[root@localhost /]# yum install python-setuptools -y
[root@localhost /]#easy_install supervisor
2.配置supervisor
[root@localhost /]#mkdir /etc/supervisor
[root@localhost /]#echo_supervisord_conf > /etc/supervisor/supervisord.conf
修改supervisord.conf文件,将文件尾部的配置
[root@localhost /]# vi /etc/supervisor/supervisord.conf
将里面的最后两行:
;[include]
;files = relative/directory/*.ini
改为
[include]
files = conf.d/*.conf
ps:如果服务已启动,修改配置文件可用“supervisorctl reload”命令来使其生效
3.配置对asp.net core应用的守护
创建一个 webapplication1.conf文件,内容大致如下
[root@localhost /]# vi webapplication1.conf
[program:webapplication1]
command=dotnet webapplication1.dll ; 运行程序的命令
directory=/home/webapplication1/ ; 命令执行的目录
autorestart=true ; 程序意外退出是否自动重启
stderr_logfile=/var/log/webapplication1.err.log ; 错误日志文件
stdout_logfile=/var/log/webapplication1.out.log ; 输出日志文件
environment=aspnetcore_environment=production ; 进程环境变量
user=root ; 进程执行的用户身份
stopsignal=int
将文件拷贝至:“/etc/supervisor/conf.d/webapplication1.conf”下
[root@localhost /]#mkdir /etc/supervisor/conf.d
[root@localhost /]#cp webapplication1.conf /etc/supervisor/conf.d/
运行supervisord,查看是否生效
[root@localhost /]#supervisord -c /etc/supervisor/supervisord.confsupervisord -c /etc/supervisor/supervisord.conf
[root@localhost /]# ps -ef | grep webapplication1
root   29878 29685 0 09:57 ?    00:00:00 dotnet webapplication1.dll
root   29892 29363 0 09:57 pts/3  00:00:00 grep --color=auto webapplication1
如果存在dotnet webapplication1.dll 进程则代表运行成功,这时候在使用浏览器进行访问。

至此关于asp.net core应用程序的守护即配置完成。
supervisor守护进程常用操作
【启动supervisord】
确保配置无误后可以在每台主机上使用下面的命令启动supervisor的服务器端supervisord
supervisord
【停止supervisord】
supervisorctl shutdown
【重新加载配置文件】
supervisorctl reload
七 、配置supervisor开机启动
新建一个“supervisord.service”文件
[root@localhost /]# vi supervisord.service
# dservice for systemd (centos 7.0+)
# by et-cs (https://github.com/et-cs)
[unit]
description=supervisor daemon
[service]
type=forking
execstart=/usr/bin/supervisord -c /etc/supervisor/supervisord.conf
execstop=/usr/bin/supervisorctl shutdown
execreload=/usr/bin/supervisorctl reload
killmode=process
restart=on-failure
restartsec=42s
[install]
wantedby=multi-user.target
将文件拷贝至:“/usr/lib/systemd/system/supervisord.service”
[root@localhost /]# cp supervisord.service /usr/lib/systemd/system/
执行命令:systemctl enable supervisord
[root@localhost /]# systemctl enable supervisord
created symlink from /etc/systemd/system/multi-user.target.wants/supervisord.service to /usr/lib/systemd/system/supervisord.service.
执行命令:systemctl is-enabled supervisord #来验证是否为开机启动
[root@localhost /]# systemctl is-enabled supervisord
重启系统看能否能成功访问
[root@localhost /]# reboot

Ce qui précède est le contenu détaillé de. pour plus d'informations, suivez d'autres articles connexes sur le site Web de PHP en chinois!

