Maison >interface Web >Questions et réponses frontales >Comment implémenter Todolist en utilisant React
Comment implémenter Todolist en utilisant React
- 藏色散人original
- 2022-12-29 11:26:052865parcourir
Comment utiliser React pour implémenter Todolist : 1. Créez un nouveau dossier de projet Code ; 2. Créez un projet React via la commande "create-react-app todo-list" 3. Créez un nouveau fichier ToDoList.jsx sous le fichier Todolist. dossier de composants ; 4. , utilisez un tableau pour enregistrer les données, chaque élément du tableau est un objet ; 5. Écrivez la mise en page ; 6. Ajoutez des événements de clavier, surveillez les modifications d'entrée et implémentez les éléments à faire et les éléments terminés.

L'environnement d'exploitation de ce tutoriel : système Windows 10, React version 18.0.0, ordinateur Dell G3.
Comment implémenter Todolist en utilisant React ?
Exemple pratique de démarrage avec React - Implémentation de ToDoList
Résumé :
J'étudie React depuis peu de temps récemment et je comprends un peu les bases de certains développements React Suite à la vidéo pédagogique, je peux La fonction d'un composant ToDoList a été implémentée. Aujourd'hui, j'enregistrerai le processus de création de ce composant pour approfondir mon impression d'apprentissage et servir de référence pour les mêmes débutants front-end.
1. Exemple d'affichage et introduction de la fonction
1.1 Exemple d'affichage
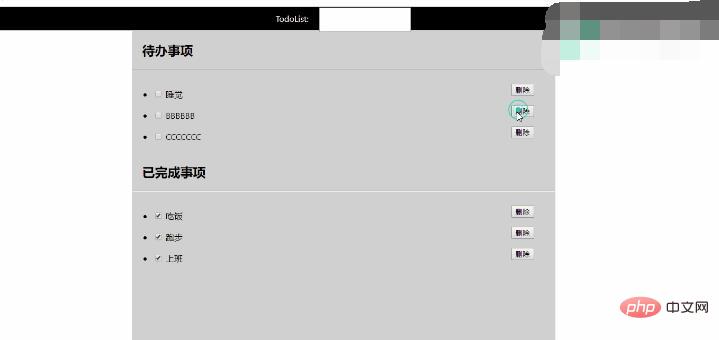
Vidéo 1.1
1.2 Introduction de la fonction
- Ajoutez une tâche, appuyez sur la touche Entrée pour confirmer et effacez la saisie. case en même temps ;
- Passer Si la case est cochée, vous pouvez basculer entre les éléments à faire et les éléments terminés
- Cliquez sur Supprimer pour supprimer des éléments
2. Préparation
2.1 Rappel de configuration de l'environnement
Avant la préparation : Cet article suppose que l'environnement de développement a été configuré, notamment :
- Node.js a été installé
- cnpm a été installé ;
- Les outils d'échafaudage ont été installés ; npm install -g create-react- app / cnpm install -g create-react-app
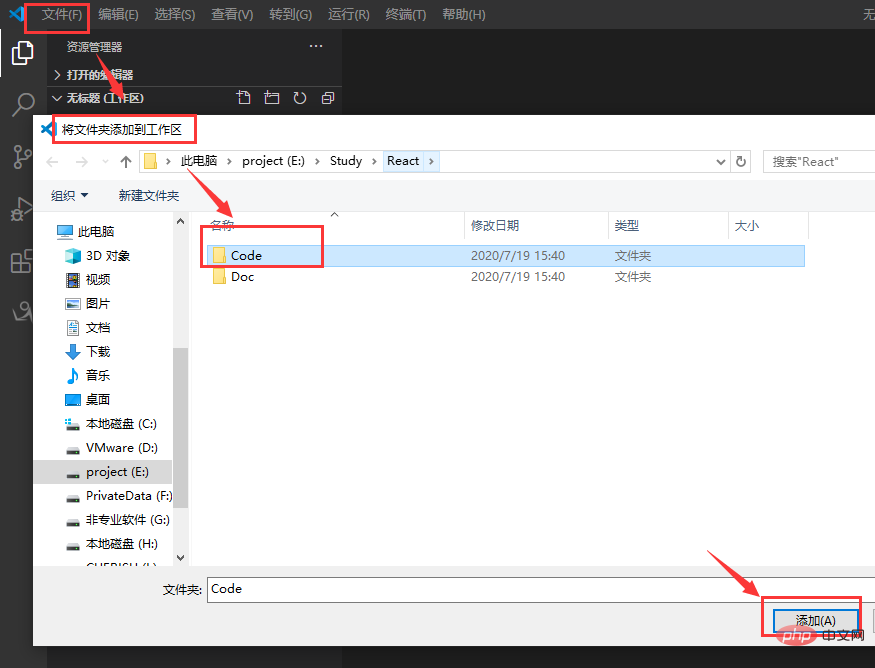 Figure 2.2
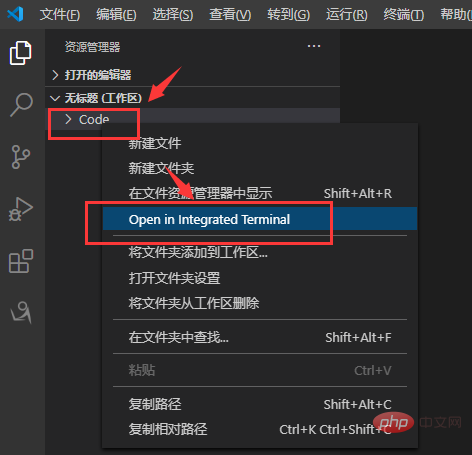
Figure 2.3
4. Générez le projet React comme suit :
 Figure 2.4
Le développement de React implique principalement la manipulation des fichiers dans
src. lieux publics quelques fichiers publics, package.json Ce sont quelques fichiers de configuration et ne seront pas détaillés ici. 2.3 Classification des fichiers
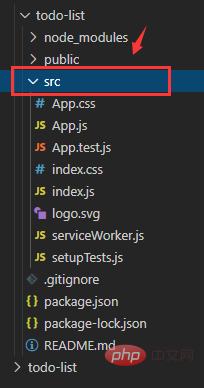 Créez un nouveau dossier de composants dans le répertoire src pour placer les composants que vous créez ;
Créez un nouveau fichier d'actifs dans le répertoire src pour empêcher les ressources statiques telles que les fichiers CSS et les fichiers image ; Comme le montre la figure 2.5 :
Figure 2.5
- 3. Processus de mise en œuvre
- 3.1 Créer un composant ToDoList
ToDoList.jsx
sous le dossiercomponents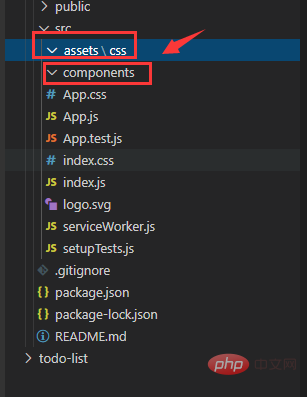 , écrivez. le code suivant, et configurez-le Le cadre de base d'un composant ; le code est le suivant :
//导入React相关依赖
import React from 'react';

//创建一个组件
class ToDoList extends React.Component{
    //构造函数
    constructor(props){
        super(props);
        //this是父组件(类)的一个实例,实例就类似于java里的一个类,创建了这个类型的一个对象,这个对象就是实例
        this.state = {
            //this.state里可以写一些初始化的数据
        }
    }


    //render渲染虚拟DOM
    render(){

        return(
            <div>
                ToDoList
            </div>
        );
    }

}


//输出组件,使得该组件可以被其他组件调用
export default ToDoList;
Les fonctions de chaque partie du composant sont brièvement décrites dans les commentaires. Un composant de base comprend généralement les parties ci-dessus : - import导入的依赖;
- 组件(class XXX extends React,Component);
- 构造函数constructor;
- render函数;
- export输出组件;
3.2 功能实现与解析
1.初始化数据
使用一个数组来保存数据,数组中每个元素为一个对象,该对象包括两个字段:title和checked,tile为字符串类型,checked为布尔类型,用来区分待办(false)和已办(true);
 list:[
                {
                    title:'吃饭',
                    checked:true
                },
                {
                    title:'跑步',
                    checked:false
                },
                {
                    title:'上班',
                    checked:false
                },
                {
                    title:'睡觉',
                    checked:true
                },
       ]
该数组在this.state中初始化:
 constructor(props){
        super(props);
        //this是父组件(类)的一个实例,实例就类似于java里的一个类,创建了这个类型的一个对象,这个对象就是实例
        this.state = {
            //this.state里可以写一些初始化的数据
            list:[
                {
                    title:'吃饭',
                    checked:true
                },
                {
                    title:'跑步',
                    checked:false
                },
                {
                    title:'上班',
                    checked:false
                },
                {
                    title:'睡觉',
                    checked:true
                },
            ],
        }
    }
2.编写页面布局
页面分为顶部的输入框(input)和下面的 待办事项列表 和已办事项列表;在render中的return中编写(jsx);
    render(){

        return(
            <div>
                 <header>TodoList:  <input> </header>

                <h2>待办事项</h2>

                <hr>

                <ul>
                    {/* 多个li,后面会循环输出 */}
                    <li>
                        <input> -- <button>删除</button>
                    </li>
                </ul>


                <h2>已完成事项</h2>

                <hr>
                <ul>
                    {/* 多个li,后面会循环输出 */}
                    <li>
                        <input> -- <button>删除</button>
                    </li>
                </ul>
            </div>
        );
    }
3.挂载到根节点下
在index.js下,引入ToDoList组件
import ToDoList from './components/ToDoList';
然后挂在组件ToDoList
import React from 'react';
import ReactDOM from 'react-dom';
import './index.css';
import App from './App';
import * as serviceWorker from './serviceWorker';
import ToDoList from './components/ToDoList';

ReactDOM.render(
  <react.strictmode>
    {/* 此处是ToDoList组件 */}
    <todolist></todolist>
  </react.strictmode>,
  document.getElementById('root')
);

// If you want your app to work offline and load faster, you can change
// unregister() to register() below. Note this comes with some pitfalls.
// Learn more about service workers: https://bit.ly/CRA-PWA
serviceWorker.unregister();
简陋渲染效果如下:
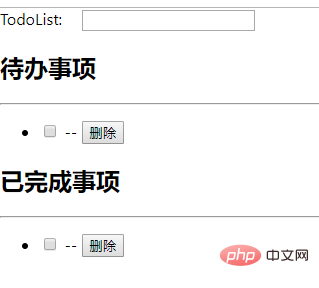
图3.1
3.功能实现
添加待办事项
(1)使用ref属性,获取input输入值:
在input标签上设置属性ref="inputToDo",然后在方法中可以通过 this.refs.inputToDo.value获取输入值;
(2)添加键盘事件,监听输入变化,当输入enter时,添加待办事项;
使用onKeyUp(键盘弹起)/onKeyDown(键盘按下)事件来监听键盘变化。当键盘变化后,触发添加函数,将输入值添加到待办事项中;代码如下:
jsx:
<header>TodoList: <input> </header>
addToDo函数:
    addToDo = (event) => {
        console.log(event.keyCode);
        if(event.keyCode === 13)
        {
            let tempList = this.state.list;
            tempList.push({
                title:this.refs.inputToDo.value,
                checked:false,
            });
            this.setState({
                list:tempList,
            });
            this.refs.inputToDo.value = '';
        }
    }
(3)在constructor中使用bind绑定addToDo,这一步是必须的,否则方法不能执行,所有的方法都需要像这样绑定;
this.addToDo = this.addToDo.bind(this);
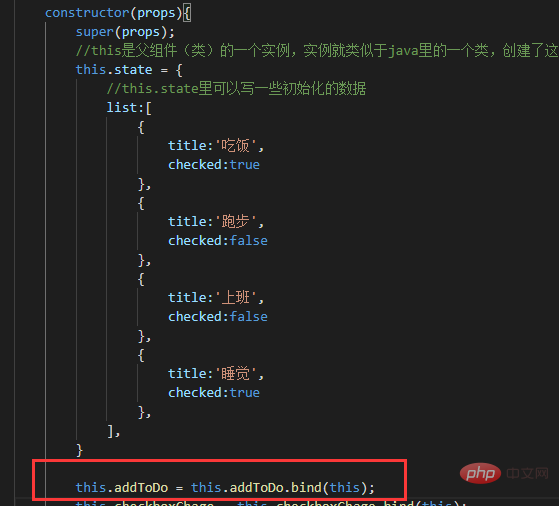
图3.2
效果:
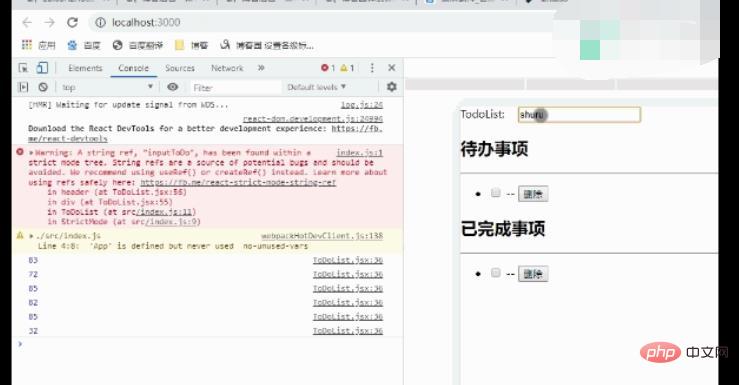
视频3.1
输出待办事项和已办事项
使用map方法,循环遍历数组,输出每组数据;代码如下:
-
{/* 多个li,后面会循环输出 */}
{
this.state.list.map((value,index)=>{
{/*checked为false表示待办*/}
if(!value.checked)
{
return (
- {/* */} <input> {value.title}-- <button>删除</button> ); } }) }
checked = {value.checked}表示复选框是否打勾,onChange事件触发一个改变事项状态的方法,index是数组的索引,该方法在下文实现;
效果:
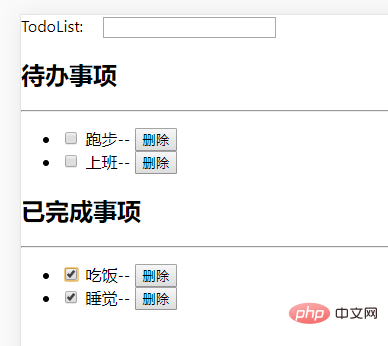
图3.3
待办和已办互相转换
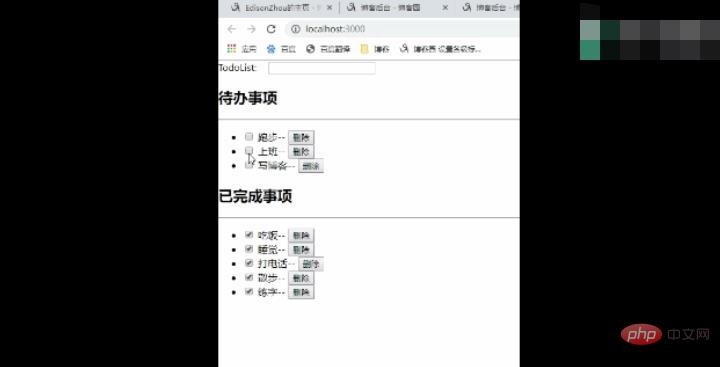
这一步的思路也很简单,其实就是在触发checkbox的onChange事件时,将某一个事项的checked值变为相反的值(true->false/false->true),所以onChange后的方法需要传入数组的索引值,具体实现代码如下:
jsx
<input> {value.title}-- <button>删除</button>checkboxChange
checkboxChange = (index) => {
      let tempList = this.state.list;
      tempList[index].checked = !tempList[index].checked;
      this.setState({
          list:tempList,
     });
}
效果:
视频3.2
删除事项
删除事项比较简单了,思路也是类似的,在button上添加onClick按钮,触发删除事件,传入参数index,然后根据index,使用数组的splice函数,删除某一待办事项。
arrayA.splice(index,n)
该方法第一个参数是数组中的元素位置,第二个参数是从index开始删除多少个元素。
具体实现如下:
jsx
removeToDo
    removeToDo = (index) => {
        let tempList = this.state.list;
        tempList.splice(index,1);
        this.setState({
            list:tempList,
        });
    }
效果:即为开篇展示的效果
3.3 编写样式
样式随便写了一下,不太好看,这里也把代码丢上来吧;
index.css
.list{

  padding: 10px;
}

.list li{

  line-height: 40px;
  margin-left: 30px;
}

.title{

  height: 44px;

  line-height: 44px;

  text-align: center;

  background: #000;

  color:#fff;
}

.title input{

  height: 40px;
}


.container{
  width: 800px;
  height: 1000px;
  margin-left: auto;
  margin-right: auto;
  background-color:  #D0D0D0;
  border: #fff solid 1px;
  border-radius: 5px;
}

.container h2{
  margin-left: 20px;
}

.del-btn {
  float: right;
  margin-right: 30px;
}
引入样式
在ToDoList.jsx中按如下代码引入index.css
import '../assets/index.css';
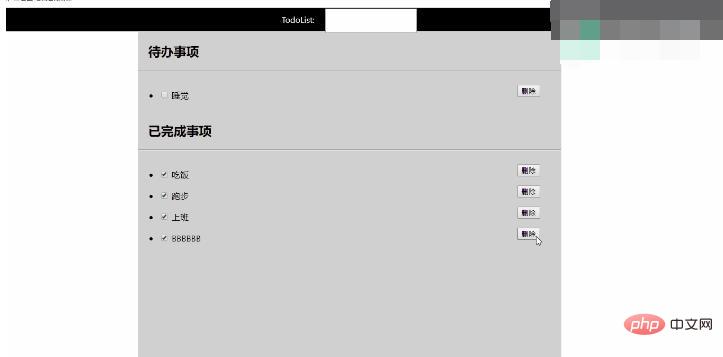
3.4 整体效果
视频3.3:整体效果展示
四、整体代码
- ToDoList.jsx


//导入React相关依赖
import React from 'react';
import '../assets/index.css';
//创建一个组件
class ToDoList extends React.Component{
//构造函数
constructor(props){
super(props);
//this是父组件(类)的一个实例,实例就类似于java里的一个类,创建了这个类型的一个对象,这个对象就是实例
this.state = {
//this.state里可以写一些初始化的数据
list:[
{
title:'吃饭',
checked:true
},
{
title:'跑步',
checked:false
},
{
title:'上班',
checked:false
},
{
title:'睡觉',
checked:true
},
],
}
this.addToDo = this.addToDo.bind(this);
this.checkboxChange = this.checkboxChange.bind(this);
}
addToDo = (event) => {
console.log(event.keyCode);
if(event.keyCode === 13)
{
let tempList = this.state.list;
tempList.push({
title:this.refs.inputToDo.value,
checked:false,
});
this.setState({
list:tempList,
});
this.refs.inputToDo.value = '';
}
}
checkboxChange = (index) => {
let tempList = this.state.list;
tempList[index].checked = !tempList[index].checked;
this.setState({
list:tempList,
});
}
removeToDo = (index) => {
let tempList = this.state.list;
tempList.splice(index,1);
this.setState({
list:tempList,
});
}
//render渲染虚拟DOM
render(){
return(
<header>TodoList: <input> </header>
待办事项
{/* 多个li,后面会循环输出 */}
{
this.state.list.map((value,index)=>{
if(!value.checked)
{
return (
-
{value.title}
);
}
})
}
已完成事项
{/* 多个li,后面会循环输出 */}
{
this.state.list.map((value,index)=>{
if(value.checked)
{
return (
-
{value.title}
);
}
})
}
);
}
}
//输出组件,使得该组件可以被其他组件调用
export default ToDoList;index.css
.red{

  color:red;
}


.list{

  padding: 10px;
}

.list li{

  line-height: 40px;
  margin-left: 30px;
}

.title{

  height: 44px;

  line-height: 44px;

  text-align: center;

  background: #000;

  color:#fff;
}

.title input{

  height: 40px;
}


.container{
  width: 800px;
  height: 1000px;
  margin-left: auto;
  margin-right: auto;
  background-color:  #D0D0D0;
  border: #fff solid 1px;
  border-radius: 5px;
}

.container h2{
  margin-left: 20px;
}

.del-btn {
  float: right;
  margin-right: 30px;
}
index.js
import React from 'react';
import ReactDOM from 'react-dom';
import './index.css';
import App from './App';
import * as serviceWorker from './serviceWorker';
import ToDoList from './components/ToDoList';

ReactDOM.render(
  <react.strictmode>
    {/* <app></app> */}
    <todolist></todolist>
  </react.strictmode>,
  document.getElementById('root')
);

// If you want your app to work offline and load faster, you can change
// unregister() to register() below. Note this comes with some pitfalls.
// Learn more about service workers: https://bit.ly/CRA-PWA
serviceWorker.unregister();
五、结语
结语就算了吧,好困,睡了。
写博客费时间啊,大家要是看到有啥不对的地方,麻烦联系我修改哈,我水平太有限了,谢谢大佬们了。
推荐学习:《react视频教程》
Ce qui précède est le contenu détaillé de. pour plus d'informations, suivez d'autres articles connexes sur le site Web de PHP en chinois!

