Maison >développement back-end >Tutoriel Python >Explication détaillée de la méthode de synthèse de photos Python
Explication détaillée de la méthode de synthèse de photos Python
- coldplay.xixiavant
- 2020-08-29 16:26:123833parcourir

[Recommandations d'apprentissage associées : Tutoriel Python]
Annuaire d'articles
- Avant-propos
- Github
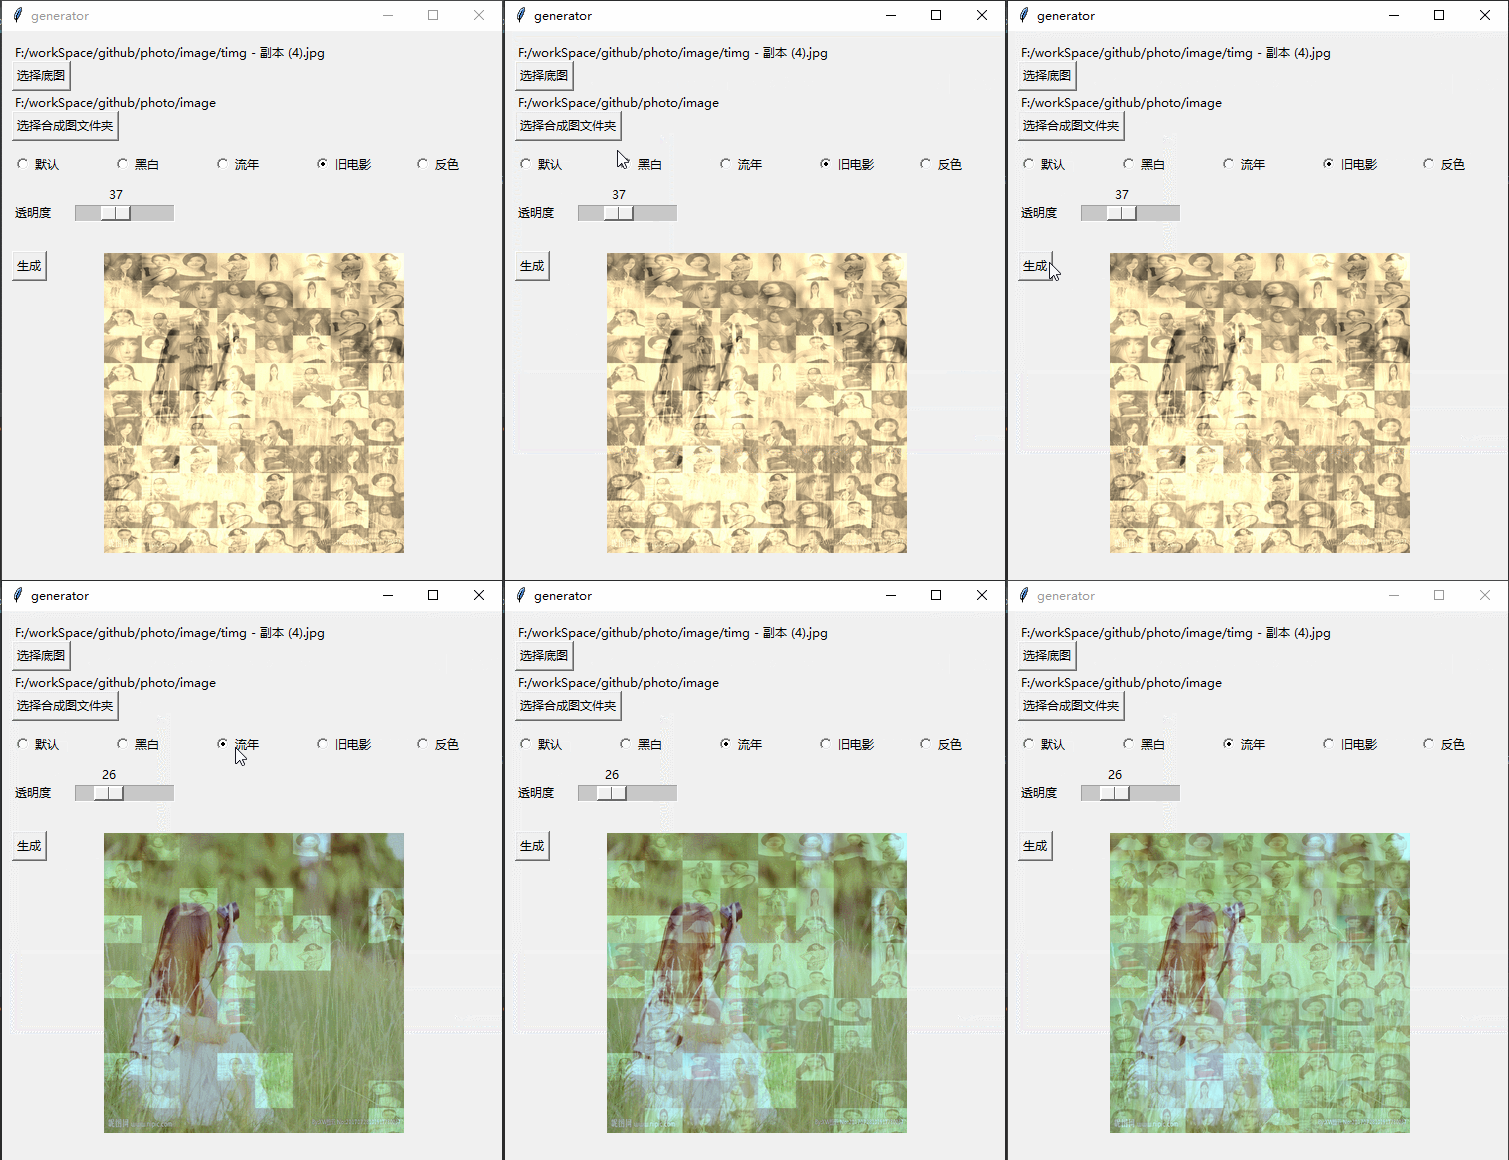
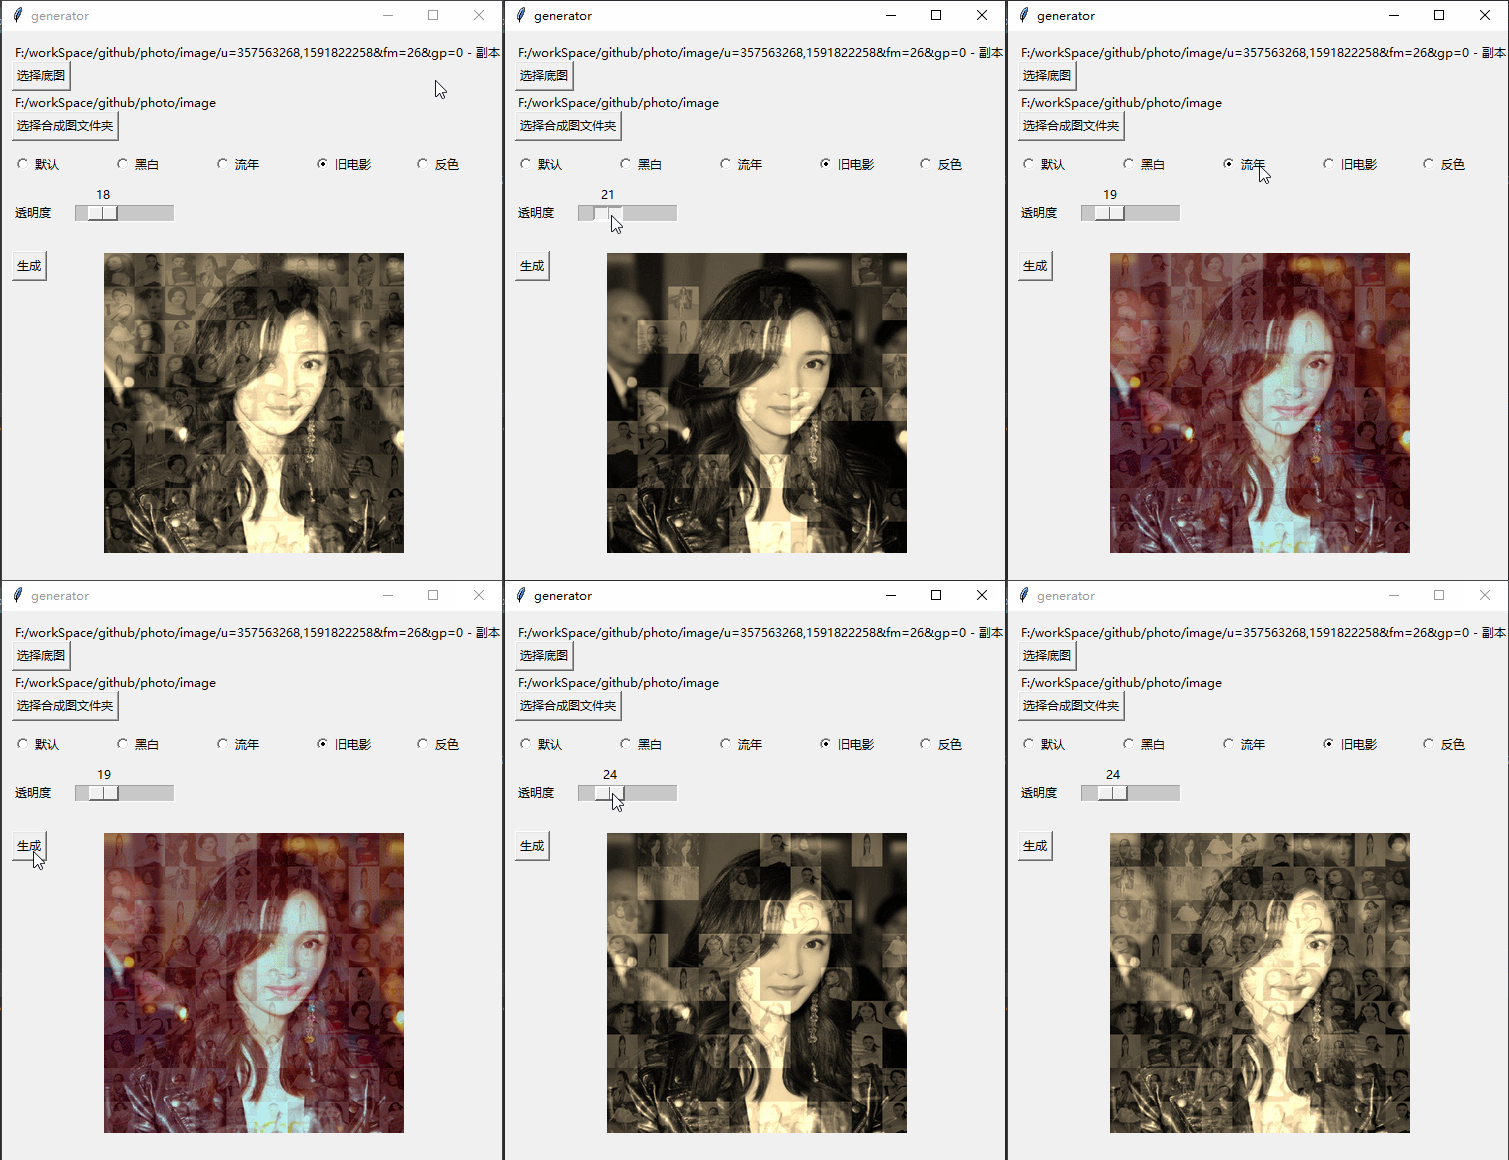
- Effet
- Processus de mise en œuvre
- Code global
Préface
En regardant un film, j'ai découvert une fonction de mur de photos. J'ai trouvé que c'était amusant de générer des photos de cette manière, alors j'ai commencé à le faire avec. Python et je l'ai trouvé utile. Ce serait peut-être une bonne idée de prendre une photo en souvenir.
P : Plus tard, j'ai appris que la fonction que je veux faire s'appelle le puzzle de montage, donc je garderai ce blog en mémoire pour l'instant, je jetterai un œil à l'algorithme du puzzle de montage quand j'aurai le temps
Githubhttps://github.com/jiandi1027/photo.gitEffet

Y et créez Par exemple, lorsqu'il y a 5 photos, vous ne pouvez prendre que 4 photos de 22) # 打开图片
base = Image.open(baseImgPath)
base = base.convert('RGBA')
# 获取图片文件夹图片并打乱顺序
files = glob.glob(imagesPath + '/*.*')
random.shuffle(files)
# 图片数量
num = len(files)
# 底图大小
x = base.size[0]
y = base.size[1]
# 每张图片数量 这个公式是为了xNum * yNum 的总图片数量<num又成比例的最大整数
yNum = int((num / (y / x)) ** 0.5)
if yNum == 0:
yNum = 1
xNum = int(num / yNum)
# 图片大小 因为像素没有小数点 为防止黑边所以+1
xSize = int(x / xNum) + 1
ySize = int(y / yNum) + 1
 2 Parcourez les images du dossier et remplissez-les afin de générer l'image composite finale
for file in files:
        fromImage = Image.open(file)
        i = int(num % xNum)
        j = int(num / xNum)
        out = fromImage.resize((xSize, ySize), Image.ANTIALIAS).convert('RGBA')
        toImage.paste(out, (i * xSize, j * ySize))
        toImage = toImage.convert('RGBA')
        img = Image.blend(base, toImage, 0.3)
        # 显示图片
        photo = ImageTk.PhotoImage(img)
        showLabel.config(image=photo)
        showLabel.image = photo
        if num < xNum * yNum:
            num = num + 1
3. Enregistrez l'image après générationtoImage.save('generator.png')
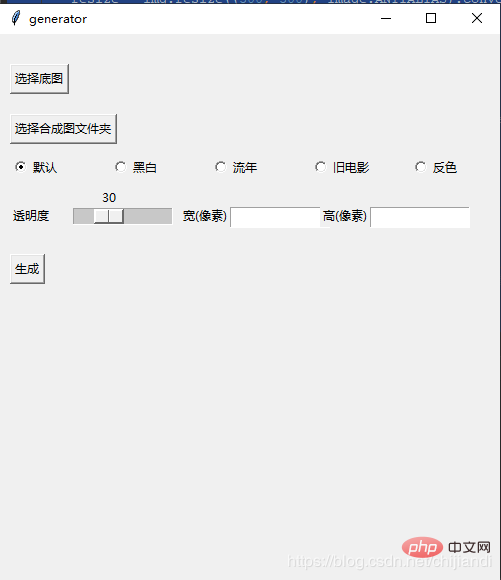
img.save("final.png") 4. . Établir une interface visuelle
5. Pyinstaller génère un fichier exécutable exe
Installez le module pyinstaller et exécutez la commande pour générer le fichier exe 
pyinstaller -F -w test.py (-w就是取消窗口)
Code global
Je n'ai pas encore appris la syntaxe et les spécifications de conception de Python, donc les spécifications du code et la réutilisation du code peuvent faire un peu défaut. Cet article de blog est principalement un enregistrement d'idées et du processus global.
Par la suite, certains effets spéciaux ont été optimisés, comme l'utilisation de positions aléatoires pour les images composites, l'ajout d'effets spéciaux d'affichage en noir et blanc, éphémères et autres, et la transparence facultative, etc.
import PIL.Image as Image
import glob
import random
import tkinter.filedialog
from tkinter.filedialog import askdirectory, Label, Button, Radiobutton, Entry
import threading
import numpy as np
from PIL import ImageTk
alpha = 0.3
imagesPath = ''
# 滑动条回调 修改透明度
def resize(ev=None):
global alpha
alpha = scale.get() / 100
# 黑白
def blackWithe(image):
# r,g,b = r*0.299+g*0.587+b*0.114
im = np.asarray(image.convert('RGB'))
trans = np.array([[0.299, 0.587, 0.114], [0.299, 0.587, 0.114], [0.299, 0.587, 0.114]]).transpose()
im = np.dot(im, trans)
return Image.fromarray(np.array(im).astype('uint8'))
# 流年
def fleeting(image, params=12):
im = np.asarray(image.convert('RGB'))
im1 = np.sqrt(im * [1.0, 0.0, 0.0]) * params
im2 = im * [0.0, 1.0, 1.0]
im = im1 + im2
return Image.fromarray(np.array(im).astype('uint8'))
# 旧电影
def oldFilm(image):
im = np.asarray(image.convert('RGB'))
# r=r*0.393+g*0.769+b*0.189 g=r*0.349+g*0.686+b*0.168 b=r*0.272+g*0.534b*0.131
trans = np.array([[0.393, 0.769, 0.189], [0.349, 0.686, 0.168], [0.272, 0.534, 0.131]]).transpose()
# clip 超过255的颜色置为255
im = np.dot(im, trans).clip(max=255)
return Image.fromarray(np.array(im).astype('uint8'))
# 反色
def reverse(image):
im = 255 - np.asarray(image.convert('RGB'))
return Image.fromarray(np.array(im).astype('uint8'))
def chooseBaseImagePath():
name = tkinter.filedialog.askopenfilename()
if name != '':
global baseImgPath
baseImgPath = name
baseImageLabel.config(text=name)
baseImg = Image.open(baseImgPath)
widthEntry.delete(0, tkinter.END)
heightEntry.delete(0, tkinter.END)
widthEntry.insert(0, baseImg.size[0])
heightEntry.insert(0, baseImg.size[1])
else:
baseImageLabel.config(text="您没有选择任何文件")
def chooseImagesPath():
name = askdirectory()
if name != '':
global imagesPath
imagesPath = name
ImagesLabel.config(text=name)
else:
ImagesLabel.config(text="您没有选择任何文件")
def thread_it(func, *args):
# 创建
t = threading.Thread(target=func, args=args)
# 守护 !!!
t.setDaemon(True)
# 启动
t.start()
def test():
MyThread(1, "Thread-1", 1).start()
baseImgPath = ''
def generator():
baseImg = Image.open(baseImgPath)
baseImg = baseImg.convert('RGBA')
files = glob.glob(imagesPath + '/*.*') # 获取图片
random.shuffle(files)
num = len(files)
# 模板图片大小
x = baseImg.size[0]
y = baseImg.size[1]
# 每张图片数量 这个公式是为了xNum * yNum 的总图片数量<num又成比例的最大整数
yNum = int((num / (y / x)) ** 0.5)
if yNum == 0:
yNum = 1
xNum = int(num / yNum)
# 图片大小 因为像素没有小数点 为防止黑边所以+1
xSize = int(x / xNum) + 1
ySize = int(y / yNum) + 1
# 生成数量的随机列表 用于随机位置合成图片
l = [n for n in range(0, xNum * yNum)]
random.shuffle(l)
toImage = Image.new('RGB', (x, y))
num = 1
for file in files:
if num <= xNum * yNum:
num = num + 1
else:
break
fromImage = Image.open(file)
temp = l.pop()
i = int(temp % xNum)
j = int(temp / xNum)
out = fromImage.resize((xSize, ySize), Image.ANTIALIAS).convert('RGBA')
toImage.paste(out, (i * xSize, j * ySize))
toImage = toImage.convert('RGBA')
img = Image.blend(baseImg, toImage, alpha)
# 特效 但是会读取像素会降低效率
choose = v.get()
if choose == 1:
img = blackWithe(img)
elif choose == 2:
img = fleeting(img)
elif choose == 3:
img = oldFilm(img)
elif choose == 4:
img = reverse(img)
resize = img.resize((300, 300), Image.ANTIALIAS).convert('RGBA')
# 显示图片
photo = ImageTk.PhotoImage(resize)
showLabel.config(image=photo)
showLabel.image = photo
toImage.save('generator.png')
img = img.resize((int(widthEntry.get()),int(heightEntry.get())), Image.ANTIALIAS).convert('RGBA')
img.save("final.png")
resize.save("resize.png")
class MyThread(threading.Thread): # 继承父类threading.Thread
def __init__(self, threadID, name, counter):
threading.Thread.__init__(self)
self.threadID = threadID
self.name = name
self.counter = counter
def run(self): # 把要执行的代码写到run函数里面 线程在创建后会直接运行run函数
generator()
root = tkinter.Tk()
root.title('generator')
root.geometry('500x550')
baseImageLabel = Label(root, text='')
baseImageLabel.place(x=10, y=10)
baseImageBtn = Button(root, text="选择底图", command=chooseBaseImagePath).place(x=10, y=30)
ImagesLabel = Label(root, text='')
ImagesLabel.place(x=10, y=60)
ImagesBtn = Button(root, text="选择合成图文件夹", command=chooseImagesPath).place(x=10, y=80)
v = tkinter.IntVar()
v.set(0)
Radiobutton(root, variable=v, text='默认', value=0, ).place(x=10, y=120)
Radiobutton(root, variable=v, text='黑白', value=1, ).place(x=110, y=120)
Radiobutton(root, variable=v, text='流年', value=2, ).place(x=210, y=120)
Radiobutton(root, variable=v, text='旧电影', value=3, ).place(x=310, y=120)
Radiobutton(root, variable=v, text='反色', value=4, ).place(x=410, y=120)
scaleLabel = Label(root, text='透明度').place(x=10, y=170)
scale = tkinter.Scale(root, from_=0, to=100, orient=tkinter.HORIZONTAL, command=resize)
scale.set(30) # 设置初始值
scale.pack(fill=tkinter.X, expand=1)
scale.place(x=70, y=150)
Label(root, text='宽(像素)').place(x=180, y=170)
widthEntry = Entry(root, bd=1)
widthEntry.place(x=230, y=173, width=100)
Label(root, text='高(像素)').place(x=320, y=170)
heightEntry = Entry(root, bd=1)
heightEntry.place(x=370, y=173, width=100)
generatorBtn = Button(root, text="生成", command=test).place(x=10, y=220)
showLabel = Label(root)
showLabel.place(x=100, y=220)
root.mainloop()
Si vous souhaitez en savoir plus sur la programmation, faites attention à la rubrique
!
Ce qui précède est le contenu détaillé de. pour plus d'informations, suivez d'autres articles connexes sur le site Web de PHP en chinois!

