Maison >interface Web >tutoriel CSS >Comment obtenir un effet d'empilement d'images en CSS
Comment obtenir un effet d'empilement d'images en CSS
- 王林avant
- 2020-03-12 17:57:053975parcourir

1. Index initial.html
Afin de créer la première photo, qui est celle du haut. Il suffit d'ajouter un div contenant l'img de la photo. C'est tout, le reste des effets est obtenu via CSS. Assurez-vous que la classe du div est stackone.
<!DOCTYPE html>
<html>
 <head>
  <meta charset="UTF-8" />
  <meta name="viewport" content="width=device-width, initial-scale=1.0" />
  <meta http-equiv="X-UA-Compatible" content="ie=edge" />
  <title>Photo Stack</title>
  <style>
    * {
      margin: 0;
      padding: 0;
    }
    html,
    body {
      width: 100%;
      height: 100%;
      overflow: hidden;
    }
    .stackone {
      --img-width: 480px;
      --img-height: 320px;
      border: 6px solid #fff;
      float: left;
      height:var(--img-height);
      width: var(--img-width);
      margin: 50px;
      position: relative;
      -webkit-box-shadow: 2px 2px 5px rgba(0, 0, 0, 0.3);
      -moz-box-shadow: 2px 2px 5px rgba(0, 0, 0, 0.3);
      box-shadow: 2px 2px 5px rgba(0, 0, 0, 0.3);
    }
    .stackone img {
      width: var(--img-width);
    }
  </style>
 </head>
 <body>
  <div>
   <img  src="/static/imghwm/default1.png"  data-src="../../../assets/image/landscape-4378548_960_720.jpg"  class="lazy"   / alt="Comment obtenir un effet d'empilement d'images en CSS" >
  </div>
 </body>
</html>
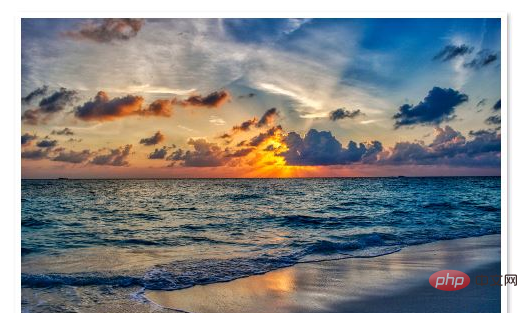
L'effet initial est le suivant :

(Tutoriel recommandé : Tutoriel d'introduction CSS)
2 . Le premier pseudo-élément
Maintenant, nous ajoutons une couche négative. L'effet souhaité est que l'image du bas semble se trouver sous la photo du haut. On peut utiliser la pseudo-classe CSS : before pour y parvenir.
.stackone::before {
  content: "";
  height:var(--img-height);
  width: var(--img-width);
  background: #eff4de;
  border: 6px solid #fff;
  -webkit-box-shadow: 2px 2px 5px rgba(0, 0, 0, 0.3);
  -moz-box-shadow: 2px 2px 5px rgba(0, 0, 0, 0.3);
  box-shadow: 2px 2px 5px rgba(0, 0, 0, 0.3);
}
3. Améliorer avant
Ajoutez un peu de positionnement à : avant, puis définissez z-index pour le mettre derrière.
.stackone::before {
  content: "";
  height:var(--img-height);
  width: var(--img-width);
  background: #eff4de;
  border: 6px solid #fff;

  position: absolute;
  z-index: -1;
  top: 0px;
  left: -10px;

  -webkit-box-shadow: 2px 2px 5px rgba(0, 0, 0, 0.3);
  -moz-box-shadow: 2px 2px 5px rgba(0, 0, 0, 0.3);
  box-shadow: 2px 2px 5px rgba(0, 0, 0, 0.3);

  -webkit-transform: rotate(-5deg);
  -moz-transform: rotate(-5deg);
  -o-transform: rotate(-5deg);
  -ms-transform: rotate(-5deg);
  transform: rotate(-5deg);
}
4. Le deuxième pseudo-élément
.stackone::after {
  content: "";
  height:var(--img-height);
  width: var(--img-width);
  background: lightblue;
  border: 6px solid #fff;
  position: absolute;
  z-index: -1;
  top: 5px;
  left: 0px;
  -webkit-box-shadow: 2px 2px 5px rgba(0, 0, 0, 0.3);
  -moz-box-shadow: 2px 2px 5px rgba(0, 0, 0, 0.3);
  box-shadow: 2px 2px 5px rgba(0, 0, 0, 0.3);
  -webkit-transform: rotate(4deg);
  -moz-transform: rotate(4deg);
  -o-transform: rotate(4deg);
  -ms-transform: rotate(4deg);
  transform: rotate(4deg);
}
Image complète :

Tutoriels vidéo associés recommandés : css Tutoriel vidéo
Ce qui précède est le contenu détaillé de. pour plus d'informations, suivez d'autres articles connexes sur le site Web de PHP en chinois!

