Maison >interface Web >js tutoriel >Configuration de l'installation de Node.js
Configuration de l'installation de Node.js
- PHPzavant
- 2019-09-23 11:53:102811parcourir
本章节我们将向大家介绍在 Windows 和 Linux 上安装 Node.js 的方法。
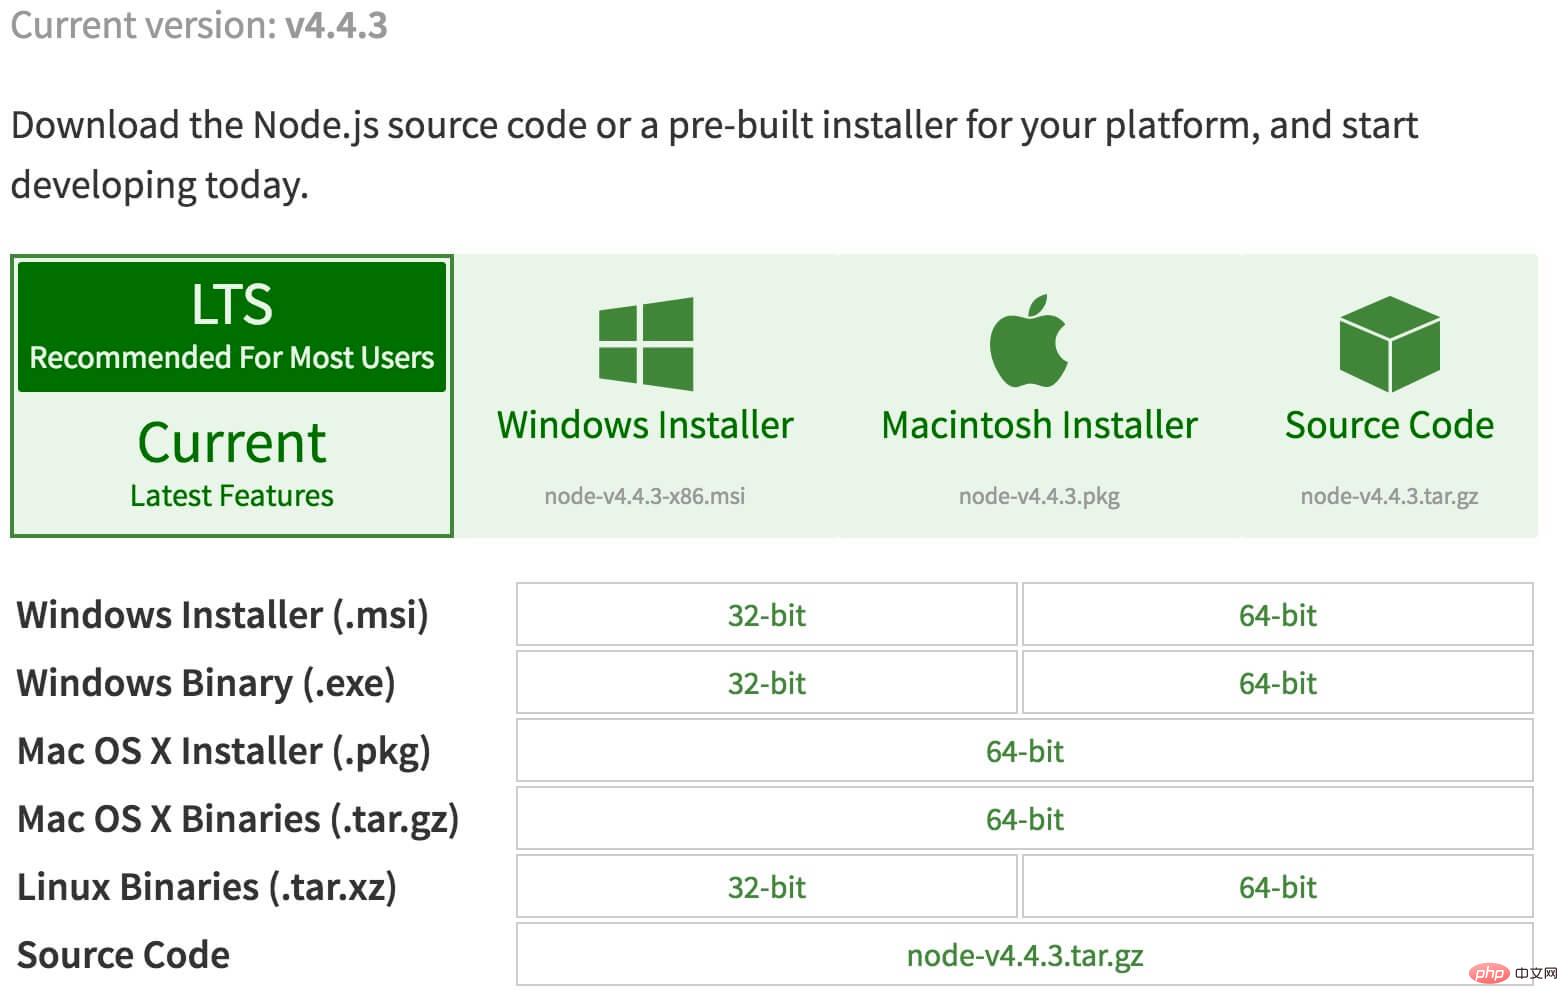
本安装教程以 Node.js v4.4.3 LTS(长期支持版本)版本为例。
Node.js 安装包及源码下载地址为:https://nodejs.org/en/download/。

你可以根据不同平台系统选择你需要的 Node.js 安装包。
Node.js 历史版本下载地址:https://nodejs.org/dist/
注意:Linux 上安装 Node.js 需要安装 Python 2.6 或 2.7 ,不建议安装 Python 3.0 以上版本。
Windows 上安装 Node.js
你可以采用以下两种方式来安装。
1、Windows 安装包(.msi)
32 位安装包下载地址 : https://nodejs.org/dist/v4.4.3/node-v4.4.3-x86.msi
64 位安装包下载地址 : https://nodejs.org/dist/v4.4.3/node-v4.4.3-x64.msi
本文实例以 v0.10.26 版本为例,其他版本类似, 安装步骤:
步骤 1 : 双击下载后的安装包 v0.10.26,如下所示:

步骤 2 : 点击以上的Run(运行),将出现如下界面:

步骤 3 : 勾选接受协议选项,点击 next(下一步) 按钮 :

步骤 4 : Node.js默认安装目录为 "C:\Program Files\nodejs\" , 你可以修改目录,并点击 next(下一步):

步骤 5 : 点击树形图标来选择你需要的安装模式 , 然后点击下一步 next(下一步)

步骤 6 :点击 Install(安装) 开始安装Node.js。你也可以点击 Back(返回)来修改先前的配置。 然后并点击 next(下一步):

安装过程:

点击 Finish(完成)按钮退出安装向导。

检测PATH环境变量是否配置了Node.js,点击开始=》运行=》输入"cmd" => 输入命令"path",输出如下结果:
PATH=C:\oraclexe\app\oracle\product\10.2.0\server\bin;C:\Windows\system32;
C:\Windows;C:\Windows\System32\Wbem;C:\Windows\System32\WindowsPowerShell\v1.0\;
c:\python32\python;C:\MinGW\bin;C:\Program Files\GTK2-Runtime\lib;
C:\Program Files\MySQL\MySQL Server 5.5\bin;C:\Program Files\nodejs\;
C:\Users\rg\AppData\Roaming\npm
我们可以看到环境变量中已经包含了C:\Program Files\nodejs\
检查Node.js版本

2、Windows 二进制文件 (.exe)安装
32 位安装包下载地址 : http://nodejs.org/dist/v0.10.26/node.exe
64 位安装包下载地址 : http://nodejs.org/dist/v0.10.26/x64/node.exe
安装步骤
步骤 1 : 双击下载的安装包 Node.exe ,将出现如下界面 :

点击 Run(运行)按钮将出现命令行窗口:

版本测试
进入 node.exe 所在的目录,如下所示:

如果你获得以上输出结果,说明你已经成功安装了Node.js。
Linux 上安装 Node.js
直接使用已编译好的包
Node 官网已经把 linux 下载版本更改为已编译好的版本了,我们可以直接下载解压后使用:
# wget https://nodejs.org/dist/v10.9.0/node-v10.9.0-linux-x64.tar.xz    // 下载
# tar xf  node-v10.9.0-linux-x64.tar.xz       // 解压
# cd node-v10.9.0-linux-x64/                  // 进入解压目录
# ./bin/node -v                               // 执行node命令 查看版本
v10.9.0
解压文件的 bin 目录底下包含了 node、npm 等命令,我们可以使用 ln 命令来设置软连接:
ln -s /usr/software/nodejs/bin/npm   /usr/local/bin/
ln -s /usr/software/nodejs/bin/node   /usr/local/bin/
Ubuntu 源码安装 Node.js
以下部分我们将介绍在 Ubuntu Linux 下使用源码安装 Node.js 。 其他的 Linux 系统,如 Centos 等类似如下安装步骤。
在 Github 上获取 Node.js 源码:
$ sudo git clone https://github.com/nodejs/node.git
Cloning into 'node'...
修改目录权限:
$ sudo chmod -R 755 node
使用 ./configure 创建编译文件,并按照:
$ cd node
$ sudo ./configure
$ sudo make
$ sudo make install
查看 node 版本:
$ node --version
v0.10.25
Ubuntu apt-get命令安装
命令格式如下:
sudo apt-get install nodejs
sudo apt-get install npm
CentOS 下源码安装 Node.js
1、下载源码,你需要在https://nodejs.org/en/download/下载最新的Nodejs版本,本文以v0.10.24为例:
cd /usr/local/src/
wget http://nodejs.org/dist/v0.10.24/node-v0.10.24.tar.gz
2、解压源码
tar zxvf node-v0.10.24.tar.gz
3、 编译安装
cd node-v0.10.24
./configure --prefix=/usr/local/node/0.10.24
make
make install
4、 配置NODE_HOME,进入profile编辑环境变量
vim /etc/profile
设置 nodejs 环境变量,在 export PATH USER LOGNAME MAIL HOSTNAME HISTSIZE HISTCONTROL 一行的上面添加如下内容:
#set for nodejs
export NODE_HOME=/usr/local/node/0.10.24
export PATH=$NODE_HOME/bin:$PATH
:wq保存并退出,编译/etc/profile 使配置生效
source /etc/profile
验证是否安装配置成功
node -v
输出 v0.10.24 表示配置成功
npm模块安装路径
/usr/local/node/0.10.24/lib/node_modules/
注:Nodejs 官网提供了编译好的 Linux 二进制包,你也可以下载下来直接应用。
Mac OS 上安装
你可以通过以下两种方式在 Mac OS 上来安装 node:
1、在官方下载网站下载 pkg 安装包,直接点击安装即可。
2、使用 brew 命令来安装:
brew install node
Ce qui précède est le contenu détaillé de. pour plus d'informations, suivez d'autres articles connexes sur le site Web de PHP en chinois!

