Maison >Opération et maintenance >Apache >Comment installer le serveur Apache sous Linux
Comment installer le serveur Apache sous Linux
- 步履不停original
- 2019-06-28 15:24:1113454parcourir

Méthode d'installation du package compressé
1. Téléchargez httpd-2.4.29.tar.gz
2. Téléchargez sur server/usr/local/software
tar -zxvf httpd-2.4.29.tar.gz
./configure --prefix=/usr/local/apache2/ # 设置apache安装目录
Si Apr n'a pas été installé, une erreur sera signalée :
checking for APR... no
configure: error: APR not found.  Please read the documentation.
3. premier téléchargement apr- 1.6.3.tar.gz
4. Télécharger sur serveur/usr/local/software
tar -zxvf apr-1.6.3.tar.gz
cd apr-1.6.3
.configure
make
make install
Une erreur sera à nouveau signalée :
checking for APR-util... no
configure: error: APR-util not found.  Please read the documentation.
5. . Téléchargez apr-util-1.6 .1.tar.gz
6. Téléchargez sur server/usr/local/software
tar -zxvf apr-util-1.6.1.tar.gz
cd apr-util-1.6.1
./configure --prefix=/usr/local/apr-util/ --with-apr=/usr/local/apr
À ce moment, une erreur sera signalée :
xml/apr_xml.c:35:19: 致命错误:expat.h:没有那个文件或目录
 #include <expat.h>
                   ^
编译中断。
make: *** [xml/apr_xml.lo] 错误 1
7. On suppose qu'expat pourrait manquer la bibliothèque de développement
yum install expat-devel # 中间会让你输入y
./configure --prefix=/usr/local/apr-util/ --with-apr=/usr/local/apr
make # 成功!
make install
8. À ce stade, revenez à l'installation d'Apache. Vous devez non seulement spécifier le chemin d'apr, mais également le chemin d'apache. apr-util
./configure --prefix=/usr/local/apache2/ --with-apr=/usr/local/apr/ --with-apr-util=/usr/local/apr-util/
Signale toujours des erreurs, de nombreuses personnes peuvent venir ici. Il s'est écrasé, mais cette erreur est similaire à celle rencontrée avant
checking for pcre-config... false
configure: error: pcre-config for libpcre not found. PCRE is required and available from http://pcre.org/
Télécharger pcre-8.41.tar.gz.
10. Télécharger sur server/usr/local/software
tar -zxvf pcre-8.41.tar.gz
./configure
a encore signalé une erreur, je vous promets que c'est la dernière fois
checking windows.h usability... no
checking windows.h presence... no
checking for windows.h... no
configure: error: You need a C++ compiler for C++ support.
Installez l'environnement C++
. 🎜>yum install -y gcc gcc-c++ # 错了那么多次,别忘了现在的位置,接下来还是要安装pcre ./configure make make install
11. D'accord, ça a été un grand cercle, et la prochaine étape est de l'installer sur Apache
cd ..
cd apache
./configure --prefix=/usr/local/apache2/  --with-apr=/usr/local/apr/ --with-apr-util=/usr/local/apr-util/
make
make install
Comme c'est misérable ! Lors de la dernière étape, une autre erreur a été signalée :
/usr/local/apr-util//lib/libaprutil-1.so: undefined reference to `XML_GetErrorCode'
/usr/local/apr-util//lib/libaprutil-1.so: undefined reference to `XML_SetEntityDeclHandler'
/usr/local/apr-util//lib/libaprutil-1.so: undefined reference to `XML_ParserCre
collect2: error: ld returned 1 exit status
make[2]: *** [htpasswd] 错误 1
make[2]: Leaving directory `/usr/local/software/apache/support'
make[1]: *** [all-recursive] 错误 1
make[1]: Leaving directory `/usr/local/software/apache/support'
Je n'avais jamais vu ce genre d'erreur auparavant, j'ai donc cherché en ligne et la réponse a été : la version apr est trop élevée
12 ; . J'ai donc téléchargé apr-util- 1.5 http://archive.apache.org/dist/apr/apr-util-1.5.2.tar.gz
13. software
tar -zxvf apr-util-1.5.2.tar.gz
cd apr-util-1.5.2
./configure --prefix=/usr/local/apr-util-1.5/ --with-apr=/usr/local/apr
make
make install
14. Répétez l'étape 11. La seule différence est que la configuration spécifie désormais : apr-util-1.5 C'est très important ! ! !
cd ..
cd apache
./configure --prefix=/usr/local/apache2/  --with-apr=/usr/local/apr/ --with-apr-util=/usr/local/apr-util-1.5/
make # make时间会比较长
make install
Fin parfaite :
Installing configuration files
mkdir /usr/local/apache2/conf
mkdir /usr/local/apache2/conf/extra
mkdir /usr/local/apache2/conf/original
mkdir /usr/local/apache2/conf/original/extra
Installing HTML documents
mkdir /usr/local/apache2/htdocs
Installing error documents
mkdir /usr/local/apache2/error
Installing icons
mkdir /usr/local/apache2/icons
mkdir /usr/local/apache2/logs
Installing CGIs
mkdir /usr/local/apache2/cgi-bin
Installing header files
mkdir /usr/local/apache2/include
Installing build system files
mkdir /usr/local/apache2/build
Installing man pages and online manual
mkdir /usr/local/apache2/man
mkdir /usr/local/apache2/man/man1
mkdir /usr/local/apache2/man/man8
mkdir /usr/local/apache2/manual
make[1]: Leaving directory `/usr/local/software/apache'
15. Entrez l'emplacement du fichier de configuration : /usr/local/apache2/conf
cp httpd.conf httpd.conf.bak    # 备份配置文件
vim httpd.conf
# 放掉191行的注释,修改为:
ServerName [你的IP]:80
:wq
16. Démarrez Apache
/usr/local/apache2/bin/apachectl start
# 或者
/usr/local/apache2//bin/httpd -k start
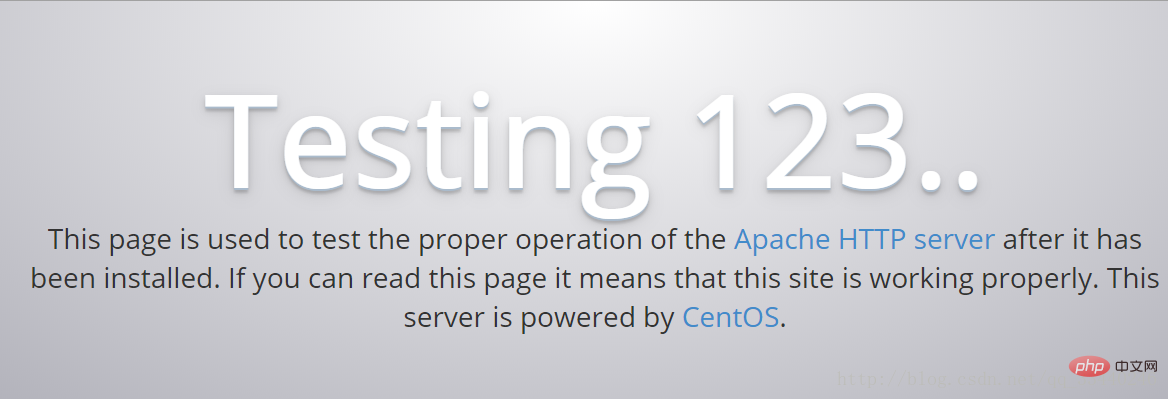
Désactivez le pare-feu, saisissez l'IP du serveur dans la barre d'adresse du navigateur et la page Web apparaîtra : Ça fonctionne 17 Fermez Apache
ps -ef|grep apache
/usr/local/apache2/bin/apachectl stop
# 或者
/usr/local/apache2//bin/httpd -k stop
# 没错,bin前面就是//
Cette méthode d'installation de fichier originale l'est également ! compliqué. En fait, il existe une autre façon d’installer le service Apache. Je ne sais pas si elle est en conflit avec mon installation précédente, je vais l’essayer aujourd’hui.
Méthode d'installation de la source yum
1. Installation de la source yum (nécessite un téléchargement sur Internet)首先关闭apache服务 yum install httpd # 中间过程中输入:yRésultat :
Installé en tant que dépendance :
  apr.x86_64 0:1.4.8-3.el7_4.1
  apr-util.x86_64 0:1.5.2-6.el7
  httpd-tools.x86_64 0:2.4.6-67.el7.centos.6
  mailcap.noarch 0:2.1.41-2.el7
完毕!
2. L'emplacement d'installation de yum est : /etc/httpd/conf Après l'avoir entré, j'ai d'abord sauvegardé le fichier de configuration. L'emplacement modifié est différent de. avant, à la ligne 95. Pour référence seulement
cd /etc/httpd/conf
cp httpd.conf httpd.conf.bak
# 放掉95行的注释,修改为:
ServerName [你的IP]:80
:wq
3 Démarrez le service
systemctl start httpd.serviceEntrez l'IP dans le navigateur, et le html prédéfini par apache apparaîtra, parfait ! ! !
4. Fermez le service 
systemctl stop httpd.service5. J'ai redémarré le httpd installé de la première manière
/usr/local/apache2/bin/apachectl startJ'ai actualisé le navigateur et tout à coup il est apparu : Cela fonctionne. !, Cela montre qu'il n'y a pas de conflit entre les deux méthodes d'installation. Pour des articles plus techniques liés à Apache, veuillez visiter la colonne
Tutoriel Apache pour apprendre !
Ce qui précède est le contenu détaillé de. pour plus d'informations, suivez d'autres articles connexes sur le site Web de PHP en chinois!

