Maison >interface Web >js tutoriel >Comment utiliser cropperjs dans vue (tutoriel détaillé)
Comment utiliser cropperjs dans vue (tutoriel détaillé)
- 亚连original
- 2018-06-02 11:18:547602parcourir
Cet article résume les méthodes d'utilisation et les leçons apprises de cropperjs dans les fichiers .vue. Les amis intéressés peuvent apprendre ensemble
Dans les projets utilisant vue, les images doivent être recadrées, j'ai donc appris à utiliser cropperjs et j'ai appris à le faire. J'ai également rencontré quelques pièges dans le processus d'utilisation. Voici un résumé des méthodes d'utilisation et des leçons apprises de cropperjs dans le fichier .vue :
Avant de l'utiliser, présentez-le d'abord :

Dans le projet, exécutez :
npm install cropperjs -save
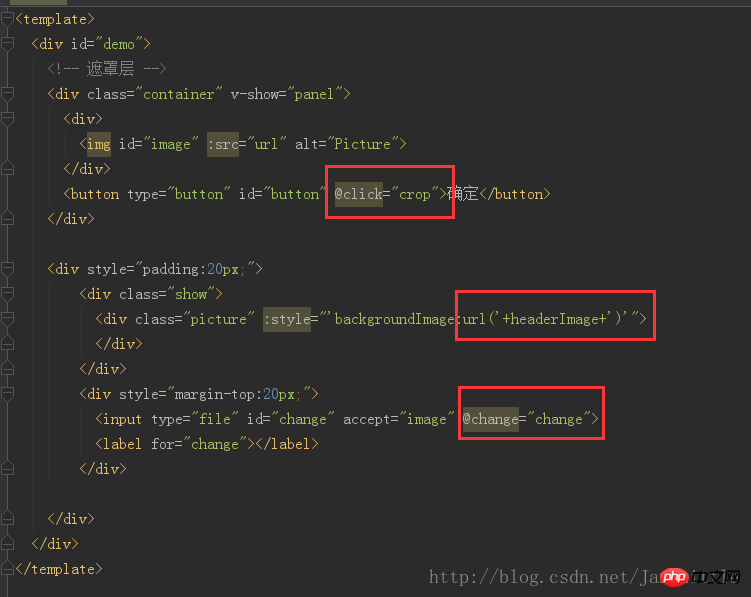
Dans le modèle :
<p id="demo">
<!-- 遮罩层 -->
<p class="container" v-show="panel">
<p>
<img id="image" :src="url" alt="Picture">
</p>
<button type="button" id="button" @click="crop">确定</button>
</p>
<p style="padding:20px;">
<p class="show">
<p class="picture" :style="'backgroundImage:url('+headerImage+')'">
</p>
</p>
<p style="margin-top:20px;">
<input type="file" id="change" accept="image" @change="change">
<label for="change"></label>
</p>
</p>
</p>
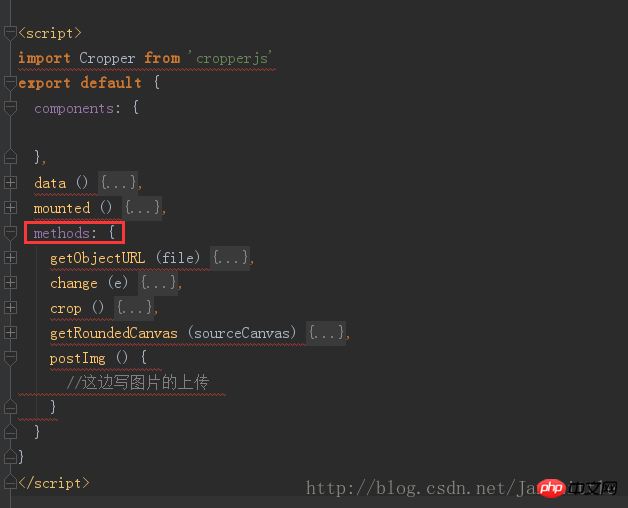
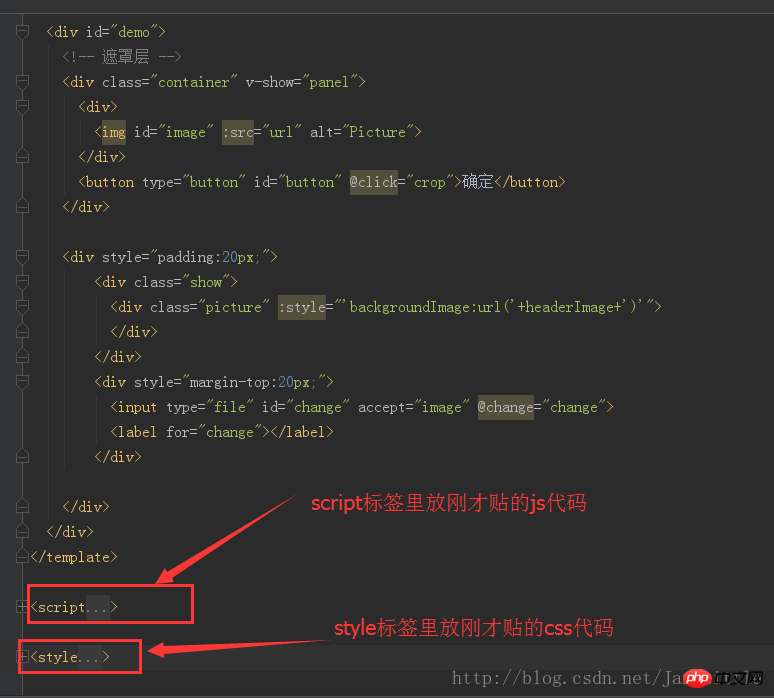
code js :
import Cropper from 'cropperjs'
export default {
 components: {
 },
 data () {
  return {
   headerImage:'',
   picValue:'',
   cropper:'',
   croppable:false,
   panel:false,
   url:''
  }
 },
 mounted () {
  //初始化这个裁剪框
  var self = this;
  var image = document.getElementById('image');
  this.cropper = new Cropper(image, {
   aspectRatio: 1,
   viewMode: 1,
   background:false,
   zoomable:false,
   ready: function () {
    self.croppable = true;
   }
  });
 },
 methods: {
  getObjectURL (file) {
   var url = null ;
   if (window.createObjectURL!=undefined) { // basic
    url = window.createObjectURL(file) ;
   } else if (window.URL!=undefined) { // mozilla(firefox)
    url = window.URL.createObjectURL(file) ;
   } else if (window.webkitURL!=undefined) { // webkit or chrome
    url = window.webkitURL.createObjectURL(file) ;
   }
   return url ;
  },
  change (e) {
   let files = e.target.files || e.dataTransfer.files;
   if (!files.length) return;
   this.panel = true;
   this.picValue = files[0];
   this.url = this.getObjectURL(this.picValue);
   //每次替换图片要重新得到新的url
   if(this.cropper){
    this.cropper.replace(this.url);
   }
   this.panel = true;
  },
  crop () {
    this.panel = false;
    var croppedCanvas;
    var roundedCanvas;
    if (!this.croppable) {
     return;
    }
    // Crop
    croppedCanvas = this.cropper.getCroppedCanvas();
    console.log(this.cropper)
    // Round
    roundedCanvas = this.getRoundedCanvas(croppedCanvas);
    this.headerImage = roundedCanvas.toDataURL();
    this.postImg()
  },
  getRoundedCanvas (sourceCanvas) {
   var canvas = document.createElement('canvas');
   var context = canvas.getContext('2d');
   var width = sourceCanvas.width;
   var height = sourceCanvas.height;
   canvas.width = width;
   canvas.height = height;
   context.imageSmoothingEnabled = true;
   context.drawImage(sourceCanvas, 0, 0, width, height);
   context.globalCompositeOperation = 'destination-in';
   context.beginPath();
   context.arc(width / 2, height / 2, Math.min(width, height) / 2, 0, 2 * Math.PI, true);
   context.fill();
   return canvas;
  },
  postImg () {
   //这边写图片的上传
  }
 }
}
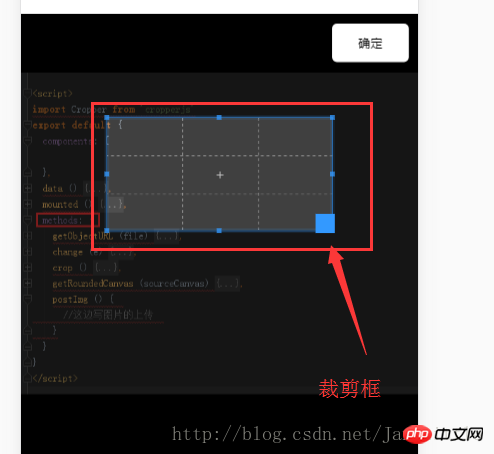
Effet global :

code css (relativement long, à l'origine je ne voulais pas le publier, mais comme je voulais lancer la démo directement pour les chaussures pour enfants, je l'ai quand même posté. La longueur est trop longue, pardonnez-moi) :
*{
margin: 0;
padding: 0;
}
#demo #button {
position: absolute;
right: 10px;
top: 10px;
width: 80px;
height: 40px;
border:none;
border-radius: 5px;
background:white;
}
#demo .show {
width: 100px;
height: 100px;
overflow: hidden;
position: relative;
border-radius: 50%;
border: 1px solid #d5d5d5;
}
#demo .picture {
width: 100%;
height: 100%;
overflow: hidden;
background-position: center center;
background-repeat: no-repeat;
background-size: cover;
}
#demo .container {
z-index: 99;
position: fixed;
padding-top: 60px;
left: 0;
top: 0;
right: 0;
bottom: 0;
background:rgba(0,0,0,1);
}
#demo #image {
max-width: 100%;
}
.cropper-view-box,.cropper-face {
border-radius: 50%;
}
/*!
* Cropper.js v1.0.0-rc
* https://github.com/fengyuanchen/cropperjs
*
* Copyright (c) 2017 Fengyuan Chen
* Released under the MIT license
*
* Date: 2017-03-25T12:02:21.062Z
*/
.cropper-container {
font-size: 0;
line-height: 0;
position: relative;
-webkit-user-select: none;
-moz-user-select: none;
-ms-user-select: none;
user-select: none;
direction: ltr;
-ms-touch-action: none;
touch-action: none
}
.cropper-container img {
/* Avoid margin top issue (Occur only when margin-top <= -height) */
display: block;
min-width: 0 !important;
max-width: none !important;
min-height: 0 !important;
max-height: none !important;
width: 100%;
height: 100%;
image-orientation: 0deg
}
.cropper-wrap-box,
.cropper-canvas,
.cropper-drag-box,
.cropper-crop-box,
.cropper-modal {
position: absolute;
top: 0;
right: 0;
bottom: 0;
left: 0;
}
.cropper-wrap-box {
overflow: hidden;
}
.cropper-drag-box {
opacity: 0;
background-color: #fff;
}
.cropper-modal {
opacity: .5;
background-color: #000;
}
.cropper-view-box {
display: block;
overflow: hidden;
width: 100%;
height: 100%;
outline: 1px solid #39f;
outline-color: rgba(51, 153, 255, 0.75);
}
.cropper-dashed {
position: absolute;
display: block;
opacity: .5;
border: 0 dashed #eee
}
.cropper-dashed.dashed-h {
top: 33.33333%;
left: 0;
width: 100%;
height: 33.33333%;
border-top-width: 1px;
border-bottom-width: 1px
}
.cropper-dashed.dashed-v {
top: 0;
left: 33.33333%;
width: 33.33333%;
height: 100%;
border-right-width: 1px;
border-left-width: 1px
}
.cropper-center {
position: absolute;
top: 50%;
left: 50%;
display: block;
width: 0;
height: 0;
opacity: .75
}
.cropper-center:before,
.cropper-center:after {
position: absolute;
display: block;
content: ' ';
background-color: #eee
}
.cropper-center:before {
top: 0;
left: -3px;
width: 7px;
height: 1px
}
.cropper-center:after {
top: -3px;
left: 0;
width: 1px;
height: 7px
}
.cropper-face,
.cropper-line,
.cropper-point {
position: absolute;
display: block;
width: 100%;
height: 100%;
opacity: .1;
}
.cropper-face {
top: 0;
left: 0;
background-color: #fff;
}
.cropper-line {
background-color: #39f
}
.cropper-line.line-e {
top: 0;
right: -3px;
width: 5px;
cursor: e-resize
}
.cropper-line.line-n {
top: -3px;
left: 0;
height: 5px;
cursor: n-resize
}
.cropper-line.line-w {
top: 0;
left: -3px;
width: 5px;
cursor: w-resize
}
.cropper-line.line-s {
bottom: -3px;
left: 0;
height: 5px;
cursor: s-resize
}
.cropper-point {
width: 5px;
height: 5px;
opacity: .75;
background-color: #39f
}
.cropper-point.point-e {
top: 50%;
right: -3px;
margin-top: -3px;
cursor: e-resize
}
.cropper-point.point-n {
top: -3px;
left: 50%;
margin-left: -3px;
cursor: n-resize
}
.cropper-point.point-w {
top: 50%;
left: -3px;
margin-top: -3px;
cursor: w-resize
}
.cropper-point.point-s {
bottom: -3px;
left: 50%;
margin-left: -3px;
cursor: s-resize
}
.cropper-point.point-ne {
top: -3px;
right: -3px;
cursor: ne-resize
}
.cropper-point.point-nw {
top: -3px;
left: -3px;
cursor: nw-resize
}
.cropper-point.point-sw {
bottom: -3px;
left: -3px;
cursor: sw-resize
}
.cropper-point.point-se {
right: -3px;
bottom: -3px;
width: 20px;
height: 20px;
cursor: se-resize;
opacity: 1
}
@media (min-width: 768px) {
.cropper-point.point-se {
width: 15px;
height: 15px
}
}
@media (min-width: 992px) {
.cropper-point.point-se {
width: 10px;
height: 10px
}
}
@media (min-width: 1200px) {
.cropper-point.point-se {
width: 5px;
height: 5px;
opacity: .75
}
}
.cropper-point.point-se:before {
position: absolute;
right: -50%;
bottom: -50%;
display: block;
width: 200%;
height: 200%;
content: ' ';
opacity: 0;
background-color: #39f
}
.cropper-invisible {
opacity: 0;
}
.cropper-bg {
background-image: url('data:image/png;base64,iVBORw0KGgoAAAANSUhEUgAAABAAAAAQAQMAAAAlPW0iAAAAA3NCSVQICAjb4U/gAAAABlBMVEXMzMz////TjRV2AAAACXBIWXMAAArrAAAK6wGCiw1aAAAAHHRFWHRTb2Z0d2FyZQBBZG9iZSBGaXJld29ya3MgQ1M26LyyjAAAABFJREFUCJlj+M/AgBVhF/0PAH6/D/HkDxOGAAAAAElFTkSuQmCC');
}
.cropper-hide {
position: absolute;
display: block;
width: 0;
height: 0;
}
.cropper-hidden {
display: none !important;
}
.cropper-move {
cursor: move;
}
.cropper-crop {
cursor: crosshair;
}
.cropper-disabled .cropper-drag-box,
.cropper-disabled .cropper-face,
.cropper-disabled .cropper-line,
.cropper-disabled .cropper-point {
cursor: not-allowed;
}. Image globale :

Mettez le code ci-dessus dans votre projet, ou créez un .vue séparé et insérez-le dans le projet pour obtenir cet effet :

Ce qui précède, c'est moi, je l'ai compilé pour tout le monde, j'espère qu'il sera utile à tout le monde à l'avenir.
Articles connexes :
Méthode de composant de saisie de formulaire d'événement personnalisé Vue.js
Un résumé de plusieurs façons d'enregistrer des composants dans vue
Utilisez use pour enregistrer les composants globaux et les directives globales de Vue
Ce qui précède est le contenu détaillé de. pour plus d'informations, suivez d'autres articles connexes sur le site Web de PHP en chinois!
Articles Liés
Voir plus- Une analyse approfondie du composant de groupe de liste Bootstrap
- Explication détaillée du currying de la fonction JavaScript
- Exemple complet de génération de mot de passe JS et de détection de force (avec téléchargement du code source de démonstration)
- Angularjs intègre l'interface utilisateur WeChat (weui)
- Comment basculer rapidement entre le chinois traditionnel et le chinois simplifié avec JavaScript et l'astuce permettant aux sites Web de prendre en charge le basculement entre les compétences en chinois simplifié et traditionnel_javascript

