Maison >interface Web >js tutoriel >Explication détaillée de l'utilisation de certains composants intégrés
Explication détaillée de l'utilisation de certains composants intégrés
- php中世界最好的语言original
- 2018-04-28 15:45:202076parcourir
Cette fois, je vais vous apporter une explication détaillée de l'utilisation de certains composants intégrés. Quelles sont les précautions lors de l'utilisation de certains composants intégrés. Voici un cas pratique, jetons un coup d'œil. .
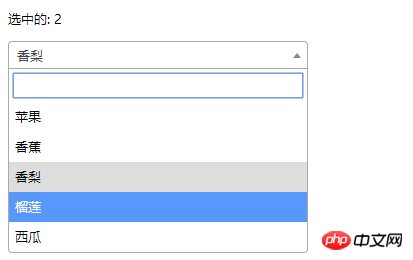
1. Plug-in jQuery tiers intégré (select2)

<!DOCTYPE html>
<html>
<head>
  <meta charset="UTF-8">
  <title></title>
  <link rel="stylesheet" href="js/select2/select2.min.css" />
  <style>
    html, body {
 font: 13px/18px sans-serif;
}
select {
 min-width: 300px;
}
  </style>
</head>
<body>
<p id="el">
  <p>选中的: {{ selected }}</p>
  <select2 :options="options" v-model="selected"></select2>
</p>
  <script src="js/jQuery-2.1.4.min.js"></script>
  <script src="js/select2/select2.min.js"></script>
  <script src="http://cdnjs.cloudflare.com/ajax/libs/vue/2.1.3/vue.js"></script>
<script>
  Vue.component('select2', {
    props: ['options', 'value'],
    template: '<select><slot></slot></select>',
    mounted: function () {
      var vm = this;// init select2
      $(this.$el).select2({ data: this.options }).val(this.value).trigger('change').on('change', function () {
        // emit event on change.
        vm.$emit('input', this.value)
      })
    },
    watch: {
      value: function (value) {
          // update value
        $(this.$el).val(value).trigger('change')
      },
      options: function (options) {
         // update options
        $(this.$el).empty().select2({ data: options })
      }
    },
    destroyed: function () {
      $(this.$el).off().select2('destroy')
    }
  })
var vm = new Vue({
  el: '#el',
  data: {
    selected: 2,
    options: [
      { id: 0, text: '苹果' },
      { id: 1, text: '香蕉' },
      { id: 2, text: '香梨' },
      { id: 3, text: '榴莲' },
      { id: 4, text: '西瓜' }
    ]
  }
})
</script>
</body>
</html>
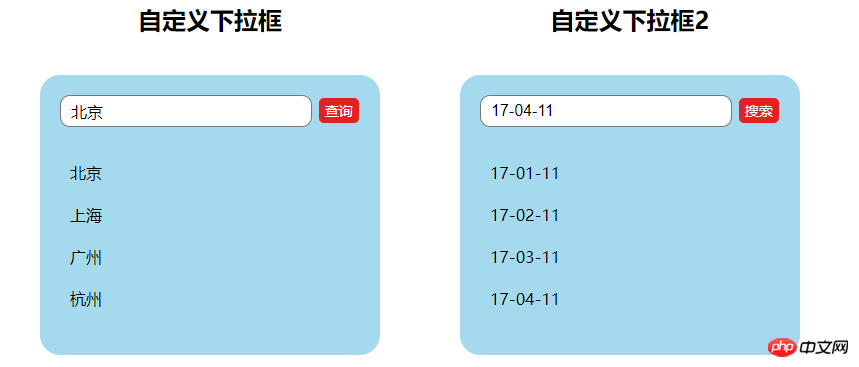
2.

<!DOCTYPE html>
<html lang="en">
<head>
<meta charset="utf-8">
  <style>
  *{
    padding: 0;
    margin: 0;
  }
  ul,li {
    list-style: none;
  }
  li {
    line-height: 2em;
  }
  li:hover {
    background-color: #f9f9f9;
    border-radius:5px;
    cursor: pointer;
  }
  input{
    cursor:pointer;
    outline:none;
  }
  #app {
    margin-top: 20px;
  }
  #app h2 {
    text-align: center;
  }
  .wrap {
    background-color: rgba(56, 170, 214, 0.45);
    border-radius: 20px;
    width: 300px;
    margin: 40px;
    padding: 20px;
  }
  input[type="button"] {
    font-size:14px;
    margin-left:2px;
    padding:2px 5px;
    background-color:rgb(228, 33, 33);
    color:white;
    border:1px solid rgb(228, 33, 33);
    border-radius:5px;
  }
  .clearFix {
    padding-left:
  }
  input.keyWord {
    border: 1px solid #777777;
    border-radius: 10px;
    height: 30px;
    width: 80%;
    padding-left: 10px;
    font-size: 16px;
  }
  ul.list {
    margin: 20px 0;
  }
  ul.list li {
    padding: 10px 0 0 10px;
  }
</style>
</head>
 <body>
 <p id="app">
    <p style="float: left;">
      <h2>自定义下拉框</h2>
      <custom-select btn-value="查询" v-bind:list="list1"></custom-select>
    </p>
    <p style="float: left;">
      <h2>自定义下拉框2</h2>
      <custom-select btn-value="搜索" v-bind:list="list2"></custom-select>
    </p>
  </p>
  <p id="app1">
    <custom-select></custom-select>
  </p>
    <script src="http://cdnjs.cloudflare.com/ajax/libs/vue/2.1.3/vue.js"></script>
 <script>
    Vue.component("custom-select",{
      data(){
        return {
          selectShow:false,
          val:""
        }
      },
      props:["btnValue","list"],
      template:`<section class="wrap">
            <p class="searchIpt clearFix">
              <p class="clearFix">
                <input type="text" class="keyWord" :value="val" @click="selectShow = !selectShow" />
                <input type="button" :value="btnValue" />
                <span></span>
              </p>
              <custom-list
                v-show="selectShow"
                :list="list"
                v-on:receive="changeValueHandle"
              >
              </custom-list>
            </p>
           </section>`,
      methods:{
        changeValueHandle(value){
          this.val = value;
        }
      }
    });
    Vue.component("custom-list",{
      props:["list"],
      template:`<ul class="list">
              <li v-for="item in list" @click="selectValueHandle(item)">{{item}}
              </li>
           </ul>`,
      methods:{
        selectValueHandle:function(item){
          this.$emit("receive",item)
        }
      }
    })
    new Vue({
      el:"#app",
      data:{
        list1:['北京','上海','广州','杭州'],
        list2:['17-01-11','17-02-11','17-03-11','17-04-11'],
      }
    })
  </script>
  </body>
</html>
Je pense que vous maîtrisez la méthode après avoir lu le cas dans cet article. Pour des informations plus intéressantes, veuillez prêter attention aux autres articles connexes sur le sujet. php site chinois !
Lecture recommandée :
Explication détaillée des étapes pour dédupliquer des tableaux JSON à l'aide de JS
Comment dédupliquer des données lors de la fusion plusieurs tableaux
Ce qui précède est le contenu détaillé de. pour plus d'informations, suivez d'autres articles connexes sur le site Web de PHP en chinois!
Articles Liés
Voir plus- Une analyse approfondie du composant de groupe de liste Bootstrap
- Explication détaillée du currying de la fonction JavaScript
- Exemple complet de génération de mot de passe JS et de détection de force (avec téléchargement du code source de démonstration)
- Angularjs intègre l'interface utilisateur WeChat (weui)
- Comment basculer rapidement entre le chinois traditionnel et le chinois simplifié avec JavaScript et l'astuce permettant aux sites Web de prendre en charge le basculement entre les compétences en chinois simplifié et traditionnel_javascript

