Maison >interface Web >js tutoriel >Utiliser cropperjs dans vue
Utiliser cropperjs dans vue
- php中世界最好的语言original
- 2018-03-17 13:12:532300parcourir
Cette fois, je vais vous montrer comment utiliser cropperjs dans Vue, et quelles sont les précautions d'utilisation de cropperjs dans Vue. Ce qui suit est un cas pratique, jetons un coup d'œil.
Dans les projets utilisant vue, les images doivent être recadrées, c'est pourquoi cropperjs a été utilisé. J'ai également rencontré quelques pièges lors de l'utilisation. Ce qui suit est un résumé des méthodes d'utilisation et des leçons apprises de cropperjs dans le fichier .vue. :
Avant utilisation, introduisez :

Dans le projet, exécutez :
npm install cropperjs -save
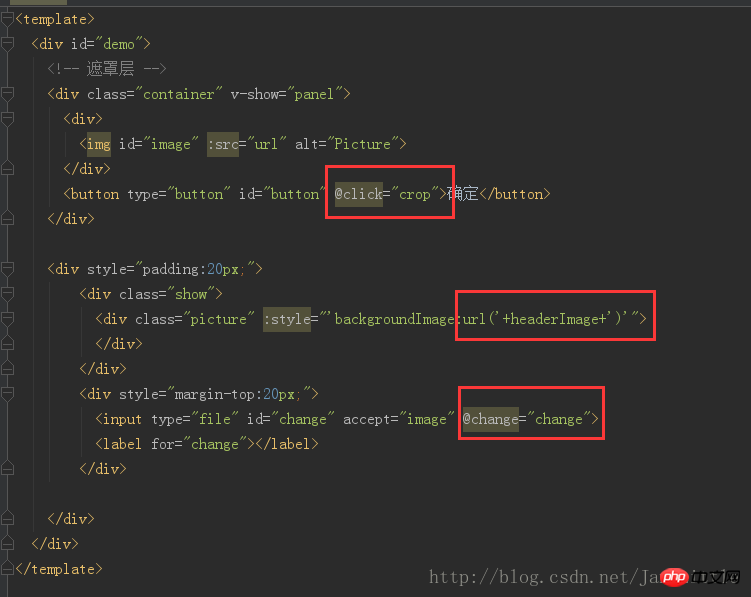
Dans le modèle :
<p>
  <!-- 遮罩层 -->
  </p><p>
   </p><p>
    <img  src="/static/imghwm/default1.png" data-src="url" class="lazy" alt="Utiliser cropperjs dans vue" >
   </p>
   <button>确定</button>

  <p>
    </p><p>
     </p><p>
     </p>

    <p>
     <input>
     <label></label>
    </p>

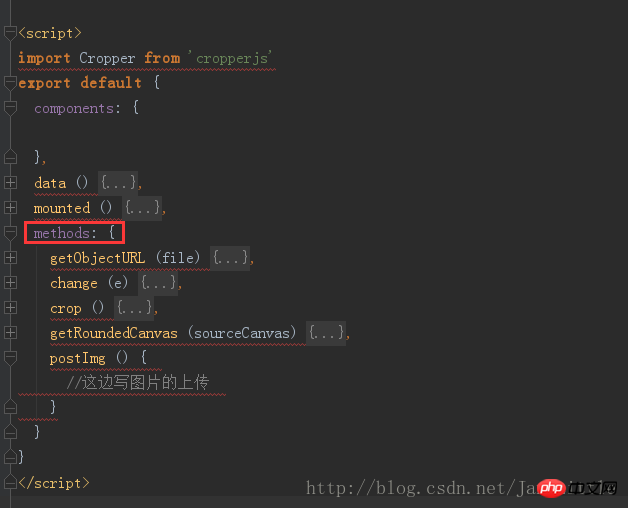
code js :
import Cropper from 'cropperjs'
export default {
 components: {
 },
 data () {
  return {
   headerImage:'',
   picValue:'',
   cropper:'',
   croppable:false,
   panel:false,
   url:''
  }
 },
 mounted () {
  //初始化这个裁剪框
  var self = this;
  var image = document.getElementById('image');
  this.cropper = new Cropper(image, {
   aspectRatio: 1,
   viewMode: 1,
   background:false,
   zoomable:false,
   ready: function () {
    self.croppable = true;
   }
  });
 },
 methods: {
  getObjectURL (file) {
   var url = null ;
   if (window.createObjectURL!=undefined) { // basic
    url = window.createObjectURL(file) ;
   } else if (window.URL!=undefined) { // mozilla(firefox)
    url = window.URL.createObjectURL(file) ;
   } else if (window.webkitURL!=undefined) { // webkit or chrome
    url = window.webkitURL.createObjectURL(file) ;
   }
   return url ;
  },
  change (e) {
   let files = e.target.files || e.dataTransfer.files;
   if (!files.length) return;
   this.panel = true;
   this.picValue = files[0];
   this.url = this.getObjectURL(this.picValue);
   //每次替换图片要重新得到新的url
   if(this.cropper){
    this.cropper.replace(this.url);
   }
   this.panel = true;
  },
  crop () {
    this.panel = false;
    var croppedCanvas;
    var roundedCanvas;
    if (!this.croppable) {
     return;
    }
    // Crop
    croppedCanvas = this.cropper.getCroppedCanvas();
    console.log(this.cropper)
    // Round
    roundedCanvas = this.getRoundedCanvas(croppedCanvas);
    this.headerImage = roundedCanvas.toDataURL();
    this.postImg()
  },
  getRoundedCanvas (sourceCanvas) {
   var canvas = document.createElement('canvas');
   var context = canvas.getContext('2d');
   var width = sourceCanvas.width;
   var height = sourceCanvas.height;
   canvas.width = width;
   canvas.height = height;
   context.imageSmoothingEnabled = true;
   context.drawImage(sourceCanvas, 0, 0, width, height);
   context.globalCompositeOperation = 'destination-in';
   context.beginPath();
   context.arc(width / 2, height / 2, Math.min(width, height) / 2, 0, 2 * Math.PI, true);
   context.fill();
   return canvas;
  },
  postImg () {
   //这边写图片的上传
  }
 }
}
Effet global :

code CSS (c'est assez long, au départ je ne voulais pas le poster, mais comme je voulais lancer la démo directement, je l'ai quand même posté. Désolé pour la longueur) :
*{
 margin: 0;
 padding: 0;
}
#demo #button {
 position: absolute;
 right: 10px;
 top: 10px;
 width: 80px;
 height: 40px;
 border:none;
 border-radius: 5px;
 background:white;
}
#demo .show {
 width: 100px;
 height: 100px;
 overflow: hidden;
 position: relative;
 border-radius: 50%;
 border: 1px solid #d5d5d5;
}
#demo .picture {
 width: 100%;
 height: 100%;
 overflow: hidden;
 background-position: center center;
 background-repeat: no-repeat;
 background-size: cover;
}
#demo .container {
  z-index: 99;
  position: fixed;
  padding-top: 60px;
  left: 0;
  top: 0;
  right: 0;
  bottom: 0;
  background:rgba(0,0,0,1);
}
#demo #image {
 max-width: 100%;
}
.cropper-view-box,.cropper-face {
 border-radius: 50%;
}
/*!
 * Cropper.js v1.0.0-rc
 * https://github.com/fengyuanchen/cropperjs
 *
 * Copyright (c) 2017 Fengyuan Chen
 * Released under the MIT license
 *
 * Date: 2017-03-25T12:02:21.062Z
 */
.cropper-container {
 font-size: 0;
 line-height: 0;
 position: relative;
 -webkit-user-select: none;
 -moz-user-select: none;
 -ms-user-select: none;
 user-select: none;
 direction: ltr;
 -ms-touch-action: none;
 touch-action: none
}
.cropper-container img {
 /* Avoid margin top issue (Occur only when margin-top <p style="text-align: left;"></p><p style="text-align: left;"><span style="color: #ff0000"></span></p><p>Je pense que vous maîtrisez la méthode après avoir lu le cas dans cet article. Pour des informations plus intéressantes, veuillez prêter attention. vers d'autres articles connexes sur le site Web php chinois ! </p><p>Lecture recommandée : </p><p><a href="http://www.php.cn/js-tutorial-388955.html" target="_blank">Comment implémenter l'actualisation de force arrière sur le côté Web de WeChat</a></p><p><a href="http://www.php.cn/js-tutorial-388951.html" target="_blank">Utilisez js pour obtenir rapidement l'adresse de l'image dans la page html</a><br></p><p><a href="http://www.php.cn/js-tutorial-388941.html" target="_blank">Définir la mise à jour automatique et l'acquisition automatique de l'expiration des cookies</a><br></p>
Ce qui précède est le contenu détaillé de. pour plus d'informations, suivez d'autres articles connexes sur le site Web de PHP en chinois!
Articles Liés
Voir plus- Une analyse approfondie du composant de groupe de liste Bootstrap
- Explication détaillée du currying de la fonction JavaScript
- Exemple complet de génération de mot de passe JS et de détection de force (avec téléchargement du code source de démonstration)
- Angularjs intègre l'interface utilisateur WeChat (weui)
- Comment basculer rapidement entre le chinois traditionnel et le chinois simplifié avec JavaScript et l'astuce permettant aux sites Web de prendre en charge le basculement entre les compétences en chinois simplifié et traditionnel_javascript

