Maison >interface Web >js tutoriel >Angularjs implémente le partage des effets de chronologie
Angularjs implémente le partage des effets de chronologie
- 小云云original
- 2018-01-05 13:32:032332parcourir
Cet article présente principalement l'exemple de code d'angularjs pour obtenir l'effet de chronologie. L'éditeur pense que c'est plutôt bon, je vais donc le partager avec vous maintenant et le donner comme référence. Suivons l'éditeur pour y jeter un œil, j'espère que cela pourra aider tout le monde.
1 Présentation du package
Présentation du package angulaire-timeline.
Adresse de téléchargement : angulaire-timeline.zip
Introduire
<link href="lib/angular-timeline/dist/angular-timeline.css" rel="external nofollow" rel="stylesheet">
<script src="lib/angular-timeline/dist/angular-timeline.js"></script>
dans index.html
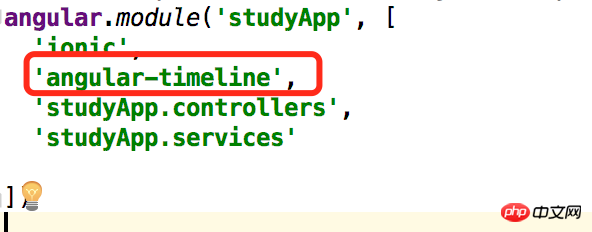
Cité dans app.js, s'il n'est pas cité, il n'y aura aucun effet.

2 Réécrire le CSS
Réécrire le CSS selon les besoins, réécrire la partie principale.
peut être écrit en style.css, ou vous pouvez créer un nouveau fichier css, mais il doit être cité dans index.html.
/* 时间轴 */
.timeline-event {
 margin-bottom: 0px !important;
}

timeline-badge.infos {
 background-color: #47d09e !important;
}

.timeline:before {
 width: 1px !important;
 left: 24px !important;
 margin-top: 30px !important;
 background-color: #47d09e !important;
}

timeline-badge {
 left: 16px !important;
 width: 15px !important;
 height: 15px !important;
 top: 15px !important;
 box-shadow: none !important;
}

timeline-panel {
 float: left !important;
 width: 85% !important;
 padding: 13px 0px 6px 0px !important;
 margin-left: 39px !important;
 background: none !important;
 border: none !important;
 box-shadow: none !important;
}

timeline-panel:before {
 visibility: hidden !important;
}

timeline-panel:after {
 visibility: hidden !important;
 display: none !important;
}

timeline-panel .time {
 font-size: 14px;
 font-family: 'PingFangSC-Regular';
}

timeline-panel .detail {
 display: flex;
 display: -webkit-flex;
 align-items: center;
 -webkit-align-items: center;
 justify-content: space-between;
 -webkit-justify-content: space-between;
 margin-top: 10px;
}

timeline-panel .detail .linename {
 font-size: 16px;
 max-width: 80%;
 color: #1c1c1c;
 display: inline-block;
 font-family: 'PingFangSC-Medium';
}

timeline-panel .detail .linelevel {
 position: absolute;
 right: 18%;
 border-radius: 4px;
 color: white;
 padding: 1px 5px 1px 5px;
 font-size: 11px;
}

timeline-panel .detail .linelevel-g {
 background-color: #f27373;
}

timeline-panel .detail .linelevel-p {
 background-color: #e29431;
}

timeline-panel .detail .linenum {
 float: right;
 font-size: 14px;
 color: #323232;
}
Trois pages
Le travail de préparation est fait, voici la rédaction de la page.
<!--html页面-->
<ion-view view-title="{{title}}">
 <ion-content scroll="true">

  <timeline>
   <timeline-event ng-repeat="event in teamDataList" side="right">
    <timeline-badge class="infos">
    </timeline-badge>
    <timeline-panel class="infos">
       <span class="time">
        {{event.hour}}
       </span>
     <p class="detail" ng-repeat="item in event.data">
      <span class="linename">{{item.customerName}}</span>
      <p style="float: right;">
         <span class="linenum">
         {{item.reserveNumber}}人
         </span>
      </p>

     </p>
    </timeline-panel>
   </timeline-event>
  </timeline>

 </ion-content>
</ion-view>
//controller
angular.module('studyApp.controllers')
.controller('TimeLineCtrl', function ($scope, $rootScope, $location) {
$scope.title = '时间轴';
makeData();
function makeData() {
$scope.teamDataList=[
{
hour:"12:00",
data:[
{
customerName:"中国国旅(江苏)国际旅行社有限公司",
reserveNumber:"12",
id:"aaaabbb12112"
},
{
customerName:"江苏2",
reserveNumber:"122",
id:"aaaabbb12112"
}
]
},
{
hour:"13:00",
data:[{
customerName:"江苏2",
reserveNumber:"112",
id:"aaaabbb12112"
}]
},
{
hour:"14:00",
data:[{
customerName:"江苏3",
reserveNumber:"12",
id:"aaaabbb12112"
}]
},
{
hour:"13:00",
data:[{
customerName:"江苏2",
reserveNumber:"112",
id:"aaaabbb12112"
}]
},
{
hour:"14:00",
data:[{
customerName:"江苏3",
reserveNumber:"12",
id:"aaaabbb12112"
}]
}
];
}
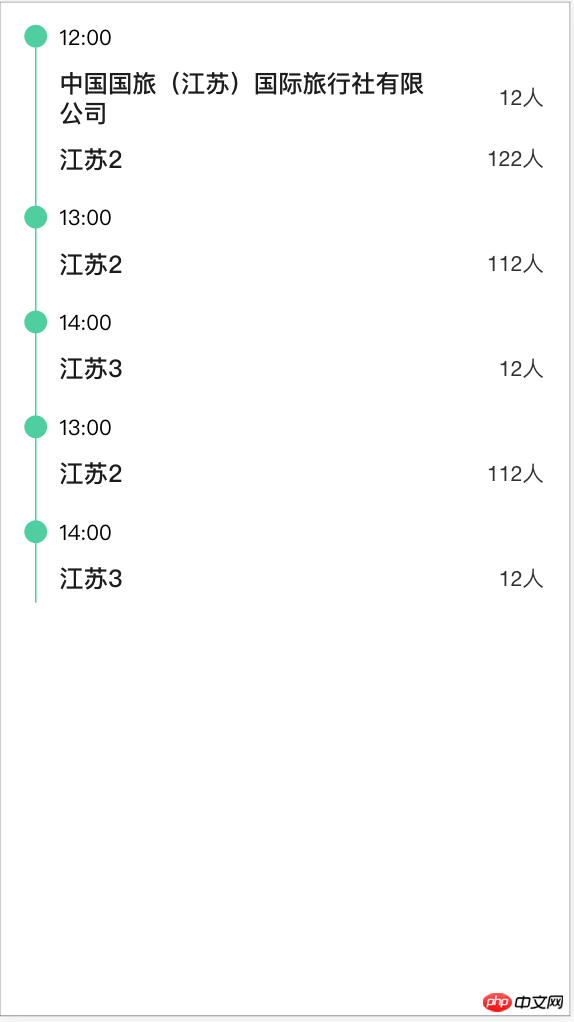
});Quatre rendus

Recommandations associées :
Plusieurs magnifiques tutoriels de chronologie implémentés avec Jquery
Analyse des effets de la chronologie,
Ce qui précède est le contenu détaillé de. pour plus d'informations, suivez d'autres articles connexes sur le site Web de PHP en chinois!
Articles Liés
Voir plus- Une analyse approfondie du composant de groupe de liste Bootstrap
- Explication détaillée du currying de la fonction JavaScript
- Exemple complet de génération de mot de passe JS et de détection de force (avec téléchargement du code source de démonstration)
- Angularjs intègre l'interface utilisateur WeChat (weui)
- Comment basculer rapidement entre le chinois traditionnel et le chinois simplifié avec JavaScript et l'astuce permettant aux sites Web de prendre en charge le basculement entre les compétences en chinois simplifié et traditionnel_javascript

